Get Your ALL ACCESS Shop Pass here →

Little bins for little hands logo

Seed Germination Experiment

Watching seeds grow is an amazing science project for kids. Our  seed germination experiment allows kids to see up close to how a seed grows and what would actually be happening under the ground! Learn about the steps of seed germination, and investigate what conditions a seed needs to germinate. Make sure to grab the free printable bean life cycle activity to go with your seed jar. Easy science experiments are great for kids of all ages!

Watching seeds grow is an amazing science lesson for kids. Our seed jar science experiment gives kids the opportunity to see up close what would actually be happening under the ground! Our awesome seed jar spring science activity turned out amazingly well, and we loved checking on the progress each day! Simple science activities are great for young kids.

Germinate Seeds For Spring Science

This simple to set up seed jar is one of our favorite spring science projects that you can do inside! We had an awesome time examining and observing the growth of our seed germination experiment.

Share an inside look at how seeds grow below the ground with our seed jar. Plus, you can even get it started when there’s is still snow on the ground. Especially if you are itching for spring to come early!

It all starts with a single seed!

seed germination experiment for class 5

Watching how a seed grows and using a mason jar gives you a front-row seat for observing it all! Sprouting seeds is perfect for a spring STEM activity !

Another fun way to sprout seeds, especially at the end of winter, is with a mini greenhouse made from plastic bottles.

seed germination experiment for class 5

What Is Seed Germination?

First, let’s learn a bit more about germination. Seeds grow into a new plant through a process called germination. Germination is the sprouting of the seed or the very beginning of plant growth.

The absorption of water, cold temperatures or warm temperatures, oxygen availability, and light exposure may all be a factor in starting germination or keeping the seed dormant. What conditions are needed for germination will vary between plants, as each has adapted to the biome in which they live.

Learn more about biomes around the world.

Stages of Seed Germination

First, the seed absorbs water. This causes the seed to swell and the outer coating to break. Then the seed starts to break down some of the food that is stored in it. Most seeds will need oxygen in the air in the soil for this to happen.

Eventually, when the seed has grown leaves it can make its own oxygen and absorb carbon dioxide through photosynthesis .

Once the seed coat breaks open, the first root grows, called the radicle. In almost all plants, the root comes before the shoot.

Once the root starts to grow, it can now absorb water and nutrients from the soil, instead of getting it from the seed coat.

After the root, the plant’s stem starts to grow. When it reaches above the ground, the leaves begin to grow. This is when the plant no longer has to rely on the stored starch (cotyledon) that comes from the seed.

You might also try a simple greenhouse-in-a-bottle model !

seed germination experiment for class 5

Seed Germination Ideas

This simple seed experiment is a great introduction for preschoolers to growing plants , and a fun plant experiment for older kids to investigate what conditions seeds need to germinate.

Older kids can use a science experiment worksheet to write down their observations about how the seeds are growing. While young kids can draw or observe the changes!

There are so many fun questions you can ask…

  • Do seeds need light to germinate?
  • Does the amount of water affect seed germination?
  • Do different types of seeds germinate under the same conditions?
  • Does salt water affect seed germination?

Explore how fast different seeds germinate by comparing different kinds of seeds under the same conditions. We tried sunflower seeds, peas, and beans in our seed jar.

Or keep the type of seed the same and set up two mason jars to explore whether seeds need light to germinate. Place one jar where it will get natural light and one in a dark cupboard.

Another idea is to investigate whether seeds need water to germinate and how much. Set up three jars, and measure out how much water goes into each so that one is fully wet, half wet and one has no water.

Read more about the scientific method for kids and using variables in science experiments!

Bean Life Cycle Mini Pack (Free Printable)

Extend the learning of this hands-on project with this free bean life cycle mini pack !

seed germination experiment for class 5

How To Germinate Seeds Faster

One easy way to get your seeds to germinate faster is to presoak them in a shallow container of warm water for up to 24 hours. That will soften the hard outer shell of the seed. Don’t soak for longer as they may go moldy!

Seed Germination Lab

  • Paper Towels or cotton wool
  • Seeds (see our suggestions above)

Also check out our list of other fun science experiments you can in do a jar! >>> Science in a Jar

H ow To Set Up Your Seed Experiment

STEP 1:  Fill the jar with paper towels. Kids can fold them and push them down into the jar. This is also great work for little hands.

STEP 2:  Gently water your seed jar to wet the paper towels. DO NOT FLOOD IT!

Seed Jar Set Up

STEP 3:  Carefully push seeds down into the paper towels around the edge of the jar so they can still be seen. Make sure they are firmly held in place.

Our mason jar below includes sunflower, pea, and green bean seeds!

seed germination experiment for class 5

STEP 4: Put your jar in a safe place, and check in regularly to observe any changes.

How To Observe Seed Growth

This activity makes a great plant science fair project for multiple ages. Get your magnifying glass out and check out all the angles of the seeds. Can you find the different stages of seed germination described earlier?

What do you see in your seed jar?

  • You are looking for a root to pop out of the side.
  • Next, you are looking for a root to push down into the soil.
  • Then, you are looking for root hairs.
  • Next, look for the seed to push up while the root hairs push down.
  • Lastly, you are looking for the shoots to come up!

The mason jar gives a stunning view of this seed experiment! My son loved being able to see the changes so easily.

Seed Jar Liam Observing Seed Growth

Our Seed Experiment Results

We started this experiment and within a few days started to see some exciting things. It was also interesting to talk about what was happening with the different seeds and how they changed over the duration of the experiment.

  • Sunflower seeds were the fastest to pop a root but never made it out of the jar.
  • Bean seeds took the longest to pop a root but finally did and made it out of the jar.
  • Pea seeds grew rapidly once the root popped out and grew the tallest.

Simple beginnings with the sunflower seeds! Then the pea and lastly the bean! It took about three days to see some action with the seeds!

Seed Jar Starting To Grow 1

Amazing to see the pea take off in the seed jar once the root popped out! My son enjoyed telling me about the root hairs he could see every day! So fun to see it flourish and check out the results! It’s a perfect spring science activity at home or in the classroom.

We also enjoyed the book, How A Seed Grows by Helene Jordan which inspired another seed planting activity with eggshells !

Seed Jar Growing 4

More Fun Plant Activities For Kids

Looking for more plant lesson plans? Here are few suggestions for fun plant activities that would be perfect for preschoolers and elementary kids.

Learn about the apple life cycle with these fun printable activity sheets!

Use art and craft supplies you have on hand to create your own parts of a plant craft .

Learn the parts of a leaf with our printable coloring page.

Use a few simple supplies you have on hand to grow these cute grass heads in a cup .

seed germination experiment for class 5

Grab some leaves and find out how plants breath with this simple plant experiment.

Learn about how water moves through the veins in a leaf.

Find out why leaves change color with our printable lapbook project.

Watching flowers grow is an amazing science lesson for kids of all ages. Find out what are easy flowers to grow!

Use this seed bomb recipe and make them as a gift or even for Earth Day.

Learn about osmosis when you try this fun potato osmosis experiment with the kids.

Explore the different plants that you find in our biomes of the world lapbook project.

seed germination experiment for class 5

58 Comments

This is what we should have done – instead we tried plastic bags to grow the seeds in, and they got foggy with condensation so it was hard to see the root! Aw, well. Lesson learned. Next time – grow them in a jar! lol!

We just started our beans in a jar last week. Looking forward to seeing what happens this week.

We’ve just done the same 🙂 Put the beans in the jar instead plastic bags 🙂 Mr Frog is so excited observing the bean growing!

Wonderful learning activity! Thanks for linking up at the Thoughtful Spot Weekly Blog Hop!

My girlie is very curious about planting and asks tons of questions about the seeds and what happens with them in the soil. This is a great way to show her clearly enough the whole process of the seed’s growing. Thank you for this idea!

What kind of pea seeds did you use?

Good question. I don’t remember the band or name but it was a common package from the store.

This looks like so much fun! Can’t wait to try with my 4 and 2 year old son and daughter. We’re always looking for affordable, educational and fun activities. This is perfect. Happy to have stumbled onto this site!

Do you cover the jar? Do they need to be near a sunny window? Are you supposed to water them? Thanks!

Wonderful! Thank you!

Hi! I did not cover the jar. They were on a table in front of window that did get sunlight at some point during the day. We did not water daily. I added a tiny bit here and there but not much at all. We actually went away for a week and came back to them being so tall which you can see in the picture above. Thats a week with no water what so ever!

What kind of beans did you use? Pinto? I’m wanting to start this activity here soon with my little in-home daycare. 🙂

We used green beans, sunflowers, and green peas!

Just double checking no soil, just paper towels. This is our spring break project. I can’t wait.

Right no soil!

hello! I’m going to try this with my kindergarten class. Did you use dried green beans infrom a bag (like at the supermarket)? Or fresh ones?

Where did you get your seeds? Did you buy them fresh and pick the seed out off the pods or take it out of the shell? I’m interested in doing this but I don’t want to buy the wrong ones.

Simple seed packets from the grocery store!

that was so cool

What a great learning activity. I am featuring this with a link on my blog.

We are getting ready to start this project today with our preschool class. One thing i have not been able to find is, how much water/how wet do the paper towels need to be?’

super cool!!!

  • Pingback: Alternative Slime Recipes Borax, Laundry Detergent, and Fiber
  • Pingback: 10 Fun Spring Activities for Kids - The Exhausted Mom

U just use dried peas you get in a box steep them over night then plant them absolutely excellent outcome 4 kids and grown ups alike lol

Interesting! Share a picture!

  • Pingback: Spring Science Ideas with Family Fun Friday!

you teach me something thanks very much.

  • Pingback: 12 Sensational Spring Activities for Kids! – The Homeschool Resource Room
  • Pingback: Super Fun Spring Activities Your Kids Will Go Crazy Over!
  • Pingback: Celery Osmosis Science Experiment and Demonstration for Kids Biology
  • Pingback: Preschool Earth Day Activities Science and Sensory Play
  • Pingback: Celebrate the Season with These 5 Easy Spring Crafts - Learning Liftoff
  • Pingback: 20 Engaging STEM Activities for Kids to Do This Spring
  • Pingback: Hydroponics For Kids- What, Why, And How | Family Focus Blog
  • Pingback: 10 + Super Fun Earth Day Crafts - Mamma Mode
  • Pingback: Earth Day Activities Earth Day STEM for Kids
  • Pingback: 50+ STEM Activities, Books, Games, & More for Kids | Faithful Farmwife
  • Pingback: 25 AWESOME EARTH DAY ACTIVITIES FOR KIDS
  • Pingback: 21 Best Science Fair Projects To Try - Fun with Mama
  • Pingback: 21 Best Science Fair Projects - Fun with Mama
  • Pingback: Earth Day STEM Activities and Challenges for Kids
  • Pingback: 5 Fun DIY Recycled Crafts - Learning Liftoff
  • Pingback: Spring Flowers Books & Activities for Preschoolers

besides seed jar science is there anything else that kids can do?

What do you mean? Feel free to email me [email protected]

  • Pingback: 21 Experiments for Summer Science Learning Activities for Kids | MilKids Education Consulting

I cant wait to try this out with the 4 year old children at the our Early Learning Centres I am grateful to have found this page. Thank you so much.

At any point do you add soil to the jar or transfer the plant out so it can grow bigger? If transferring, what’s the best way to move them out of the jar and into a pot? What stage of growth should they be at before doing so? Does this method work for any type of seeds? This is perfect for the plant project I want to start with my in-home daycare but I wanted to use seeds from foods they eat and can replant as a way of incorporating recycling into the other lessons learned but I’m new to all of this including being a first time mom/in-home daycare owner and have lots of questions lol! Thank you in advance for your time, patients, and wisdom! 🙂

You could potentially transfer it! We did not. You wouldn’t add soil to the jar though. Makes a great experiment to see if it takes outside or in a pot!

  • Pingback: 10 Fall Toddler Activities - A Blossoming Life
  • Pingback: 25 Spring Science Experiments for Kids
  • Pingback: Homeschooldaze: “Seed Jar Science Experiment for Spring STEM Activities with Kids” – Darlene's Homeschool Daze
  • Pingback: Nature Play Activities and Environments for Children
  • Pingback: Spring has Sprung! | Science in Storytime
  • Pingback: Ultimate Boredom Buster: 101 Things to Do When Kids Are Bored
  • Pingback: Ideas for Home Learning #1 | The Outdoor Classroom @ Rhyl Primary School

Since we are getting to spring, a seed germination jar is a perfect activity. Thanks

Comments are closed.

seed germination experiment for class 5

Subscribe to receive a free 5-Day STEM Challenge Guide

~ projects to try now ~.

seed germination experiment for class 5

How Wee Learn

Out of the box learning ideas, playful art, exploring nature, and simple living - that is How We Learn!

Seed Germination Experiment – The Results!

May 27, 2024 by Sarah

Have you ever used the mason jar method for a seed germination experiment?! It is so neat to watch a seed sprout and grow, and to see the root structure take shape. It also makes for an awesome seed germination experiment, comparing roots and sprouts and how quickly each grows!

In this blog post, I’ll share with you exactly how we set up our seed germination experiment, a Free Printable Seed Growth Tracker, AND the results with the best seeds to germinate with kids!

Seed Germination Experiment with Free Printable Tracker

Seeds and Plants Family Unit Study

This seed germination experiment is one of the hands-on activities from my Seeds and Plants Family Unit Study .  

If you’re new here, let me explain. This unit study, like all of our ever-growing library of unit studies, takes one big topic—Seeds and Plants—and breaks it down into ten manageable, bite-sized learning topics. This format gives you the freedom to dive into learning at a pace that works for your family.

Each of the ten topics included with a unit study contains everything you need for that topic, including:

  • a curated YouTube video,
  • suggested information to read,
  • a “what’s happening” section,
  • an interesting fact,
  • a discussion question,
  • literacy and math extension questions,
  • and an ultimate-can’t-be-beat hands-on activity!

Perhaps you do one topic per day, perhaps one per week. Whatever suits your fancy! You can learn about seeds and plants and explore one of the 10 topics from start to finish in about 1-2 hours.

Printable Seed Growth Tracker

Within the Seeds and Plants Family Unit Study, your little ones will observe and document how their seeds grow with this Printable Seed Growth Tracker . You can grab it for FREE right here:

Seed Germination Experiment: The Set-Up

For this experiment, we’re going to germinate our seeds using the ‘mason jar and paper towel’ method. With this method, kids can see the seed sprout and the root structure form, giving them the real-life learning they need to understand what’s happening beneath the soil!

For your seed germination experiment, you will need:

  • a glass jar
  • paper towels

Instructions

First, we pushed sheets of paper towels, one at a time, into the glass jar. Once it was full, we added some water to wet it (dumping out any excess). Wetting the paper towel made room for a few more pieces to be pushed into the jar and then wet again (and again, dumping out any excess water). We made sure the paper towel was rather packed so the seeds would stay nicely in place next to the glass.

wet paper towels for seed germination for kids

Next, we picked four seeds to germinate: beans, snap peas, cucumber, and swiss chard. We pushed each seed down the side of the glass jar and supported them with the wet paper towel when pulling our fingers out.

using different seeds so kids will understand seed germination

We added all four of our seeds to one mason jar, but you could also set up separate mason jars for each of your different types of seeds.

Finally, I labeled each seed so we could make observations and comparisons.

Seed germination in a mason jar with paper towels

Seed Germination Experiment: The Results!

One of the reasons I love doing seed germination with kids is how quickly the seeds start to grow. For this seed growth experiment, our seeds started to root on Day 2! By the next day, there were sprouts, too. And by Day 5, three of our four seeds were growing strong!

These are the seeds that we chose to germinate:

  • Swiss Chard

So, how did our four seeds compare?

Here is a little run down of our results, though yours may, of course, be slightly different.

seed germination for kids how we learn

Day 1 – Despite checking a gazillion times, nothing happened.

Day 2 – Snap Pea rooted.

Day 3 – Snap Pea started to sprout, and Bean started to root.

Day 4 – Bean started to sprout, and Swiss Chard started to root (though it was tricky to see!).

Day 5 – Snap Pea , Bean , and Swiss Chard were all rooted and sprouting.

Day 6 – Bean overtook Snap Pea for the tallest and strongest plant.

Day 7 – All growing strong! (Except for the Cucumber …)

seed germination for kids

We had the best success with snap pea and bean seeds. Both grew fairly similarly, easily, and strongly. The roots to the snap pea were a bit easier to see, but the bean seed looks really neat as it sprouts!

So, What’s the Best Seed to Germinate with Kids?

So, if I were forced to choose between a bean or a snap pea seed to germinate with my little ones, I would choose—after a long and restless night’s sleep debating the choice— Snap Pea!

The root system on a snap pea is really fascinating—and that is why I do seed germination for kids in clear jars with paper towels : so they can see the root system.

Truthfully, we didn’t do too many activities while we were observing our seeds sprouting. It was mostly casual conversations. But conversations themselves can be one of the most powerful learning tools of all!

We made predictions and comparisons, developed new vocabulary, and—most importantly—marveled at how miraculous the whole process is.

This is one of the simplest ways to introduce little ones to seed germination. You can keep it simple, or turn it into quite an all-encompassing endeavor! Whatever floats your boat. Our boats are currently floated in a shallow stream… some days, a puddle…

More Seed Activities for Kids

If you’re looking for more seed activities, be sure to check out these 35 Seed Activities for Kids . And if you’re feeling crafty, I have tons of Seed Art Ideas for Kids as well.

And if you would like everything planned for you, I encourage you to check out my Seeds and Plants Family Unit Study!

https://shop.howweelearn.com/products/family-unit-study-seeds-and-plants

I hope you find these seed activities helpful for you and yours!

Thank you for reading, my friend,

"Mom, you're the BEST!"

Get playful activities emailed each week. Subscribing is FREE!

' src=

April 4, 2014 at 3:32 pm

The fail-safe ones are my favorite! lol! I love that this is just a casual experiment that still puts the roots (pun not intended) of science in their minds! 🙂

' src=

February 11, 2016 at 10:52 pm

Really helpful for my sons science project. I appreciate you sharing a lot! Thank you. We aren’t finished with ours however it’s a little more complicated. But wanted to say again appreciate your share! Great job!

' src=

February 15, 2019 at 4:44 pm

We always had the best success with nasturtium seeds.

' src=

February 19, 2019 at 9:12 pm

Oh interesting Theresa! I have never tried sprouting these seeds. I will have to give it a go!

' src=

March 5, 2021 at 2:00 pm

Hi, Did you just fill the jar up with wet paper towels? really wet? or misted wet? I’m trying to figure out how the seeds sit against the side of the jar. thanks

March 8, 2021 at 10:51 am

Hi Christina, Great question! The trick is to really fill the jar all the way with paper towels. Rip them off one by one and shove them in the jar. Then add lots of water to wet them down and continue to fill the jar again with the paper towel, wetting them down and repeating until the jar is totally full. Then dump out the excess water and press the seeds in. We then water the jar every two or so days and dump out the excess water. Hope this helps! I actually have a video coming out with more details next week. I will be sure to link it here!

' src=

April 11, 2022 at 9:15 pm

Where can we find the video? Love this idea!

April 17, 2022 at 8:28 pm

Thank you so much! You can check out the video in this blog post: https://www.howweelearn.com/two-spring-learning-crafts-we-love/

' src=

April 11, 2021 at 10:35 pm

Where did you get your seeds? Is it something I can just get at any store? Thank you. I nanny and always looking for learning amd fun things to do with her.

April 12, 2021 at 7:23 pm

Hi Faith! Yes, any store at all. The dollarstore carries seeds as well. I hope you have fun!

April 11, 2021 at 10:38 pm

Also, where in the jar did you put the seeds? On the sides? Do I put the different types of seeds in different jars?

April 12, 2021 at 7:28 pm

Yes! Once the paper towels are stuffed in the jar you can just slide the seeds in between the jar and the paper towels. You can put them in different jars, or pop them all in the same jar. Anything goes!

' src=

April 16, 2022 at 5:56 pm

Radish seeds sprout really fast as well. I’m a teacher and I use a plastic glove ( the large ones that cafeteria workers use) and instead of paper towels I use cotton balls. One cotton ball and one seed for each finger. Dip the cotton ball in water and wring out the water so that its damp and not dripping. Hope this helps anyone and thanks for the seed ideas!

April 17, 2022 at 8:23 pm

Great tips, Lindzi! Thank you!

' src=

February 6, 2022 at 10:46 pm

Hi Sarah, I have done this with many students. I had over 1200 students come to our conservation days and we showed them how to do this. With so many kids buying packaged seed was out of the question, so I just bought a bag of beans from the grocery store and started the process the night before by soaking them overnight. Then the bean seed germinated faster. Also corn seed can be used. Neither need to be soaked but it does speed up the process.

Just found your site. I was looking for fun easy experiments for my grandson who is 3 years old. I taught science for 35 years but, have been away from it and needed some inspiration, you know that oh yea, that would be a great one for him to do. Thank you.

February 9, 2022 at 7:56 pm

What a great tip, Brenda! Thank you so much.

For every step of your journey

seed germination experiment for class 5

Shop Resources

Privacy Overview

seed germination experiment for class 5

Free Sample

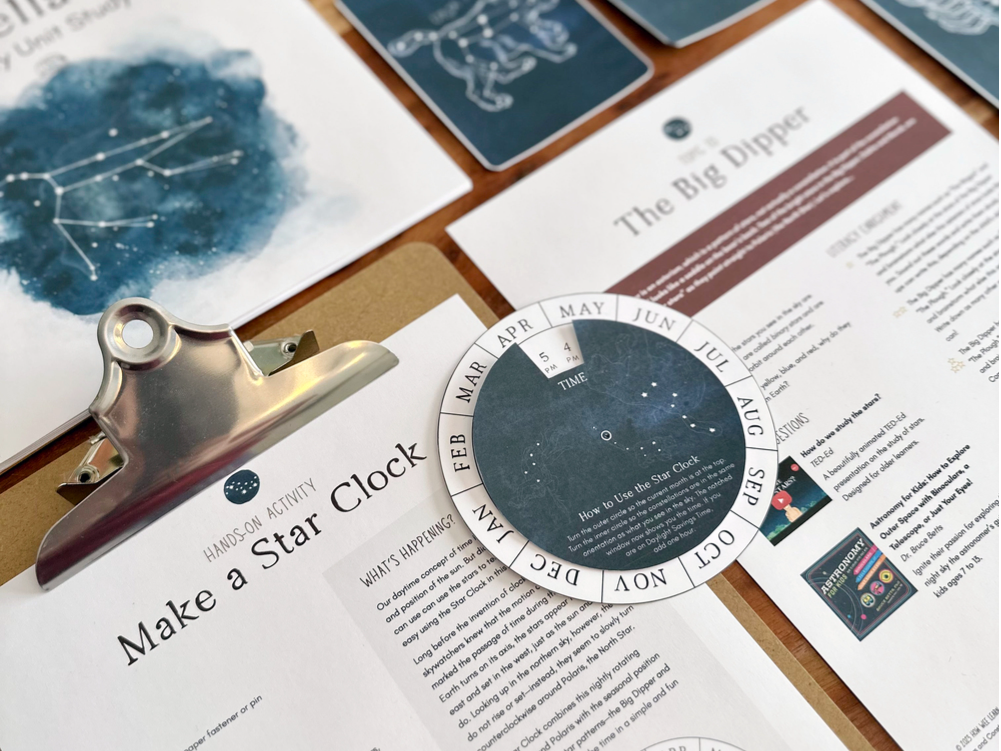
Stars & constellations family unit study.

Wondering if Unit Studies are right for you? Get a FREE sample! It will be delivered to your inbox instantly, then you will be redirected to my shop where you can take a peek at the rest of the available units and bundles.

Each week, I send an email to my lovely subscribers with fun activities for children. You’ll also be the first to know when I’m offering an incredible deal. Unsubscribe at any time!

seed germination experiment for class 5

Free Printable

Let's take the mystery out of learning to read..

Check your inbox! Your free printable will be emailed to you immediately.

ASU for You, learning resources for everyone

  • News/Events
  • Arts and Sciences
  • Design and the Arts
  • Engineering
  • Global Futures
  • Health Solutions
  • Nursing and Health Innovation
  • Public Service and Community Solutions
  • University College
  • Thunderbird School of Global Management
  • Polytechnic
  • Downtown Phoenix
  • Online and Extended
  • Lake Havasu
  • Research Park
  • Washington D.C.
  • Biology Bits
  • Bird Finder
  • Coloring Pages
  • Experiments and Activities
  • Games and Simulations
  • Quizzes in Other Languages
  • Virtual Reality (VR)
  • World of Biology
  • Meet Our Biologists
  • Listen and Watch
  • PLOSable Biology
  • All About Autism
  • Xs and Ys: How Our Sex Is Decided
  • When Blood Types Shouldn’t Mix: Rh and Pregnancy
  • What Is the Menstrual Cycle?
  • Understanding Intersex
  • The Mysterious Case of the Missing Periods
  • Summarizing Sex Traits
  • Shedding Light on Endometriosis
  • Periods: What Should You Expect?
  • Menstruation Matters
  • Investigating In Vitro Fertilization
  • Introducing the IUD
  • How Fast Do Embryos Grow?
  • Helpful Sex Hormones
  • Getting to Know the Germ Layers
  • Gender versus Biological Sex: What’s the Difference?
  • Gender Identities and Expression
  • Focusing on Female Infertility
  • Fetal Alcohol Syndrome and Pregnancy
  • Ectopic Pregnancy: An Unexpected Path
  • Creating Chimeras
  • Confronting Human Chimerism
  • Cells, Frozen in Time
  • EvMed Edits
  • Stories in Other Languages
  • Virtual Reality
  • Zoom Gallery
  • Ugly Bug Galleries
  • Ask a Question
  • Top Questions
  • Question Guidelines
  • Permissions
  • Information Collected
  • Author and Artist Notes
  • Share Ask A Biologist
  • Articles & News
  • Our Volunteers
  • Teacher Toolbox

Question icon

A classic seed experiment

Seed germination activities are a long-time favorite of educators. One of the classic seed experiments uses a resealable plastic bag, a paper towel or napkin, seeds and water. This is a low-cost, effective tool for teaching about seeds, germination, gravitropism and energy. It also provides a perfect environment for introducing the fundamentals of the  scientific method .

A twist on an old favorite

Dr. Biology’s  Virtual Pocket Seed Experiment  adds a twist to this classic experiment that fits into today's technology. It allows educators to introduce students to all the concepts of the original with some added features and benefits.

  • The virtual version is a collection of real data that students can use to chart the results of different seed treatments.
  • Each treatment is also animated so 10 days can be viewed in a matter of seconds.
  • A companion Excel spreadsheet introduces students to 21st century skills as well as graphing and charting.

Virtual Pocket Seed Experiment

The best part of the Virtual Pocket Seed Experiment is it is flexible. It allows teachers to introduce as much of the virtual data as desired.

In some cases it can serve as a backup for the real-world experiment. It can be used in its fully virtual form to compress the time it takes to run the hands-on version.

The animations and companion story also serve as introductory materials to capture student imagination and interest.  The virtual version is based on a real world experiment adding to its authenticity. Students can then run their own experiments and compare their results to the virtual version.

How to use the Virtual Pocket Seed Experiment

The  Experiment Packet PDF  contains all the educator needs for either the hands-on or virtual experiment. It also provides detailed instructions including illustrations, a sample lesson plan, handouts and materials for students to use for either experiment. It is worth downloading the reviewing the packet. There are several ways to introduce the experiment to students depending on the needs of the educator. Below are some suggestions based on instructor feedback.

  • Many teachers introduce students to seeds, their anatomy and seed germination using the companion,  Time Traveling Plants , story.
  • Before using the virtual experiment it is best to review  Experiment Overview  and  Data Card Help  sections.
  • Depending on the grade level and the time available, students can conduct the hands-on experiment or use the virtual version.
  • Younger learners run the experiment and carry out the analysis.
  • Older learners begin to use the companion Excel file.
  • For some high school teachers the experiment is used as a quick 30-50 minute refresher for students to get them thinking critically and using the scientific method.

Arizona Science Standards

Strand One: Inquiry process

Concept 1: Observations, Questions, and Hypotheses

  • PO 1. (5) Formulate a relevant question through observations that can be tested by an investigation.
  • PO 1. (7) Formulate questions based on observations that lead to the development of a hypothesis.
  • PO 2. (2) Predict the results of an investigation.

Concept 2: Scientific Testing (Investigating and Modeling)

  • PO 1. (7) Demonstrate safe behavior and appropriate procedures in all science inquiry.
  • PO 2. (4) Plan a simple investigation that identifies the variables to be controlled.
  • PO 3. (4) Conduct controlled investigations in life, physical, and Earth and space sciences.
  • PO 4. (5) Measure using appropriate tools (e.g., ruler, scale, balance) and units of measure.
  • PO 5. (5) Record data in an organized and appropriate format.

Concept 3: Analysis and Conclusions

  • PO 1. (7) Analyze data obtained in a scientific investigation to identify trends.
  • PO 2. (7) Form a logical argument about a correlation between variables or sequence of events.
  • PO 3. (6) Evaluate the observations and data reported by others.

Strand 4: Life Science

Concept 1: Structure and Function in Living Systems

  • PO 1. (3) Describe the function of the following plant structures: roots, stems, leaves, flowers.

Concept 2: Life Cycles

  • PO 2. (3) Explain how growth, death, and decay are part of the plant life cycle.

Concept 3: Organisms and Environments

  • PO 5. (3) Describe how environmental factors in the ecosystem may affect a member organism's ability to grow, reproduce, and thrive.

Read more about: Virtual Pocket Seed Viewer

View citation, bibliographic details:.

  • Article: For Teachers
  • Author(s): Dr. Biology
  • Publisher: Arizona State University School of Life Sciences Ask A Biologist
  • Site name: ASU - Ask A Biologist
  • Date published: December 29, 2016
  • Date accessed: July 15, 2024
  • Link: https://askabiologist.asu.edu/experiments/vpocketseeds_teachers

Dr. Biology. (2016, December 29). For Teachers. ASU - Ask A Biologist. Retrieved July 15, 2024 from https://askabiologist.asu.edu/experiments/vpocketseeds_teachers

Chicago Manual of Style

Dr. Biology. "For Teachers". ASU - Ask A Biologist. 29 December, 2016. https://askabiologist.asu.edu/experiments/vpocketseeds_teachers

MLA 2017 Style

Dr. Biology. "For Teachers". ASU - Ask A Biologist. 29 Dec 2016. ASU - Ask A Biologist, Web. 15 Jul 2024. https://askabiologist.asu.edu/experiments/vpocketseeds_teachers

seed germination experiment for class 5

On screen measuring tool speeds up data collection from any zoom view.

Virtual Pocket Seed Viewer

Be part of ask a biologist.

By volunteering, or simply sending us feedback on the site. Scientists, teachers, writers, illustrators, and translators are all important to the program. If you are interested in helping with the website we have a Volunteers page to get the process started.

Share to Google Classroom

The Educators' Spin On It

Learning Games and Activities

By The Educators Spin On It

Germination Science Experiment

seed germination experiment for class 5

In this twist on the classic germination science experiment, children will test the germination rate of 10 green bean seeds. From making predictions to collecting data, your little scientists will learn all about seeds and how plants grow.

Let’s get started with this germination of seeds activity! 

A math and science spin off the classic green bean germination science experiment

Affiliate links to products like the super cute Melissa & Doug Sunny Patch Tootle Turtle Tote Set pictured in the above picture!

An Easy Germination Science Experiment for Kids to Do

A fun way to teach your child about the germination of seeds!

Materials Needed for Germination Science Experiment

  • Plastic baggie
  • Black permanent marker
  • Paper towel
  • Spray Bottle

Directions for Germination Science Experiment

Before the germination science experiment read seed books and talk about seeds.

Introduce the word GERMINATION.  Germination is when the seed begins to grow a root and a shoot. This experiment will allow children to see how and how many seeds germinate.  The plastic bag acts as a window into the world of plant growth!

  • Fold the paper towel so it will fit neatly inside the plastic bag.
  • Using a black permanent marker, draw a 10 frame on the bag.
  • Fill the spray bottle with water and let children mist the paper towel until it is completely moist.
  • Place the wet paper towel in the bag.
  • Have the children place one bean seed in each compartment in the 10 frame.
  • Close the bag and set it flat near a window or other sunny area. (the bag can be taped to a window, but the seeds do not stay in the 10 frame well!)

TIP: Here are the Fastest Growing Seeds for Science Projects .

bean germination science experiment with bag and math 10 frame

Want to expand this lesson? Use this free plant life cycle worksheet !

Discussion Questions for Germination Science Experiment

Do you think that all 10 bean seeds will germinate? Explain your answer.

MATH CONNECTIONS:

  • Write a prediction on how many bean seeds you believe will germinate.  You many guess numbers between 0 and 10. After plants have germinated check your predictions.  Discuss the results.
  • Can you figure out the percentage or germination rate of your bean seeds?  Take the number of bean seeds in your bag that germinated.  Use a calculator and times that number by 10.  If 8 seeds germinated, you would take 8 x 10 = 80.  Your seeds would have an 80% germination rate.
Why do you think knowing a seeds germination rate would be helpful to a farmer?

NOTE: Bean seeds germinated in this way “may” grow if you place them in a soil garden area shortly after germination begins. Often teachers will allow the bean plants to continue growing until leaves form so that students can see the plants growing.

Bean Seed Germination Experiment

Facts about Beans

  • A bean seed will grow into a bean plant.
  • The plant will produce blossoms that will turn into beans.  If left to mature. The beans will contain 5-6 bean seeds that can be re-planted.
  • Some bean seeds are white, red, brown, or black.  We have even planted red speckled bean seeds.
  • The roots and stem will come out of the seed.  When this happens, it is called – germination.
  • Roots go down from the bean seed into the earth due to gravity.  They help the bean plant absorb water and nutrients from the soil.  You will see this in the first few days of your grow a bean maze experiment.
  • Even if you plant the seed upside down, the roots will “turn themselves” back the right way.
  • The stem, or shoot, will go upwards in search of sunlight and air.

Germination Science Experiment Vocabulary

Germination :  when the seed begins to grow a root and a shoot.

Root :  Part of the plant beneath the soil that absorbs water and nutrients.

Sprout : the beginning growth of a plant

Sprouting : the practice of germinating seeds

We all know that plants need water, sun, and soil to grow. In this science experiment, kids will grow a bean maze to truly “see” how plants will seek out what they need.

Vegetables harvested from a backyard garden with kids

Seed and Flower Activities for Kids

More SEED and Flower Inspired Learning Activities from our Teach ECE Education Team and here at The Educators’ Spin On It. We recommend:

  • Tracing Letters with Seeds by Mom Inspired Life
  • Flower Scavenger Hunt Mini-Book by Life Over C’s
  • Growing Seeds and Journaling by Learning 2 Walk
  • Song About Weeds by Capri + 3
  • Printable Seed Activities Inspired by The Tiny Seed by Eric Carle
  • Gardening with Kids, Seeds versus Transplants
  • Saving Sunflower Seeds
  • Best Flowers to Plant to Attract Butterflies
  • Unlocking the Mysteries of Seed Germination

Kids in the Garden Learning and Growing Activities

Click for more Gardening with Kids

Like this idea? Pin for later or share now with a friend!

  • Pinterest 56
  • Facebook 118

' src=

June 17, 2016 at 5:52 am

The blog is very nice and shares great information. keep up the good work. school franchise in india

' src=

April 20, 2016 at 9:19 am

Our kids would love to try this experiment. I love that they can also try multiplication with a calculator to find out the rate of germination.

You Might Also Like

back to school themed stem activities for kids

Back to School STEM Activities

Back to School Resources and Activities for Parents

Back to School Resources for Parents

Featured books for the first day of school books.

16 Adorable First Day of School Books

Meet the Teacher Tips for First Day of School

Meet the Teacher Tips for Parents

Why You Should be Using Beginner Pencils from Ticonderoga Pencils for Handwriting Practice with Kids

Why You Should Be Using Beginner Pencils for Handwriting Practice

Let’s connect.

seed germination experiment for class 5

Seed Germinator

What goes on underground when seeds are sprouting? Make yourself a window into the process of plant development.

  • Quick-germinating seeds, such as radish or Wisconsin Fast Plants®
  • Paper towel or coffee filter
  • Large petri dish with lid, or an old CD case with clear sides (if you’re using a CD case, open it and remove the plastic insert that holds the CD, being careful not to break the case)
  • Lidless, straight-sided plastic container wide enough to set the petri dish or CD case inside, on its edge, as shown in the photo
  • Two rubber bands big enough to fit around the open container
  • Metric ruler with millimeter markings
  • Magnifying glass

Assorted office and craft supplies including scissors, magnifying glass, ruler, and various plates or containers.

  • Soak the seeds overnight in water.
  • Set aside the top of the petri dish, or open the CD case. Cut the paper towel (or coffee filter) to fit inside.
  • With a ruler and pencil, draw a straight line across the middle of the paper towel. Lay the marked-up paper in the bottom of the dish (or inside the CD case) so the line sits horizontally across the center. If you’re using a CD case, be sure the hinged edge is at the top or side (not bottom).
  • Pour a little water into the dish to wet the paper towel. Smooth out any bubbles and tip out any extra water not absorbed by the paper. Later, when you stand the dish on its edge, the wet paper should remain stuck to the inside of the dish or CD case.
  • Place 6 to 10 seeds on the paper towel, evenly spaced along the reference line. Then put the lid on the petri dish, or close the CD case.

seed germination experiment for class 5

  • Pour water into the container to a depth of about 1 inch (2 to 3 cm). The water should seep into the petri dish or CD case and contact the paper towel, keeping it moist as the seedlings begin to sprout.
  • Put your seed germinator in a warm place (room temperature or slightly higher), away from direct sunlight.

Check on your seeds once or twice a day, and notice what changes or emerges (see photo below). (It’s fine to open the seed germinator; just handle it carefully so the seeds don’t move.) Do shoots with green tips emerge first, or do white roots emerge first? Do each seed’s roots and shoots sprout in the same direction, or in different directions? Use a magnifying glass to examine the growing structures in more detail. How do they change over time?

Measure the growth of the roots and shoots over time. You may want to collect data to graph average root length vs. time, and average shoot length vs. time. (Note that it’s helpful to measure time in total elapsed hours, rather than days.) Which grows faster, the shoots or the roots?

seed germination experiment for class 5

Inside a seed is the embryo of a plant, plus a food source for that embryo, all contained within a protective seed coat. Here, you can observe seed germination, in which the embryo begins to digest the food and grow into a seedling. While this process usually happens in soil, the key component for germination is water.

At appropriate temperatures, most seeds begin their germination by absorbing water through a tiny hole in the seed coat. The moisture starts the metabolic processes of the embryo that’s contained within the seed. When hydrated by absorption of water, enzymes in the seed are activated. They begin digesting the food stored inside to generate energy for the embryo’s growth.

The developing root emerges from the seed first. As the root grows longer and thicker, it develops tiny root hairs, which help the developing plant take up water and nutrients. Shoots with pale-green leaflike structures emerge after the roots. Eventually, these leaves will turn a deeper green color and begin to photosynthesize, capturing and storing light energy and carbon dioxide from the air.

Photosynthesis in leaves supplies the plant with the energy and matter it needs to grow. Newly germinated seedlings, however, are not yet photosynthesizing. Instead, in early stages of growth, the embryo digests and assimilates the energy and matter from the food present in the seed. Depending on the type of seed, this food store contains a mixture of proteins, fats, sugars, and starches. This stored food isn’t just important to the developing plant embryo; it’s also important to human diets. About 45 percent of the calories humans consume globally comes from seed grains like rice, wheat, and corn.

A common misconception is that plants get their mass from soil. In this soil-free experiment, you can prove to yourself that plants don’t strictly require soil to grow. In fact, many plants grow very well hydroponically in water cultures, as long as the appropriate nutrients such as nitrogen, phosphorous, and potassium are provided. Your seedlings will eventually need more space than the seed germinator can provide, but given the right lighting conditions, they’ll begin to photosynthesize, accumulating mass from the carbon dioxide in the air and the water you provide.

This seed germinator makes it easy to design and perform experiments to determine the materials and conditions seeds need in order to germinate and grow. The effects of temperature, light levels, and water conditions (such as pH or salinity), as well as the presence or absence of various nutrients are all factors you can investigate. Experimenting with the position and lighting of the seed germinator can help you determine the conditions necessary for roots to grow down, and for shoots to grow up. Do roots sense gravity? Do they sense light? Or are they affected by other factors?

This Science Snack is part of a collection that showcases LGBT artists, scientists, inventors and thinkers whose work aids or expands our understanding of the phenomena explored in each Snack.

seed germination experiment for class 5

Jennifer Nemhauser (she/her) is a queer and pansexual biologist. She is a faculty member in the Department of Biology at the University of Washington and studies how plants use signaling networks to change the shapes of their bodies to make the best of particular environments. She hopes that if she can learn how plants control division, growth, differentiation, communication, and death, she can help breed the next generation of more resilient crops. Prior to her faculty position at the University of Washington, she completed her doctoral work in auxin and flower development and post-doctoral work in hormone interactions in seedling development. Jennifer feels as though she expresses her queer identity the most in the ways she works to build a distinctly queer scientific culture within her lab group—an effort that is reflected in the large number of LGBTQIA+ students and postdocs that have found a home there. Make yourself a window into the process of plant development with the Seed Germinator Science Snack.

As noted in the What’s Going On? section above, this experiment can be used to begin investigating where a plant’s mass comes from. To do this, weigh the seeds before you soak them. Allow the seedlings to grow under good light conditions for several days, so they begin to accumulate mass through photosynthesis. Then take them out, let them dry, and check their mass again. Comparing the initial mass of the seeds to the dry mass of the germinated seedlings can help show students that a plant’s mass does not come from soil or water.

Related Snacks

Science activity that demonstrates photosynthesis

  • Skip to primary navigation
  • Skip to main content
  • Skip to primary sidebar

Science Experiments for Kids

  • FREE Experiments
  • Kitchen Science
  • Climate Change
  • Egg Experiments
  • Fairy Tale Science
  • Edible Science
  • Human Health
  • Inspirational Women
  • Forces and Motion
  • Science Fair Projects
  • STEM Challenges
  • Science Sparks Books
  • Contact Science Sparks
  • Science Resources for Home and School

Bean in a jar

April 30, 2012 By Emma Vanstone 13 Comments

This germination investigation is very simple but fascinating. Did you know you can grow a bean in a jar with just a little water? Germination is the sprouting of a seedling from a seed.

What is germination?

Three factors are important for germination .

Water – seeds need water for germination to occur. When a seed absorbs water, it starts to swell up, the outer coat of the seed cracks and roots start to grow through.

Oxygen – oxygen is needed for a plant to grow (oxygen is needed for respiration to occur ). Seeds buried too deeply in the soil won’t grow.

Temperature – the temperature can be important ( warm or cold ) depending on the type of seed.

Once a seedling has used all the nutrients from the seed, it then needs to take nutrients from the soil. Once your seed has germinated and grown a little bit, you’ll need to transfer it into a pot of soil.

Light is not needed for germination but is needed for a plant to grow.

Roots grow downwards to anchor the plant in the ground and find nutrients, and shoots grow upwards to find light.

How to grow a bean in a jar

What you need.

  • A broad bean seed
  • Kitchen roll or a napkin

Instructions

  • Swirl a small amount of water around the jar.
  • Fold your napkin or kitchen roll and place it in the jar ( we made the kitchen roll very slightly damp also ).
  • Place the bean seed in the jar resting on the napkin.
  • Spray some water on the bean every few days.

The bean should start to grow roots after a few days. This is called germination.

bean in a jar - the roots can clearly be seen inside the jar

We kept one bean in the dark and one in the light. Both seeds germinated and grew into small bean plants. This shows that light is not necessary for germination .

You can see here that the plant grown in the dark is slightly less green than the one grown in the light. We have seen this before when growing cress .

bean in a jar - bean plant kept in the light

What amazes me the most is that all this can grow from one tiny seed with no additional nutrients other than those contained in the bean itself.

After a few days in the light, the bean plant kept in the dark was as luscious a green colour as its counterpart.

Two bean plants grown in a jar for a science experiment

Bean in a jar instructions

Download the instructions completely free.

Bean in a jar instructions

More plant science

Little ones will enjoy growing a bean for Jack and the Beanstalk.

Inspiration Laboratories has a lovely plant science experiment growing seeds in different soil types , such as sand and stones.

Playdough to Plato has a gorgeous sprout house !

Another idea is to dissect a plant or try one of our other fun plant science experiments for kids .

Suitable for:

Key Stage 1 Science – Plants

Identify and describe the basic structure of a variety of common flowering plants, including trees.

Image of  bean in a jar grown for a science experiment

Last Updated on March 29, 2023 by Emma Vanstone

Safety Notice

Science Sparks ( Wild Sparks Enterprises Ltd ) are not liable for the actions of activity of any person who uses the information in this resource or in any of the suggested further resources. Science Sparks assume no liability with regard to injuries or damage to property that may occur as a result of using the information and carrying out the practical activities contained in this resource or in any of the suggested further resources.

These activities are designed to be carried out by children working with a parent, guardian or other appropriate adult. The adult involved is fully responsible for ensuring that the activities are carried out safely.

Reader Interactions

' src=

April 30, 2012 at 8:52 am

You keep coming up with really inspiring ideas. Thankyou!

' src=

May 04, 2012 at 7:39 pm

So glad you like them!

' src=

April 30, 2012 at 12:53 pm

I love this idea. It is so much better than the ziploc bag on the window. (Maybe it is just me, but those always get so nasty. Plus it would be great to have where the students could see actually grow and record the height. Love it.

May 04, 2012 at 7:41 pm

oooh yes, what a good idea!

' src=

May 02, 2012 at 10:17 pm

It is fascinating and beautiful! We have to try this!

It was great! and so simple x

' src=

May 06, 2012 at 8:29 pm

We love this activity. Ours is growing strong and we’re going to try transferring into the soil and growing further now

Thank you for linking to Tuesday Tots this week

' src=

May 07, 2012 at 2:26 pm

love this idea.. will find some jars x

' src=

May 11, 2012 at 3:01 am

How fun!! I love the lessons where they get to see the roots that would be underground. Thank you for sharing at Sharing Saturday! I hope you are having a great week!

' src=

March 08, 2013 at 6:55 pm

Ooh great way to use my jars! Now to get some beans x

' src=

March 08, 2013 at 8:28 pm

We grew a bean in a glass Mason jar for each kid a couple months ago. Can you believe they ate still thriving? One even grew a bean pod with beans in it. I should transfer them to a pot with soil.

' src=

April 10, 2013 at 6:14 pm

I would like to know just why this works. Why is the one kept in the dark white? I know it has something to do with light. And why did it grow faster that the one in the light? Thank you!

' src=

April 23, 2020 at 10:28 am

Hi there, can you use any seed for this?

Leave a Reply Cancel reply

Your email address will not be published. Required fields are marked *

The Resourceful Mama

April 18, 2016

Seed Germination Observation for Kids {Free Printable}

  • Pinterest 142

This is a sponsored post written by me on behalf of Gro-ables Project for IZEA . All opinions are 100% mine.

There’s something magical about seeds sprouting into plants. Kids watch them expectantly for days. It’s their daily mission to check on their plants.

For days they come back with nothing to report and then it happens. They come running and shouting that their plants are growing, their seeds have sprouted.  

Free printable seed germination observation worksheet. Fun and educational gardening activity for kids.

This post contains affiliate links. See my Disclosure Policy  for details.

Our kids love to help plant the garden in the spring. It’s a great way to get them outside, active, and invested in the vegetables we will be eating over the summer.

They get so excited when I tell them it’s time to plant the garden. They rush around and help gather all the supplies and equipment.

It never fails, ever year we end up with seeds dumped in a pile. Last year it was the carrots. There was some (or a lot) thinning out that was needed.  

When we were offered the chance to review Miracle-Gro® Gro-ables® this year we were super excited! No spilt seeds! We even made a fun printable to go along with our seed pods to help kids track the germination progress. 

Miracle-Gro® Gro-ables® are so simple and easy to use and give kid a hands on opportunity to learn about gardening. Th ey make gardening a breeze. Each ready-to-plant seed pod contains everything needed to get started. Each Miracle-Gro® Gro-ables® contains a seed, plant food, and growing materials. They take the guesswork out of gardening; no need to worry about planting depth or dumping too many seeds into one hole.

Just 3 easy steps and you will be on your way to fresh vegetables and herbs:

Start by loosening the potting mix, peel off the lid and push in the seed pod until the top of pod is even with the potting mix. You don’t need to cover the top with potting mix. Each seed pod will give your instructions for spacing. 

Planting Miracle Gro Growables and tracking seed observation with a free printable.

Keep your seed pods moist by watering daily.

Miracle-Gro® Gro-ables® are guaranteed to grow. Before you know it, you will be enjoying fresh garden salads, BLTs with lettuce and tomatoes from your garden, salsa, cucumber salad, zucchini bread and all your other favorite garden recipes. 

After you plant your Miracle-Gro® Gro-ables®, to help curb the when is it going to grow questions, have them record their data on this Germinating Seeds printable. There is a column for date planted, type of seed, estimated days until germination, and date they observed the germination.

Free printable seed germination observation worksheet. Fun and educational gardening activity for kids.

I really like the estimated germination date. It gives kids an idea of when they will be seeing their plants begin to grow. They know that if we plant cucumbers today, they will not see anything for 7-10 days. 

Download  Germinating Seeds  Printable

Extend the Activity:

1. Plant the seed pods in pots and do an experiment. What do seeds need to grow? Alter water and light and track the affect it has on seed germination.

2. Plant the seed pods in pots that the kids decorate and give it as a gift.

3. Compare the growth of Miracle-Gro® Gro-ables® to other forms of seed germination. 

Miracle-Gro®, believes that there’s a lot to learn from even the smallest plants, so they started The Gro-ables Project . It’s a movement that shares the joy of growing herbs and veggies while giving kids truly hands-on learning experiences.

Be sure to share your Gro-ables story and how you utilize the Germinating Seeds printable! Follow us on social media for updates on our plants:  Instagram ,  Facebook , and  Twitter . 

Visit Sponsors Site

Subscribe Via Email

seed germination experiment for class 5

Student Sheet 5 – Investigating Seed Germination

  • Share to Facebook
  • Share to Twitter
  • Share via Email

Age Ranges:

seed germination experiment for class 5

This is a simple experiment to investigate the germination of seed under different conditions, by growing seeds upright in Petri dishes. While simple enough to be used at KS2, the practical can be used for investigations at GCSE and post-16.

The experiment allows students to make quantitative measurements of root / shoot growth, length of root hairs, etc, as well as % germination. By rotating the dishes, some tropic effects can also be investigated.

This technique can be used to investigate the effects of acid rain and its effects on germination, by filling the reservoir with an appropriate solution.

Cress seeds  are often used for germination experiments, but we find that white mustard ( Brassica alba ) seed is generally cheaper and easier to handle, and somewhat more reliable in germination.

Download the student sheet and teachers’ notes from the links on the right.

What's included?

  • SAPS Sheet 5 - Investigating Seed Germination - grid templates
  • SAPS Sheet 5 - Investigating Seed Germination - Student Notes
  • SAPS Sheet 5 - Investigating Seed Germination - Student Sheet
  • SAPS Sheet 5 - Investigating Seed Germination - Technical and Teaching Notes
  • Cells and tissues
  • How plants grow
  • Plant growth
  • Plant reproduction
  • Reproduction
  • Essential practicals

Related content

Teaching resources.

  • Seed Dispersal - physics and biology at Key Stage 3
  • Fruits, Seeds and their Dispersal
  • Growing seeds in a plastic bag
  • Using Cress in the Lab
  • Student Sheet 8 - Phototropism: the Response of Seedlings to Light

Choose an Account to Log In

Roly

Notifications

Science project, factors affecting seed germination.

seed germination experiment for class 5

What do plants need to grow? In this experiment, you’ll explore one of the most important factors affecting seed germination by finding out whether the amount of water a seed receives changes how quickly it germinates.

A seed contains the beginnings of a new baby plant. To grow, this plant needs water. Water helps a plant with different processes inside the plant. It allows the plant to move nutrients from the soil into its cells.

How does the variable of moisture affect seed germination?

  • Potting soil
  • 12 bean seeds
  • 4 clear plastic cups
  • Plant mister
  • Permanent marker
  • Distilled water
  • To set up the experiment, you’ll prepare four different soil samples. Save a small amount of soil from each batch so you can use it later.
  • First, label one cup “Dry,” another “Moist,” another “Wet,” and another “Soaked”.
  • Divide the potting soil into four equal parts. One part can go into the cup labeled Dry.
  • Mist the second batch of potting soil with water until it is damp to the touch. Place this in the cup labeled “Moist”.
  • Add water to the third batch of soil. It should be wet and slightly muddy to the touch. Place this batch of soil into the third cup.
  • Add a lot of water to the fourth batch of soil. It should be soaking wet: When you squeeze it in your hand, water should come out. Place this batch of soil into the fourth cup.
  • Plant four bean seeds in each cup. Place them gently on top of the soil near the edge of each cup. You should be able to see the seeds from the outside of each cup. Try to place them equal distances from each other. Cover them with ¼ inch of soil from the appropriate dry, moist, wet, or soaked pile.
  • Create a hypothesis, your best guess about what is going to happen. Will the seeds from the different cups germinate at the same rate? At different rates? Why?
  • Now, wait. Every day, look at the bean seeds. The seeds may begin to germinate. Use your notebook and pencil to take notes on what is going on with your bean plants from day to day.
  • Do some seeds germinate more quickly than others? Do some not germinate at all? Why?  

The seeds germinate the best in moist soil.

What do seeds need to grow? Baby plants have fairly simple needs. They need good soil with nutrients, water, sunshine, and air, particularly carbon dioxide. However, the right mix of these essential elements for life can be surprisingly hard to find. If a seed falls in a place where there is very little light, it won’t grow at all or its growth will be stunted.

The same thing happens when a seed does not get a lot of water. Water is important to plants. When plants can get water from the soil, it’s easier for them to move soil nutrients into the plant tissues. Plants have a circulatory system just like you do. In your body’s circulatory system, your blood helps move food around your body. In plants, water works a lot like blood, helping the plant to move soil nutrients around. Plants also make food through a process called photosynthesis . This process involves light, water, and carbon dioxide. After photosynthesis, the plant needs to be able to move the food around inside itself. Water also helps keep the plant’s cells plump so that the plant stands tall.

Plants need water, but they don’t like to have too much water. Too much water can rot seeds before they get to grow. If you give soil too much water, the water fills in all of the air pockets in the soil. This means that your plant’s roots can’t breathe and get stressed. They may rot as well. For a plant, a little water is an amazing thing, but a lot can make it sick.

Related learning resources

Add to collection, create new collection, new collection, new collection>, sign up to start collecting.

Bookmark this to easily find it later. Then send your curated collection to your children, or put together your own custom lesson plan.

Logo

  • Free Resources
  • Project Search
  • Featured Projects
  • Member Benefits

1059 Main Avenue, Clifton, NJ 07011

The most valuable resources for teachers and students

logo

(973) 777 - 3113

[email protected]

1059 Main Avenue

Clifton, NJ 07011

07:30 - 19:00

Monday to Friday

123 456 789

[email protected]

Goldsmith Hall

New York, NY 90210

Logo

  • Why We’re Unique

Germination

Introduction: (initial observation).

A seed is a miracle waiting to happen. The embryo comes pre-packaged with a food supply and the vital genetic information needed to become a plant just like its parents. Seeds exist in a state of dormancy, absorbing oxygen, giving off carbon dioxide, and slowly using up their stored food reserves. During this process the seed continually monitors the external environment waiting for ideal conditions specific for the particular seed. Once the ideal conditions occur, the seed breaks dormancy and germinates.

In this project, you must display different stages of seed germination. You can plant different seeds and get sample at different stages and use them for your display and report.

This project guide contains information that you need in order to start your project. If you have any questions or need more support about this project, click on the “ Ask Question ” button on the top of this page to send me a message.

If you are new in doing science project, click on “ How to Start ” in the main page. There you will find helpful links that describe different types of science projects, scientific method, variables, hypothesis, graph, abstract and all other general basics that you need to know.

Project advisor

Germination : To begin to sprout or grow.

Information Gathering:

Gather information about seed germination and plant growth. Read books, magazines or ask professionals who might know in order to learn about what a seed needs in order to germinate. Keep track of where you got your information from.

Following are samples of information that you may find:

A seed certainly looks dead. It does not seem to move, to grow, nor do anything.

Indeed if a seed is not allowed to germinate (sprout) within some certain length of time, the embryo inside will die. Each species of seed has a certain length of viability. Some maple species have seeds that need to sprout within two weeks of being dispersed, or they die. Some seeds of Lotus plants are known to be up to 2000 years old and still can be germinated.

Source…

Farmers know the best season and conditions for sowing different seeds. A database for such information is also available online .

A seed contains an embryonic plant in a resting condition, and germination is its resumption of growth. Seeds will begin to germinate when the soil temperature is in the appropriate range and when water and oxygen are available.

Germination in Dicots

  • The primary root emerges through the seed coats while the seed is still buried in the soil.
  • The hypocotyl emerges from the seed coats and pushes its way up through the soil. It is bent in a hairpin shape — the hypocotyl arch — as it grows up. The two cotyledons protect the epicotyl structures — the plumule — from mechanical damage.
  • Once the hypocotyl arch emerges from the soil, it straightens out. This response is triggered by light.

With the first warm days of spring, gardeners are anxious to get their vegetable seed in the ground. Unfortunately, it is not the air temperature, but the soil temperature that controls seed germination. We have to wait for the soil temperature to reach the optimum for a specific crop if we hope to get a good stand of vigorous seedlings.

Question/ Purpose:

What do you want to find out? Write a statement that describes what you want to do. Use your observations and questions to write the statement.

The purpose of this project is to display different stages of seed germination. You may also want to study on certain questions such as:

  • How long does it take for Kidney Beans to germinate?
  • What is the rate of germination in Kidney Beans?

Identify Variables:

When you think you know what variables may be involved, think about ways to change one at a time. If you change more than one at a time, you will not know what variable is causing your observation. Sometimes variables are linked and work together to cause something. At first, try to choose variables that you think act independently of each other.

This project can be a display project with no questions. In this case you will not need to identify any variables.

If you are studying on a question such as the rate of germination, then type of bean and germination rate are your variables.

Type of bean is called an independent variable. Germination rate is called the dependent variable.

If you are studying on a question such as the speed of germination, then type of bean and the speed of germination are your variables.

Type of bean is called an independent variable. The speed of germination is called the dependent variable.

Hypothesis:

Based on your gathered information, make an educated guess about what types of things affect the system you are working with. Identifying variables is necessary before you can make a hypothesis.

A display project will not need a hypothesis. An experimental project will need you to write a hypothesis. Following are sample hypothesis that might be used for the proposed questions.

My hypothesis is that all seeds will germinate.

My hypothesis is that seeds will germinate in about 10 days.

Experiment Design:

Design an experiment to test each hypothesis. Make a step-by-step list of what you will do to answer each question. This list is called an experimental procedure. For an experiment to give answers you can trust, it must have a “control.” A control is an additional experimental trial or run. It is a separate experiment, done exactly like the others. The only difference is that no experimental variables are changed. A control is a neutral “reference point” for comparison that allows you to see what changing a variable does by comparing it to not changing anything. Dependable controls are sometimes very hard to develop. They can be the hardest part of a project. Without a control you cannot be sure that changing the variable causes your observations. A series of experiments that includes a control is called a “controlled experiment.”

Experiment 1:

In this experiment you grow some lentils and observe their germination and growth. Lentil is a good seed for germination experiments.

  • Fill up a cup with lentils and transfer it to a bowel.
  • Add water to the bowel to about 1 inch over the lentils. Let it sit for 24 hours (one day) at room temperature (72ºF to 85ºF).
  • Discard excess water in the bowel and transfer moistened lentils to another plate. The layer of lentils in this plate can be 1/2 inch to 1 inch.
  • Cover the plate and lentils with a wet piece of cloth.
  • Inspect the lentils every day by removing the cloth. Use a spray bottle to moisten the seeds (lentils) while you are inspecting the seeds. Record any changes that you notice in your notebook. Add some water to the plate so the seeds at the bottom of the plate will also have access to enough water. Put back the cloth and moisten it with a spray gun.
  • If the changes that you observe are noticeable, remove one of the seeds and draw a picture of that. Write the date next to your drawing. Use a tape to connect the seed next to your drawing.
  • In about 10 to 15 days, seeds will germinate and will need light to continue their growth. Remove the cloth and put a desk lamp with a 60 watt bulb about 2 feet above the seeds. Leave the light on.
  • Continue daily observation, recording your notes and watering the seeds. Note that seeds must not be left dry. Also too much water is not good for plant either. In other words, plant roots must have access to both air and water. Too much water does not let the roots get the air that they need.

Lentils can grow quite high in this way and make a nice display.

seed germination experiment for class 5

If you are going to use a plastic or ceramic pot instead of a plate, fill the bottom of the pot with sand and make sure that the pot has a hole for excess water to exit.

Advanced experiments and collecting data

Higher grade students may need to compare the germination rate of different seeds and record their data in a data table. This is how you may do this:

Get 100 lentils and germinate them as described above. A few days after germination, count the number of lentils that are germinated and record the results in your notes.

Repeat your experiment with other seeds or beans such as white beans, red beans, kidney beans and peas.

For each type of seed you test grow 100 of them and finally count the number of seeds that are germinated.

Record your results in a table like this:

seed germination experiment for class 5

100
100
100

Need a graph?

You can visually present your results by making a bar graph. Make one vertical bar for each seed you test. Under each bar write the name of seed it represents. The height of bar will show the number of seeds germinated. 

Experiment 2: Observing Seed Germination

Introduction: Planting a seed next to a clear glass can give us the opportunity to view different stages of seed germination and take pictures or draw diagrams of each stage.

Fill up a clear glass cup with a role of paper towel.

Insert 4 Kidney Beans between the paper towels and the glass. Keep the beans away from each other, for example, place one Kidney Bean in each quarter of the cup.

Make five of these cups, each with four Kidney Beans.

seed germination experiment for class 5

Add some water to the cups so the paper towels will be moist; however no water must drip when you turn the cup upside down. Excess water can be harmful.

Place all the cups in a warm place. No light is necessary before germination.

Inspect the cups every day and moisten the paper towels again if needed.

Take pictures or make drawings of different stages of seed germination. Use pictures or drawings for your display.

A seed contains all the nutrients that it needs for germination, so you do not need to add any nutrients to the water.

This experiment can be performed with varieties of different seeds. Pictures on the right show how your display may look depending on the type of seeds that you test. ( Pictures are not Kidney Beans )

Rotate the cups, so they will all get the same amount of heat, light exposure and air.

When you see the first real leaves, you can make your final observation and record your results.

seed germination experiment for class 5

Count the number of seeds that germinated.

What percentage of all seeds are germinated? (divide the number of germinated seeds by total number of seeds)

Do the results support your hypothesis?

seed germination experiment for class 5

Note that the shrunken paper towel allows air to get to the roots. Both air and moisture are required for the young plant.

seed germination experiment for class 5

Materials and Equipment:

  • Kidney Beans
  • Paper towel
  • Clear glass cups

Results of Experiment (Observation):

Experiments are often done in series. A series of experiments can be done by changing one variable a different amount each time. A series of experiments is made up of separate experimental “runs.” During each run you make a measurement of how much the variable affected the system under study. For each run, a different amount of change in the variable is used. This produces a different amount of response in the system. You measure this response, or record data, in a table for this purpose. This is considered “raw data” since it has not been processed or interpreted yet. When raw data gets processed mathematically, for example, it becomes results.

Calculations:

You will need to calculate the rate of germination by dividing the number of germinated seeds by total number of seeds.

Summary of Results:

Summarize what happened. This can be in the form of a table of processed numerical data, or graphs. It could also be a written statement of what occurred during experiments.

It is from calculations using recorded data that tables and graphs are made. Studying tables and graphs, we can see trends that tell us how different variables cause our observations. Based on these trends, we can draw conclusions about the system under study. These conclusions help us confirm or deny our original hypothesis. Often, mathematical equations can be made from graphs. These equations allow us to predict how a change will affect the system without the need to do additional experiments. Advanced levels of experimental science rely heavily on graphical and mathematical analysis of data. At this level, science becomes even more interesting and powerful.

Conclusion:

Using the trends in your experimental data and your experimental observations, try to answer your original questions. Is your hypothesis correct? Now is the time to pull together what happened, and assess the experiments you did.

Related Questions & Answers:

What you have learned may allow you to answer other questions. Many questions are related. Several new questions may have occurred to you while doing experiments. You may now be able to understand or verify things that you discovered when gathering information for the project. Questions lead to more questions, which lead to additional hypothesis that need to be tested.

Possible Errors:

If you did not observe anything different than what happened with your control, the variable you changed may not affect the system you are investigating. If you did not observe a consistent, reproducible trend in your series of experimental runs there may be experimental errors affecting your results. The first thing to check is how you are making your measurements. Is the measurement method questionable or unreliable? Maybe you are reading a scale incorrectly, or maybe the measuring instrument is working erratically.

If you determine that experimental errors are influencing your results, carefully rethink the design of your experiments. Review each step of the procedure to find sources of potential errors. If possible, have a scientist review the procedure with you. Sometimes the designer of an experiment can miss the obvious.

References:

List of References

http://www.iit.edu/~smile/bi9404.html

seed germination experiment for class 5

It is always important for students, parents and teachers to know a good source for science related equipment and supplies they need for their science activities. Please note that many online stores for science supplies are managed by MiniScience.

Testimonials

" I called School Time and my husband and son came with me for the tour. We felt the magic immediately."

- Robby Robinson

" My husband and son came with me for the tour. We felt the magic immediately."

- Zoe Ranson

Contact Info

Our address, working hours.

Week Days: 07:00-19:00

Saturday: 09:00-15:00

Sunday: Closed

Science Project

Enjoy our range of fun science experiments for kids that feature awesome hands-on projects and activities that help bring the exciting world of science to life.


Learn about seed germination with this fun science experiment for kids. Plant some seeds and follow the growth of the seedlings as they sprout from the soil while making sure to take proper care of them with just the right amount of light, heat and water. Have fun growing plants with this cool science project for children.


Hopefully after a week of looking after them, your seedlings will be on their way. Germination is the process of a plant emerging from a seed and beginning to grow. For seedlings to grow properly from a seed they need the right conditions. Water and oxygen are required for seeds to germinate. Many seeds germinate at a temperature just above normal room temperature but others respond better to warmer temperatures, cooler temperatures or even changes in temperature. While light can be an important trigger for germination, some seeds actually need darkness to germinate, if you buy seeds it should mention the requirements for that specific type of seed in the instructions.

Continue to look after your seedlings and monitor their growth. For further experiments you could compare the growth rates of different types of seeds or the effect of different conditions on their growth.


Science Kids ©  |     |     |     |     |     |     |     |     |     |     |     |     |     |  Updated: Oct 9, 2023

  • BiologyDiscussion.com
  • Follow Us On:
  • Google Plus
  • Publish Now

Biology Discussion

Process of Seed Germination: 5 Steps (With Diagram)

seed germination experiment for class 5

ADVERTISEMENTS:

The process of seed germination includes the following five changes or steps.

Such five changes or steps occurring during seed germination are: (1) Imbibition (2) Respiration (3) Effect of Light on Seed Germination(4) Mobilization of Reserves during Seed Germination and Role of Growth Regulators and (5) Development of Embryo Axis into Seedling.

(i) Imbibition:

The first step in the seed germination is imbibition i.e. absorption of water by the dry seed. Imbibition results in swelling of the seed as the cellular constituents get rehydrated. The swelling takes place with a great force. It ruptures the seed coats and enables the radicle to come out in the form of primary root.

Imbibition is accomplished due to the rehydration of structural and storage macromolecules, chiefly the cell wall and storage polysaccharides and proteins. Many seeds contain additional polysaccharides, not commonly found in vegetative tissues. Seeds packed dry in a bottle can crack it as they imbibe water and become swollen.

(ii) Respiration:

Imbibition of water causes the resumption of metabolic activity in the rehydrated seed. Initially their respiration may be anaerobic (due to the energy provided by glycolysis) but it soon becomes aerobic as oxygen begins entering the seed. The seeds of water plants, as also rice, can germinate under water by utilizing dissolved oxygen.

The seeds of plants adapted to life on land cannot germinate under water as they require more oxygen. Such seeds obtain the oxygen from the air contained in the soil. It is for this reason that most seeds are sown in the loose soil near the surface. Ploughing and hoeing aerate the soil and facilitate seed germination. Thus the seeds planted deeper in the soil in water-logged soils often fail to germinate due to insufficient oxygen.

(iii) Effect of Light on Seed Germination:

Plants vary greatly in response to light with respect to seed germination. The seeds which respond to light for their germination are named as photoblastic. Three categories of photoblastic seeds are recognized: Positive photoblastic, negative photoblastic and non-photoblastic. Positive photoblastic seeds (lettuce, tobacco, mistletoe, etc.) do not germinate in darkness but require exposure to sunlight (may be for a brief period) for germination.

Negative photoblastic seeds (onion, lily, Amaranthus, Nigella, etc.) do not germinate if exposed to sunlight. Non-photoblastic seeds germinate irrespective of the presence (exposure) or absence (non-exposure) of light.

In these light sensitive seeds, the red region of the visible spectrum is most effective for germination. The far-red region (the region immediately after the visible red region) reverses the effect of red light and makes the seed dormant. The red and far-red sensitivity of the seeds is due to the presence of a blue-coloured photoreceptor pigment, the phytochrome. It is a phycobiloprotein and is widely distributed in plants.

Phytochrome is a regulatory pigment which controls many light-dependent development processes in plants besides germination in light- sensitive seeds. These include photo-morphogenesis (light-regulated developmental process) and flowering in a variety of plants.

Phytochrome and Reversible Red-Far-red Control of Germination:

The pigment phytochrome that absorbs light occurs in two inter-convertible forms Pr and Pfr. Pr is metabolically inactive. It absorbs red light (660 nm.) and gets transformed into metabolically active Pfr (Fig. 4.10). The latter promotes germination and other phytochrome-controlled processes in plants. Pfr reverts back to Pr after absorbing far-red (730 nm.).

In darkness too, Pfr slowly changes to Pr. Owing to this oscillation of phytochrome between Pr and Pfr status, the system has been named as “reversible red—far-red pigment system” or in brief phytochrome system. Treatment with Red light (R) stimulates seed germination, whereas far-red light (FR) treatment, on the contrary, has an inhibitory effect.

Functioning of phytochrome system

Let US examine seed germination in positive photoblastic seeds e.g. lettuce (Lactuca sativa). When brief exposure of red (R, 660 nm.) and far-red (FR, 730, nm.) wave lengths of light are given to soaked seeds in close succession, the nature of the light provided in the last exposure determines the response of seeds. Exposure to red light (R) stimulates seed germination. If exposure to Red light (R) is followed by exposure to far-red light (FR), the stimulatory effect of Red light (R) is annulled.

This trick can be repeated a number of times. What is crucial for seed germination is the quality of light to which the seeds are exposed last. This also indicates that responses induced by red light (R) are reversed by far-red light (FR).

Whole of this can be shown as given ahead:

image

Light requirement for seed germination may be replaced by hormones such as gibberellins or cytokinins. Several development processes of plants controlled by phytochrome may be mimicked by appropriate hormones given singly or in combination with other hormones at the correct time.

(iv) Mobilization of Reserves during Seed Germination and Role of Growth Regulators:

During germination the cells of the embryo resume metabolic activity and undergo division and expansion. Stored starch, protein or fats need to be digested. These cellular conversions take place by making use of energy provided by aerobic respiration.

Depending upon the nature of the seed, the food reserves may be stored chiefly in the endosperm (many monocotyledons, cereal grains and castor) or in the cotyledons (many dicotyledons such as peas and beans). Thorough investigations in the mobilisation of reserves from the endosperm to the embryo via a shield-like cotyledon (scutellum) has been done in several cereal grains (Fig. 4.11).

Diagram showing relationship between GA production and hydrolytic enzyme synthesis and release in germinating barley grain

The outer layer of special cells (aleurone layer) of endosperm produces and secretes hydrolyzing enzymes (such as amylases, proteases). These enzymes cause digestion i.e. breakdown of the stored food such as starch and proteins in the inner endosperm cells.

The insoluble food is rendered soluble and complex food is made simple. These simpler food solutions, comprising of sugars and amino acids thus formed, are diluted by water and passed towards the growing epicotyl, hypocotyl, radicle and plumule through the cotyledon.

Gibberellic acid plays an important role in initiating the synthesis of hydrolyzing enzymes. Gibberellin, therefore, promotes seed germination and early seedling growth. Assimilation of this food by the growing organ induces growth and the seedling soon assumes its ultimate shape.

It is very significant to note that the dormancy inducing hormone, abscisic acid (ABA), prevents the germination. The concentration of ABA has been shown to increase during the onset of dormancy of the embryo during seed development in several kinds of seeds.

When young embryos of cotton are removed and grown in culture, they continue to grow without the development of any dormancy. Dormancy in such cases can be induced by the addition of ABA at a crucial stage of growth.

(v) Development of Embryo Axis into Seedling:

After the translocation of food and its subsequent assimilation, the cells of the embryo in the growing regions become metabolically very active. The cells grow in size and begin divisions to form the seedling.

Related Articles:

  • Seed Germination: Definition and Conditions | Botany
  • Factors Affecting Seed Germination: External and Internal Factors
  • Anybody can ask a question
  • Anybody can answer
  • The best answers are voted up and rise to the top

Forum Categories

  • Animal Kingdom
  • Biodiversity
  • Biological Classification
  • Biology An Introduction 11
  • Biology An Introduction
  • Biology in Human Welfare 175
  • Biomolecules
  • Biotechnology 43
  • Body Fluids and Circulation
  • Breathing and Exchange of Gases
  • Cell- Structure and Function
  • Chemical Coordination
  • Digestion and Absorption
  • Diversity in the Living World 125
  • Environmental Issues
  • Excretory System
  • Flowering Plants
  • Food Production
  • Genetics and Evolution 110
  • Human Health and Diseases
  • Human Physiology 242
  • Human Reproduction
  • Immune System
  • Living World
  • Locomotion and Movement
  • Microbes in Human Welfare
  • Mineral Nutrition
  • Molecualr Basis of Inheritance
  • Neural Coordination
  • Organisms and Population
  • Photosynthesis
  • Plant Growth and Development
  • Plant Kingdom
  • Plant Physiology 261
  • Principles and Processes
  • Principles of Inheritance and Variation
  • Reproduction 245
  • Reproduction in Animals
  • Reproduction in Flowering Plants
  • Reproduction in Organisms
  • Reproductive Health
  • Respiration
  • Structural Organisation in Animals
  • Transport in Plants
  • Trending 14

Privacy Overview

CookieDurationDescription
cookielawinfo-checkbox-analytics11 monthsThis cookie is set by GDPR Cookie Consent plugin. The cookie is used to store the user consent for the cookies in the category "Analytics".
cookielawinfo-checkbox-functional11 monthsThe cookie is set by GDPR cookie consent to record the user consent for the cookies in the category "Functional".
cookielawinfo-checkbox-necessary11 monthsThis cookie is set by GDPR Cookie Consent plugin. The cookies is used to store the user consent for the cookies in the category "Necessary".
cookielawinfo-checkbox-others11 monthsThis cookie is set by GDPR Cookie Consent plugin. The cookie is used to store the user consent for the cookies in the category "Other.
cookielawinfo-checkbox-performance11 monthsThis cookie is set by GDPR Cookie Consent plugin. The cookie is used to store the user consent for the cookies in the category "Performance".
viewed_cookie_policy11 monthsThe cookie is set by the GDPR Cookie Consent plugin and is used to store whether or not user has consented to the use of cookies. It does not store any personal data.

web counter

CBSE Class Notes Online – Classnotes123

CBSE Class Notes, Worksheets, Question Answers, Diagrams , Definitions , Diffrence between , Maths Concepts, Science Facts Online – Classnotes123

Germination of Seed Class 5

seed germination experiment for class 5

Define Germination 

The process by which a seed grows into a young plant, or seedling, is called G ermination .  

  • A seed germinates only when it gets enough light, air, water, and warmth.
  • During the early stages of germination, the seedling uses the food stored inside the seeds for its growth.
  • When the seed receives adequate light, water, air, and warmth, it becomes soft and spongy.
  • The seed coat then breaks and the young plant comes out.
  • The young plant develops roots and shoots.
  • Tiny leaves develop on the shoot and start making food. This young plant is called a seedling .
  • The seedling absorbs water and nutrients from the soil with the help of its roots. As the plant grows in size, it develops more leaves
  • . The seed then shrinks and disappears.
  • The seedling grows to become a new plant.
  • All seeds do not grow into new plants because some are eaten by animals, some get destroyed by rain or wind, while some get insufficient air, water, or warmth.

Stages of Germination

seed germination experiment for class 5

  • The seed gets water , light and air.
  • The seed coat breaks and the young plant comes out.
  • The young plant develops roots and shoots .
  • As the plants grow in size ,tiny leaves develop on the shoot .
  • The seed then shrinks and disappears. 

Related Posts

seed germination experiment for class 5

Class 7 Science- Chapter 10- Electric Current and its Effects- Activity 10.4- Understanding Electric Fuses Using a Steel Wool Circuit

January 16, 2024 January 16, 2024

The Water Cycle

The Water Cycle: The Steps and Hydrologic Processes from Evaporation to Infiltration

December 10, 2023 December 13, 2023

structure of seed explained of types of seed

Structure of the Seed

December 24, 2022 March 20, 2024

seed germination experiment for class 5

About Jaishree Gorane

Leave a reply cancel reply.

Your email address will not be published. Required fields are marked *

Save my name, email, and website in this browser for the next time I comment.

  • Biology Article

Seed Germination

Seed Germination

In simple words, germination can be defined as the growth of a seed into a young plant or a seedling.

What is Seed Germination?

Seed germination may be defined as the fundamental process by which different plant species grow from a single seed into a plant. This process influences both crop yield and quality.

A common example of seed germination is the sprouting of a seedling from a seed of an angiosperm or gymnosperm.

Also, read:  Formation and Dispersal of Seeds

The Process of Seed Germination

The complete process of seed germination is carried out in the following steps:

Process of Seed Germination

  • During the beginning stage of germination, the seeds take up water rapidly and this results in swelling and softening of the seed coat at an optimum temperature. This stage is referred to as Imbibition. It starts the growth process by activation of enzymes. The seed activates its internal physiology and starts to respire and produce proteins and metabolizes the stored food. This is a lag phase of seed germination.
  • By rupturing of the seed coat, radicle emerges to form a primary root. The seed starts absorbing underground water. After the emerging of the radicle and the plumule, shoot starts growing upwards.
  • In the final stage of seed germination, the cell of the seeds become metabolically active, elongates and divides to give rise to the seedling.

Also Read   Parts of a Seed.

Conditions Necessary for Seed Germination

Here are some important requirements which are essential for a seed to germinate into a seedling and to a plant.

Water: It is extremely necessary for the germination of seeds. Some seeds are extremely dry and need to take a considerable amount of water, relative to the dry weight of the seed. Water plays an important role in seed germination. It helps by providing necessary hydration for the vital activities of protoplasm, provides dissolved oxygen for the growing embryo, softens the seed coats and increases the seed permeability. It also helps in the rupturing of seed and also converts the insoluble food into soluble form for its translocation to the embryo.

Oxygen: It is an important and essential source of energy required for seed growth. It is required by the germinating seed for metabolism and is used as a part of aerobic respiration until it manages to grow green leaves of its own. Oxygen can be found in the pores of soil particles, but if the seed is buried too deep it will be deprived of this oxygen.

Temperature: For a seed to germinate, it requires a moderate temperature of around 25-30°C. Quite obviously different seeds require different optimum temperatures. There are some seeds which require special requirements either lower or higher temperature between 5 to 40°C.

Light or darkness: This can act as an environmental trigger. Many seeds do not germinate until sunlight falls on them.

The process of seed germination triggers under the above mentioned favourable conditions. The seeds undergo rapid expansion and growth of the embryo and subsequently rupturing the covering layers and emergence of the radicle. This radicle emergence is considered the completion of germination.

Explore more:  Significance of Seeds and Fruits Formation

Factors Affecting Seed Germination

There are some major factors that affect seed germination. These include:

External Factors

  • Water: The poor or additional supply of water affects seed germination.
  • Temperature: This affects the growth rate as well as the metabolism of the seed.
  • Oxygen: Germinating seeds respire vigorously and release the energy required for their growth. Therefore, deficiency of oxygen affects seed germination.

In certain cases, a temperature below the moderate level slows down seed germination and promotes fungal growth. In some cases, germination stops at the temperature above the moderate level.

Internal Factors

Seed dormancy.

This is a condition in which the seeds are prevented from germinating even under favourable conditions.

During seed dormancy :

  • The seed coat, which is resistant to water and gases, restricts water-uptake and oxygen exchange.
  • The seeds with undeveloped or immature embryo do not germinate.
  • Certain seeds contain plant growth regulators, which inhibit seed germination.
  • Some seeds require more time for their germination.

To learn more about seeds, its parts,  seed germination, its process, factors affecting seed germinations and any other related topics visit  BYJU’S Biology

seed germination experiment for class 5

Put your understanding of this concept to test by answering a few MCQs. Click ‘Start Quiz’ to begin!

Select the correct answer and click on the “Finish” button Check your score and answers at the end of the quiz

Visit BYJU’S for all Biology related queries and study materials

Your result is as below

Request OTP on Voice Call

BIOLOGY Related Links

Leave a Comment Cancel reply

Your Mobile number and Email id will not be published. Required fields are marked *

Post My Comment

seed germination experiment for class 5

It was very useful thankq

It is informative and good for our exams

This is very helpful for everyone

Wow, this is so helpful, thanks.

Well explained thank you so much

Precise and well understandable

seed germination experiment for class 5

Register with BYJU'S & Download Free PDFs

Register with byju's & watch live videos.

IMAGES

  1. Seed Germination Bean in a Jar Experiment for Kids

    seed germination experiment for class 5

  2. Seed Germination Bean in a Jar Experiment for Kids

    seed germination experiment for class 5

  3. Class-5 Science Seed Germination

    seed germination experiment for class 5

  4. ( Class 5th ) Lesson-2 Reading skill (sub-topic:- Seed germination )

    seed germination experiment for class 5

  5. Class 5 Science

    seed germination experiment for class 5

  6. Seed Jar Science Experiment for Spring STEM Activities with Kids

    seed germination experiment for class 5

VIDEO

  1. Pollen Grain Germination Slide Preparation Experiment Class 12th Biology With Hindi Explanation

  2. Plant Life CBSE class 5 Science

  3. Journey of Seed germination 🌱 #admissionopen #rkiytes #ytshorts #shortsvideo

  4. 🌽 Fresh Corn Seed Germination Experiment! 🌱#SeedLife #vegega #raisedbeds#GerminationStation

  5. Study pollen germination on a slide

  6. Class 5 EVS chapter 5: Seeds and seeds

COMMENTS

  1. Seed Germination Experiment

    Watching seeds grow is an amazing science project for kids. Our seed germination experiment allows kids to see up close to how a seed grows and what would actually be happening under the ground! Learn about the steps of seed germination, and investigate what conditions a seed needs to germinate. Make sure to grab the free printable bean life cycle activity to go with your seed jar. Easy ...

  2. Seed Germination Experiment

    Have you ever used the mason jar method for a seed germination experiment?! It is so neat to watch a seed sprout and grow, and to see the root structure take shape. It also makes for an awesome seed germination experiment, comparing roots and sprouts and how quickly each grows!

  3. Seed Germination Experiment For Kids

    A classic seed experiment Seed germination activities are a long-time favorite of educators. One of the classic seed experiments uses a resealable plastic bag, a paper towel or napkin, seeds and water. This is a low-cost, effective tool for teaching about seeds, germination, gravitropism and energy.

  4. Germination Science Experiment

    Germination Science Experiment In this twist on the classic germination science experiment, children will test the germination rate of 10 green bean seeds. From making predictions to collecting data, your little scientists will learn all about seeds and how plants grow.

  5. Seed Germinator

    This seed germinator makes it easy to design and perform experiments to determine the materials and conditions seeds need in order to germinate and grow. The effects of temperature, light levels, and water conditions (such as pH or salinity), as well as the presence or absence of various nutrients are all factors you can investigate.

  6. Germination Exploration

    Before conducting germination experiments, make sure your students understand the structure of seeds and the process of germination. You may want to first implement the Journey to the Center of a Seed lesson.

  7. Plant Science

    This germination investigation is very simple but fascinating. Did you know you can grow a bean in a jar with just a little water? Germination is the sprouting of a seedling from a seed.

  8. PDF Lesson seed germination

    Other seeds germinate better in dark conditions (example is a pansy seed) and others need light exposure to germinate (example is a lettuce seed). When you purchase seeds, you will most likely find planting instructions on the seed packet. If you collect seeds from nature, you may need to research their germination requirements online.

  9. Seed Germination Observation for Kids {Free Printable}

    Download Germinating Seeds Printable Extend the Activity: 1. Plant the seed pods in pots and do an experiment. What do seeds need to grow? Alter water and light and track the affect it has on seed germination. 2. Plant the seed pods in pots that the kids decorate and give it as a gift. 3.

  10. Germination of Seeds

    Germination of Seeds | Environmental Studies for Kids | Grade 5 | Periwinkle Periwinkle 1.82M subscribers Subscribed 274 29K views 4 years ago

  11. Student Sheet 5

    This is a simple experiment to investigate the germination of seed under different conditions, by growing seeds upright in Petri dishes. While simple enough to be used at KS2, the practical can be used for investigations at GCSE and post-16.

  12. Factors Affecting Seed Germination

    This science fair project looks one of the most important factors affecting seed germination: water. A fun and easy plant biology experiment for 3rd graders.

  13. Germination

    Experiment 2: Observing Seed Germination Introduction: Planting a seed next to a clear glass can give us the opportunity to view different stages of seed germination and take pictures or draw diagrams of each stage.

  14. Germinating Seeds in a Bag: Science Experiment for Kids

    Really? Seed germination in a paper towel? The best part of this STEM activity is showing that these seeds don't need soil or a hole in the ground to grow. Your little gardeners can watch how seeds sprout with a clear view from the plastic bag. There is a lot to learn in this experiment, yet it is so simple to do! Recommended Grade Level ...

  15. Seed Germination

    Plant Seeds & Watch Them Grow Learn about seed germination with this fun science experiment for kids. Plant some seeds and follow the growth of the seedlings as they sprout from the soil while making sure to take proper care of them with just the right amount of light, heat and water. Have fun growing plants with this cool science project for children.

  16. PDF Chapter 2

    Chapter 2 - Seed Germination and Dispersal Subject - Science Class V. - Seed Germination and DispersalS. bject - Science SeedsClass. Seeds are important source of food. All the. eed. For example- rice, wheat, gram, kidney beans. tructure of SeedSeed coat: The out. he seed coat has a tiny opening called the Hilum which absorbs water.

  17. Bean Seed Germination Experiment

    Bean Seed Germination Graphing - Coordinate Grids (recommended for 5th grade and students with enrichment or extension needs) • For each experiment: 2-3 navy or lima bean seeds, soaked in water overnight. Small plastic zipper storage bag (transparent) Paper towel. Water. Tape. Space in a window, preferably one that faces the sun.

  18. Process of Seed Germination: 5 Steps (With Diagram)

    The process of seed germination includes the following five changes or steps. Such five changes or steps occurring during seed germination are: (1) Imbibition (2) Respiration (3) Effect of Light on Seed Germination (4) Mobilization of Reserves during Seed Germination and Role of Growth Regulators and (5) Development of Embryo Axis into Seedling.

  19. Germination of Seed Class 5

    The process by which a seed grows into a young plant, or seedling, is called Germination. A seed germinates only when it gets enough light, air, water, and warmth. During the early stages of germination, the seedling uses the food stored inside the seeds for its growth. When the seed receives adequate light, water, air, and warmth, it becomes ...

  20. Seed germination

    Seed germination is the basic process of emerging a new plant from seeds under favorable conditions including water, sunlight, oxygen and moderate temperature.

  21. PDF Plant Germination and Growth Lab Report

    Plant Germination and Growth Lab ReportThe purpose of this lab was to study factors that affect seed germination, please follow the format as set below:Introduction: since we covered a number of topics, you should include the following in your introduction - germination factors for seeds, what is normal, and what are significant factors ...

  22. PDF Microsoft Word

    Germination Exploration. Overview. Old seed packets make the perfect tools for exploring seed germination. Grade Level/Range: 2-5. Objective: Students will learn: • A seed contains a new plant. • Seeds need certain conditions to grow and not all seeds need the same conditions. • Some seeds may not germinate. Time: 1-2 weeks.