- My presentations

Auth with social network:
Download presentation
We think you have liked this presentation. If you wish to download it, please recommend it to your friends in any social system. Share buttons are a little bit lower. Thank you!
Presentation is loading. Please wait.
To view this video please enable JavaScript, and consider upgrading to a web browser that supports HTML5 video
INTRODUCTION Lesson 1 – Microsoft Word Word Basics
Published by Carli Dennis Modified over 10 years ago
Similar presentations
Presentation on theme: "INTRODUCTION Lesson 1 – Microsoft Word Word Basics"— Presentation transcript:

Cairo Modern School Computer for Grade

Word Processing Computer Technology.

Project 2: Adding a New Web Page to a Web Site Presentation by: Joseph H. Schuessler, B.B.A., M.B.A., M.S., Ph.D. (ABD) Agenda Video Last Class Front Page.

1 WORKING WITH 2007 WORD Part 1 Developed October 2007 with lots of help from.

Getting Started with Microsoft Office 2007

BASIC SKILLS AND TOOLS USING ACCESS

Tutorial 3 – Creating a Multiple-Page Report

XP New Perspectives on Microsoft Office Word 2003 Tutorial 6 1 Microsoft Office Word 2003 Tutorial 6 – Creating Form Letters and Mailing Labels.

XP New Perspectives on Microsoft Office Word 2003 Tutorial 2 1 Microsoft Office Word 2003 Tutorial 2 – Editing and Formatting a Document.

Microsoft Access 2007 Advanced Level. © Cheltenham Courseware Pty. Ltd. Slide No 2 Forms Customisation.

Local Customization Chapter 2. Local Customization 2-2 Objectives Customization Considerations Types of Data Elements Location for Locally Defined Data.

Microsoft®.

Office 2003 Introductory Concepts and Techniques M i c r o s o f t Windows XP Project An Introduction to Microsoft Windows XP and Office 2003.

Creating a Dreamweaver Web Page and Local Site

Photo Slideshow Instructions (delete before presenting or this page will show when slideshow loops) 1.Set PowerPoint to work in Outline. View/Normal click.

Key Applications Module Lesson 11 — Using Microsoft Office 2003

1 School Administrators Guide Standards-based Report Card (SBRC) Special Access/Privileges for School Administrators Interim Reporting Interim Reporting.

Turing Machines.

PP Test Review Sections 6-1 to 6-6
About project
© 2024 SlidePlayer.com Inc. All rights reserved.
PowerPoint 101: The Ultimate Guide for Beginners

Are you struggling with PowerPoint? You need a quick design in PowerPoint but don't know where to start? Don't worry, you have nothing to be ashamed of.
In this article, we're going to refresh the most important PowerPoint basics so you can take advantage of this Microsoft software and create high-impact presentations at any time!
Millions of users worldwide use Microsoft 365 services , making PowerPoint the presentation design software with the highest market share. And with good reason! PowerPoint's features stand out for its usability and originality . We can tell you that PowerPoint is pretty intuitive software, and it's a great option to choose when working with presentations on a daily basis. So, are you ready for a quick PowerPoint 101 class?
Let ' s see what you ' re going to learn today with this PowerPoint Guide :
What is PowerPoint?
What are the best uses of powerpoint, powerpoint basics: what are the components of powerpoint workspace, mastering powerpoint: what are the main features of powerpoint, what are powerpoint templates and where to find them, time to practice how to make a presentation in powerpoint.

Microsoft PowerPoint is a presentation design software that is part of Microsoft 365 . This software allows you to design presentations by combining text, images, graphics, video, and animation on slides in a simple and intuitive way.
Over time, PowerPoint has evolved and improved its accessibility to users. For this reason, it has been adapted to the main operating systems and modalities:
- PowerPoint Online
Additionally, you can use Word and Excel in this online version. That way, you'll be able to make real-time changes in the cloud without fearing losing your files. Sounds great, right?
PowerPoint has a versatile range of uses. Here's a list of the different tasks you can complete with this presentation design software:
- Business presentations or Pitch decks.
- Marketing, Sales and HR plans.
- Project briefs and timelines.
- Inductions to new employees.
- Seminars and educational classes.
- Professional portfolio of photos or designs.
- Presentations of a research summary.
- Presentations for special occasions.
These are just a few examples of the multiple possibilities this Microsoft software offers. Your imagination is the only limit!
Stay tuned as we continue with this PowerPoint 101 Guide...

In order to deeply understand this presentation design software, you need to recognize its main components. Now it's time to learn about the PowerPoint basics!
A quick note before going any further: when opening PowerPoint, some of the commands in the ribbons will look grayish and won't be highlighted when you hover the mouse over them.
This happens since some commands need to be selected in order to function. For example, if you want to change the color of a text, you first need to select it.
That being said, let's start with this Guide for PowerPoint beginners:
PowerPoint Main Window
The first aspect to learn is PowerPoint Main Window. To facilitate the explanation, we've organized its main elements with numbers from 1 to 10:

Based on that, the main components of PowerPoint window are the following:
1. Quick Access Toolbar: allows you to customize commands to have them at hand. You only have to select it and go to "More commands."
2. Title Bar: shows you the name of your file and other "Suggested options" like Slide Master View . These options will vary depending on the use you give to the commands.
3. File Tab: you will see the Home Menu (PowerPoint backstage) by selecting it. There, you can create a new presentation, save it, print it, export it, and many other options.
4. The Ribbon: it's where PowerPoint tabs and tools are. These tools can also be called "commands" or “features.”
5. More Button or Down Arrow: these arrows allow you to view more tools or layout options in PowerPoint.
6. Slides Pane: shows your slides in thumbnail size. By right-clicking, you can access additional options for customizing each slide. Perfect for PowerPoint beginners!
7. Slide: PowerPoint's blank canvas and the frame to be seen when presenting the file.
8. Placeholders: they are dotted boxes that will store your content.
9. Status Bar: allows you to view the slide number, grammatical errors, speaker notes, and the comments on your file.
10. Zoom: allows you to enlarge or minimize your PowerPoint workspace. The range goes from 10 to 400%.
PowerPoint Tabs
The PowerPoint tabs are the control desk of your presentation . Since PowerPoint's features are too many, they're organized in tabs.
You can come and go between tabs as you need. Once you click on a tab, it will open its ribbon, and there, you'll be able to see all the tools related to that particular category.
This PowerPoint tutorial for beginners will give you an overview of all PowerPoint tabs . Pay attention to the following list:
- Transitions Tab
- Animations Tab
- Slide Show Tab
- Recording Tab
1. Home Tab
The Home tab is the most common tab of PowerPoint. This is the tab you'll probably use the most if you're designing a presentation deck from scratch.

It allows you to add new slides and change the text characteristics : font, size, boldness, underlining, alignment, etc. If you've ever used Microsoft Word, these features will be familiar to you.
Also, you will find commands to edit the characteristics of the geometric shapes you insert. This includes: fill color, line color, sharpe effects, among others.
2. Insert Tab
The Insert tab is exactly what its name says it is. In this ribbon, you'll find all the options concerning adding a new element to your PowerPoint presentation .

You can insert a picture, some geometric shapes, icons, WordArt graphics, among others. We can tell you that this tab is really helpful for PowerPoint beginners!
For example, if you have a lot of data in PowerPoint , you could add a chart or diagram to show your information in a more visual way. Also, you can embed videos or music into PowerPoint really easily.
- PowerPoint tip for beginners: To be able to write text on your slides, you need a text box. So, if you're designing your presentation from scratch, remember to go first to the Insert tab and add a text box to start writing.
3. Design Tab
If you are one of those people who enjoy choosing the design of a PowerPoint presentation, this tab will be your favorite.

The Design tab offers a wide range of premade designs , allowing you to get more polished slides. Even better, if you explore its ribbon, you can adjust the color palette and change the overall style of your PowerPoint deck.
The PowerPoint interface, as this basic PowerPoint Tutorial, is really intuitive. We believe that you won't have any problem with this tab!
4. Transitions Tab
Using transitions in PowerPoint is a dynamic way to move from one slide to the next during a presentation. This feature is PowerPoint's stamp, so don ' t miss it!

Some PowerPoint transitions are really classic, like wiping the old slide to present the new one. Others are somewhat over the top, like the “Vortex” or the “Airplane” effect.
If you click on each kind of transition, you'll see a preview on how it would look when presenting. Really cool, right?
5. Animations Tab
In case you want to add special effects for certain elements in your slides , the Animations tab in PowerPoint will interest you.

Like the Transitions tab, you will find various animation effects in this ribbon. It's a matter of trying and choosing the best one according to your needs!
6. Slide Show Tab
As its name says, the Slide Show tab is about presenting your slides . We really like that it gives you several options to show up your presentation!

Considering that you're a PowerPoint beginner, you're not likely to use the Slide Show tab very much.
But if you're curious about this command, you must read our article: How to Make a PowerPoint Slideshow that Runs Automatically?
7. Review Tab
The Review tab is not often used by PowerPoint beginners either.
However, if your job is related to writing or if you work at an international company, this tool can be extremely useful!

With this tab, you can check the slide's spelling, translate the text in real-time, and add comments to your slides . This last function can be helpful to give feedback to a colleague.
8. View Tab
This View tab allows you to change the view of your PowerPoint slides and make handouts from them, among other things.

As you can see, the majority of its commands are really specific. So you won't have any issues while designing, test and see!
In this section, our favorite command for PowerPoint beginners is Slide Master . Explore more about this tool in our guide!
9. Recording Tab
In the last versions of this design presentation software, PowerPoint added the Recording tab. As its name says, it allows you to record all your presentation slides .

This ribbon has advanced commands, so the most common action for a PowerPoint beginner is to take a screenshot or record the screen sequentially .
10. Help Tab
Finally, there is the Help tab. If you have any problem or question concerning how to use PowerPoint, you may go here to look for a solution.
In the latest versions, Windows has added a “Show Training” option. You can click this command to practice the PowerPoint basics since it will download training templates.

As a beginner in PowerPoint, you must recognize the objective of each PowerPoint tab to be able to master the software . But, in order to conduct an outstanding presentation deck, you also need to dominate its most important features. Let's see some of them in the next section!
If you feel ready to delve deeper into PowerPoint's tools, this section is for you.
As you may know , 24Slides specializes in creating outstanding presentations for any Design Project . So, we asked one of our experts about her favorite PowerPoint features, and we want to share them all with you!
Carmen Navarrete , Graphic Designer at 24Slides, highlighted the following features that will make your presentations stand out from the crowd:
PowerPoint Feature #1: Crop to Shape
This first PowerPoint feature is simple but effective!
Let's see how to use it:
- First, choose an image you want to cut and insert it into your workspace.
- Once inserted, select it with the mouse.
- Go to the "Picture Format" tab.
- Press the arrow of the "Crop" button (right side of the screen).
- Select "Crop to Shape."
- Choose your favorite shape and customize your PowerPoint presentation!

PowerPoint Feature #2: Merge Shapes
If you don't like any figure enough, you can create one from scratch!
This is possible thanks to the "Merge Shapes" option. Follow these steps to unleash your creativity:
- First choose an image you want to cut.
- Check the list of PowerPoint shapes (Insert tab > Shapes).
- Choose two or three figures you want to merge (they can be the same figure).
- Select the figures you are going to merge (see the image).
- Once selected, go to the "Shape Format" tab.
- Press the "Merge Shapes" option and the type of merge you want (test and choose!).

- A new figure will appear, and you must fill it with the image from the first step.
- Stay on the Shape Format tab and go to "Shape Fill" (button in the middle of the ribbon).
- Select "Picture Fill" and browse for your image.
- Select the image to fill your new figure, and that's it!

- PowerPoint tip for beginners: When your merged figure is ready, paste the image to the background of your slide to achieve a better result. This way, you can use your image as a canvas and see if both elements fit well.
PowerPoint Feature #3: Insert Icons
This PowerPoint feature is quite easy to follow for PowerPoint beginners!
Just follow these steps:
- Go to the Insert tab.
- Select the "Icons" option.
- A Microsoft 365 library will open, where you can search for the required icon.
- Now, you must insert it into your presentation and adapt it to your design.
- If you have an active Microsoft 365 subscription, you'll have access to a larger number of icons in PowerPoint.
- PowerPoint tip for beginners: If you want to learn more about icons in PowerPoint, read our article on How to Use Icons to Make Amazing PowerPoint Presentations .
PowerPoint Feature #4: Insert SmartArt
PowerPoint's SmartArt is one of the most popular and accessible tools to dominate while learning about PowerPoint basics.
To use it in your slide deck, you must:
- Select SmartArt.
- See all SmartArt categories and choose your favorite based on your needs.
- Add the text you have prepared and adapt it to your presentation.

We want to give you some ideas to master this SmartArt tool in PowerPoint: you can make timelines , flowcharts , and even a Venn diagram in just a few seconds. Try and see!
PowerPoint Feature #5: Remove Background
If you don't know how to use Photoshop and want to remove the background from an image, in this PowerPoint 101 Guide, we show you how:
- First choose the image you want to remove the background from.
- Insert the image in the PowerPoint workspace.
- Select the image and go to the "Picture Format" tab.
- Select "Remove Background" (first option on the left).
- You can keep and remove parts of the image with the first two tools of the ribbon (see image).
- Keep in mind that all the sections highlighted in purple will be deleted.

- We recommend zooming in to keep or remove parts of the image with more detail.
- Once you're done, press the "Keep Changes" button.
- Finally, adapt the new image to your PowerPoint presentation.

- PowerPoint tip for beginners: Choose a high-contrast photo or image for best results. In other words, the outline of the person or object you want to cut out must have clear edges and cannot blend with the image's background color.
PowerPoint Feature #6: Add Speaker Notes
The latest PowerPoint feature is a command you can use to prepare your speech before presenting to an audience.
Learning how to add speaker notes in PowerPoint is simple:
- Select the slide that needs some notes.
- Usually, there is a footer below the slide, but if not, you will have to activate it.
- Go to the View tab and select "Notes."
- The Speaker Notes section will appear, and you can add whatever you want!

- PowerPoint tip for beginners: In case you want to practice your entire presentation and have a lot of notes, go to the View tab and select "Notes Page" (fourth command). You'll be able to see all your Speaker Notes faster!
PowerPoint Feature #7: PowerPoint Translator
If you've ever wondered how to translate your PowerPoint Slides, we'll explain the step by step here:
- Go to the Review tab.
- Select the text you want to translate.
- Press the “Translate” button.
- A panel will open on the right side of the screen.
- Choose the language you need and you'll see the translation in real-time.
- If you press Insert, the text will change to the new translation!
PowerPoint Feature #8: Screen Recording
The process of recording your screen in PowerPoint is straightforward and intuitive. Let's see:
- Go to the “Record” or “Recording” tab.
- Press the "Record Slide Show" button or the “From Beginning” button (depending on your PPT version).
- A new window will open.
- Select the red record button and start recording!
- When you're done, select “Export.”
- By default, the video will be 1080p. If you want to lower the video quality, go to "Customize export."
- Name the video, save it to a folder and that's it!
As you may have noticed, this software has endless PowerPoint design options for beginners. We encourage you to try and test each functionality!
However, we're clear that PowerPoint has different features, so it can be hard to know where to start. That's why understanding PowerPoint basics is crucial if you truly want to master this software!
Our PowerPoint 101 Guide continues; stay tuned to discover more great stuff about this Microsoft software. Keep reading!
A PowerPoint template is a pre-made design that you can use for your own means, and that will save you a lot of time!
Templates in PowerPoint are a great resource for designing since all the structure is already done, and you only have to update the content . We can tell you they're the perfect resource for PowerPoint beginners!
They can be incredibly specific. For example, there are templates for a SWOT analysis or a complete Marketing report. Otherwise, templates can also be very general, with several slides with a similar design.
If you struggle with the artistic part of designing presentations, downloading PowerPoint templates will be a life changer!

How to download PowerPoint templates for free?
If you didn't know, 24Slides has an extensive repository of PowerPoint templates. But how to obtain them? It's really simple:
- First, create an account on our Free Templates Website with the button “Register” (that way, you can download everything without problems!).
- Think about the graphics you need and the ideal structure for your presentation deck (you can also change the color palette later!).
- Download it in PowerPoint format (if you prefer it in Google Slides format, you'll also find this type in our repository).
- Edit and change everything you need for your PowerPoint presentation!
24Slides Designers specialize in business and corporate PowerPoints, but you'll also find other types of templates on our website: Data templates, Timelines, Roadmaps, Matrixes, Diagrams, and more.
Keep in mind that a well-designed PowerPoint deck helps you communicate stronger messages to your audience . Don't waste this opportunity to make your presentation shine!

If you want to learn more about how to master PowerPoint, do not miss the last section. We'll show you some PowerPoint basics from the software itself!
A PowerPoint 101 Guide wouldn't be that useful with no examples. So, if you enjoy the step-by-step guides, this section is for you.
Below, we'll show you how to make a simple PowerPoint presentation. But first, here are some tips to be more efficient in the process:
- Be clear about what type of presentation you're going to create (is it corporate, playful, or more creative?).
- Make a draft with the most important information you need to add and, thus, generate a good structure in your presentation .
- Get inspired by examples on the internet , but adapt them to your needs and audience.
- If you will create a business presentation, keep in mind your brand identity .
- Make sure your PowerPoint works , you may need to update to the latest version or pay for the subscription.
Step 1: Make a draft to structure your presentation
As we said before, writing a draft or script of your content will be vital to start on the right foot as a PowerPoint beginner.
This advice is so important that we choose it as the first step to learning how to make a PowerPoint presentation. Remember: Planning is key!

Regarding the process of planning, we share some good practices:
- If your presentation will be very long , write down all subtitles and content in a Word document. This will help you organize your ideas and give a correct sequence to your narrative. In addition to avoiding redundancies in the message you want to communicate.
- If your presentation will use many visual resources , we recommend choosing high-quality images. This will help you have a starting graphic base. Some good free image repositories are Freepick , Unsplash , and Adobe Stock .
- If your presentation is based on data , have all your results summarized or your most relevant conclusions at hand. The idea of making a PowerPoint presentation is to show your information in the simplest way possible for your audience.
Step 2: Create a new document in PowerPoint
Once you check that all the functions are working fine with the software, please open it and go to the File tab. If you've ever used Word or Excel, you'll probably find this Home Menu familiar.
In short, this is the main page of PowerPoint, where you can create a new presentation or open an older one. Let's see:

In order to follow this part of our PowerPoint Tutorial correctly, take into consideration the following points:
- On the lower side of the screen, you'll find your recently opened PowerPoint files. This option is great for saving some time.
- If you don't find the presentation you're looking for, click on the “Open” option at the left bar and find older files.
- Don't forget to save your presentation with a relatable name so you won't lose sight of it!
Step 3: Choose the perfect design for your presentation
With your information ready in a draft, it's time to choose the design of your PowerPoint slide deck. You must imagine that the available design options are endless!
For practical reasons, you have three options regarding the design:
- Start a design from scratch (very difficult for a PowerPoint beginner).
- Choose an established PowerPoint design or layout.
- Download a PowerPoint template and modify some details.
Don't worry if you don't know how to continue! In this PowerPoint 101 class, we're going to explain step by step the second option:
How do you set a default design in PowerPoint?
- First, go to the Design tab.
- Open the list of options by clicking on the third arrow.
- Choose the design you like the most for your PowerPoint presentation.

If you want to explore more PowerPoint designs, there is a way to research online. For that, you only need to:
- Go to the File tab (first tab, next to the Home tab).
- Select "More themes" (see image).

- Use the search engine and write the keyword you want (it can be related to your business or it can be a color).
- Check the list of PowerPoint themes and choose your favorite.
- Wait a few minutes while it loads and keep designing in PowerPoint!

How do you change the layout of one slide in PowerPoint?
In this PowerPoint 101 Guide, you will also learn how to configure the layout of each slide.
Keep in mind that to have a high-impact presentation, you must adapt your slides' design to the type of content you'll add. And using layouts is perfect for this purpose.
To change the layout type in PowerPoint, follow these steps:
- Right-click on the slide you want to change.
- Select the "Layout" option.
- You will find more than ten layout models.
- Choose the one that best suits your content.
- Repeat these steps for each slide (if you wish or require).

How do you customize your slides in PowerPoint?
The design process in this PowerPoint 101 Guide doesn't stop there.
You also can customize your presentation's color palette , font style, background format , and graphics effects .
Just go to:
- Design tab > Variants.
- Select Colors, Fonts, Effects or Background Styles (as you need).
- If you're inspired and want to create your own background in PowerPoint, select Background Styles > Format Background.
- Finally, custom your slides as you want!

Step 4: Add all your information to your presentation
Now, it's time to add all your information to your slides. If your script is long, take your time to copy each part of it.
In this PowerPoint Tutorial, we're going to show how our design is going so far. We design at your side!

Step 5: Add transitions or animations to your presentation
The stamp of PowerPoint is its transitions and animations! Naturally, our PowerPoint 101 has considered these essential commands.
If you want to add them to your presentation and make your speech more fluid, follow these steps:
- Go to the tabs section of PowerPoint.
- Select "Transitions" or "Animations" and try your favorite effects.
- Remember that if you select Transitions, these will modify the entire slide, while Animations can be added to each element individually.
When choosing one Animation, you can eliminate it if you aren't 100% convinced. You only need to:
- Select the Animation number that appears on the corner.
- Press the "Delete" or "Backspace" button on your keyboard.
- Choose another Animation in PowerPoint if you want!

This “PowerPoint for dummies” is full of tips and tricks! So here is one more: Don't overuse transitions or animations in PowerPoint ; they can make your presentation slower and unprofessional . Use this tool in a subtle way!
Step 6: Refine the final details
As always, every final product must be reviewed. Especially if you're learning the PowerPoint fundamentals with us.
We recommend reviewing each slide of your PowerPoint presentation one final time. In this process, you will be able to:
- Add icons if your presentation requires it.
- Change any image or illustration if they don't convince you.
- Change transitions or animations.
- Customize your presentation's color palette .
- Proofread your slides' text or add more information.
- Add speaker notes to your presentation.

Step 7: Slideshow your presentation
When your presentation is finished, it's essential to know how to make a PowerPoint slideshow. This way, you can see your slides from the exact same perspective your audience will see them.
To slideshow your presentation in PowerPoint, follow these simple steps for PowerPoint beginners:
- Position yourself on your first slide.
- Go to the bottom right of the software.
- Select the "Slide Show" button (see image).
- Have a look of your presentation by clicking on each slide or pressing the right arrow on your keyboard.
- To go out from the Slide Show mode, you have to press the ESC key.

Now you can present your slides like an expert!
When you master this presentation design software, you'll be able to create amazing things in PowerPoint : infographics, diagrams, charts, pitch decks, business cards, calendars, you name it!
This was our PowerPoint Guide for beginners. We hope that our compilation today will be useful for conducting more professional presentations in the future and, why not, achieve all your goals!
Don't forget to share this PowerPoint 101 Guide with your co-workers or whoever you want!

Want to boost your beginner PowerPoint skills? Check out this content:
- How to Work with Multiple Images in PowerPoint
- How to Add a Timer to Your Powerpoint Presentations
- PowerPoint Charts, Graphs, & Tables Made Easy | Tips & Tricks
- How To Use PowerPoint Design Ideas - All Questions Answered!
- 36 Fun Icebreakers for Your Next Presentation
- The Cost of PowerPoint Presentations: Discover the hidden expenses you might overlook!
Create professional presentations online
Other people also read

Tutorial: Save your PowerPoint as a Video
How To Convert Google Slides To PowerPoint and Vice Versa

How To Add Animations To PowerPoint

Try Process AI free
How to make a powerpoint presentation using microsoft word 2010.
Microsoft Word 2010 isn’t normally used to make PowerPoint presentations. It’s a word processing program. But, if you only have Microsoft Word 2010 and need to make a PowerPoint presentation, there are ways around it.
One way is to make slides using Word’s page layout features, and then save them as images. JPEG or PNG is a good file format for this.
Next, open PowerPoint and make a blank presentation. Put the saved images from Word into it as slides. You can adjust the layout and design of the slides in PowerPoint.
Alternatively, you can use Word’s Outline View feature to create your PowerPoint presentation. In Outline View, structure your content into bullet points which will become slides when imported into PowerPoint.
To get into Outline View in Word 2010, go to the “View” tab and select “Outline” in the “Document Views” section. Then, organize your text using bullet points and headings.
Save your outline as a .rtf file. Open PowerPoint and choose “Open” from the File menu. Select your .rtf file and follow the prompts to import the outline as slides.
Pro Tip: Although Microsoft Word 2010 wasn’t made to do this, these workarounds can help you when PowerPoint isn’t available. Remember to adjust the formatting and design within PowerPoint for a professional presentation.
Overview of Microsoft Word 2010 features
Microsoft Word 2010 is a powerhouse of amazing features that make it ideal for crafting presentations. Here’s a glimpse of its top functions.
- Limitless customization: Word 2010 allows users to customize their slides with a wide range of formatting choices. From font type and color to bullet points and alignment, you can create slides that grab attention.
- SmartArt graphics: It offers an excellent SmartArt graphics option. This lets you insert professional diagrams, charts, and images into your presentation easily, so you can present complex info in a visually-pleasing way.
- Enhanced collaboration: It has co-authoring capability, so multiple people can work on a presentation at the same time. This makes team projects much simpler and efficient.
- Seamless integration with other Office apps: You can import/export content from programs like Excel or Access. This simplifies incorporating data into slide decks.
Also, you can add audio/video elements, apply transition effects between slides, and even save your presentation as a video. Unlock the potential of Microsoft Word 2010 – explore its features and create presentations that leave a mark.
Opening Microsoft Word 2010 and starting a new document
- Launch Microsoft Word 2010 by clicking its icon.
- Once open, find the “File” tab in the top-left corner.
- Select “New” from the drop-down menu to create a new document.
- A gallery will appear with templates and document types.
- Scroll through or use the search bar to find one for your PowerPoint .
- Or, select “Blank Document” from the gallery.
- Click “Create” to start working on your PowerPoint.
It’s worth mentioning that templates offer pre-designed layouts and themes for presentations. This can save time and effort. Align the template to the theme or purpose of your presentation to maintain consistency. For example, if giving a sales pitch, choose a template that looks professional and has eye-catching graphics.
By utilizing templates, you’ll get a visually appealing presentation while streamlining your workflow. Customize them to make them unique and engaging for your audience.
Choosing a design template for the PowerPoint presentation
When making a PowerPoint using Word 2010, it’s essential to pick a design template that will showcase your content well. Here are some key points for choosing one:
- Visual Appeal: Pick a template with colors, fonts and layouts that fit your content.
- Content Organization: Make sure the template has sections for titles, bullet points, images and charts.
- Customization Options: Check the template can be modified – colors, fonts, backgrounds etc – to create a unique presentation.
- Consistency: Get a template that keeps the same font styles, sizes and colors for headings and text, for readability.
Take a look at various design templates before settling on one. This’ll give you an idea of how each looks with your content. Selecting a great design template will give you an engaging PowerPoint.
Choose a template that boosts visual appeal whilst keeping consistency across slides. This will create an awesome presentation experience for your viewers. Start exploring design templates now to make your PowerPoint stand out!
Adding and formatting text in slides
- To add a text box to your slide, click “Insert” in the ribbon.
- Select “Text Box” from the drop-down menu.
- Drag and make it the size you want.
- Type in your content.
- Format the font, size, and color using the “Home” tab.
- To enhance the text, use bullet points, numbered lists, or different styles like bold or italic . These options are in the “Paragraph” section of the “Home” tab.
- Don’t use too many styles as it can make the slides look cluttered.
- For a professional and cohesive look, use a consistent style throughout the presentation.
- According to Microsoft Office Support , PowerPoint 2010 offers many options for adding and formatting text in slides.
Inserting images, graphs, and other media
Select visuals that are relevant to your content. Choose images that look good and support your message. For data, use graphs or charts. To insert an image or media file, go to the “Insert” tab in Microsoft Word 2010. Pick pictures, shapes, charts, and SmartArt graphics. Position images and media files in a way that looks nice and supports your message. Add videos or audio clips for a dynamic presentation. Research shows that multimedia content makes presentations more memorable. Follow these guidelines to create a captivating PowerPoint presentation.
Applying transitions and animations to slides
Select the slide you want to add transitions or animations to. Head to the “Transitions” tab in the PowerPoint ribbon, and choose from the “Transition to This Slide” group. Hover over each transition to preview it, then click to apply.
To animate individual elements, select the element first (e.g. text box, image). Then, go to the “Animations” tab in the PowerPoint ribbon. Explore the “Animation” group for different effects, and click one to apply. Customize using “Effect Options”.
Keep it simple! Excessive effects can distract from your message. Use entrance and exit animation sparingly for better impact. To maintain consistency, use similar transition styles and timings across all slides. This will create a more cohesive and polished look for your presentation.
Adding speaker notes and timings
When crafting a PowerPoint presentation in Microsoft Word 2010, think about speaker notes and timings . These tools help the presenter give their message clearly.
- Speaker Notes : For extra info or reminders, add speaker notes. These only show up for the presenter, not the audience.
- Timing Slides : Also use timing slides to control the duration of each slide. That way, the presentation is smooth and timed well.
- Adding Speaker Notes : Go to “View,” click “Notes Page,” and start typing in the space provided.
- Setting Timings : Go to the “Slide Show” tab. Click “Rehearse Timings,” and follow the instructions.
To take your presentation further, personalize speaker notes with text styles or pics. Practice with timing to make sure you speak at the right pace.
For example, one student used speaker notes and timings to avoid embarrassment at a crucial presentation. With rehearsed slides and prepared notes, they managed to get through their talk without missing important points or rushing.
Previewing and running the PowerPoint presentation
Preview your PowerPoint to make sure everything is running smoothly for your audience. Click the “Slideshow” tab and select either “From Beginning” or “From Current Slide”. To preview individual slides, click on the “Slide Show” button. Utilize the arrows and spacebar to move forward and press “B” to temporarily black out the screen. End the show by pressing “Esc” or right-clicking and selecting “End Show”.
If you want to practice without an audience, go to the “Set Up Slide Show” option under the Slideshow tab and choose one of three options.
Also, check for any hidden slides that may contain extra content. Lastly, have a backup copy saved on external storage in case of technical difficulties.
Saving and sharing the PowerPoint presentation
Saving and sharing a PowerPoint presentation is a must for collaboration and distribution. It allows you to keep your work and easily share it with others. Here’s a simple guide on how to save and share your PowerPoint presentation using Microsoft Word 2010.
- Click on ‘File’.
- Choose ‘Save As’ from the dropdown menu.
- Select the location you want to save your file.
- Type a name for your presentation in the ‘File Name’ field.
- Click ‘Save’.
- Open your saved presentation in Microsoft Word 2010.
- Click ‘File’.
- Select ‘Share’ from the left-hand menu.
- Pick ‘Email’.
- Put in the recipient’s email address, subject and message (if needed).
- Click ‘Send’.
- Choose ‘Save & Send’ from the left-hand menu.
- Pick an option like ‘Save to SkyDrive’.
- Log in with your Microsoft account or create one if you don’t have one. (SkyDrive is now called OneDrive.)
- Follow the instructions to upload and share your file.
Plus, you can also think of saving and sharing your PowerPoint presentations through other file-sharing platforms such as Google Drive or Dropbox. These platforms provide convenient ways to store, access and collaborate on files online.
Fun Fact: Survey says, SlideShare has an average of 60 million unique visitors visiting their platform every month. This makes it one of the biggest professional content sharing communities out there.
- Creating a PowerPoint with Microsoft Word 2010 may seem strange, but it’s possible! Follow these steps to make an attractive and interactive presentation.
- Go to the “ Page Layout ” tab and select “ Slide Orientation “. Customize the slide size and orientation.
- In the “ Insert ” tab you’ll find ways to add images, videos and audio.
- Use the “ Home ” tab to add formatting styles and shapes or SmartArt graphics.
- The “ Design ” tab has pre-designed themes and layouts to quickly customize your slides.
- Incorporate bullet points, headings, and subheadings in your content.
- Finally, use the “ Animations ” tab to add slide transition effects.

No credit card required
Your projects are processes, Take control of them today.
4th Of July Sale Flat 10% off , Use Code: FREEDOM10
30-days Money-Back Guarantee
Mastering Microsoft Office 2021-365: Word, Excel, PowerPoint
Microsoft Office 2021: Boost Your Productivity and Professionalism with Expert Instruction and Hands-On Practice
English [CC]
Lectures - 135
Duration - 8 hours
Training 5 or more people ?
Get your team access to 10000+ top Tutorials Point courses anytime, anywhere.
Course Description
Welcome to the ultimate Microsoft Office course! In this course, you'll learn everything you need to know to become proficient in Word, Excel, PowerPoint, and Office 365.
Microsoft Excel is a powerful spreadsheet program that is essential for analyzing data and making informed decisions. In this course, you'll learn how to use Excel to create and format worksheets, perform calculations and functions, and create charts and graphs.
Microsoft PowerPoint is the premier program for creating dynamic presentations that grab your audience's attention. In this course, you'll learn how to create and format slides, add multimedia elements, and use animations and transitions to bring your presentation to life.
Microsoft Word is the go-to word-processing program for businesses and individuals alike. In this course, you'll learn how to create and format documents, use styles and templates, work with tables and images, and more.
Finally, you'll learn about Office 365 access on the cloud-based suite of productivity tools that includes Word, Excel, PowerPoint, and more. You'll discover how to collaborate with others in real time, access your files from anywhere, and take advantage of the many benefits of cloud computing.
About Your Instructor
Sekhar Metla is a software engineer with 20+ years of professional experience. He is the author of several online-selling courses with more than 50,000+ students in many countries. He has a Master of Science in Computer Applications in Software Engineering. His students describe him as passionate, pragmatic, and motivational in his teaching.
Whether you're a beginner or an experienced user, this course is designed to take your Microsoft Office skills to the next level. With expert instruction and hands-on practice, you'll gain the confidence and expertise you need to succeed in today's fast-paced business environment. So, what are you waiting for? Enroll now and start mastering Microsoft Office today!
Who this course is for:
- Business professionals who want to create professional-quality documents, presentations, and spreadsheets
- Students who need to use Microsoft Office for school projects or assignments
- Job seekers who want to improve their Microsoft Office skills for career advancement
- Anyone who wants to learn how to use Office 365 for collaboration and productivity
- Freelancers, entrepreneurs, and small business owners who need to create professional documents and presentations
- Anyone who wants to boost their productivity and efficiency with Microsoft Office tools.
Learn the essential Microsoft Office Skills in these three courses: Word, Excel, and PowerPoint
Apply new and improved features in Excel 2021 and Office 365
How to use Microsoft Word to create, format, and edit documents
Work with styles, templates, tables, and images in Word
Learn to use Microsoft Excel to create, format, and analyze data in spreadsheets
Effectively use formulas, functions, charts, and graphs in Excel
Master of VLOOKUP, XLOOKUP, and Pivot table to create speedy Data Analytics
Use to apply Microsoft PowerPoint to create dynamic and engaging presentations
Add multimedia elements, animations, and transitions in PowerPoint
Access and manage files from anywhere using Office 365
Take advantage of the many benefits of cloud computing with Office 365
Expert Tips and tricks to improve your productivity and efficiency in Microsoft Office.
Learn time-saving techniques including how to copy slides, and set your presentation
Control page appearance including using columns, indents, footers, borders, and watermarks.
How to create a mail merge in Microsoft Word
Learn how to correctly Print envelopes and labels in Word
Make your Word documents look amazing by inserting and editing
Prerequisites
You will need a PC with Microsoft Office Suit installed or Office 365 Access
No prior technical experience is required!

Check out the detailed breakdown of what’s inside the course
Instructor Details

Metla sudha sekhar
Mr. Sudha Sekhar, He is a Teacher and an IT Specialist, and also passionate to teach every single real-time step that leads students as well as professionals to become successful and the vision to impart Good Quality Software Education to all I.T to aspirants make a strong bridge the gap between the software companies requirements and the beginners.
He is Professional about web development and technologies:
* Programming: Python, C# Asp.Net and PHP more..
* UI/UX : HTML, CSS, Bootstrap, JavaScript, AJAX and more...
* Database : MS-SQL, MySQL, PostgreSQL, MongoDB, MariaDB and
* Operating Systems / Servers: Administration of LINUX, Ubuntu,
CentOS, Windows and more...
Start solving your challenge now | Enroll today and learn real world practical example courses.
He is passionate about:
* Teaching students the correct way.
* Making things simple and easy to understand.
* Providing the best audio and video qualities to my courses.
* Real-time Examples who will understand real-time skills easily.
Course Certificate
Use your certificate to make a career change or to advance in your current career.

Our students work with the Best

Related Video Courses
Annual membership.
Become a valued member of Tutorials Point and enjoy unlimited access to our vast library of top-rated Video Courses

Online Certifications
Master prominent technologies at full length and become a valued certified professional.

1800-202-0515

- Get started with computers
- Learn Microsoft Office
- Apply for a job
- Improve my work skills
- Design nice-looking docs
- Getting Started
- Smartphones & Tablets
- Typing Tutorial
- Online Learning
- Basic Internet Skills
- Online Safety
- Social Media
- Zoom Basics
- Google Docs
- Google Sheets
- Career Planning
- Resume Writing
- Cover Letters
- Job Search and Networking
- Business Communication
- Entrepreneurship 101
- Careers without College
- Job Hunt for Today
- 3D Printing
- Freelancing 101
- Personal Finance
- Sharing Economy
- Decision-Making
- Graphic Design
- Photography
- Image Editing
- Learning WordPress
- Language Learning
- Critical Thinking
- For Educators
- Translations
- Staff Picks
- English expand_more expand_less
In this free Word 2016 tutorial, learn how to format text, save and share documents, modify line and paragraph spacing, use tables and columns, and do more with your documents.

Word Basics
- 1 Getting Started with Word arrow_forward_ios ✓ Get to know the Ribbon, Quick Access Toolbar, and Backstage view to produce Word 2016 documents.
- 2 Understanding OneDrive arrow_forward_ios ✓ Learn all about working with your Microsoft account and OneDrive.
- 3 Creating and Opening Documents arrow_forward_ios ✓ Learn all about opening existing documents and creating new ones.
- 4 Saving and Sharing Documents arrow_forward_ios ✓ Learn more about saving and sharing documents.
Working with Text
- 5 Text Basics arrow_forward_ios ✓ Learn how to add, delete, move, cut, copy, and paste text.
- 6 Formatting Text arrow_forward_ios ✓ Learn how to change font size, color, and text alignment.
- 7 Using Find and Replace arrow_forward_ios ✓ Learn more about using the Find and Replace features to search your document.
- 8 Indents and Tabs arrow_forward_ios ✓ Learn how to use the tab selector and horizontal ruler to set tabs and indents.
- 9 Line and Paragraph Spacing arrow_forward_ios ✓ Learn how to modify line and paragraph spacing in your documents.
- 10 Lists arrow_forward_ios ✓ Learn how to add and modify bulleted and numbered lists.
- 11 Hyperlinks arrow_forward_ios ✓ Learn how to add and modify hyperlinks.
Layout and Printing
- 12 Page Layout arrow_forward_ios ✓ Learn how to modify page orientation, margins, and size.
- 13 Printing Documents arrow_forward_ios ✓ Learn all about printing in Word 2016.
- 14 Breaks arrow_forward_ios ✓ Learn how to add page, section, and column breaks.
- 15 Columns arrow_forward_ios ✓ Learn all about working with columns.
- 16 Headers and Footers arrow_forward_ios ✓ Learn how to add and modify headers and footers.
- 17 Page Numbers arrow_forward_ios ✓ Learn how to add and modify page numbers.
Working with Objects
- 18 Pictures and Text Wrapping arrow_forward_ios ✓ Learn how to add pictures and use the text wrapping feature.
- 19 Formatting Pictures arrow_forward_ios ✓ Learn more about formatting pictures, including removing the background from an image.
- 20 Shapes arrow_forward_ios ✓ Learn how to add and modify shapes in your document.
- 21 Text Boxes arrow_forward_ios ✓ Learn how to use text boxes in Word 2016.
- 22 Aligning, Ordering, and Grouping Objects arrow_forward_ios ✓ Learn how to align, group, order, and rotate objects.
- 23 Tables arrow_forward_ios ✓ Learn more about working with tables.
- 24 Charts arrow_forward_ios ✓ Learn how to add and modify charts.
Collaboration and Reviewing
- 25 Checking Spelling and Grammar arrow_forward_ios ✓ Learn how to use the review features available in Word 2016.
- 26 Track Changes and Comments arrow_forward_ios ✓ Learn how to track changes and comments when collaborating on documents.
- 27 Inspecting and Protecting Documents arrow_forward_ios ✓ Take these steps to inspect and protect your document.
Doing More with Word
- 28 SmartArt Graphics arrow_forward_ios ✓ Learn all about using SmartArt graphics in your document.
- 29 Applying and Modifying Styles arrow_forward_ios ✓ Learn how to apply and modify styles.
- 30 Mail Merge arrow_forward_ios ✓ Learn how to use the Mail Merge feature to produce letters, labels, and envelopes.
- 31 Buying Office 2016 arrow_forward_ios ✓ If you're considering purchasing Office 2016, learn about some important changes you should know about.
- 32 New Features in Office 2016 arrow_forward_ios ✓ Discover some of the new features in Office 2016.
- 33 Word Quiz arrow_forward_ios ✓ Test your knowledge of Word by taking our quiz.

MS Word 2010 Tutorial
Jul 11, 2014
7.15k likes | 11.94k Views
MS Word 2010 Tutorial. Prepared by: Mr. R. De Vera ii. Microsoft Word 2010. Word-processing program, designed to help you create professional-quality documents . Word helps you organize and write your documents more efficiently .
Share Presentation
- change page orientation
- minimize button
- opening outlook

Presentation Transcript
MS Word 2010Tutorial Prepared by: Mr. R. De Vera ii
Microsoft Word 2010 • Word-processing program, designed to help you create professional-quality documents. • Word helps you organize and write your documents more efficiently. • Word also includes powerful editing and revising tools so that you can collaborate with others easily.
The Ribbon • Understanding the Ribbon is a great way to help understand the changes between Microsoft 2003 to Microsoft 2010. • The ribbon holds all of the information in previous versions of Microsoft Office in a more visual stream line manner through a series of tabs that include an immense variety of program features.
Interface of Microsoft Word 2010
Parts of Microsoft Word 2010 Minimize button Maximize Button Close Button Undo and Redo Title Bar Save Button Ribbon Menu Tab Scroll Bar Minimize Ribbon Button Ruler Blank Document Page Number Number of Words in Document Zoom Level Layout Button
Menu Tab Home Tab • This is the most used tab; it incorporates all text formatting features such as font and paragraph changes.
Menu Tab Insert Tab • This tab allows you to insert a variety of items into a document from pictures, clip art, tables and headers and footers.
Menu Tab Page layout Tab • This tab has commands to adjust page elements such as margins, orientation, inserting columns, page backgrounds and themes.
Menu Tab Reference Tab • This tab has commands to use when creating a Table of Contents and citation page for a paper. It provides you with many simple solutions to create these typically difficult to produce documents.
Menu Tab Mailing Tab • This tab allows you to create documents to help when sending out mailings such as printing envelopes, labels and processing mail merges.
Menu Tab Review Tab • This tab allows you to make any changes to your document due to spelling and grammar issues. • It also holds the track changes feature which provides people with the ability to make notes and changes to a document of another person.
Menu Tab View Tab • This tab allows you to change the view of your document to a different two page document or zoom.
Getting Started Opening Outlook • If you have a shortcut to Word on your desktop, double click the icon and Word will open. If not Steps Below: 1. Click on the Start button 2. Highlight Programs 3. Highlight Microsoft Office 4. Click on Microsoft Word 2010 Steps on how to create a document
Getting Started Steps to open MS word 2010 1. Click on the Start button 2. Highlight Programs 3. Highlight Microsoft Office 4. Click on Microsoft Word 2010
Getting Started How to Create New a Document: 1. Click the File tab and then click New. 2. Under Available Templates, click Blank Document. 3. Click Create.
Getting Started Using templates • Word 2010 allows you to apply built-in templates from a wide selection of popular Word templates, including resumes, agendas, business cards, and faxes.
Getting Started Using Templates To find and apply a template in Word, do the following: 1. On the File tab, click New. 2. Under AvailableTemplates, do one of the following: • To use one of the built-in templates, click Sample Templates, click the template that you want, and then click Create. • To reuse a template that you’ve recently used, click RecentTemplates, click the template that you want, and then click Create. • To find a template on Office.com, under Office.com Templates, click the template category that you want, click the template that you want, and click Download to download the template from Office.com to your computer. 3. Once you have selected your template you can modify it in any way to create the document you want.
Getting Started How to: • Open a Document • Cut, Copy Paste Different Options Button, Depending on the source content:
Getting Started How to: • Undo • Show/Hide Formatting Marks • Show/Hide command allows you to see every time you hit the space bar, hit enter or tab. • This feature can be quite useful when creating documents to understand where everything is placed within your document and see if any errors have been made.
Getting Started Formatting Text • Formatting a document can range from modifying text size to adding graphics. • It is easy to add creative touches to any document with the options Microsoft Word has to offer.
Formatting Text How to: • Modify Fonts • Change Text Case • Add text effects • Remove text effects • Format Painter • Clear Format
Formatting Documents How to: • Adjusting Line Spacing • Change Page Orientation • Page Orientation - You can choose either portrait (vertical) or landscape (horizontal) orientation for all or part of your document. • Page Margins- are the blank space around the edges of the page. • Setting Predefined Page Margins • Create Custom Margins • Page Breaks • Inserting a Page Break • Deleting a Page Break • Headers, Footers, and Page Numbers • Add Page Numbers • Add Header or Footer • Remove page numbers, headers, and footers
- More by User

MS Word Tutorial: Equation Builder
331 views • 14 slides

Packaged Application MS Word Tutorial 1
Kemtis Kunanuraksapong MSIS with Distinction, A+ MCT, MCTS , MCDST, MCP. Packaged Application MS Word Tutorial 1. Introduction to MS Word. What is MS Office Word (Word)? What can it do? What does it look like?. Introduction (Cont.). Print Layout Status Bar
354 views • 21 slides

Text Editing in MS Word 2010
Text Editing in MS Word 2010. Tutorial:. by David Butler. We’ve started up MS Word and we’re now ready to type and practice our word-processing skills. This always begins with text-editing , whether you’ve typed it in or not.
834 views • 8 slides

MS Word. Text Editing Software f or writing documents. Scope of Work. New Documents. Borders and Backgrounds. Themes. Lay Out Documents. Page Settings, Headers & Footers. Page Settings. Headers and Footers. Columns. Formatting Content. Character Formatting. Paragraph Formatting.
622 views • 15 slides

MS Word 2010 Ribbons
MS Word 2010 Ribbons. Home Ribbon. Insert Ribbon. Page Layout Ribbon. References Ribbon. Mailing Ribbon. Review Ribbon. View Ribbon.
534 views • 9 slides

Ms Word. Typing Skill. http://www.youtube.com/watch?v=zpfYm6S8dss&feature=related. Typing Reference - Fingering. Typing Practice (Home Row). Open your Ms Word and Key each line twice in single spaced. aaa ;;; sss lll ddd kkk fff jjj aa ss dd ff aa ss dd ff ;; ll kk jj ;; ll kk jj
400 views • 5 slides

MS WORD. Microsoft Office Mr. Mistler. Microsoft Word File Formats. . docx : default Word 2007/2010 format . dotx or dotm : Word 07/2010 template file .doc: Word 97/2003 format .dot: Word 97-2003 template file. .doc vs . docx.
1.69k views • 23 slides

Microsoft IT Academy MS Word 2010
Microsoft IT Academy MS Word 2010. Lesson Two Roberson—Fall 2011. The Open Command. The Open command is accessed from the File Tab in the Backstage Clicking File/Open brings up the Open dialog box. The Open dialog box looks very similar to the Save As dialog box.
1.22k views • 39 slides

Beautiful ms -word
Beautiful ms -word. Sritrusta sukaridhoto , st. ph.d. content. Page layout Font Paragraph and Style Caption Cross-Reference Index and tables. Page layout. Paper size Page Setup : (size) A4, letter, dsb Margins Text Layout : Columns. Font. Times New Roman
357 views • 12 slides

MS word word processing
MS word word processing. 5 th Grade , I.C.Tech . Wizard Ms. Abeera Arif 10th Sept2010. Uses of ms word:. Dear Students, Tomorrow is OFF! Thank you!. MS Word is use for Writing Document. Letters, Reports, Circulars, Applications, Notifications etc.
2.04k views • 8 slides
- Interview Q
MS Word Tutorial
Text basics, proofing features, formatting text, formatting paragraph, modify page layout, working with tables, inserting illustrations, working with lists, using wordart, shortcut keys.

| Microsoft Word is a computer application program written by Microsoft. It is mainly used to design text for presentation. Our MS Word tutorial includes all topics of MS Word such as save the document, correct error, word count, font size, font style, apply a style, customize a style, page size, page margin, insert header and footer and more. Microsoft Word is word processing software. It is developed by Microsoft and is part of Microsoft Office Suite. It enables you to create, edit and save professional documents like letters and reports. Microsoft word was released in 1983 as Multi-Tool Word. Its first version was based on the framework of Bravo which was world's first graphical writing program. Microsoft renamed Multi Tool Word to Microsoft Word, and then in October 1983, Microsoft released its first version for the IBM PC. In 1985, Microsoft ported it to the Macintosh which was different from its DOS-based counterpart, i.e. Macintosh offered various major interface changes. In 1989, Microsoft released a new version of Word for its Windows operating systems. It was the Microsoft Word who introduced the concept of WYSIWYG (What You See Is What You Get), i.e. it allowed to create and display bold and italics text. In 2014, Microsoft developed the source code for Microsoft Word for Windows 1.1a.
Before learning MS Word, you must have the basic knowledge of Computer Fundamental. Our MS Word tutorial is designed to help beginners and professionals. We assure that you will not find any problem in this MS Word tutorial. But if there is any mistake, please post the problem in contact form. |

- Send your Feedback to [email protected]
Help Others, Please Share

Learn Latest Tutorials

Transact-SQL

Reinforcement Learning

R Programming

React Native

Python Design Patterns

Python Pillow

Python Turtle

Preparation

Verbal Ability
Interview Questions

Company Questions
Trending Technologies

Artificial Intelligence

Cloud Computing

Data Science

Machine Learning

B.Tech / MCA

Data Structures

Operating System

Computer Network

Compiler Design

Computer Organization

Discrete Mathematics

Ethical Hacking

Computer Graphics

Software Engineering

Web Technology

Cyber Security

C Programming

Control System

Data Mining

Data Warehouse

Houston, We Have a Problem
We don't seem to have a working coupon for Microsoft Office Training Master Excel Powerpoint Word at the moment, but here are some similar ones that you might find interesting.
If you still can't find what you're looking for, try using the search feature by clicking the magnifying glass icon above.
Enjoy all the free Udemy coupons!
The Complete Google Forms Course – Sending & Analyzing Forms
Learn Google Forms - Master Google Forms and Capture Data, Quizzes, Email Address, and Other Categories
Free Intro to MS Excel
Enhance your productivity with this tool - Free Course
Microsoft Excel : Mastering Data Analysis with Pivot Table
You'll learn everything - Become proficient in creating, customizing, and analyzing data with Pivot Tables.
Essential Microsoft Excel from Beginner to Advance level
Microsoft Excel Beginner to Professional. Includes Pivot Tables, Power Query, NEW Formulas,Excel Charts,Projects & More
The Complete Computer Basics Course: Become a Power User
Basic Computer Course - IT Support - Computer Fundamentals - Desktop Support - Basic Computer Skills
Airtable for Project Management: From Setup to Success
Optimize Workflow, Task Management, and Team Collaboration with Airtable

Free WordPress Tutorial – wordpress tutorial for beginners Easy To Understand
How To Install Wordpress On Your Doman And How To Configure Basic Pages. - Free Course
Microsoft Excel – Journey from Beginner to Advanced in Excel
Master Microsoft Excel. Learn Data Analysis and Business Data Analysis With Excel. - Free Course
Excel with Excel: Learn to use Microsoft Excel 2021 Part 2
Step By Step Excel - Free Course
Microsoft Excel : A Crash Course for Beginners
Unlock Excel's Power: Data Entry, Formulas, Analysis, Efficiency
Excel with Excel: Customizing Window, Making Calculations
Step By Step Guide to Get familiar and become an expertise with Microsoft Excel 2021 - Free Course
- Next Page »
Coupon Scorpion is the ultimate resource for 100% off and free Udemy coupons . We scour the web like madmen, looking for working coupons to save you money. Coupons don't last long so subscribe to our service to get instant notifications.
Contact | Privacy Policy | Disclosure | Web Hosting
- Submit a Coupon
Search for: Search Button
- Add the US Flag into Word, Excel or PowerPoint
Add the US National flag “ Old Glory ” “ The red, white and blue ” into Office documents, Word, Excel or PowerPoint, then use some Office picture tools to enhance the image.
Get the US Flag image
Insert us flag to word, powerpoint or excel, us flag colors, flag etiquette.
The same help can be used for any other national flag, just look for a different source or our articles about using many national flags in Microsoft Office .
There are many, many copies of the US flag available. We’ve opted for the Wikipedia site because it has an SVG scalable version (preferred) and PNG versions for older MS Office and other programs.
SVG graphics are supported by Office 365 and Office 2019. They maintain high quality regardless of resizing.
Go to https://en.wikipedia.org/wiki/File:Flag_of_the_United_States.svg . Below the image are a choice of images to download – right-click and choose ‘Save link as…’ (or similar depending on browser).
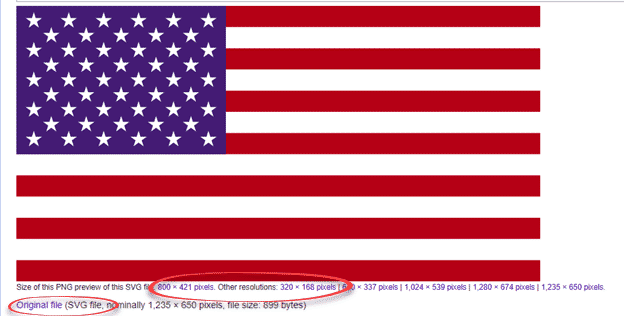
For Microsoft 365, Office 2021/2019 choose ‘Original file’ which is the SVG version.
Otherwise choose one of the ‘PNG preview’ options. Select a resolution larger than what you’ll need in your document.
An alternative source is the Office image search at Insert | Online pictures. It gives you many variations to choose from though not necessarily the current version of the flag. The first image (top left) is from Wikipedia but it’s not the preferred SVG graphic.
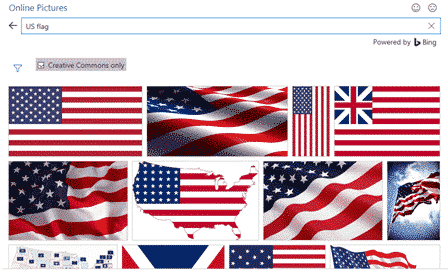
Click the funnel icon to filter the search.
Once the flag image is saved to your computer, it’s the usual process to insert into a document. Go to Insert | Pictures, choose the image you just downloaded.
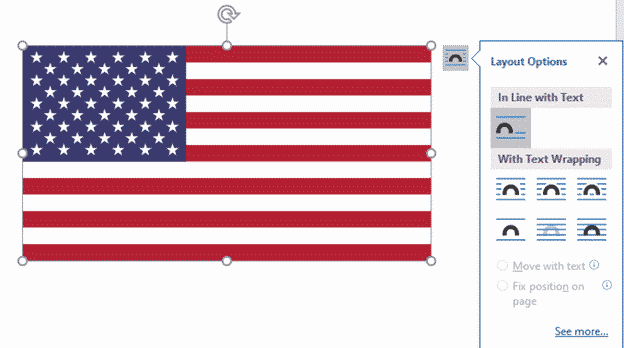
In Office, you can resize and position the image just like any other.
The specific colors in the flag are useful to know when designing a document, worksheet or slide. It helps choose matching or contrasting colors
There’s a US Federal Specification for the flag colors but they are for cloth. Converting those colors to screen display isn’t exact and there are different values given by various sources, even within the US government, see Wikipedia .
Red: 197, 14, 61 #B31942 (PMS 193C)
Blue: 4,30, 66 #0A3161 (PMS 282C)
White: 255,255,255 #FFFFFF
(Using the US State Department style guide with the Pantone PMS codes , as quoted on Wikipedia)
Use the # Hex color code in modern Office.
The United States Flag Code has the rules for the use and display of the US national flag. The penalties are not enforced and some of the code is widely ignored.
Most of the rules apply to physical flags but these two are relevant to computer documents:
“ The flag should never be used for advertising purposes in any manner whatsoever. It should not be embroidered on such articles as cushions or handkerchiefs and the like, printed or otherwise impressed on paper napkins or boxes or anything that is designed for temporary use and discard.”:
This rule might be the US law that’s most commonly broken! Look in any souvenir shop.
“ The flag should never be upside down. According to the United States Flag Code, an American flag upside down means a sign of distress or great danger. “
It’s easy (too easy) to accidently ‘flip’ an image in Office when resizing from the edge handles.
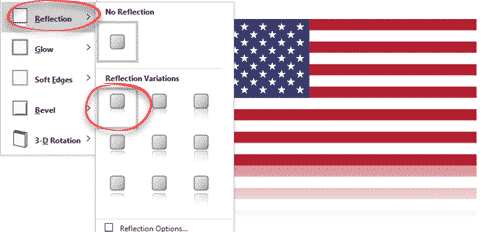
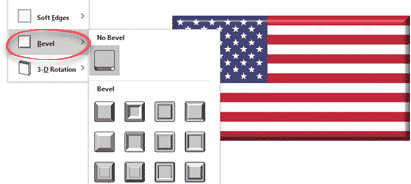
Flag Effects
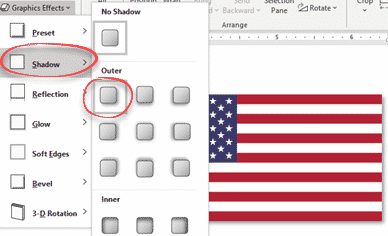
Once you have the image in Office, all the usual Office Graphic or Picture Format options are available.
Some of the Graphics Effects like Shadow, Reflection and Bevel add a little visual interest without distorting the flag to a level that might offend.
For a nice little shadow effect, try Graphics Effects | Shadow | Outer which adds a little ‘shadow’ to the right and bottom of the image.
Reflection is another way to add a little effect to an image.
Bevel is another choice for a slight 3D effect
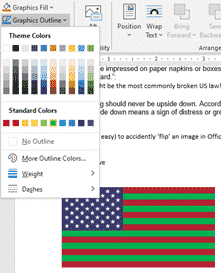
Beyond these choices there are many more available, especially if you’re using an SVG. Graphics Fill or Graphics Outline can change the colors of an image.
National Flags in Microsoft Office
Australian flag and more into Word, Excel or PowerPoint docs
Insert the British ‘Union Jack’ flag into Word, Excel or PowerPoint
About this author

Office-Watch.com
Office 2021 - all you need to know . Facts & prices for the new Microsoft Office. Do you need it? Office LTSC is the enterprise licence version of Office 2021.
Office 2024 what's known so far plus educated guesses. Microsoft Office upcoming support end date checklist.
Latest from Office Watch
- Microsoft Office support end dates checklist
- Get flag emoji in Microsoft Office with Windows workaround
- Microsoft might cop a HUGE fine for EU antitrust violations
- Will Microsoft 365 stop working if the plan is not paid?
- See the world’s top companies in Excel
- Add Video background to text, objects in PowerPoint
- Don't Fall for This Fake Microsoft Email Scam
- Copilot comes to some Outlook for Windows
- All about Clear Formatting in Word
- Mobile Phone 📱 emoji in Word, Excel, PowerPoint and Outlook
- Join Tables with Excel Power Query
- Make lines and arrows straight – a Word bug fix
- How changes in Outlook login will affect you
- Busting the myth about Two-Factor Authentication
- New Windows 11 option: Update both Windows and Office
- Transform a photo with Restyle Image in Designer
- What's in and out of the new Microsoft 365 Basic
- Major benefit removed from Copilot Pro
- Copilot Pro brings AI into Microsoft Office
How to add Grammarly to Microsoft Office on Windows
To use Grammarly in Microsoft Office, install Grammarly for Windows by following these steps:
- Download Grammarly for Windows .
- Double-click the downloaded file and follow the prompts to complete the installation.
In Microsoft Word, Grammarly for Windows will show a list view of suggestions and will let you filter suggestions by category:
In Outlook, PowerPoint, OneNote, and Excel, Grammarly’s suggestions will appear one by one on a draggable widget:
If you use Microsoft Office on a Mac, follow the steps in this article: How to add Grammarly to Microsoft Office on Mac
Note: If Grammarly does not appear in your Microsoft Office products, please see our article Grammarly for Windows and Mac doesn’t work in Microsoft Office products for system requirements and troubleshooting steps. If your current version of Microsoft Office is not compatible, we suggest trying the Grammarly Editor . For more information about the Grammarly Editor , check out this article .

Copilot tutorial: Summarize a presentation

Duration: 41 seconds
Watch how Copilot in PowerPoint effortlessly summarizes presentations down to key points with interactive citations for improved clarity and productivity.
Try in PowerPoint
See more videos

Kickstart a presentation

Create a branded presentation from a file

Create a presentation with a prompt
Browse all Copilot videos

Need more help?
Want more options.
Explore subscription benefits, browse training courses, learn how to secure your device, and more.

Microsoft 365 subscription benefits

Microsoft 365 training

Microsoft security

Accessibility center
Communities help you ask and answer questions, give feedback, and hear from experts with rich knowledge.

Ask the Microsoft Community

Microsoft Tech Community

Windows Insiders
Microsoft 365 Insiders
Was this information helpful?
Thank you for your feedback.
IMAGES
VIDEO
COMMENTS
Download now. Microsoft word basics ppt. 1. 2. Word Processing Software that is designed for the entry, editing, and printing of documents. Windows Version = Microsoft Word (MS Word) Word processing documents include: Letters Memorandums Faxes Mail Merges Reports One page flyers E-mail. 3.
31 Creating Folders Folders are an easy way to organize files. To create a folder within your current folder, click on the Create New Folder button on the Save As dialog box. A New Folder dialog box appears. Give the folder a name. After you click OK, Word automatically opens the new folder. Microsoft Word: Basics.
V. This document provides an overview of the features and functions of Microsoft Word. It explains how to create and save files, edit and format text including fonts, paragraphs, headers and footers, check spelling and grammar, insert special characters, print, add images, set page layouts, and add tables. Key features covered include bolding ...
Word, Excel, or PowerPoint. 20. Save a copy of file Click the File tab and then click Save as. Keyboard shortcut Word, Excel, or PowerPoint F12. 21. Save a file to another format 1. Click the Microsoft Office Button , and then click Save as. 2. In the File name box, enter a new name for the file. 3.
Open PowerPoint. In the left pane, select New. Select an option: To create a presentation from scratch, select Blank Presentation. To use a prepared design, select one of the templates. To see tips for using PowerPoint, select Take a Tour, and then select Create, . Add a slide.
To add a New Command: • Click the Choose Commands From arrow. • From the drop - down list, select the command category you want to use. • Click the command you want to add. • Click the Custom Group you want to use and click the Add button. • Click Ok and Word adds the command.
Templates. Training: Watch and learn how to use PowerPoint in Windows. Explore PowerPoint training guides, articles, and how-to videos.
Under Drawing Tools, choose Format. Do one of the following: To change the color of your text, choose Text Fill, and then choose a color. To change the outline color of your text, choose Text Outline, and then choose a color. To apply a shadow, reflection, glow, bevel, 3-D rotation, a transform, choose Text Effects, and then choose the effect ...
Learn everything you need to know to get started using Microsoft PowerPoint! You'll learn all the basics plus more, including: how to choose a design theme...
Presentation Transcript. Introduction to Microsoft Word By the end of this session you will know and be able to: • Identify and use editing and formatting features of a word processing program • cut and paste, • fonts, • justify/center • Spell check, • Insert images (e.g., graphics, clip art,) into word processed document.
Microsoft PowerPoint is a presentation design software that is part of Microsoft 365. This software allows you to design presentations by combining text, images, graphics, video, and animation on slides in a simple and intuitive way. Over time, PowerPoint has evolved and improved its accessibility to users.
Opening PowerPoint. To open a PowerPoint 2016 presentation, click on the File tab in the upper left corner. The most common choices for opening a presentation are: New ‐ allows you to open a Blank presentation or you may choose from a selection of Templates and Themes.
Microsoft applications and systems including Access, Excel, OneNote, Outlook, PowerPoint, SharePoint, Windows, and Word. A former small business owner and recovering workaholic, she has worked for over 36 years with Microsoft and Microsoft technologies and for over 26 years in the training and certification industry.
To get into Outline View in Word 2010, go to the "View" tab and select "Outline" in the "Document Views" section. Then, organize your text using bullet points and headings. Save your outline as a .rtf file. Open PowerPoint and choose "Open" from the File menu. Select your .rtf file and follow the prompts to import the outline as ...
In this video, I will quickly show you how you can export your Microsoft Word into a Microsoft PowerPoint in seconds. This is done online with Microsoft 365...
Welcome To Microsoft Word 2016. 2. Microsoft Word Word 2016 is a word processing application/program that allows you to create a variety of documents like letters, flyers, and reports Word 2016 allows you to do more with your word processing project. 3. Word Interface When Word is opened the Word Start Screen will appear The start screen allows ...
A Mail Merge pane will open on the right that will take you through the mail merge process in 6 steps. Step 1 - Notice Select document type prompt. By default, the radio button for letters is checked, check the radio button next to Labels. Click on Next: Starting Document at the bottom of the Mail Merge pane.
Learn the essential Microsoft Office Skills in these three courses: Word, Excel, and PowerPoint. Apply new and improved features in Excel 2021 and Office 365. How to use Microsoft Word to create, format, and edit documents. Work with styles, templates, tables, and images in Word. Learn to use Microsoft Excel to create, format, and analyze data ...
1. Getting Started with Word Get to know the Ribbon, Quick Access Toolbar, and Backstage view to produce Word 2016 documents. 2. Understanding OneDrive Learn all about working with your Microsoft account and OneDrive. 3. Creating and Opening Documents Learn all about opening existing documents and creating new ones. 4.
Getting Started Steps to open MS word 2010 1. Click on the Start button 2. Highlight Programs 3. Highlight Microsoft Office 4. Click on Microsoft Word 2010. Getting Started How to Create New a Document: 1. Click the File tab and then click New. 2. Under Available Templates, click Blank Document.
Microsoft Word is a computer application program written by Microsoft. It is mainly used to design text for presentation. Our MS Word tutorial includes all topics of MS Word such as save the document, correct error, word count, font size, font style, apply a style, customize a style, page size, page margin, insert header and footer and more.
When you learn the Office basics on your PC, Mac, or mobile device, you'll be able to: Use templates to create professional documents. Express complex ideas and data with SmartArt and Charts. Collaborate in shared documents whether you're working offline, online, or simultaneously with others. Work seamlessly anywhere with your favorite Office ...
I have tried to create a presentation from an outline file i have in MS Word, but my Ppt struggles to do and finally shuts down and sometimes restarts on its own.i tried with a 10 page file to 1 page Why does PowerPoint shut down trying to create a presentation from a word outline file.
AI-enhanced description. This document provides an introduction to using Microsoft Word. It covers launching and closing Word, identifying the interface, typing and saving documents, and reopening saved files. It also discusses basic formatting such as changing font, size, style and color, and paragraph justification, indentation and spacing.
Unlock the full potential of Microsoft Office with this comprehensive training course covering Excel, PowerPoint, and Word. Whether you're a student, professional, or entrepreneur, proficiency in these essential Office applications is key to success in today's digital world.
On the "Get Microsoft 365 Personal Plan" screen, press Skip For Now. If you're offered a free trial, select Try later (or enjoy the free 30-day trial if you're interested).
Microsoft Office support end dates checklist; Add the US Flag into Word, Excel or PowerPoint; Get flag emoji in Microsoft Office with Windows workaround; Microsoft might cop a HUGE fine for EU antitrust violations; Will Microsoft 365 stop working if the plan is not paid? See the world's top companies in Excel
To use Grammarly in Microsoft Office, install Grammarly for Windows by following these steps: Download Grammarly for Windows. Double-click the downloaded file and follow the prompts to complete the installation. In Microsoft Word, Grammarly for Windows will show a list view of suggestions and will let you filter suggestions by category:
Insert Icon and Picture doesn't work in Powerpoint or Word I've lost access to insertion of icons and pictures this morning. When I click on the insert Icon or Picture button, a pop-up window opens but is entirely blank.
Learn how to optimize your presentations in this Copilot in PowerPoint video tutorial. Instantly summarize your slides and add citations for a more efficient workflow. ... Microsoft 365 training. Microsoft security. Accessibility center. Communities help you ask and answer questions, give feedback, and hear from experts with rich knowledge. ...