- Skip to primary navigation
- Skip to main content
- Skip to primary sidebar

- FREE Experiments
- Kitchen Science
- Climate Change
- Egg Experiments
- Fairy Tale Science
- Edible Science
- Human Health
- Inspirational Women
- Forces and Motion
- Science Fair Projects
- STEM Challenges
- Science Sparks Books
- Contact Science Sparks
- Science Resources for Home and School

Paper Chromatography Experiment
March 17, 2021 By Emma Vanstone Leave a Comment
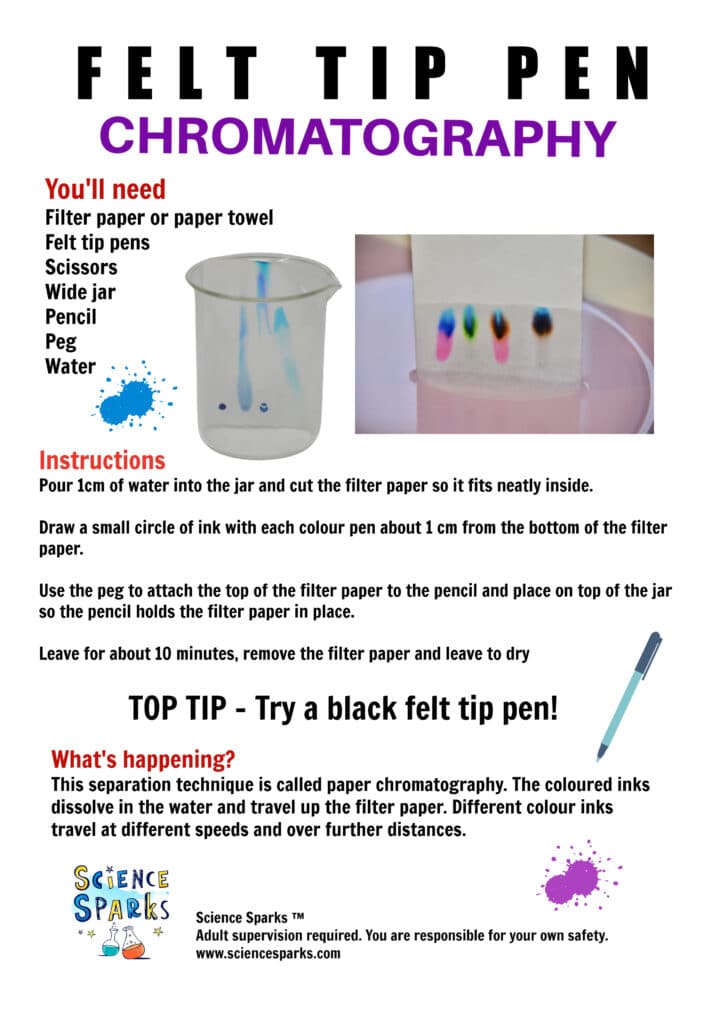
This simple felt tip pen paper chromatography experiment is a great way to learn about this particular method of separating mixtures .
WHAT IS CHROMATOGRAPHY?
Chromatography is a technique used to separate mixtures. Information from a chromatography investigation can also be used to identify different substances.
In chromatography, the mixture is passed through another substance, in this case, filter paper. The different-coloured ink particles travel at different speeds through the filter paper, allowing the constituent colours of the pen ink to be seen.
All types of chromatography have two phases: a mobile phase where the molecules can move and a stationary phase where they can’t move. In the case of paper chromatography, the stationary phase is the filter paper, and the mobile phase is the solvent ( water ).
The more soluble the ink molecules, the further they are carried up the paper.
The video below shows chromatography in action.
You’ll need:
Filter paper or paper towel
Felt tip pens – not washable or permanent
A container – glass, jar or plate
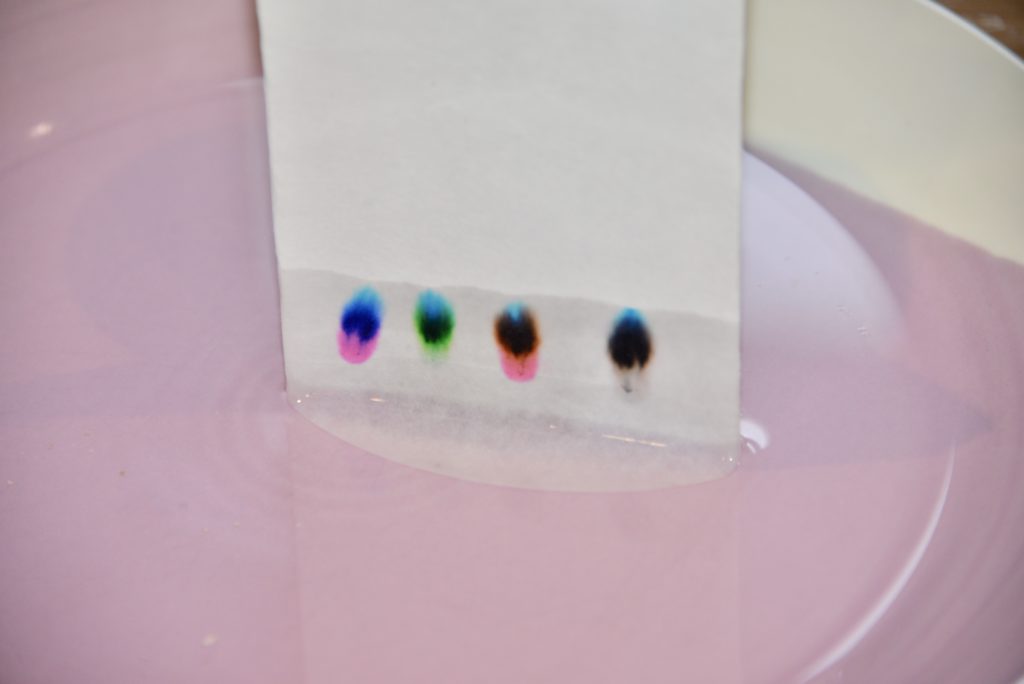
Instructions
Pour a small amount of water onto a plate or into the bottom of a jar.
Find a way to suspend the filter paper over the water so that just the very bottom touches the water. If you do the experiment in a jar, the easiest way to do this is to wrap the top of the filter paper around a pencil, clip it in place, and suspend it over the top of the jar.
Our LEGO holder worked well, too!
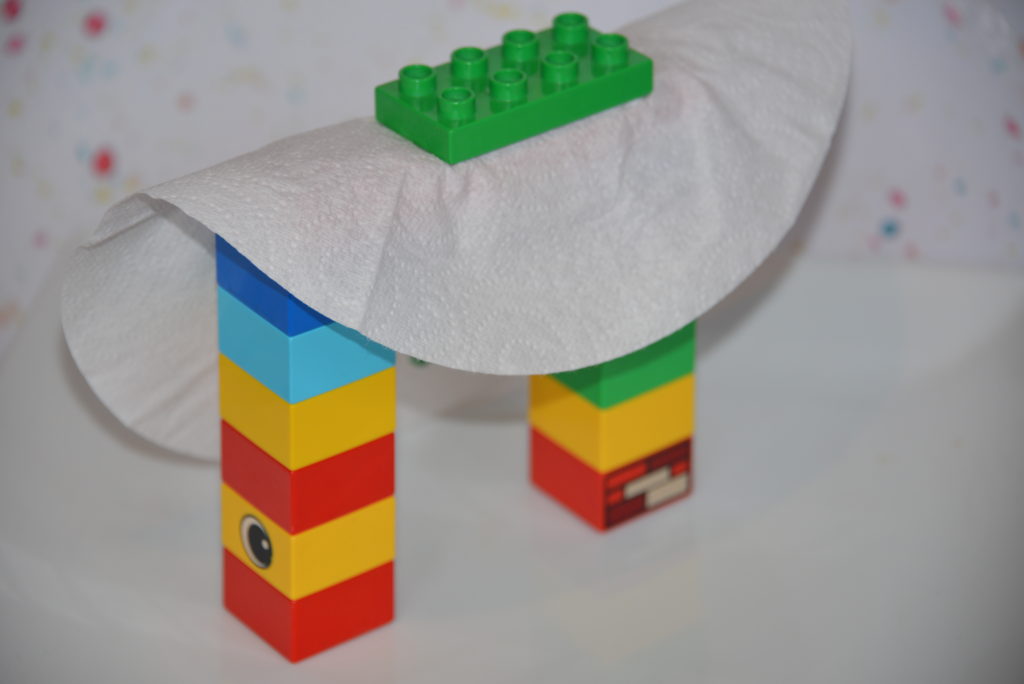
Use the felt tip pens to draw a small circle about 1cm from the bottom of the filter paper with each colour pen you want to test.
Suspend the filter paper in the water and watch as the ink moves up the filter paper.
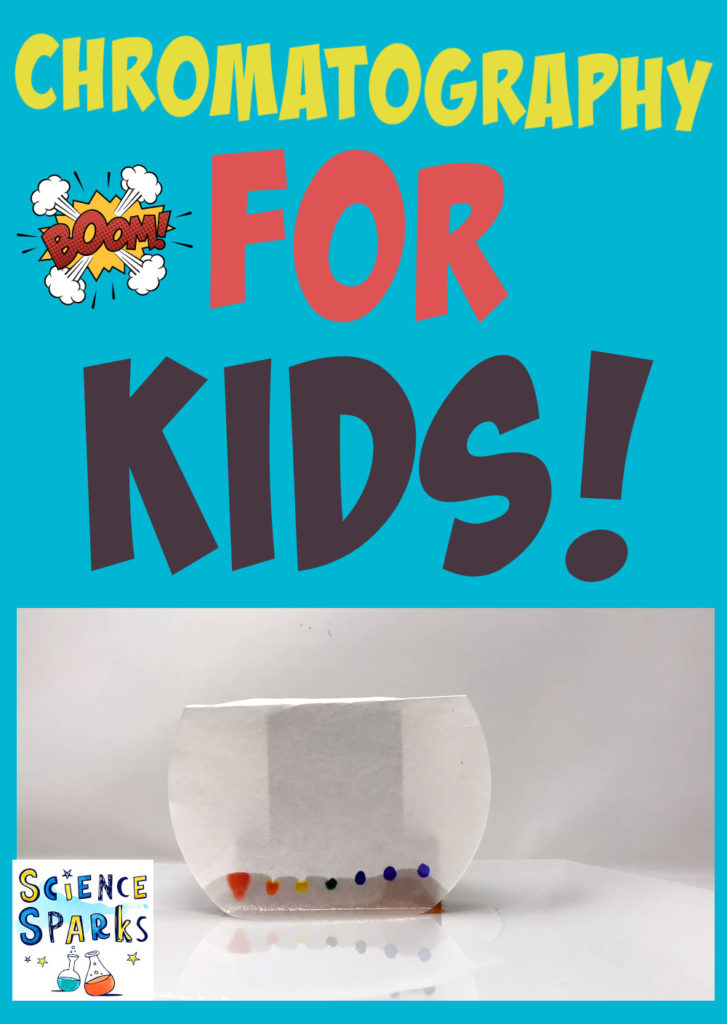
You should end up with something like this! The end result is called a chromatogram.
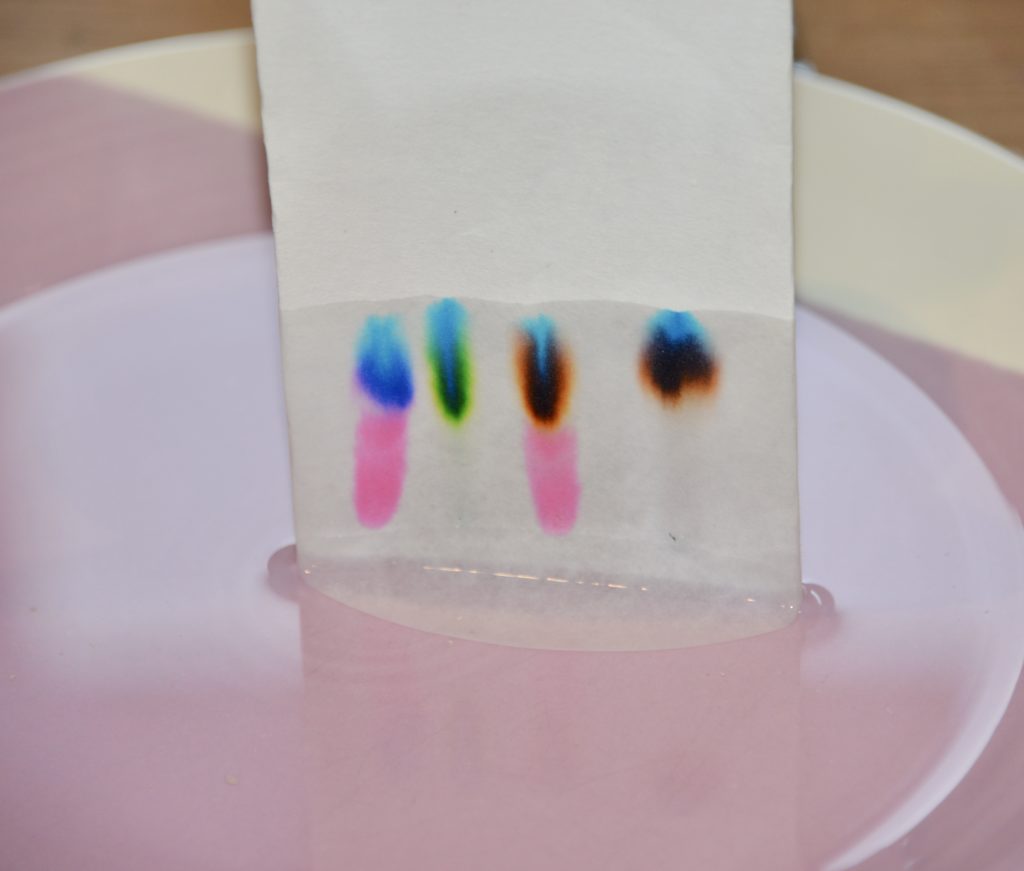
What happens if you use washable pens?
If the inks are washable, they tend to contain just one type of ink, so there is no separation of colour.
Below, only a couple of the inks have separated compared to the non-washable pens above.
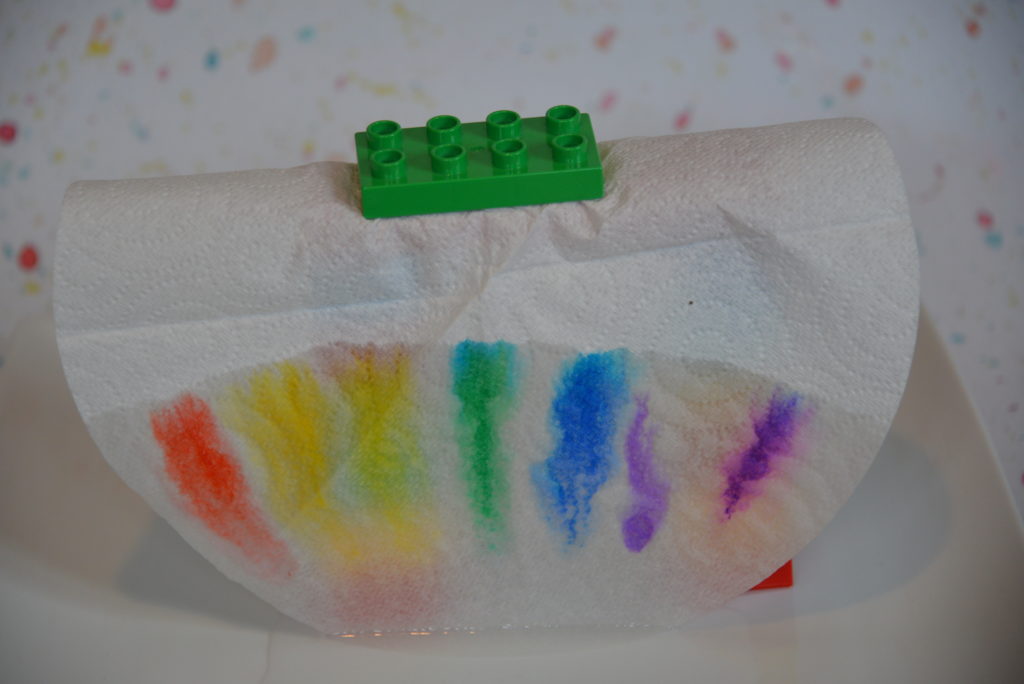
Why does chromatography work?
When the filter paper containing the ink spots is placed in the solvent ( in this case, water ), the dyes travel through the paper.
Different dyes in ink travel through the chromatography filter paper at different speeds. The most soluble colours dissolve and travel further and faster than less soluble dyes, which stick to the paper more.
I’ve created a free instruction sheet and chromatography experiment write up to make the activity even easier.
Extension task
Experiment with different types and colours of pens. Depending on the type of ink used, some will work better than others.
Try chromatography with sweets .
Steamstational also has a great leaf chromatography investigation.
More separation experiments
Clean up water by making your own filter .
Separate water and sand by evaporation .
Make colourful salt crystals by separating salt and water.
Separate liquid mixtures with a bicycle centrifuge .
Last Updated on May 20, 2024 by Emma Vanstone
Safety Notice
Science Sparks ( Wild Sparks Enterprises Ltd ) are not liable for the actions of activity of any person who uses the information in this resource or in any of the suggested further resources. Science Sparks assume no liability with regard to injuries or damage to property that may occur as a result of using the information and carrying out the practical activities contained in this resource or in any of the suggested further resources.
These activities are designed to be carried out by children working with a parent, guardian or other appropriate adult. The adult involved is fully responsible for ensuring that the activities are carried out safely.
Reader Interactions
Leave a reply cancel reply.
Your email address will not be published. Required fields are marked *

Chromatography

Please enable JavaScript

Chromatography is used as a means of separating mixtures . The word itself means ‘colour writing’. Chromatography can separate colours in order to see what colours make up that specific colour.
Chromatography experiment Materials:
- Filter paper
- Markers (different colours)
- Cut the filter paper into a strip long enough to touch the bottom and top of the glass jar
- With a pencil draw a horizontal line 2-3 cm from the bottom of the filter paper
- Using your marker, draw a dot under the line you have just drawn
- Pour 1 cm of your water (solvent) into the jar glass
- Hang the paper into the jar (ensuring that the solvent is below the marker dot)
- Place your rod over the top of the glass jar and wrap the remaining paper around it and secure it under the rod with a paper clip
- When the water has reached the top of the paper, take it out of the jar and allow it to dry
- Repeat the experiments using different coloured markers.

Question and answer
Q: How does this work?
A: The solvent (water) carries the multiple dyes in the ink dot up the paper.
Q: Why are some colours higher up on the paper than others?
A: If the dye is not very soluble, it comes out of the solution early therefore it appears at the bottom. If the dye is very soluble, it is carried by the water further up the paper.
Q: Does this experiment work on all paper?
A: No. The paper you use must be absorbent paper other examples include chromatography paper or paper from the side of a newspaper
Q: What if the dye is not water soluble?
A: If the dye is not water soluble, then you can use alternative solvents such as propanone, alcohol or hexane
What is paper chromatography used for?
- Forensic science: Forensic scientists can use chromatography in order to separate substances in a crime scene
- Art: Artists use chromatography to identify the breakdown of colours in order for them to remake the colours they need
- Food Colourings: food scientists can check that food companies are only using the appropriate food colourings
Chromatography Wordsearch
Kitchen Detective (chromatography experiment)
The aim of the activities is to introduce chromatography as an idea to the children, but also as a way of showing them how science/chromatography can be used a tool to solve real life problems.
This experiment was designed around KS2 / yr 3 classes.
What you’ll need
- Felt tip pens with different colours (Berol or Crayola usually work well)
- Circular filter paper
- Rectangles of filter paper
- Plastic cups
- Pipe cleaner (easily available from stationery/craft suppliers)
To prepare in advance
It is good to test out the activity in advance with different felt-tips pens as some have better splitting patterns than others with different types of filter paper. It is key for the final activity to have different makes of black pen to compare, so it’s good to test different makes of black pen too! It is useful for the final activity to have a splitting pattern of the pen used for the note left behind. The children can then compare the splitting of different pens to this one to identify the culprit.
Activity 1: Starter exercise
To introduce the children to the idea of how chromatography works, a fun task is to let them discover what happens when the folded up filter paper is put in a slightly filled cup of water.
Instructions;
- Draw a shape in the centre of the filter paper. This can be any shape to start with, but symmetric shapes usually lead to more defined patterns. Also make sure the shape is not to big as this will lessen the effect.
- Fold the filter paper in half 3 times (i.e. into 8ths).
- Add a small amount of water to a cup so that the water level is a few centremeters from the bottom of the cup.
- Gently place the folded filter paper in the cup which contains the small amount of water. If the water level is to high or the placement of the filter paper too rough, the full effect will not be seen.
- Once the water has climbed up the filter paper a sufficient amount (i.e. close to covering all the filter paper), remove the filter paper and unfold it. This should then reveal a pattern on the filter paper.
- After the first attempt, its good to let the children to be more creative with the designs in the middle of the filter paper, e.g. using multiple colours etc. But remember to make sure the shapes/drawings are not to big.
It is good to prompt the children into observations as to what is happening. For example how the colours also move up the filter paper and how the green will split into yellow and blue.
Activity 2: Chromatography butterflies
After making the funky patterns on the filter paper it is a fun activity for the children to make Chromatography butterflies.
- Create the pattern as before.
- Leave the filter paper to dry.
- Tie a small amount of pipe cleaner around the centre of the filter paper.
- Can then tie a small amount of string around the centre to hang the chromatography butterflies up!
It is good to introduce the idea of chromatography after the children have had a go with activities 1 and 2. For example describing how scientists use it to investigate what makes up a mixture in a lab or by forensic scientists to investigate clues in a crime scene through looking at the splitting patterns. This is also a good way of building up to the last activity.
Activity 3: Kitchen detectives
In the last activity, you can set the children up to solve the mystery of who stole the (insert item) and left the note behind. It is good to be creative with this to get the children interested and involved. The key behind this activity is to have felt-tip pens which give distinct splitting’s for the children to then compare using chromatography.
Setting the scene. For example someone in the staff room has stolen all the biscuits from the staff room and left a note behind – “you will never catch me”. The note was written in a pen, but who’s pen was it, Mr X or Mr Y or Ms Z? You can then say we did a test using chromatography and it gave this splitting pattern, can you use chromatography to find who’s pen matches that of the note?
- Draw a line a few centre metres above the bottom of the rectangular filter paper (across smallest width) using 1 of the pens.
- Add a small amount of water to a cup.
- Gently place the filter paper in the cup. Remember it is important for this activity to make sure the water level is BELOW the line on the rectangle when the filter paper is added. If not the colours wont move up the filter paper.
- Remove the filter paper just before the water has moved all the way up the filter paper.
- Let the filter paper dry and then label each with a pencil of which/who’s pen was analysed.
- Repeat for each pen to find out who wrote the note.

This work is licensed under a Creative Commons Attribution 4.0 International License.
- Already have a WordPress.com account? Log in now.
- Subscribe Subscribed
- Copy shortlink
- Report this content
- View post in Reader
- Manage subscriptions
- Collapse this bar

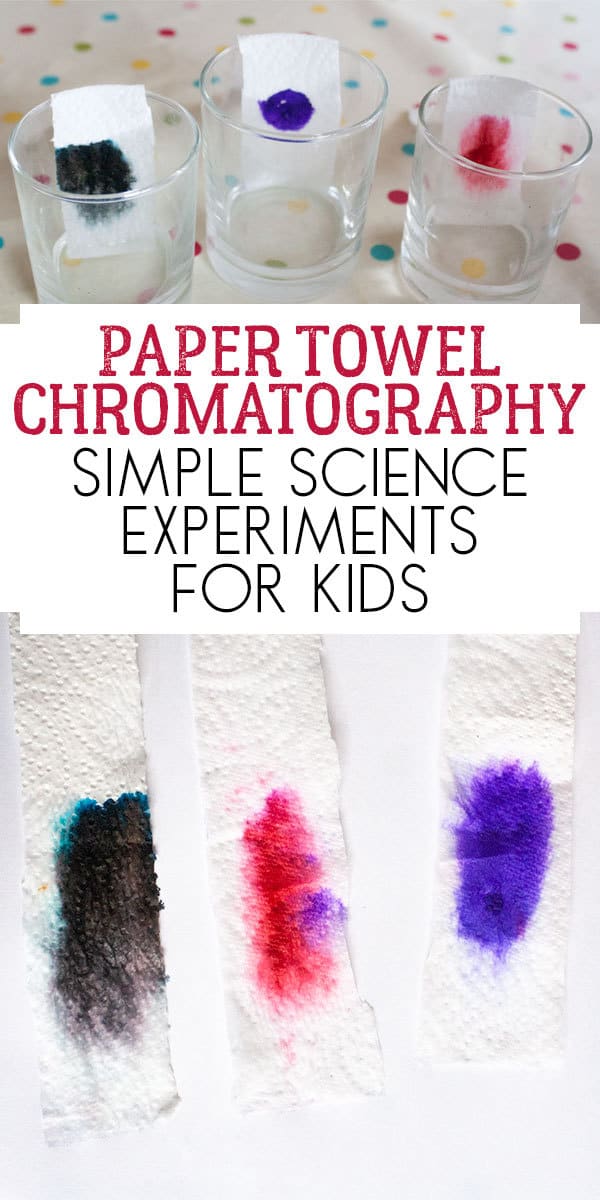
Simple Paper Towel Chromatography Experiment for Kids
One of my favourite experiments to do with the younger students when I taught secondary school science was Chromatography – of course in my lab I had all of the equipment I needed including filter paper, different mixed up inks and solvents to use. But it’s so easy to do at home and my kids were fascinated by this very simple Kitchen Science experiment, science at home is so much fun and we’re taking part in the A to Z of science organised by Frogs Snails and Puppy Dog Tails this month check out all of the details for more at home science with kids.
When we were painting the kids asked for black paint and unfortunately we had run out of it and that we could mix it up – I said yes but it’s not easy to make as black isn’t really a colour and neither is white so I set about proving it to them with a black pen to see what colours it was actually made up of.
What You'll Find on This Page
Materials needed for this Simple Chromatography Experiment
Paper Towel
Water Soluble Marker Pen (any washable marker) – black plus other colours of your child’s choice
How to do this Paper Towel Chromatography Experiment

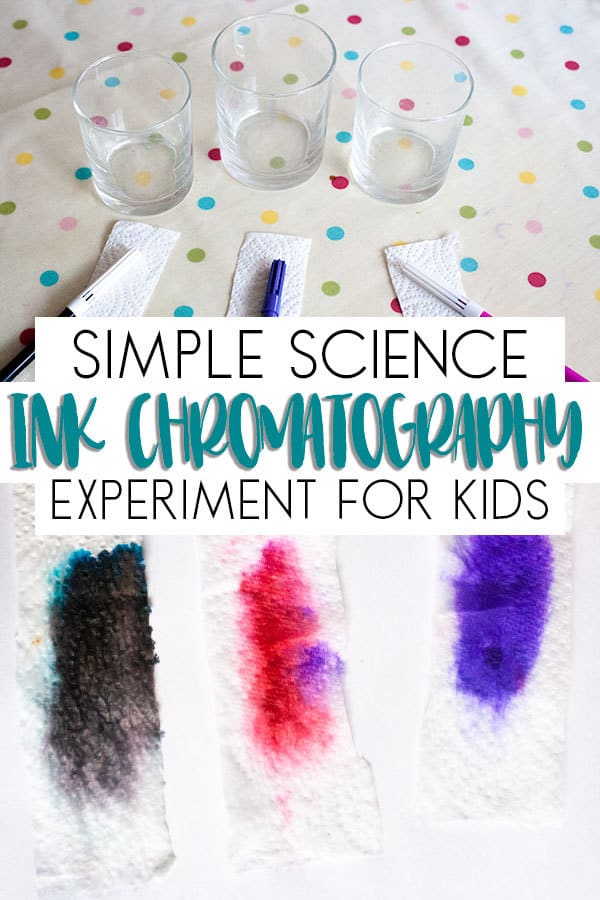
With a kitchen paper towel we cut up 3 strips and selected 3 different coloured marker pens – a black plus a pink and a purple.
I explained that we were going to split the ink in the pens into the different colours that it was made of using a method called chromatography and then I asked what they thought would happen. My eldest said that the pink would split into a white and a red cause that’s what made pink, the younger one joined in and suggested that purple would be red and purple. But black was black and from trying to make the colour with their paints they couldn’t do it.

On the strips of paper towel I drew a circle around an inch from the bottom for them to colour in with the different colours and filled up a glass with around 1/4 inch of water.
They then put the paper towel into the water – make sure that you don’t let the ink spot touch the water and we folded the paper over the glass to hold it in place.

As we watched the water travelled up the paper towel through the ink spot – as it went up through the ink spot it split the colours that made up the different inks and headed up the paper.

When the ink had travelled to the paper at the top of the glass we removed it and placed it on a sheet of white paper to dry and then looked at the colours.
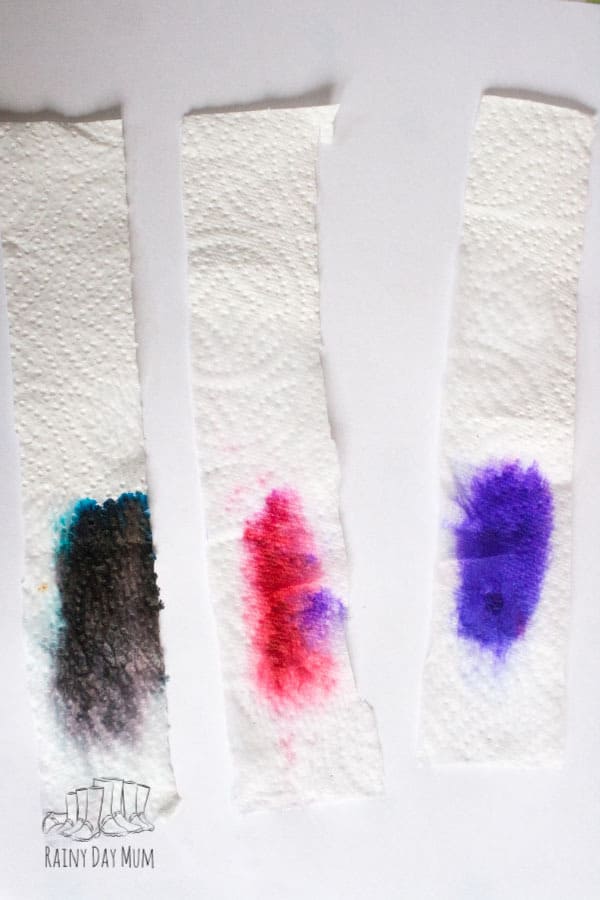
The Purple ink was a true purple, the pink was made up of different colours of pink and red that travelled different distances but the black ink was the most revealing and the kids loved looking at the dried paper towel.
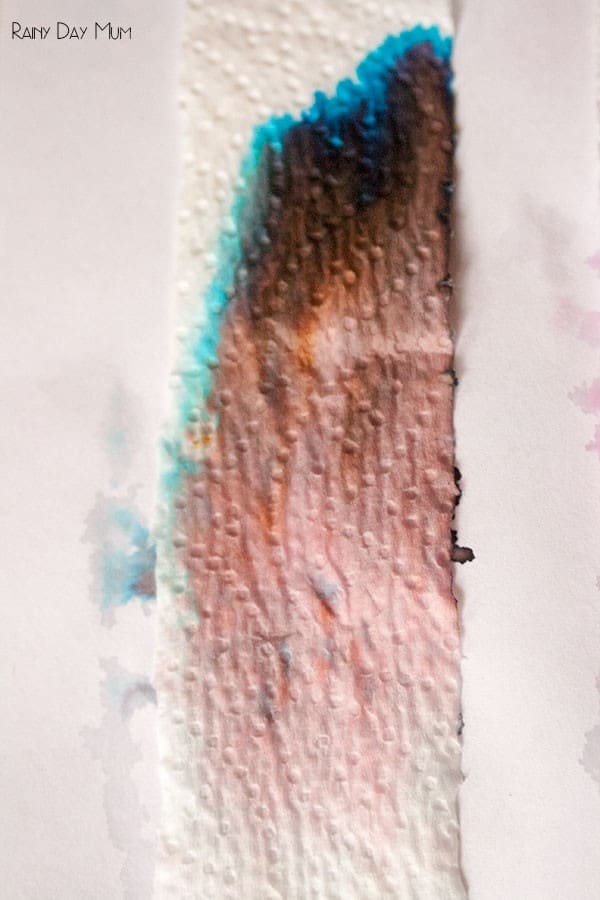
How Chromatography works
As I said I used to teach this with my secondary school students – using different ink mixes – black ink works really well as an example because it is made up of different colours – each of the colours has a different polar value.
With paper Chromatography, the paper is non-polar none reactive to the water solvent as it is made up of cellulose. When the ink meets the water the more polar the colour is further it will travel through the paper in our example the red is the least polar staying near to where the black spot was – the yellow the next and then the blues most polar travelling up the furthest from the black spot.
Try these other easy Science Experiments to do at Home
Growing Crystals without Borax
Exploring Plant Structure with Celery
Seeing how roots grow with beans in a jar experiment
Testing Materials – what makes balls bounce
Energy transfer with a cotton reel car
Viewing the Constellations – with a show box viewer
Exploring how colours are made (no mess experiment using light)
Sea Turtle Conservation Lessons away from the Beach
A great extension of the experiment is to collect all of the different makes of black ink washable markers that you have in the house and repeat the experiment to see what different colours each of the inks are made from.

Don’t forget to check out the rest of the A to Z of Science Experiments for kids at Frogs and snails and puppy dog tails.
Pin this Simple Paper Towel Chromatography Experiment to Do Later
One Comment
What a brilliant idea, I’m going to show my kids this in the week.
Leave a Reply Cancel reply
Your email address will not be published. Required fields are marked *
Save my name, email, and website in this browser for the next time I comment.
This site uses Akismet to reduce spam. Learn how your comment data is processed .
- Skip to primary navigation
- Skip to main content
- Skip to primary sidebar
- Skip to footer
B-Inspired Mama
Kids Crafts · Play & Learning Activities · Fun Food · Creative Parenting Tips
Super Easy Marker Chromatography Experiment for Kids
By Krissy of B-Inspired Mama 2 Comments
Disclosure: This site contains affiliate links; as an affiliate and Amazon Associate, I earn from qualifying purchases. Read my full disclosure policy for more information .
Sharing is caring!
Disclosure: This blog post, contributed by Crystal of The Science Kiddo , contains affiliate links. As an affiliate and Amazon Associate, I earn from qualifying purchases at no additional cost to you. Please read my full disclosure policy for more information.
Many of our favorite kids activities are those that combine the magic of science with the flare and creativity of art. And marker chromatography is an easy science experiment that lets kids create beautiful artwork they can displayed as-is or use to make other colorful craft.
Explore Art & Science with Marker Chromatography for Kids!
This marker chromatography experiment is so quick and easy. Plus, it requires minimal materials and therefore minimal cleanup, yet it keeps the kids engaged and learning! Let’s check it out…

Marker Chromatography Science Experiment Supplies
The best thing about this kids science experiment is that you probably have everything you need right around the house. Here is all you need:
- white coffee filters
- washable markers (like Crayola markers ; not Sharpie or permanent markers)
- wooden craft stick (or a sturdy ruler )
- binder clip (or strong chip bag clip , utility clip , or even a clothespin )
- mason jar with an 1-2 inches of water inside (or a tall clear plastic cup )
- paper towel
Now, if you can get your hands on some sheets or strips of chromatography paper (also known as filter paper ), you can obviously use that. But everyday coffee filters work, too.
Marker Chromatography Experiment Instructions
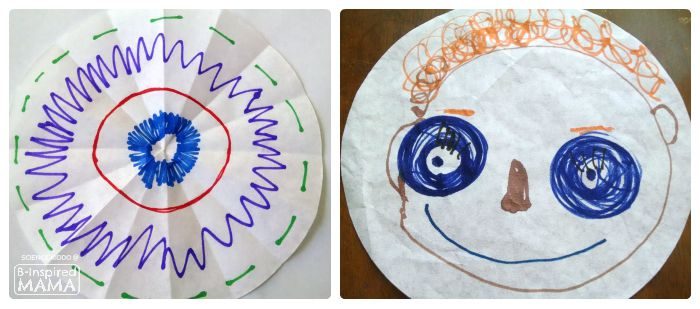
First, have your child use colored marker to draw a design on a coffee filter (or chromatography paper). Using dark, bright colors will yield the best results. The design can be circular or asymmetrical, whatever you feel inspired to do!
Fold the coffee filter in half and then in half again and again until it is a skinny triangle, narrow enough to fit inside your jar. Then use the binder clip to clip the top (straight edge) of the skinny triangle coffee filter onto the center of the craft stick.
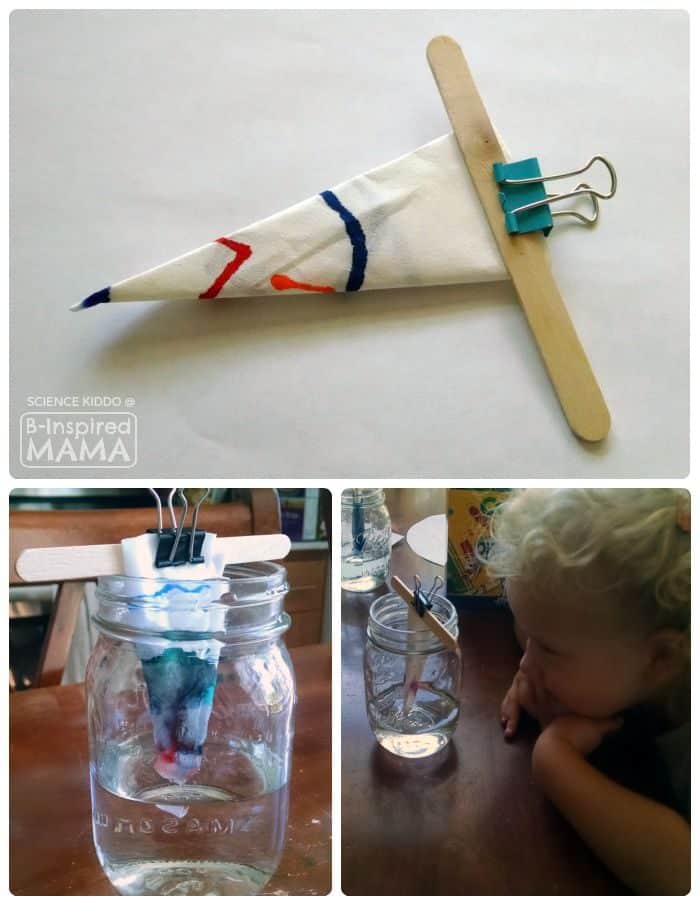
Place the pointed end of the coffee filter triangle into the jar of water and let the craft stick rest across the top of the jar to hold it in place. Make sure the tip of the coffee filter triangle is touching the water and add a small amount of water, if necessary.
Have your child observe how the paper draws water up from the bottom of the jar. They will start to see the colors separate and spread!
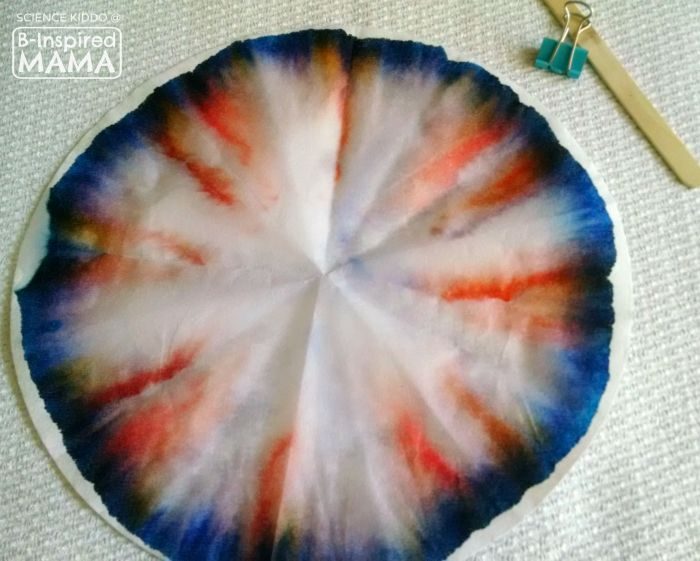
When the water line reaches the top of the paper, pull it out, unfold it, and lay it on a paper towel to dry.
How to Make Chromatography Art Flowers & Butterflies
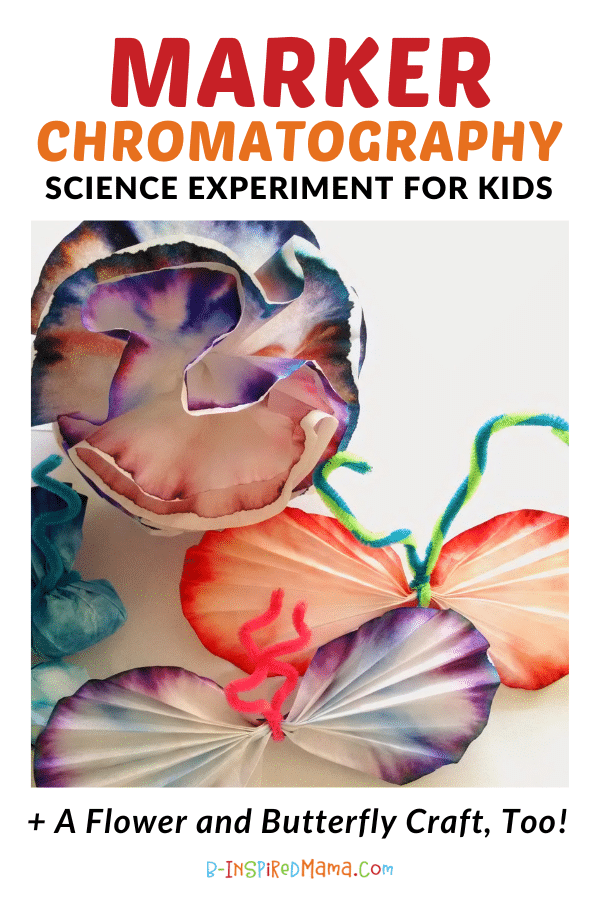
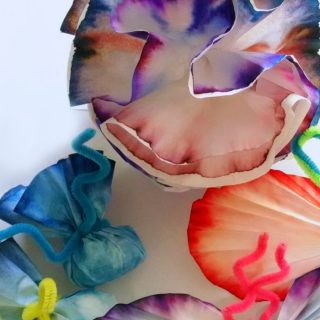
After the colorful coffee filter is completely dry, you can display your chromatography art as is or use it to make a cute craft, like colorful chromatography flowers or butterflies.
You only need one crafts supply to turn your chromatography coffee filters into flowers and butterflies: pipe cleaners !
To Make a Chromatography Butterfly:
Fold your coffee filter accordion style, then twist a pipe cleaner around the middle before unfolding the wings. Trim and bend the ends of the pipe cleaner into cute little butterfly antennae.
To Make a Chromatography Flower:
Place 2-3 coffee filters on top of one another, then fold them in half and then in half again. Pinch the pointed end and wrap it tightly with the end of a pipe cleaner. Then separate and unfold the coffee filters a bit to form the flower.
The Science Behind Marker Chromatography
According to Britannica Kids , paper chromatography is a “technique for separating the components, or solutes, of a mixture on the basis of the relative amounts of each solute distributed between a moving fluid stream, called the mobile phase, and a contiguous stationary phase. “ In other words, it is a way to separate parts of a mixture based on their rate of movement.
So, for our marker chromatography experiment, our marker ink is a mixture of pigments. Even though it looks like just one color, it actually has many different color pigments, some heavier and some lighter, that travel at different speeds as the water (our solvent) moves them up through the paper. The heavier pigments will separate out first and move more slowly, while the lighter pigments keep moving faster up the paper, creating the tie-dyed or washed out effect. Try to count how many different colors you see on your final product!
Paper chromatography is used every day by industrial and forensic scientists in professional laboratories. This marker chromatography experiment is an easy and safe way to play scientist and artist with your child!
Marker Chromatography Extensions on Learning
- Compare Rates of Absorption — Use different types of filter paper to experiment with different rates of absorption or flow.
- Compare Different Solvents — Set up separate chromatography experiments, one with water like above and the other using isopropyl alcohol instead of water. Try each one with water-based markers . Then try each one with permanent markers instead.
- Explore Color Theory — Use only markers in primary colors (red, yellow, and blue) to see how the colors mix to make secondary colors (orange, green, purple).

Full Marker Chromatography Experiment
Marker Chromatography Experiment for Kids
- 16 ounce mason jar (or tall clear plastic cup, with 1-2 inches of water inside)
- binder clip (or strong bag clip, utility clip, or clothespin)
- wooden craft stick (or sturdy ruler)
- washable markers
- white coffee filter
- paper towels
- Have child use washable markers to draw a design on white coffee filter . (Dark, bright colors work best, but any design works.)
- Fold coffee filter in half and then in half again and again until it is a skinny triangle, narrow enough to fit inside the jar. Use binder clip to clip the top (straight edge) of the coffee filter triangle onto the center of the craft stick.
- Place pointed end of coffee filter triangle into the jar of water and let the craft stick rest across the top of the jar to hold it in place. Make sure the tip of coffee filter triangle is touching the water. Add water, if necessary.
- Have child observe how the colors separate and spread as the water travels up through the coffee filter triangle.
- When the water line reaches the top of the coffee filter triangle, pull it out, unfold it, and lay it flat on paper towels to dry. After completely dry, display marker chromatography art as is or use to make crafts.
The Science Behind Marker Chromatography:
Marker chromatography extensions on learning:, marker chromatography supplies on amazon:.
Get everything you need to do your own marker chromatography experiment or make your own chromatography art right on Amazon…

Kids Chromatography Kits & Science Sets on Amazon:
Or, if you’re not up for gathering all of the supplies yourself, grab one of these paper chromatography science kits. Or another kids science experiment sets.
Plus, find more kids science experiment sets in B-Inspired Mama’s Amazon Shop: Fun Finds for STEM Learning
Like this Kids Marker Chromatography Activity? Save It & Share It!
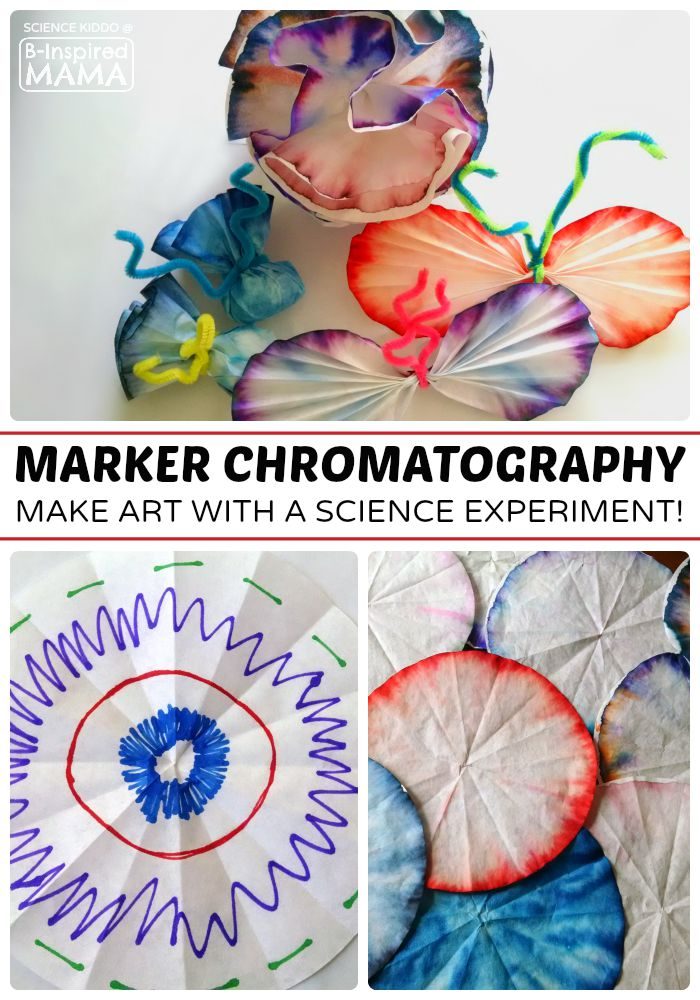
Don’t forget to save this cool chromatography art project to come back to later. And share it with friends! Simply use the buttons at the top or bottom of this post. Or, click here: Share on Facebook | Tweet It | Pin It | Email to a Friend
More Kids Science Experiments from The Science Kiddo:
- Rainbow Paper Color Science Experiment for Kids
- Lava Lamp Density Experiment for Kids
More Science Ideas from B-Inspired Mama:
- 5 Fun Color Mixing Experiments for Preschool Kids
- Snowstorm in a Jar Science Experiment
- 28 Fun Valentine’s Day Science Experiments
Crystal is a homeschooling mom of two blondies. After giving up an academic career in chemistry to stay home with her kids she decided to launch The Science Kiddo to focus on doing science experiments with her children. She writes about science and math activities for kids, early childhood science education, homeschool, and carefree living in the city with kids.
Get more fun ideas + a free gift.
Sign up for the newsletter to get MORE creative, kid-friendly ideas and we'll send you a FREE gift - Printable Conversation Starters for Kids and Parents - right in your inbox TODAY!
Great! Now, pop on over to your email to confirm and download your printable.
There was an error submitting your subscription. Please try again.
About Krissy of B-Inspired Mama
Former M.Ed Art Teacher. Current Blogger & Social Media Influencer. Always Crazy & Creative Mama of 3.
Reader Interactions
April 8, 2018 at 11:10 PM
How long do you leave it in the water in order for the color to spread all the way around the edge?
Krissy of B-Inspired Mama says
April 9, 2018 at 2:11 PM
It varies with the specific coffee filter you use and the type of markers. But it shouldn’t take more than a few minutes.
Leave a Reply Cancel reply
Your email address will not be published. Required fields are marked *
This site uses Akismet to reduce spam. Learn how your comment data is processed .
Follow Along on Social Media:
Browse by category:, browse by date:.
Disclosure: This Site is a participant in the Amazon Services LLC Associates Program and Influencer Program. As an Amazon Associate I earn from qualifying purchases (without the cost being higher for you).
Rate This Recipe
You'll need JavaScript enabled to experience the full functionality of this site. Please enable JavaScript by following the instructions at enable-javascript.com .
Sorry, the browser you're currently using is not supported by this site. Please upgrade your browser by following the instructions at browser-update.org .

Chromatography Activity (Year 5)
Write a review

Choose your format:
Save to Your Lessons
Save to Homework
Share resource
Your download limit has been reached!
Check out our FAQs for more info.
This activity is a great introduction to chromatography. Children will use felt tip pens and filter paper to observe how the ink separates in water.
- Key Stage: Key Stage 2
- Subject: Science
- Topic: Properties and Changes
- Topic Group: Properties of Materials
- Year(s): Year 5
- Media Type: PDF
- Resource Type: Activities & Games
- Last Updated: 25/10/2023
- Resource Code: S2WAT311
- Curriculum Point(s): Use knowledge of solids, liquids and gases to decide how mixtures might be separated, including through filtering, sieving and evaporating.
Related Topics:
Other Teachers Downloaded...

Food Chains — Fill in the Blanks (Year 4)
- Animals, Including Humans
- Key Stage 2 Science

Food Chains (Year 4)

How Sound is Made — Reading Comprehension (Year 4)

Predators and Prey (Year 4)

Parts of a Flower Anagrams (Year 5)
- Living things and Habitats

Pollination and Fertilisation — Correct the Explanation (Year 5)
No reviews (yet!)
Related Resources

Separating Mixtures (Year 5)
- Properties and Changes

Can You Separate This Mixture? (Year 5)

Properties and Changes — Milk and Vinegar (Year 5)

Grouping Transparent, Translucent and Opaque Materials (Year 5)

Properties and Changes — Going Separately (Year 5)

Bicarbonate of Soda and Vinegar Investigation (Year 5)

Making a Saturated Solution (Year 5)

Properties and Changes — Salt Water Solution (Year 5)

Investigating Melting (Year 4)
- States of Matter

Properties and Changes — Grouping Conductors and Insulators (Year 5)

Properties and Changes — Making Bread (Year 5)

Grouping Magnetic Items (Year 5)
Cookies are disabled on your browser. This means some features of the site won't be fully available to you.
CGP uses cookies to give you a smooth shopping experience and to help us understand how well our site is working. To agree to us using all cookies, click 'Accept', or to reject optional cookies click 'Customise'.
Accept cookies Customise cookies

COMMENTS
This simple felt tip pen paper chromatography experiment is a great way to learn about this particular method of separating mixtures. WHAT IS CHROMATOGRAPHY? Chromatography is a technique used to separate mixtures. Information from a chromatography investigation can also be used to identify different substances.
Q: Does this experiment work on all paper? A: No. The paper you use must be absorbent paper other examples include chromatography paper or paper from the side of a newspaper. Q: What if the dye is not water soluble? A: If the dye is not water soluble, then you can use alternative solvents such as propanone, alcohol or hexane
The aim of the activities is to introduce chromatography as an idea to the children, but also as a way of showing them how science/chromatography can be used a tool to solve real life problems. This experiment was designed around KS2 / yr 3 classes. What you'll need . Felt tip pens with different colours (Berol or Crayola usually work well)
How to do this Paper Towel Chromatography Experiment With a kitchen paper towel we cut up 3 strips and selected 3 different coloured marker pens - a black plus a pink and a purple. I explained that we were going to split the ink in the pens into the different colours that it was made of using a method called chromatography and then I asked ...
C2.1g describe the techniques of paper and thin layer chromatography; Scotland. Higher. SQA Chemistry. 3. Chemistry in society (e) Chemical analysis (i) Chromatography. Chromatography is a technique used to separate the components present within a mixture. Chromatography separates substances by making use of differences in their polarity or ...
The Science Behind Marker Chromatography. According to Britannica Kids, paper chromatography is a "technique for separating the components, or solutes, of a mixture on the basis of the relative amounts of each solute distributed between a moving fluid stream, called the mobile phase, and a contiguous stationary phase." In other words, it is a way to separate parts of a mixture based on ...
This Chromatography STEM activity pack is full of everything you need to teach your children about chromatography. Once you've hit download, you'll have unlimited access to a brilliant teacher-made PowerPoint as well as a handy worksheet to go along with it. The PowerPoint is the main teaching material included in this resource and it's packed full of information about chromatography ...
Experiment with Paper Chromatography. Chromatography is a technique used to separate a mixture or solution into its individual components. There are several different types of chromatography, including thin-layer, column, and paper chromatography. Paper chromatography uses materials that make it accessible for chemistry exploration at the K-12 ...
Browse our comprehensive range of KS2 Science resources. You'll find topics such as Physical Processes, Living Things and Properties of Materials. ... This activity is a great introduction to chromatography. Children will use felt tip pens and filter paper to observe how the ink separates in water. ... Reversible Change Experiments (Year 5 ...
Use this resource to allow students the opportunity to develop prediction skills before experimenting and learning about chromatography in this simple, yet effective, experiment. Twinkl Australia 5 - 6 Australian Curriculum Resources Science Science Understanding Chemical Sciences Reversible or Irreversible Changes Mixtures