Line Drawing: A Guide for Art Students
Last Updated on September 1, 2023
When we first picked up a pen or pencil and started making marks on paper, we began with line. Whether self-taught, through trial and error, or guided by others, we learned how line defines form, creates structure, divides a frame, traces contour, creates tonal variation (cross-hatching, for example) and leads the eye from one part of a work to another. Initially a mechanism for getting outlines onto paper – identifying edges – we begin to applaud lines for their own merit: celebrate their presence…whether a quiet flick of charcoal on paper or a streak of graphite.

This article contains exercises for Art students who wish to produce contour line drawings, cross contour drawings, blind drawings and other types of line drawings. It is a teaching aid for high school Art students and includes classroom activities, a free downloadable PDF worksheet and inspirational artist drawings.

Blind Contour Drawing
Definition : A blind contour drawing contains lines that are drawn without ever looking at the piece of paper. This forces you to study a scene closely, observing every shape and edge with your eyes, as your hand mimics these on paper. The aim is not to produce a realistic artwork, but rather to strengthen the connection between eyes, hand and brain: a reminder that, when drawing, you must first learn to see.
Blind Drawing Exercises : Blind drawing is an excellent way to start a high school Fine Art programme. Drawing wobbly lines that bear little resemblance to the chosen object is relaxing and stress-free. Often, a classroom bubbles with laughter at the unexpected results. Blind drawing stretches the arms and soul; eases you into observational drawing without fear.
READ NEXT: How to make an artist website (and why you need one)

Gesture Drawing / Timed Drawing / Movement Drawing
Definition : A gesture drawing is completed quickly – often in short timed durations, such as 20, 30, 60 or 90 seconds – using fast, expressive lines. Gesture drawings capture basic forms and proportions – the emotion and essence of a subject – without focusing on detail. Due to their rapid completion, they are a great way to record movement and action, as well as increase your drawing speed, confidence and intuitive mark-making skill. Gesture drawings are best completed with smooth, easily applied mediums (chunky graphite pencils, charcoal sticks, pastels, soft brushes dipped in Indian ink, for example), without the use of an eraser. They are often completed on large, inexpensive sheets of paper, where you can move your arm fluidly, be bold with mark-making, and not worry about mistakes. As with blind drawings, gesture drawing is an ideal warm-up activity.
Gesture Drawing Exercises : When you begin investigating your subject matter in the initial phase of a high school Art programme, it can be helpful to make several first-hand gestural drawings. The best of these can be selected for your final portfolio (taking advantage of a photocopier or digital camera to reduce in size, if necessary). A small still life scene can be depicted just as easily as a large moving form.
A gesture drawing by Rembrandt Harmenszoon van Rijn :

A gestural figure drawing by Chelsea Stebar :

Continuous Line Drawing
Definition : A continuous line drawing is produced without ever lifting the drawing instrument from the page. This means that, in addition to outlines and internal shapes, the pencil must move back and forth across the surface of the paper, with lines doubling back on each other, so that the drawing is one free-flowing, unbroken line. To avoid the temptation to erase lines, it can be helpful to complete a continuous line drawing with an ink pen, varying the line weight, as needed, to indicate perspective and areas of light and shadow. Like the drawing methods described above, this drawing method develops confidence and drawing speed, and encourages your eyes and hand and brain to work together. Continuous line drawings work best with in-depth observation of your subject, without interference from your thinking mind. According to Smithsonian Studio Arts :
…continuous line drawing is actually a very powerful way to create a piece that is both hard edged and fluid, representational and abstract, rational and emotional all in one.
Continuous Line Drawing Exercises : This drawing method is great for sketchbooks and drawing from life. It can be an excellent starter activity, with drawings completed on large, inexpensive paper that can be scanned / edited / cropped and used in other ways within your projects.
An A Level Art sketchbook page by Lucy Feng from Hereford Sixth Form College, Herefordshire, UK:

Contour drawing
Definition: A contour drawing shows the outlines, shapes and edges of a scene, but omits fine detail, surface texture, colour and tone (‘contour’ is French for ‘outline’). According to Wikipedia :
The purpose of contour drawing is to emphasize the mass and volume of the subject rather than the detail; the focus is on the outlined shape of the subject and not the minor details.
The illusion of three-dimensional form, space and distance can be conveyed in a contour drawing through the use of varied line-weight (darker lines in the foreground / paler lines in the distance) and perspective.
Contour Drawing Exercises : Using line alone eliminates the challenge of applying tone, colour and mediums; and instead focuses attention solely upon shape and proportion. After completing warm-up activities such as blind and gesture drawings, slower, more formal contour drawings can be an excellent way to begin more realistic representations of your subject matter. Used intermittently throughout projects, contour drawings can also be helpful for the student who needs to work faster .
A contour drawing by Ultima Thule :

Cross contour drawing
Definition : A cross contour drawing contains parallel lines that run across the surface of an object (or radiate from a central point), such as those that appear on a topographical map or a digital wireframe. The lines can run at any appropriate angle (sometimes at multiple angles) and may continue across objects and into the background. Cross contour drawings typically follow the rules of perspective, with lines drawn closer together in the distance and further apart in the foreground. In this type of drawing, the illusion of three-dimensional volume is created entirely with line.
Cross Contour Drawing Exercises : This is an excellent way to gain familiarity with the volumes and three-dimensional forms in your project, producing analytical cross contour drawings that are suitable for sketchbooks or early preparatory sheets.
Cross contour drawing of a shell by Matt Louscher :

Cross contour hand drawings by (from left) Mathew Young, Ryan Acks and Lea Dallaglio while studying at the San Jose State University , Department of Art and Art History:

Cross contour drawings by Daniel Servin (left) and Alfred Manzano, completed while studying AP Studio Art at Mt Eden High School in Hayward, California, USA:

A wireframe contour drawing exercise by Year 9 student Seonmin Lee from ACG Parnell College , Auckland, New Zealand:

Planar analysis drawing
Definition : A planar analysis drawing simplifies complex curved surfaces into flat planes, using straight lines. This process helps students to think about the underlying structure of objects and results in an analytical drawing, that is rather mechanical in appearance.
Planar Analysis Drawing Activity : This can be a great introductory drawing exercise, especially if you are moving towards Cubism or abstracting scenes into geometric form.
A planar analysis portrait completed by a student of Cat Normoyle :

Wire sculpture drawings
Definition : Wire can be cut and bent into shapes with pliers to create three-dimensional ‘drawings’, often resulting in a work filled with flowing, curved lines. These wire sculptures can be attached to a two-dimensional frame or a flat surface, hung in the air, or be left free-standing, changing in appearance as a viewer moves around the room. Due to their flexible nature, wire sculptures often move slightly in the wind, adding an extra interactive element to the work.
Wire Sculpture Line Drawing Exercise : This is an excellent activity for middle school students and for high school students, if it relates specifically to your project (and does not interfere with postage requirements, for those who need to post work away for assessment). Small wire experiments, using light-weight wire, can also be mounted to sketchbook pages.
Wire sculptures completed by the students of Amy Bonner Oliveri from Allendale Columbia School, Rochester, New York, USA:

Hatching, cross hatching, and other line techniques
As well as representing contours, line can also be used to apply tone (light and shadow) to a drawing. This can be done by altering the:
- Gap between the lines
- Lightness / darkness of the line
- Thickness of the line
There are many line techniques can be used to create tone, as illustrated in the worksheet below. Common techniques include:
- Small dashes
- Hatching (long, parallel lines on an angle)
- Cross-hatching (parallel lines at right angles)
- Stippling (dots)
- Small crosses
- Small circles
The angle that these techniques are applied may remain constant within a drawing, or it may change in response to the angle and direction of the forms. For example, cross-hatching may flow around the surface of an object in a similar direction as cross contour lines. These techniques are also a great way to create the illusion of texture (see our article about observational drawings ).
Line Techniques Worksheet : The worksheet below has been provided by the Student Art Guide for classroom use only and may be issued freely to students (credited to studentartguide.com), as well as shared via the social media buttons at the bottom of this page. It may not be published online or shared or distributed in any other way, as per our terms and conditions . The full size printable worksheet is available by clicking the PDF link below. This worksheet is suitable for middle school students, or senior students who have not had prior experience with line techniques.

Click here to open the full size worksheet as a printable PDF .
An Indian Ink still life drawing by Kirana Intraroon, completed while in Year 10 at ACG Strathallan College , Auckland, New Zealand:

An A* GCSE Art sketchbook page by Samantha Li :

A final GCSE Art piece by Hannah Armstrong :

Artist line drawings
Here is a collection of line drawings from famous and less well known artists, to inspire high school Art students and teachers. This section is continually updated. Enjoy!
Pablo Picasso :

Andy Warhol :

David Hockney :

Vincent van Gogh :

Leonardo da Vinci :

Aaron Earley :

Peter Root :

Maurizio Anzeri

Karolina Cummings :

Daniel Mathers

Roz McQuillan :

Wang Tzu-Ting :

Nina Smart :

Andy Mercer :

Vital Photography :

Matthew Dunn :

Rod McLaren :

Andreas Fischer :

Nicholas Weltyk :

Liliana Porter :

Hong Chun Zhang :

Bruce Pollock :

David Eskenazi

Matt Niebuhr :

Albrecht Durer :

Victoria Haven :

Carne Griffiths :

William Anastasi :

Charles Avery

Did you enjoy this article? You may wish to read 11 Tips for Producing an Excellent Observational Drawing .

Amiria has been an Art & Design teacher and a Curriculum Co-ordinator for seven years, responsible for the course design and assessment of student work in two high-achieving Auckland schools. She has a Bachelor of Architectural Studies, Bachelor of Architecture (First Class Honours) and a Graduate Diploma of Teaching. Amiria is a CIE Accredited Art & Design Coursework Assessor.
JOIN OVER 21,000 PEOPLE WHO RECEIVE OUR FREE NEWSLETTER
You will be notified first when free resources are available: Art project ideas, teaching handouts, printable lesson plans, tips and advice from experienced teachers. What are you waiting for?
Email Address*
We send emails monthly. And don’t worry, we hate spam too! Unsubscribe at any time.

- Skip to primary navigation
- Skip to main content
- Skip to primary sidebar
Teaching Expertise
- Classroom Ideas
- Teacher’s Life
- Deals & Shopping
- Privacy Policy
Inspiring Creativity: 24 Line Art Activities For Kids
April 12, 2023 // by Seda Unlucay
From simple line exercises to intricate patterns, these 24-line art projects encourage children to explore different techniques, materials, and styles. They are designed to offer a diverse range of projects suitable for kids of all ages, skill levels, and interests. As kids experiment with various types of lines and compositions, they will develop problem-solving skills, spatial awareness, and artistic confidence. Dive into these engaging line art activities and watch your students’ creativity flourish!
1. Elements of Art Scavenger Hunt
In this scavenger hunt activity, kids search for various line types in their surroundings, art galleries, or works of various artists. Children can gain an understanding of the role of line in visual art by exploring its versatility in expressing movement, structure, emotion, form, energy, and tone.
Learn More: Childhood 101
2. Art Project with Lines
Let kids unleash their inner artist by creating shapes with repeating lines while exploring repetition in art. This simple yet effective activity is suitable for kindergarten and first-grade students, providing instant gratification while requiring minimal materials.
Learn More: Art Is Basic
3. Line Art With Dynamic Colors
Guide children to practice scissor-cutting skills by creating various lines and shapes from colored construction paper. This fun project encourages creativity and improves fine motor skills while teaching kids about the connection between lines and shapes
Learn More: Playdough to Plato
4. Line Art With Floral Designs
For this simple, hands-on activity, children draw a large flower, create a border around it, and divide the background into sections with lines. They then fill each section with different line patterns or doodles. Finally, they color the flower and background using their favorite art mediums.
Learn More: Ms. Artastic
5. Abstract Line Drawings
This directed drawing activity helps children follow multi-step instructions and develop fine motor skills. Kids begin by drawing different horizontal lines with a black marker on white construction paper. Next, they fill the paper with various lines using watercolors, creating a visual masterpiece they can show off with pride!
Learn More: Carmel Mountain Preschool
6. Geometric Simple Line Drawings
Geometric line art is a fun and educational activity where kids connect dots using a pen or pencil and a ruler to create beautiful designs with straight lines. This activity enhances their understanding of geometric shapes and requires only simple supplies and printable worksheets, making it easy to set up and enjoy.
Learn More: It’s Always Autumn
7. Name Line Art
Invite students to create personalized artwork featuring their name by experimenting with various line styles and techniques. Children will develop confidence in drawing and self-expression while learning about lines as a fundamental element in art.
8. Line Art Exercises for Art Students
The optical illusion-based hand art activity involves tracing a child’s hand on paper and drawing horizontal lines across the page, with arches over the traced hand and fingers. It’s a compelling way to develop their concentration abilities and boost spatial awareness while creating unique artwork.
Learn More: Candace Ashment
9. Paper Line Sculptures
For this 3D, textured activity, kids work with pre-cut paper strips to create paper line sculptures. The project helps develop fine motor skills, introduces different types of lines, and teaches paper manipulation, all while exploring the concept of sculpture.
10. Line Art Collage
Students begin this striking art project by painting vertical lines on one side of a piece of paper and drawing horizontal lines on the other side. Once dry, have them cut along the drawn lines and reassemble the pieces on a black background, leaving gaps to emphasize different line types.
Learn More: Use Your Coloured Pencils
11. Crazy Hair Line Art Portraits
This zany and fun idea invites kids to explore various types of lines while creating self-portraits with imaginative hairstyles. Begin by introducing different line types like straight, curvy, and zigzag before having kids draw a face and upper body. Finally, have them fill the rest of the space with different types of lines to form unique hairstyles.
Learn More: Little Dots Education
12. One-Line Drawings
Students are sure to enjoy creating colorful drawings by making one continuous line that fills the entire paper. They then trace the shapes formed and fill them with a monochromatic color scheme using colored pencils. This project helps kids understand the definitions of line and shape while providing a calming moment during the busy school day.
Learn More: Splish Splash Splatter Art
13. Spiral 3D Line Drawing
In this striking line art activity, kids create a radial design by drawing intersecting straight lines and arcs using a ruler and compass. They then fill the shapes with different patterns using black ink. This is a wonderful way to teach kids the concepts of symmetry and radial balance.
Learn More: YouTube
14. Draw a Line Art Turtle
Kids will love drawing these adorable turtles using a black fine-tip marker. They can experiment with various patterns to fill the turtle shell, helping to establish a sense of freedom in art, where mistakes are celebrated as part of the creative process.
Learn More: Deep Space Sparkle
15. Kindergarten Line Art Project
Have kids draw lines with a black crayon on white paper, creating various shapes and patterns. Next, have them color some spaces with crayons and fill in areas using different types of lines, like dots and crosses. Finally, invite them to paint the remaining spaces with watered-down tempera paints or watercolors.
Learn More: Art Lessons For Kids
16. Doodle Line Art
For this doodle art activity, kids draw a continuous, loopy line with a black marker on white paper, creating various shapes. They then color the shapes with crayons, markers, colored pencils, or paint. This activity helps kids practice coloring within lines and can serve as a relaxing and mindfulness-based activity.
Learn More: Craft Corner DIY
17. Graphic Line Drawings
Using markers, paper, and paint, kids create graphic squares by drawing a simple grid on paper and filling each section with various shapes, lines, and patterns. Coloring with waterproof markers or watercolor paints adds vibrancy to their artwork. The activity can be further enhanced with black construction paper strips for a more dramatic effect.
18. Optical Illusion Art with Lines
In this line art activity , children create a series of “doodle circles” by drawing circles on paper and filling them with various patterns and designs. This activity encourages self-expression and can be completed using various art materials, allowing for diverse outcomes and plenty of artistic exploration.
19. Draw Emotions with Lines
In this activity, kids draw emotions using lines with oil pastels on paper. They start by scribbling, imagining their hand as an animal leaving marks. Next, they select emotions and corresponding colors, then draw lines representing each emotion.
Learn More: Thirsty For Art
20. Experiment with Line Drawing Exercises
Have kids engage in these four straight-line drawing exercises to improve their line control with colored pencils and other dry media. Kids will practice drawing parallel lines, graduated parallel lines, hatching lines, and value shift parallel lines. These exercises are fun, and easy, and can enhance kids’ creativity while improving their pencil control.
Learn More: Carrie Lewis
21. Hand Line Design Lesson
Have kids create a continuous line drawing by drawing an object without lifting the pen from the paper. They can start with simple shapes before gradually moving to complex ones. This activity encourages kids to develop observation skills, boosts creativity, and improves hand-eye coordination while offering a fun and engaging drawing experience.
22. Drawing Bottles With Parallel Lines
In this line art activity , students create a three-dimensional visual effect using parallel lines. They draw large bottles with a pencil, then use felt-tip pens in a sequence of three or four colors to fill the bottles with parallel lines. For the background, students draw curved, parallel lines with different color sequences. This activity develops their understanding of colors, and positive-negative space while creating the illusion of volume.
Learn More: Arte Scuola
23. Contour Line Rainbow Shapes
Invite students to create contour line rainbow blobs using watercolor and marker techniques. Have them start by drawing eight circles in pencil and filling them with analogous colors using wet-on-wet watercolor and marker wash techniques. After the water dries, students can trace the circles with contour lines, creating an interesting visual effect. Finally, they can add shadows with a pencil and shading stump.
Learn More: Tabitha Ann
24. Expressive Line Art
In this line art activity, students create layered line designs by drawing various types of lines from one edge of the page to another, keeping them thin. They add more overlapping lines for depth and use paint to create a strong contrast between lines and negative space. This activity encourages spatial awareness, and pattern recognition while producing a striking result.
Learn More: Dealey Arts
The Elements of Art: Line
Grade Level: 1-2
Students will be introduced to one of the basic elements of art—line—by analyzing types of lines used in various works of art to help students understand how artists use line to convey movement and mood. They will then create an abstract line art piece based on an activity they enjoy to do or watch.

Frank Stella American, born 1936 Jarama II , 1982 mixed media on etched magnesium, 319.9 x 253.9 x 62.8 cm (125 15/16 x 99 15/16 x 24 3/4 in.) National Gallery of Art, Gift of Lila Acheson Wallace
Curriculum Connections
- Performing Arts
- Smart Board or computer with ability to project images from slideshow
- Variety of art media for students to choose from (suggestions: markers, watercolors, colored pencils, colored paper for collage, oil pastel, tempera paint, yarn, etc.)
- A long cardboard box
- Small balls in a variety of sizes
Warm-up Questions
If this painting could move, would it move quickly or slowly? Is there something about the lines that make you think so?
Line is a mark made using a drawing tool or brush. There are many types of lines: thick, thin, horizontal, vertical, zigzag, diagonal, curly, curved, spiral, etc. and are often very expressive. Lines are basic tools for artists—though some artists show their lines more than others. Some lines in paintings are invisible—you don't actually see the dark mark of the line. But they are there, shown in the way the artist arranges the objects in the painting.
Artist Frank Stella is a racing fan. This metal relief painting, Jarama II , is named after an automobile racetrack outside Madrid, Spain. Here, Stella used winding, curving strips of metal painted in bright, dynamic colors to forcefully carry the motion and excitement of professional racing.
Guided Practice
Lines in art express different things. View the slideshow below and have students answer the questions beneath each image:
Slideshow: Exploring Lines in Works of Art

Roy Lichtenstein American, 1923–1997 Leo Castelli Gallery (publisher) Chiron Press (printer) Brushstroke , 1965 color screenprint on heavy, white wove paper, 58.4 x 73.6 cm (23 x 29 in.) Corlett/Fine 1994, Vol. II, no. 5 National Gallery of Art, Gift of Roy and Dorothy Lichtenstein
What type of line is this?
Now, look closely at these lines. Which group of words best describes them?
(1) Calm, serious, quiet
(2) Energetic, fun, dynamic

Charles Sheeler American, 1883–1965 Classic Landscape , 1931 oil on canvas, 63.5 x 81.9 cm (25 x 32 1/4 in.) National Gallery of Art, Collection of Barney A. Ebsworth
What types of lines do you see?
Where do you see the following:
(1) Solid, serious, organized, planned
(2) Silly, energetic, dynamic, in motion, chaotic

Joan Miró Spanish, 1893–1983 The Farm , 1921–1922 oil on canvas, 123.8 x 141.3 x 3.3 cm (48 3/4 x 55 5/8 x 1 5/16 in.) National Gallery of Art, Gift of Mary Hemingway
Look closely at these lines. Which group of words best describes them?
(1) Busy, topsy turvy, active
(2) Serious, calm, quiet

Morris Louis American, 1912–1962 Beta Kappa , 1961 acrylic on canvas, 262.3 x 439.4 cm (103 1/4 x 173 in.) National Gallery of Art, Gift of Marcella Louis Brenner
How is this painting different than the previous ones?
(1) In motion, festive, fun
(2) Calm, sleepy, still

Henri Matisse French, 1869–1954 Woman Seated in an Armchair , 1940 oil on canvas, 54 x 65.1 cm (21 1/4 x 25 5/8 in.) National Gallery of Art, Given in loving memory of her husband, Taft Schreiber, by Rita Schreiber
(1) Motion, festive, fun

Winslow Homer American, 1836–1910 Breezing Up (A Fair Wind) , 1873-1876 oil on canvas, 61.5 x 97 cm (24 3/16 x 38 3/16 in.) National Gallery of Art, Gift of the W. L. and May T. Mellon Foundation
Can you find the hidden lines in this painting? This painting of a fast-moving sailboat is full of diagonal lines. Why? Artists use diagonals to show energy and movement. Diagonals also lead the viewer into the painting. Try to imagine the boat without the diagonals, sitting flat on the water—horizontally—with the mast going straight up—vertically—into the sky. Would the boat be moving, or sitting still, without the diagonals?
Now, compare this boating scene to the next slide image...

Fitz Henry Lane American, 1804–1865 Lumber Schooners at Evening on Penobscot Bay , 1863 oil on canvas, 62.5 x 96.8 cm (24 5/8 x 38 1/8 in.) National Gallery of Art, Gift of Mr. and Mrs. Francis W. Hatch, Sr.
Is this boat moving fast or slow? It looks like it is standing still. Does the water seem calm or churning? How hard is the wind blowing? (No sails up = very little wind!) Are there any diagonal lines in this painting? (Very few—mostly straight lines here, vertical and horizontal. Without diagonal lines, the artist created a quiet, calm scene with a slow moving boat.)
Students will select an activity they enjoy watching or participating in that involves movement such as playing a sport, dancing, climbing a tree, biking, jumping rope, etc. They will list adjectives that describe both the activity and feelings they have while doing or viewing this activity. Then, students will write next to each adjective what type of line and color would reflect this activity best. For example, watching a ballet may be soft, thin, wavy lines in pastel colors, while jumping rope may be thick, zigzag lines in bold hues. Using Stella’s Jarama II as their inspiration, students will create an abstract line art piece in a medium of their choice that evokes the feeling of their activity. Remind students that selection of media is very important; markers create a much bolder impression than watercolors so they should think about the whole picture they wish to depict.
To accommodate visual impairments, students can use yarn and glue to create their abstract line drawings. Students can draw with glue onto a piece of paper, and then lay different types and lengths of yarn to create a raised surface drawing.
An alternative to accommodate motor control differences would be to create an abstract line drawing using a box, balls, and tempera paint. Students would place a piece of paper inside a long box, and squeeze 3-4 quarter-size amounts of tempera paint in different colors onto the paper. Students would then use balls of varying sizes and roll the balls through the paint, trying different speeds, to create lines.

Place a piece of paper inside a box, and put 3-4 quarter-size amounts of tempera paint in different colors on the paper.

Pick balls of various sizes and have students roll the balls through the paint to create lines.

Students can try rolling the balls at different speeds to experiment with different lines.
Line Drawing with Balls
Students will then post their finished works of art for class discussion. First, their fellow classmates should guess what activity is being depicted and give their reasons for their answer: What is it about the shape of the line? the thickness? the number of lines included? the color? choice of media? Then the student artist will justify their decisions to the class.
The Elements of Art is supported by the Robert Lehman Foundation
National Core Arts Standards
VA:Cr1.1.2 Brainstorm collaboratively multiple approaches to an art or design problem.
VA:Cr1.2.2 Make art or design with various materials and tools to explore personal interests, questions, and curiosity.
VA:Cr2.1.2 Experiment with various materials and tools to explore personal interests in a work of art or design.
VA:Cr2.2.1 Demonstrate safe and proper procedures for using materials, tools, and equipment while making art.
VA:Cr3.1.2 Discuss and reflect with peers about choices made in creating artwork.
VA:Re7.2.2 Perceive and describe aesthetic characteristics of one’s natural world and constructed environments.
VA:Re8.1.2 Interpret art by identifying the mood suggested by a work of art and describing relevant subject matter and characteristics of form.
Borrow the DVD Making Art
Use the Drawn From Nature sketching worksheet
Use the Sketching and Sculpture activity guide
THAT ART TEACHER
Sharing my classroom with the world.

Step by Step Sketchbook Drawing Prompts

Practicing basic drawing techniques can help artists of all ages build confidence and sharpen their technical skills.
I love having my students keep a sketchbook. It’s a great opportunity for students to practice foundational skills, brainstorm artwork ideas, and write and reflect about their own artwork and the artwork of others.
It’s a great place to hit all of the standards of teaching that are NOT about producing finished artworks! I think creativity and self-expression are the pillars of a quality art education, but sometimes it’s time to focus on those drawing basics!
Here is a list of my go-to drawing sketchbook assignments. These are step by step video guided tutorials that are classroom ready or can be done at home! I love doing these in the classroom, but they are perfect for distance learning in our new reality of Covid-19.If you’re not an art teacher or in an art class, draw along with me in your sketchbook to grow your artistic skills.
How to Shade Water Droplets

Facial Proportions for Beginners

Two Point Perspective

One Point Perspective 3-D Letters

Value Scale Zentangle

Contour Drawing

How to Draw an Eye

Value Scale & Sphere Shading

Share this:

Leave a Reply Cancel reply

Published by
Sierra machado.
HI! My name is Sierra Machado and I am an art educator in Oklahoma. This is a creative space dedicated to the craft of teaching and art making. My goal is to inspire young artists, encourage and support fellow art educators and to push myself to create more art. View all posts by Sierra Machado
Discover more from THAT ART TEACHER
Subscribe now to keep reading and get access to the full archive.
Type your email…
Continue reading
You must be logged in to post a comment.

Line Drawing: A Guide For Art Students

Sharing is caring!
When we first picked up a pen or pencil and started making marks on paper, we began with line. Whether self-taught, through trial and error, or guided by others, we learned how line defines form, creates structure, divides a frame, traces contour, creates tonal variation (cross-hatching, for example) and leads the eye from one part of a work to another. Initially a mechanism for getting outlines onto paper – identifying edges – we begin to applaud lines for their own merit: celebrate their presence…whether a quiet flick of charcoal on paper or a streak of graphite.
line drawing – a student guide This article contains exercises for Art students who wish to produce contour line drawings, cross contour drawings, blind drawings and other types of line drawings. It is a teaching aid for high school Art students and includes classroom activities, a free downloadable PDF worksheet and inspirational artist drawings.
Blind Contour Drawing Definition: A blind contour drawing contains lines that are drawn without ever looking at the piece of paper. This forces you to study a scene closely, observing every shape and edge with your eyes, as your hand mimics these on paper. The aim is not to produce a realistic artwork, but rather to strengthen the connection between eyes, hand and brain: a reminder that, when drawing, you must first learn to see.
Blind Drawing Exercises: Blind drawing is an excellent way to start a high school Fine Art programme. Drawing wobbly lines that bear little resemblance to the chosen object is relaxing and stress-free. Often, a classroom bubbles with laughter at the unexpected results. Blind drawing stretches the arms and soul; eases you into observational drawing without fear.
A warm-up activity in which students were asked to create blind contour line drawings of shell (teaching exemplar by the Student Art Guide). These blind drawings were included in the first preparatory sheets submitted by CIE IGCSE Art and Design students.

Gesture Drawing / Timed Drawing / Movement Drawing Definition: A gesture drawing is completed quickly – often in short timed durations, such as 20, 30, 60 or 90 seconds – using fast, expressive lines. Gesture drawings capture basic forms and proportions – the emotion and essence of a subject – without focusing on detail. Due to their rapid completion, they are a great way to record movement and action, as well as increase your drawing speed, confidence and intuitive mark-making skill. Gesture drawings are best completed with smooth, easily applied mediums (chunky graphite pencils, charcoal sticks, pastels, soft brushes dipped in Indian ink, for example), without the use of an eraser. They are often completed on large, inexpensive sheets of paper, where you can move your arm fluidly, be bold with mark-making, and not worry about mistakes. As with blind drawings, gesture drawing is an ideal warm-up activity.
Gesture Drawing Exercises: When you begin investigating your subject matter in the initial phase of a high school Art programme, it can be helpful to make several first-hand gestural drawings. The best of these can be selected for your final portfolio (taking advantage of a photocopier or digital camera to reduce in size, if necessary). A small still life scene can be depicted just as easily as a large moving form.
Rembrant gesture drawing This gestural drawing by Rembrandt is completed using red chalk on rough, textured paper. With just a few expressive lines, we instantly recognise the scene: two women teaching a child to walk.
A gestural figure drawing by Chelsea Stebar:
Completed while studying Animation, this gesture drawing captures a clothed figure. Note the variation in line weight: light lines applied initially, with darker lines and hints of detail all that are needed.
Continuous Line Drawing Definition: A continuous line drawing is produced without ever lifting the drawing instrument from the page. This means that, in addition to outlines and internal shapes, the pencil must move back and forth across the surface of the paper, with lines doubling back on each other, so that the drawing is one free-flowing, unbroken line. To avoid the temptation to erase lines, it can be helpful to complete a continuous line drawing with an ink pen, varying the line weight, as needed, to indicate perspective and areas of light and shadow. Like the drawing methods described above, this drawing method develops confidence and drawing speed, and encourages your eyes and hand and brain to work together. Continuous line drawings work best with in-depth observation of your subject, without interference from your thinking mind. According to Smithsonian Studio Arts:
…continuous line drawing is actually a very powerful way to create a piece that is both hard edged and fluid, representational and abstract, rational and emotional all in one.
Continuous Line Drawing Exercises: This drawing method is great for sketchbooks and drawing from life. It can be an excellent starter activity, with drawings completed on large, inexpensive paper that can be scanned / edited / cropped and used in other ways within your projects.
An A Level Art sketchbook page by Lucy Feng from Hereford Sixth Form College, Herefordshire, UK:
Contour drawing Definition: A contour drawing shows the outlines, shapes and edges of a scene, but omits fine detail, surface texture, colour and tone (‘contour’ is French for ‘outline’). According to Wikipedia:
The purpose of contour drawing is to emphasize the mass and volume of the subject rather than the detail; the focus is on the outlined shape of the subject and not the minor details.
The illusion of three-dimensional form, space and distance can be conveyed in a contour drawing through the use of varied line-weight (darker lines in the foreground / paler lines in the distance) and perspective.
Contour Drawing Exercises: Using line alone eliminates the challenge of applying tone, colour and mediums; and instead focuses attention solely upon shape and proportion. After completing warm-up activities such as blind and gesture drawings, slower, more formal contour drawings can be an excellent way to begin more realistic representations of your subject matter. Used intermittently throughout projects, contour drawings can also be helpful for the student who needs to work faster.
Modern line drawings by Ultima Thule: there is a slick contrast in this drawing between the sharp black lines and the dripping green. The application of colour to one area creates a dramatic focal point.
Cross contour drawing Definition: A cross contour drawing contains parallel lines that run across the surface of an object (or radiate from a central point), such as those that appear on a topographical map or a digital wireframe. The lines can run at any appropriate angle (sometimes at multiple angles) and may continue across objects and into the background. Cross contour drawings typically follow the rules of perspective, with lines drawn closer together in the distance and further apart in the foreground. In this type of drawing, the illusion of three-dimensional volume is created entirely with line.
Cross Contour Drawing Exercises: This is an excellent way to gain familiarity with the volumes and three-dimensional forms in your project, producing analytical cross contour drawings that are suitable for sketchbooks or early preparatory sheets.
This delicate cross contour drawing helps to communicate the bumpy surface of the shell. Note how the shell pieces that are furthest away from the viewer are thin and light, whereas those that are closest are darker and thicker. Note also how the direction of the contour lines relates to the shape of object that is drawn, with lines projecting outwards from the centre of the shell.
Cross contour hand drawings by (from left) Mathew Young, Ryan Acks and Lea Dallaglio while studying at the San Jose State University, Department of Art and Art History:
Hands are a great subject for a cross contour line drawing exercise. Hands can create interesting, complex, curving shapes, as in the examples above, and are readily available for first-hand observation. Note how the density and weight of the line also helps to communicate areas of light and shadow.
Cross contour drawings by Daniel Servin (left) and Alfred Manzano, completed while studying AP Studio Art at Mt Eden High School in Hayward, California, USA:
These cross contour drawings were completed as part of Breadth assignments for AP Studio Art. These drawings show clever use of line thickness, with the line-weight varying in order to create the illusion of tone and show three-dimensional form.
A wireframe contour drawing exercise by Year 9 student Seonmin Lee from ACG Parnell College, Auckland, New Zealand:
Contour lines can also be a great way for students to design three-dimensional forms. These drawings were completed as part of a papier mache sculpture project, with the contour lines representing the supporting cane structure.

Planar analysis drawing Definition: A planar analysis drawing simplifies complex curved surfaces into flat planes, using straight lines. This process helps students to think about the underlying structure of objects and results in an analytical drawing, that is rather mechanical in appearance.
Planar Analysis Drawing Activity: This can be a great introductory drawing exercise, especially if you are moving towards Cubism or abstracting scenes into geometric form.
A planar analysis portrait completed by a student of Cat Normoyle:
The symmetry and familiarity of the human face makes portraiture a great subject for planar analysis; the task of converting complex three-dimensional form into flat surfaces. Note the careful attention given to the nose and lips in this example.
Wire sculpture drawings Definition: Wire can be cut and bent into shapes with pliers to create three-dimensional ‘drawings’, often resulting in a work filled with flowing, curved lines. These wire sculptures can be attached to a two-dimensional frame or a flat surface, hung in the air, or be left free-standing, changing in appearance as a viewer moves around the room. Due to their flexible nature, wire sculptures often move slightly in the wind, adding an extra interactive element to the work.
Wire Sculpture Line Drawing Exercise: This is an excellent activity for middle school students and for high school students, if it relates specifically to your project (and does not interfere with postage requirements, for those who need to post work away for assessment). Small wire experiments, using light-weight wire, can also be mounted to sketchbook pages.
Wire sculptures completed by the students of Amy Bonner Oliveri from Allendale Columbia School, Rochester, New York, USA:
This wire drawing exercise ‘using line to create space’ is completed by students within a 3D Art class, working over photographic portraits. Having a base image to work from (this could also be an earlier observational drawing) makes the process of transferring from two-dimensional to three-dimensional much easier.
Read more about Medium’s interesting 5 drawing exercises .
Hatching, cross hatching, and other line techniques As well as representing contours, line can also be used to apply tone (light and shadow) to a drawing. This can be done by altering the:
Gap between the lines Lightness / darkness of the line Thickness of the line There are many line techniques can be used to create tone, as illustrated in the worksheet below. Common techniques include:
Small dashes Hatching (long, parallel lines on an angle) Cross-hatching (parallel lines at right angles) Stippling (dots) Scribbles Small crosses Small circles The angle that these techniques are applied may remain constant within a drawing, or it may change in response to the angle and direction of the forms. For example, cross-hatching may flow around the surface of an object in a similar direction as cross contour lines. These techniques are also a great way to create the illusion of texture (see our article about observational drawings).
Line Techniques Worksheet: The worksheet below has been provided by the Student Art Guide for classroom use only and may be issued freely to students (credited to studentartguide.com), as well as shared via the social media buttons at the bottom of this page. It may not be published online or shared or distributed in any other way, as per our terms and conditions. The full size printable worksheet is available by clicking the PDF link below. This worksheet is suitable for middle school students, or senior students who have not had prior experience with line techniques.
- Education Resources
- Art + Merch
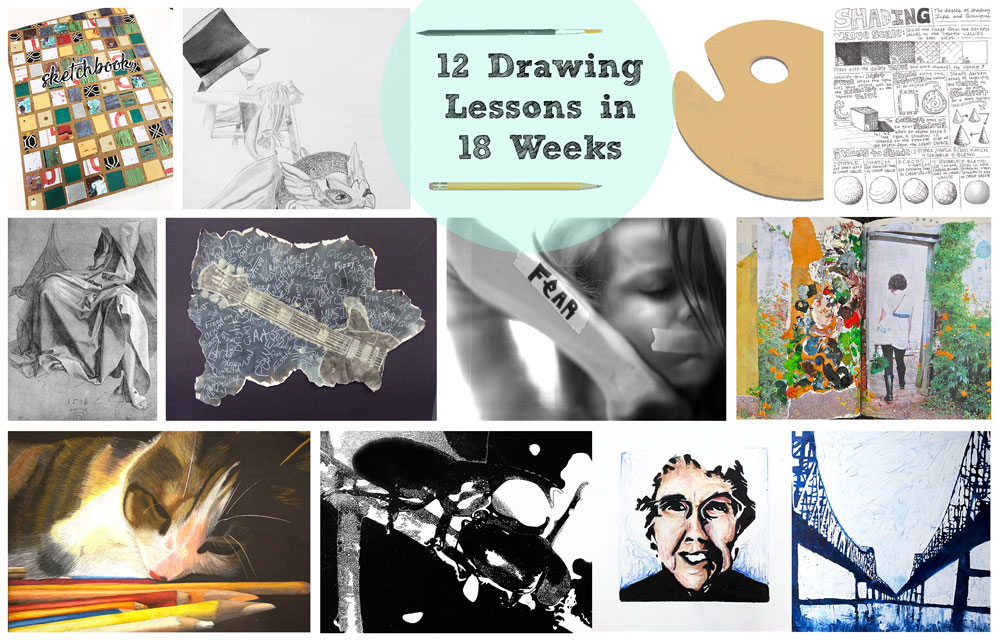
High School Drawing Curriculum: 12 Lessons
HIGH SCHOOL DRAWING
In my teaching career I have taught a wide range of high school art courses: Introduction to Art, Drawing, Painting, Advanced 2D Design, AP Art, 3D Design, 3D Design II, and 3D Design III. I have loved teaching such a variety because it has given me the opportunity to develop and test a breadth of lesson plans. The past two years I have been working on compiling my favorite lessons into curriculum packs to sell on my TPT store. The most recent posting on my store is my semester-long high school drawing curriculum pack. I have taught every single one of these lessons (plus more that I tested, failed, and left out so you don’t have to) and these are my top twelve.
This high school drawing curriculum includes information and resources to fill every single day of the semester in your drawing class. Other than making copies of worksheets and doing a handful of demos, you don’t have to plan a thing for the semester. Each project includes a detailed lesson plan (including big ideas, essential questions, national standards, vocabulary, and step-by-step instructions), rubrics, critique information, and handouts. In addition to the project packs I have included my syllabus, get-to-know-you worksheets, a timeline, breaking down the semester into days and weeks, and supply list.
12 PROJECTS
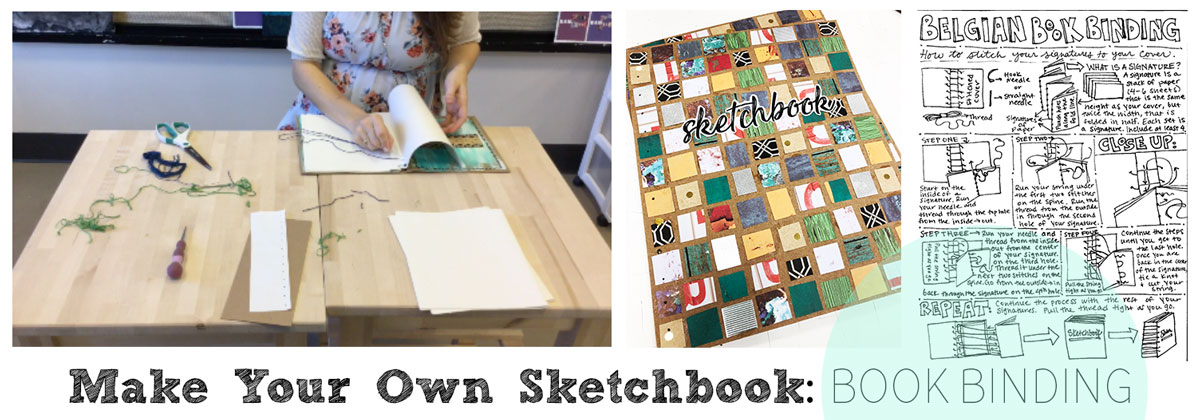
The first project of the semester is learning the Belgian bookbinding technique and using it to create your own sketchbook. This not only saves money on purchasing sketchbooks, but it also introduces the students to book cover design and bookbinding techniques. In addition to a PowerPoint, lesson plan, and rubric, this also includes a how to worksheet and how to video. This product is sold individually here .
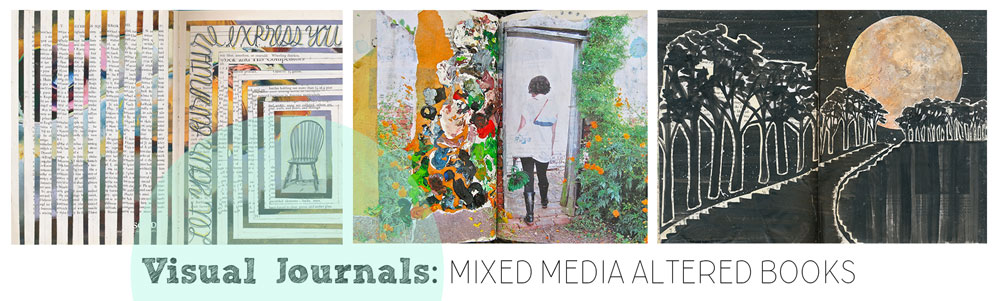
In every class I teach I include a weekly focus on visual journals. Each Friday students have the option to work in their visual journal, have free art time, or catch up on an assignment. By the end of the semester they must have at least 12 pages completed in their book. The PowerPoint to introduce this project, lesson plan, and rubric are included in this pack.
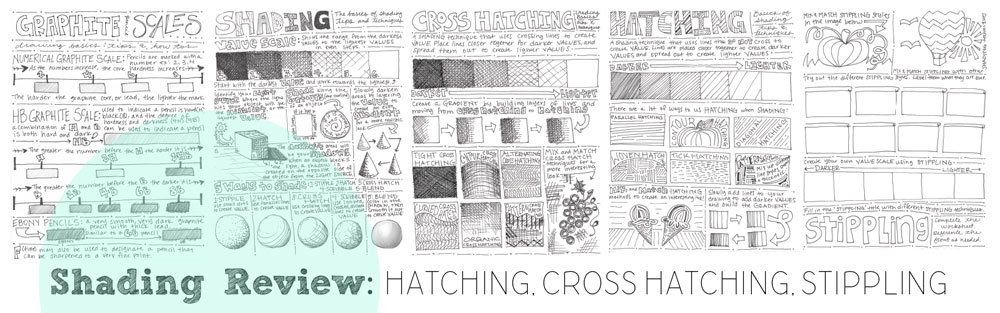
Before the students start longer drawing projects, they complete a shading review. Seven worksheets are included that cover graphite pencils, hatching, cross-hatching, scribbling, stippling, and a general shading worksheet. The front of the worksheets include information and the students must complete the activities on the back. This product can be purchased individually here .

The first true drawing assignment is a still life drawing. However, I put a twist on it by requiring the students to bring in objects to create the still life. Before starting the drawing, the students learn about still lifes at various periods in art history. at both traditional and modern versions of still lifes. They must apply their understanding of various shading techniques by including at least three of them in their drawing. Check out the individual link for this product here .
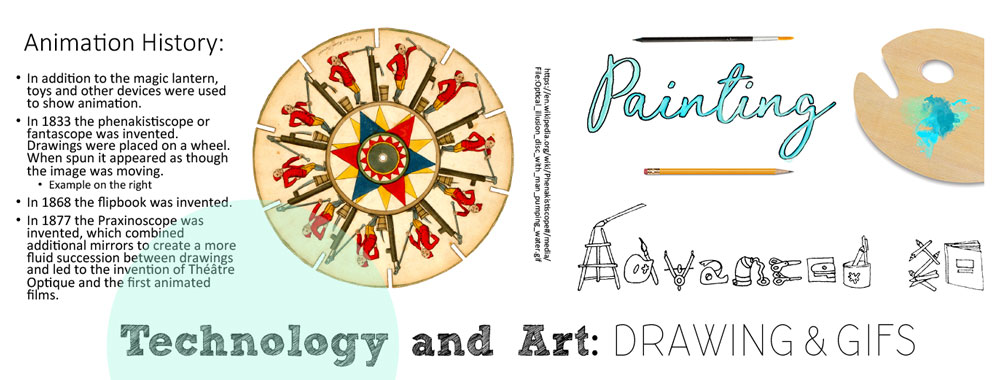
Once the class has a few drawing projects under their belt, we look at combining technology and art by creating their own GIFs. They must draw the majority of the design, then use various computer programs to compile their drawings, add to them, then create an animated version of them. You can read more about this project in my blog post here .
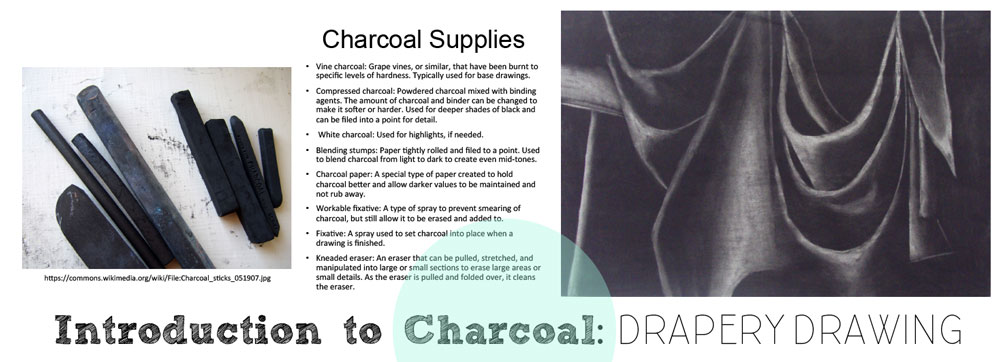
Once the students have a handle on using pencils, we move onto charcoal drawings. One of the best ways I have found to teach how to shade using charcoal is through the traditional charcoal drapery drawing lesson. A PowerPoint about charcoal, in depth lesson plan, rubric, and critique are included. You can purchase this lesson individually here .

After learning about charcoal, the students apply their knowledge to a mixed media work of art that includes shading with charcoal. For this assignment, the students must select an object and redraw it on a background layered with color and text. The object is meant to serve as a metaphor for who they are, a part of their personality, or interests. I love any cross disciplinary lessons, and this does a great job combining English and art. Check out specifics of this project here .

After completing a metaphorical self portrait, the students are asked to create an actual self portrait drawing, with a twist. The students must select a current event that interests them and reflect it through their portrait. In addition, they have to scan their faces using a copier or scanner to create an unusual and ethereal look to their portrait. They then re-draw their scanned image using pencil. This project pack includes multiple PowerPoints to introduce the project and show examples of current artists who create social and politically driven artwork. In addition to the PowerPoints are an in depth lesson plan, rubric, critique sheet, and brainstorm worksheet. Check out more here .
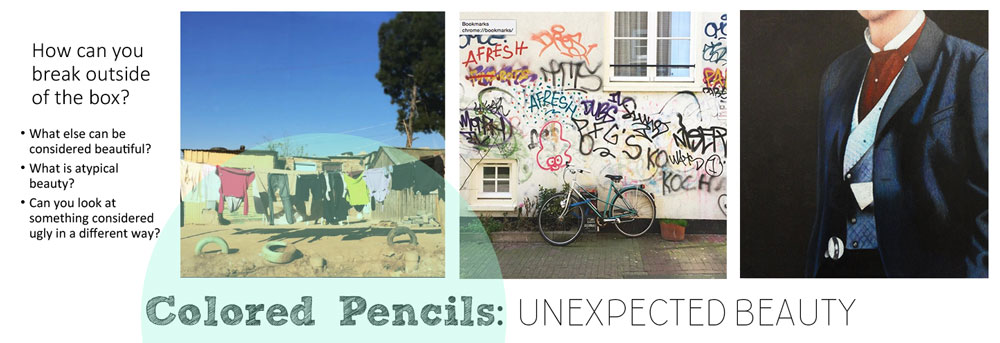
After working mostly in black and white, students have the chance to do a full color drawing using colored pencils. They are asked to think outside of the box and take a photograph that reflects the topic, “unexpected beauty.” They then turn the photograph into a colored pencil drawing. Colored pencil techniques are covered in the introduction PowerPoint. Check out more information about it here .
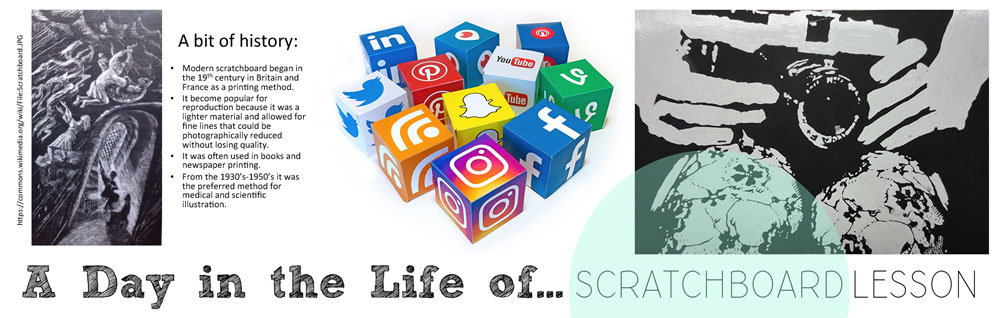
After learning about colored pencils, we start moving towards different media that still use traditional drawing techniques, such as scratchboard. Social media is the focus of the lesson and students create a scratchboard image that reflects a snapshot of their day. History of scratchboard, as well as techniques, are in the PowerPoint. In depth instructions on how to teach the lesson are included in the lesson plan, as well as the rubric and critique sheet. This lesson can be purchased individually here .
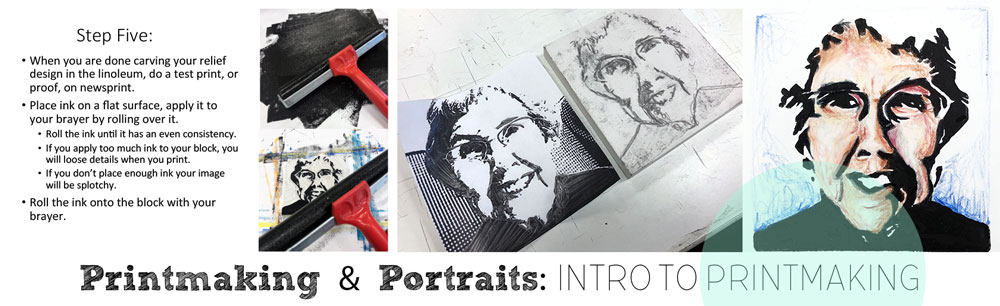
Printmaking is a natural next step after learning about scratchboard. The basic concepts are similar, removing highlighted areas and leaving dark areas. For this assignment, students create a portrait out of a linoleum block. They use traditional relief printmaking techniques to create at least 5 quality prints and one print must be colored in using colored pencils. In addition to a PowerPoint, lesson plan, rubric, and critique sheet, this also includes a handout on which colors to use to create a range of skin tones and a worksheet to test various color combinations. An in-depth look at this lesson will be coming soon. In the meantime, check out the product listing here .
The final lesson in the curriculum is to design your own project. The students can try out a technique or material they didn’t get a chance to or redo a project they liked or could improve on.
It took me years to develop this curriculum and it is very gratifying to see it all compiled in one place. Check out the individual product links above or check out the entire curriculum here . You save $16.00 by purchasing it as a bundle pack. Thanks for taking the time to check out my blog and my latest TPT product. Help me spread the word about art education, lessons, and art in general by sharing with others.
Check out more visual journal blog posts here . Shop my education resources here . Don’t forget to follow me on Instagram and TikTok for weekly visual journal demos. Until next time!
4 responses to “High School Drawing Curriculum: 12 Lessons”
This looks very helpful. Thank you!
You’re welcome! Reach out anytime with questions or comments!
Could I get a copy of the worksheets? [email protected]
Hi, Stacy! The worksheets can be purchased in my drawing curriculum or individually. If you want to purchase individually let me know which worksheets you are interested in and I can share links! You can look at the drawing curriculum here: https://lookbetweenthelines.com/product/visual-art-drawing-curriculum-12-lessons-for-18-weeks-of-high-school-art/
Leave a Reply Cancel reply
Your email address will not be published. Required fields are marked *
Save my name, email, and website in this browser for the next time I comment.
Related Posts

Recent Posts

Another awesome resource from one of my favorite creators! I used this with both in person and virtual students. All were engaged and enjoyed learning." -Buyer, Photoshop Basics Packet
Give us a Follow
Get a free set of 8 elements of art posters when you subscribe!
Crazy Laura

May 2, 2023 By Bridget Hawkins This post may contain affiliate links. For more information please read my disclosure
Beginner’s Guide For Artists: Line Drawing Worksheets

Line drawing is an essential part of the creative process for many artists, from professional illustrators to aspiring doodlers. It’s a great way to refine your drawing skills and develop an eye for detail. These Line drawing worksheets are an excellent way to get started in the field of art and hone your skills. You can use an assortment of tools such as pencils, felt-tip pens, markers, and even charcoal for this exercise.
If you love line art like me, we also have Line Art Printables and Minimalist Free One Line Drawing Printables that you can use. These easy-to-print worksheets are great to bring with you on your next sketchbook journey and explore the world of line drawing.
Here are the worksheets:
Straight Lines

Download Here: Straight Lines Worksheet
First up, this one has vertical, horizontal, diagonal, and criss-cross lines. This will help you familiarize yourself with the different types of lines and how to make them. You can use a ruler first, then draw the lines freehand for this one.
Continuous Lines

Download Here: Continuous Lines Worksheet
This worksheet includes a variety of line patterns, such as zigzag, wavy, scallop, and curly lines. Engaging in this exercise will not only improve your hand and wrist control but also assist you in mastering the art of creating continuous lines. By practicing with these diverse line styles, you will develop a natural proficiency in maintaining smooth and continuous strokes.

Download Here: Scribbles Worksheet
This worksheet is a fun way to practice the basics of drawing scribbles. It involves scribbling different lines, such as crosshatching, scribble dots, zig-zag scribbles, and broken lines. Don’t be afraid to go wild and free here! Just let your pencil or pen flow freely as you draw the lines.
Related Posts:
- Free Flower Template
- Free Sun Template Outlines
- Free Flower Line Art Printables
Some Art Workbooks You Can Buy:

- Holmes, Catherine V (Author)
- English (Publication Language)
- 143 Pages - 07/22/2020 (Publication Date) - Library Tales Publishing, Inc. (Publisher)

- 253 Pages - 03/17/2014 (Publication Date) - Library Tales Publishing, Incorporated (Publisher)

- Dunn, Alphonso A (Author)
- 140 Pages - 08/04/2018 (Publication Date) - Three Minds Press (Publisher)
📌 FOLLOW ME ON PINTEREST!
📌 pin to save for later.

Reader Interactions
Leave a reply cancel reply.
Your email address will not be published. Required fields are marked *
How to Draw: Free Beginner’s Course

This free drawing course will guide you through a series of fun and easy tutorials which will develop your drawing skills quickly.
If you’re a seasoned artist, this course could be a great refresher! You might even learn something new.
My name is Darlene and I created this free drawing course because I want to provide beginners with all the resources to learn the skills they need without having to fork up loads of cash or rummage the web for bits and pieces.
Shout out to Nadia Adalath for inspiring me to create this course! Thank you :)
The unique thing about this course is that I’m going to use my non-dominate hand to learn along with you.
That means that I won’t have the same level of control as my right hand and will basically need to develop my drawing muscles from scratch! I want to prove to you that you can learn how to draw even if your writing looks like chicken scratch!

Some of the things you will learn:
- How to draw the smart way
- How to draw more realistically
- How to draw what you see
- How to shade realistically
- How to draw with perfect proportions
Tools you’ll need to begin:
A sharp pencil, blank piece of paper and an open mind.
- HB Pencil: Also known as #2 pencil
- Any sketch paper
How to Draw for Beginners: Course Outline
There are 5 levels in this free drawing course with a total of 10 lessons (I may decide to add more). Each lesson can be completed at your own pace and comes with a series of homework assignments.
You can submit your homework assignments on the RFA facebook page and get feedback from me and other students participating in the course, just like in a real classroom. It will be a great way to track your progress as well!
I like to date all of my work (yes, even if it’s bad) so that I can go back and see my improvements later. It’s really fun and I highly suggest you do it as well :)
If you want to make some suggestions on what to cover in future lessons, let me know. I’m always taking in new ideas and since these lessons are for YOU, I want them to be more personalized.
You can access all lessons from this page, so make sure to bookmark it in your browser. You can even subscribe to my mailing list to get notified when new lessons are posted!
Ready to start?
LEVEL 1: The Building Blocks of Art
Level 1 covers the very basics of drawing and why you don’t need to be perfect when it comes to sketching. You’ll learn how to draw faster and how to draw things that are more structurally sound.
Lesson 1: How to Sketch If you can make a mark on a piece of paper, you can sketch! –> Go to lesson!
Lesson 2: Learn to see things differently Learn how you can draw more accurately and quickly by breaking complicated objects down into simple shapes –> Go to lesson!
Lesson 3: Going from 2D to 3D Step up your game and learn how to make your drawings go from 2D to 3D using various techniques. –> Go to lesson!
LEVEL 2: The Devil’s in the Details
Level 2 allows you to really pay attention to what you’re drawing and how you can make even your line drawings look realistic!
Lesson 4: How to draw with accurate proportions Learn 4 awesome techniques to get your proportions more accurate. –> Go to lesson!
Lesson 5: Common Drawing Mistakes and How to Fix Them Are you paying enough attention? Learn how to analyze your artwork and easily identify areas that could use improvement –> Go to lesson!
LEVEL 3: Techniques to Step Up Your Game
Lesson 6: Introduction to Linear Perspective Learn how you can draw unique scenes with people using one-point and two-point linear perspective –> Go to lesson!
Lesson 7: Introduction to Line Quality Learn how to further enhance your drawings by varying your line weight –> Go to lesson!
LEVEL 4: How to Shade Realistic Textures
Lesson 8: Introduction to shading techniques
Learn four different shading techniques to shade a variety of realistic textures –> Go to lesson!
Lesson 9: Learn how to shade
Learn 7 simple steps so you can start shading today! –> Go to lesson!
LEVEL 5: Wrapping it all up
Lesson 10: – Putting it all together
Learn how to put everything from lessons 1-9 into practice through 3 examples –> Go to lesson!
Leave a Reply Cancel reply
Your email address will not be published. Required fields are marked *
Save my name, email, and website in this browser for the next time I comment.
117 thoughts on “How to Draw: Free Beginner’s Course”

Can you please show how to draw the human body?

I can’t seem to find a video from you about sketching a person from a photo i was curious if you have one. I enjoy your tutorials very much unfortunately the tablet im using leaves much to be desires would you suggest buying a wacom one like you have?

Just wanted to say thanks. Your video lessons have changed my life (in a good way)

I am a beginner…and I need advance experience on drawing

How do I sign up for this course please and thank you.
Hi Daniel, there’s no need to sign up. You can just click on the lesson links to get started. I don’t collect any of your information :) Cheers!

I asked for a video on drawing the human head – I found that video on your site. Thanks.
Your videos are so very helpful. I would love to see a video on how to draw the human head. Do you have one?

Pls I am a beginner and I want to how to draw. So when will your next class begin? I would like to take your free course for beginners

Hello I would like to take your free course for beginners. When will your next class begin?
Hi Maggie, you can access the lessons at your own leisure. Here’s lesson 1! https://rapidfireart.com/2017/04/06/lesson-1-how-to-sketch/ At the end of that page, you can find lesson 2 and so on and so forth :)

Hey so i want to learn anatomy and i did learn some stuff but it seem’s i just can’t get that next step and my drawings just suck so bad I used youtuber name he is quite good ( draw like a sir) tutorials but it does not click 🥲

Want to learn art

Can you help me

You are so very helpful and so very generous to share your talents with the world! A thousand thanks would not be enough – I have benefitted so very much from your instruction!

so glad i found these ,, could draw as a child, couldnt for 25 years after apart from a month recently ,, had some life issues and just happened ,, drew lots of pictures im way more happy wit now than i was as i cant draw again n e more ,, found these ,, did tutorial 1, and 100 pieces of paper no less , later have 3 decentish family portraits and bobble head edition , i will send u my month could draw and a sample of my nows thanks to ur 1st tut

im looking forward to my journey. Thankyou
RFA uses cookies to offer you a better browsing experience, analyze site traffic, personalize content, and serve targeted ads. By clicking accept, you are helping to support my site and keep drawing tutorials free 🙂 . Not a fan of cookies? No worries! Adjust your preferences in the settings! Not consenting may affect some features and functions such as embedded video tutorials.
Choose Your Test
- Search Blogs By Category
- College Admissions
- AP and IB Exams
- GPA and Coursework
How to Draw Contour Line Art: 4 Key Steps
General Education

Have you heard about contour line art but aren’t sure what it is? The good news is that you’ve likely already made dozens, maybe even hundreds, of contour line drawings throughout your life without realizing it! Contour drawing is one of the easiest and most effective ways to improve your hand-eye coordination and drawing skills.
In this guide, we explain what contour lines in art are and how you make contour line art. We also suggest different contour drawing exercises so you can keep improving your skills.
What Is Contour Line Drawing?
Contour line art is a method of drawing where you draw only the outline of an object, without any shading. “Contour” actually means “outline” in French, which is where the name comes from. For example, if you wanted to do a contour line drawing of a pear, you’d simply draw the outline of the pear, add a stem, and stop there. Some contour drawings will include outlines of important interior shapes (such as wrinkles in cloth or objects on a bookshelf), but contour drawings will never contain shading or minute details.
Because you’re focusing on just the shape of an object and not any minor details, contour line art is a great drawing method for beginning artists as well as those looking for some quick drawing exercises. Children, as well as people without a lot of experience drawing, typically make contour line drawings without realizing it, simply because this method is one of the easiest and quickest ways to begin drawing.
However, just because contour line art is easy to start doesn’t mean it’s only meant for beginner artists or those who don’t have the skills to do more detailed drawings. Contour line art has many uses, even for highly-experienced artists. Many artists will begin a project with a contour line drawing to get a quick sense of the piece’s composition, then they’ll later go back and add more details. Contour line art is also a good way to become more skilled at replicating the outline of an object and developing hand-eye coordination (which we’ll explain more about in the next section). If you can’t create strong and accurate outlines of an object, the piece will still look unfinished or slightly “off” even if you add in lots of details and embellishments.
Professional artists have used contour art for centuries. Cartoonists often use contour art in their finished pieces, the ancient Greeks used it when decorating vases, and da Vinci frequently made contour line drawings when doing figure studies. It’s an essential skill that every artist should know and practice regularly.

The image on the left is an example of contour line art. The image on the right is NOT because it includes shading.
How to Draw Contour Lines in Art
In order to get the most from your contour line drawing practice, follow these four steps when making contour art.
Step 1: Choose What You’ll Draw and Gather Materials
For your first contour drawing, we recommend choosing just one object to draw, as this will be easier to focus on than several objects. Put the object or place your seat in a spot where you have a clear view of the object. For materials, you’ll need a drawing tool (pencil or charcoal is most common), and paper or a sketchpad. If you’re using loose paper, you may want to tape it to something so it doesn’t move around while you’re drawing. Now you’re ready to begin!
Step 2: Look at the Object
It may surprise you to learn that, when you’re drawing contour lines, you want to spend most of your time looking at the object itself, not at your sketchpad. This can be really difficult when you first start doing it, but that’s the point! Contour drawing forces you to really notice and work to replicate the outline of an object. It trains your hand to follow what your eye sees.
Start by spending about half your time looking at the object and half your time looking at your paper, and gradually work your way up to looking at the object 90% of the time. This will feel strange initially, and your first drawings will probably look a little wonky, but just keep practicing! As you develop your hand-eye coordination, it’ll feel much more natural, and your drawing skills will improve as a result.
You also want to make sure that you’re capturing as much detail of the object’s outlines as possible. If there’s a notch or a warp in the object, make sure your drawing represents that. Contour art is all about replicating the form of an object as closely as possible.
Step 3: Draw Long, Continuous Lines
Many people new to contour art begin by drawing lots of short lines because they aren’t used to not looking at their paper, and they don’t want to make too big of a mistake by drawing a long line that doesn’t follow the object’s lines. However, you’ll improve your drawing skills more if you draw fewer, longer lines. Drawing longer lines, especially without looking at your paper, improves your hand-eye coordination and helps you become more confident when drawing.
Step 4: Go Slow and Steady
It can be tempting to rush through contour drawing exercises, especially if you’re used to drawing detailed pieces where the outline is only the first step. Remind yourself to slow down and concentrate on replicating the outline of the object as perfectly as you can.
At the same time, don’t freeze up while you’re drawing. Especially when you first begin contour drawing, you may feel tempted to take breaks to compare your drawing to the actual object. Resist this urge! Remember, you want to spend very little time looking at your paper and more time looking at the object. Just concentrate on closely observing the object, keep drawing steadily, and pause and critique your work once you’ve finished.
There’s no “correct” amount of time to spend on a contour drawing, and it’ll likely depend on what you’re drawing. However, about 5 to 20 minutes per drawing is average.

Contour Line Drawing Practice Exercises
Now it’s time to put all this new art knowledge to the test! In this section are eight contour line drawing exercises you can do to improve your drawing and observation skills.
#1: Make a Contour Drawing of Your Hand
If you aren’t sure where to start with contour line art, start with something right in front of you! Hands are a very common object to do a contour drawing of, so once you finish, you can look online or in art books for lots of other examples of contour drawings of hands to compare to your own piece. When you’re drawing, remember to aim to look at your paper only 10% of the time.
#2: Copy a Contour Line Drawing by Another Artist
If you’re still getting the hang of contour art and are not quite sure how to tackle a real-world object, start by replicating another artist’s contour line drawing. Remember to look more at the object than at your paper, and focus on replicating the lines as closely as possible.
#3: Do a Blind Contour Drawing
A blind contour drawing means that you don’t look at your paper at all--not even for a single second--from the time you begin your drawing until the time you finish. Cover your canvas or sketchpad if you need to. Expect your drawing to look a little funny, especially if it’s your first time doing a blind drawing, but this is a great way to improve those hand-eye-coordination skills and learn to really focus on whatever it is you’re drawing.

#4: Draw the Outline of an Object With One Continuous Line
This takes the concept of drawing long lines even further. For this exercise, you’ll draw the object in one continuous line, never lifting your pencil from the paper until the outline is complete. Again, these drawings will look strange at first, but as you practice, you’ll improve your drawing skills and your ability to recreate the lines you see in real life.
#5: Make Five Contour Line Drawings in Less Than One Minute Each
Sometimes you just need a quick exercise to get your creative juices flowing, and contour art, because it doesn’t get into the details of objects, is great for this. This exercise involves drawing five contour line pieces in less than five minutes. You can draw five different objects, draw the same object five times, or a combination. Because you’re only spending a minute on each object, you’ll need to be able to replicate its form quickly but accurately.

#6: Draw an Object You Know Really Well
Choose something you’re very familiar with, such as a favorite childhood toy, the dresser that you’ve looked at every day of your life, or even a pet or friend, and make a contour line drawing of the object. This may be harder than you think. Because you know the object so well, you may be tempted to add in lots of detail, but remember, contour art focuses on the outer edges of the object. This is a good way to remember what’s important in contour art and what you don’t include.
#7: Use Cross Contouring to Add Dimension
Cross-contour lines are a way to add depth to your contour drawings without adding shading. To add them, you’ll draw parallel lines that run across the object, similar to those you might see on a topographic map. See examples here.
Cross-contour lines will help improve your observational skills and learn more about the rules of perspective by requiring you to pay close attention to the outlines of an object and how the lines run across it. The parts of the object that are closer to you will have cross-contour lines closer together, while the more distant parts of the object will have lines further apart.
#8: Draw an Object That's Upside Down
Once you’ve gotten the hang of contour line art, try drawing an object upside down! You won’t be able to rely on your memory as much since the object will be flipped, so this will exercise really force you to pay attention to the object’s form as you observe it.
Summary: Contour Line Art
Contour line definition art is a great way for any artist, whether beginning or advanced, to hone their drawing and observation skills. Contour line drawing involves only drawing the outline of an object, without any shading. When you do contour lines in art, you should spend the majority of the time looking at the object, not your paper, in order to improve your hand-eye coordination and really get a good sense of what the object looks like. Once you feel comfortable with the basics, there are many contour line art exercises you can try out to keep growing your skills!
What's Next?
Are you making an art portfolio to apply to art schools? Check out our guide to learn everything your art portfolio must include to stand out from the crowd!
Now that you know how to create a portfolio, are you wondering what art programs you should apply to? Check out our guide on the best art schools in the United States!
Trending Now
How to Get Into Harvard and the Ivy League
How to Get a Perfect 4.0 GPA
How to Write an Amazing College Essay
What Exactly Are Colleges Looking For?
ACT vs. SAT: Which Test Should You Take?
When should you take the SAT or ACT?
Get Your Free
Find Your Target SAT Score
Free Complete Official SAT Practice Tests
How to Get a Perfect SAT Score, by an Expert Full Scorer
Score 800 on SAT Math
Score 800 on SAT Reading and Writing
How to Improve Your Low SAT Score
Score 600 on SAT Math
Score 600 on SAT Reading and Writing
Find Your Target ACT Score
Complete Official Free ACT Practice Tests
How to Get a Perfect ACT Score, by a 36 Full Scorer
Get a 36 on ACT English
Get a 36 on ACT Math
Get a 36 on ACT Reading
Get a 36 on ACT Science
How to Improve Your Low ACT Score
Get a 24 on ACT English
Get a 24 on ACT Math
Get a 24 on ACT Reading
Get a 24 on ACT Science
Stay Informed
Get the latest articles and test prep tips!
Christine graduated from Michigan State University with degrees in Environmental Biology and Geography and received her Master's from Duke University. In high school she scored in the 99th percentile on the SAT and was named a National Merit Finalist. She has taught English and biology in several countries.
Ask a Question Below
Have any questions about this article or other topics? Ask below and we'll reply!
Get my TIP of the Month!
Line Designs with Shading
| (and added to his instructions just a bit) to use with my 4th & 5th graders for some end-of-the-year fun!! |
- White paper
- Black “F” Sharpies
- Colored pencils
Directions: 1. Draw a curvy line across your paper. 2. Make about 8 dots, unevenly spaced , on your line. 3. Next, connect the dots with curved lines. (The lines from the dots at each end should go off the paper, rather than curve back down to the line.) 4. Then, from each of these curved lines, build up a “column” of more curved lines (or “rings”), stacked on top of each other. Build one complete column at a time across the top half of your paper. If your columns start to slant or get smaller or larger, all the better! We found it easiest to develop every other one, and then connect the spaces in between. (When you fill in these “in-between” columns, make sure that each successive “ring” that you add connects at its ends to the ring below it.) 5. When the top half of your paper is finished, spin your paper around and repeat steps 3 and 4 until your entire paper is filled and all your columns are connected. 6. Finally, choose a color scheme (I chose “color families”, above) and color each of your columns, pressing harder on each side and lighter in the middle, to give it more of a 3D look!

You may also like...

Similar Posts

Self-Portraits for the 100th Day of School

More about Picasso….

Haiku Tunnel Books PDF Directions

The Healthy Benefits of Coloring for Kids

“Teach Kids Cartooning”

K Portfolios – a Purple Crayon Adventure!
Leave a reply cancel reply.
Your email address will not be published. Required fields are marked *
Notify me of follow-up comments by email.
Notify me of new posts by email.
This site uses Akismet to reduce spam. Learn how your comment data is processed .
35 Comments
Looks great! :) Glad the kids love it!!!!!
These look wonderful- I had a go myself inside a circle- looks great too. Very addictive!! Thanks for sharing! Jenny Kay
harika çal??malar ve harika payla??m…
Te?ekkürler, Alanay!
I like your circle idea, Jenny Kay! I'll have to try that!!
i am soooo trying this with my students next yr!
My bilingual fifth graders are STILL working on this project. . . you should see how long we've just been working on the shading concept. The thing is they love to start things. . .hate to finish them so I've been rewarding anyone who sticks with it and finishes their shading. . . lame I know! But it's the last few weeks. It would totally go over well with another class I'm sure. I hope they feel proud when they see what they've created. . . we'll see.
Hang in there, Art Project Girl! I'm sure your students will be proud of their finished projects! None of my students finished in one (50 min.) class, either. But most were motivated to finish it on their own, since that was our last art class for the year. I think their classroom teachers were happy for them to have a quiet activity (shading their drawings) they could keep in their desks and pull out as they finished other stuff!
I'm with Lori – I definitely want to do this next year – it's already bookmarked.
K-Sue of http://k-sue-smarties.blogspot.com/
Thanks for the moral support! I won't let them abandon this because at this point I think they need to feel pride in finishing:) I'm usually not a stickler but. . . It is artWORK not art recess right?
Hahaha! I love that, Art Project Girl!! I will have to remember that quote next year for my students… “It is artWORK not art recess right?” Brilliant!! :)
So cool! I'm going to get my own kids to try these this summer.
Hello, I am Lynda, an art teacher from Australia. i have just had a good look around your blog and feel very inspired by it. So, I am now following. I hope you can visit my blog too and see some of the things I do with my boys. By the way have you done any Chinese artworks with you classes?
Hi Lynda! I enjoyed looking around your blog, too! I found some great ideas I'll definitely be trying out! As for projects inspired by China, I have two right now: http://teachkidsart.blogspot.com/search/label/China Stay tuned for more to come!!
I had all three of my kids try this last week- my 11 year old loved it the most and finished but even my 6 year old tried his hand at it. I saw tubular critters in the design and added eyeballs which made it a whole different creation. Thank you for sharing! Let me know if there is a way I can share their work with you…
Love this and I want to try it myself. I have a degree in Art Ed, but I am a stay at home mom and photographer. I love these ideas for my kids. I gave your blog an award on my artblog today. GO check it out!
Christine, I would LOVE to see your kids' work!! You can email me at cbtrowbridge[at]gmail[dot]com. And Danett, I enjoyed looking through your blog – what a beautiful family! So glad you can share the joy of art with them!! :)
were you all talkin turkey up there?? I lived in Istanbul for a summer…loved it!!
Haha – yes, Mr. E.! Thanks to Google translator!! :)
We made these at a Music Theatre Summer Camp, the kids loved them!!! thanks!
I will have my kids work on these next week! Can't wait to share their creations with you. I picked up your email address from a few comments up. :)
Your blog is so well organized and VERY inspiring!! Thank you for sharing your ideas and talent!
Great stuff. Gonna try it!
Doing this tonight with my new art students, just trying it myself and it's fun! I say they look like stripy socks. Thanks for a great blog. Blessings. x
Really enjoyed doing this my Gr. 6-7 students (and doing it myself). I appreciate your excellent directions, too. Here are the results of our efforts (and your teaching!) on our class blog .
Thanks again for sharing so generously, Jan
Jan, your students did a great job! Thanks for sharing!!
Saw this on Mr. E's blog after finding it on Pinterest (LOVE!). I teach Middle School Art and the students love/hate this project. They love the way it looks and how complicated it SEEMS, but I have them do it on a large scale, as an extra credit assignment to work on whenever they finish their current project. IT's very time consuming, which is great because it keeps them busy for a long time. They refer to it as the “Tornado” drawing, or “worms” or even “tornado worms”. Love your blog btw!
I really like this for my 5th graders who work on 3d looks all year. I call it “Giant Snails and Dragon Tails.”
I love that name, Stephanie! Great idea!!
i think they should be call stalagmites (for the ones that go up) and stalactites (for the ones that go down) after the rock formations that form one “drip” at a time. these are formed similarly – one line at a time :)
Good idea, Kim!
- Pingback: An art-teachers creative class collection | Sanna K Design
- Pingback: UN AULA DE VERANO EN CASA | La Cajita Azul
- Pingback: 4th grade art – Westwood Homeschool
This is so cool I did it with my fith grade class this week.
That’s awesome, Colin! I’m glad it was a hit with your students!
Line Drawing Art Worksheets
Line Drawing Art Worksheets are a great tool for aspiring artists and individuals who want to explore their creativity through drawing. These worksheets provide a structured and organized way to practice and improve your drawing skills. By following the step-by-step instructions and exercises in these worksheets, you will gain a better understanding of lines and shapes in drawing, as well as improve your hand-eye coordination. Whether you are a beginner or already have some experience in drawing, these worksheets will help you refine your techniques and achieve greater precision in your artwork. Enhance your artistic abilities and bring your drawings to life with line drawing art worksheets.
Table of Images 👆
- Line Elements of Art Value Worksheet
- Drawing Geometric Shapes Worksheet
- Art Drawing Practice Worksheets
- Symmetry Art Activities
- Line Drawing Techniques Worksheet
- Op Art Lesson Worksheet
- Symmetry Art Worksheets
- How to Draw Clenched Fist
- Elements of Art Value Worksheets
- Line Art Lesson Worksheet
- Symmetry Art Activity
- Train Outline Drawing
- Tiger Drawing Symmetry Worksheet
- Cross Contour Line Drawing
- Drawing Basic Shapes of 5
- Duck Clip Art Line Drawings
- Leg Outline Clip Art
- Van Gogh Starry Night Coloring Page

Enhance your artistic abilities with our line drawing art worksheets , providing detailed exercises for contour line drawing.
More Line Worksheets
Develop your art skills through these Line Drawing Art Worksheets!
What are the Elements of Art?
We cannot separate art from humans. It is a medium that helps people to connect with their surroundings. As there are various arts, we can enjoy or create many things. Art is an aspect of life that guides someone to beautify and romanticize their life. It is an aspect of the long-lasting human culture.
People who make art is known as artist. Everyone can be an artist as long as they understand the seven elements of art. Understanding them will help someone deliver a craft that communicates with the audience.
According to the Mississippi Museum of Art, the seven elements of art are line, color, texture, value, space, form, and shape. These elements refer to stylistic features which enable the artist to deliver the message through their creations.
The mastermind behind the Seven Elements of Art is an American artist and art teacher, Arthur Wesley Dow. His invention became the foundation for modern artists to develop the current elements of art.
What does a Line from Elements of Art Mean?
As we learn from the previous part, the seven elements of art are essential complements to make a craft have more dimension and value. It can escalate how the audience perceives the art and help them understand the message behind the creation. The appropriate use of art elements will give the effect of unity and a sense of order to the works.
When someone cannot combine the parts of art, their message will not get delivered to the audience. We will discuss the line in this part among the seven elements (line, color, texture, value, space, form, and shape).
In art, the line refers to the element of a continuous mark. The artist creates it on top of a surface with a moving point. Lines have various variations depending on the size, length, or pattern. There are some types of lines that artists should master: two-dimensional, three-dimensional, descriptive, implied, or abstract.
Other experts also mention kinds, such as horizontal, vertical, short, long, curved, straight, or zig-zag. Artists use lines to build a foundation structure of a creation. It also provides various effects on the arts, such as movement, rhythm, or emphasis. The line also represents the borders of a form in art.
Why is Studying Line in Art Important?
Art helps an artist to deliver on how they see the world. It will make many people learn a different take on the same world they live in. However, sometimes, some people could make a wrong assumption about art because of the lack of understanding or the unclear message. Even though an artist should not be obligated to create a particular craft, it is better to make an apparent creation if they want to deliver a specific message to the audience.
One of the methods or strategies to create unambiguous art is to master the seven elements of art. It will help the artist to make a craft with an apparent message to the audience. As one of the elements of art, the line has a vital purpose in art . It helps the artist to create the work's shapes, figures, or forms. Line also indicates motion, emotion, and other elements to elevate the art.
Many experts stated the undeniable importance of this element as it is one of the fundamental for artists to create something. Hence, we can conclude that every beginner artist should master the line.
How to Teach Line in Art for Beginners?
As we learn from the previous part of elements of art and their importance, it is essential for people who start to learn about art to master them. The beginner should start studying these elements. Parents and teachers of young learners could help their kids and students to start practicing about line as the starter. Below are the strategies to learn line:
- Teach the 2-4-year-old kids to do big scribbles practice.
- From age four until six, the kids can learn paper line sculpture or make a line on the ground with a stick.
- The kids could start to study graphic and contour lines at the age of five until eight years old.
- The young learners can begin the more complex practice, such as doodling or drawing actual objects, at eight.
How to Improve Art Skills?
Many people have a high interest in art. It is not a surprising fact because having the ability to create something is a way for someone to express their views, ideas, and opinions.
The arts also work as a source of income for many people. Hence, it is never a waste for people to learn art. People can develop their abilities through various regular practices, having broad exposure to creation-making, and the appropriate physical and mental support.
Through the Line Drawing Art Worksheets, whether you are an art student or a beginner artist, the various art activities in these worksheets will help you practice your skills. Sketching exercises, drawing tutorials, contour drawing practices, and shading technique practices are some of the activities you could do with these worksheets.
Mastering lines in drawing is crucial for the artist because it helps the artist to create the work's shapes, figures, or forms. Line also indicates motion, emotion, and other elements to elevate the art.

Have something to share?

Dec 26, 2022
These Line Drawing Art Worksheets offer a great opportunity to practice and improve my drawing skills. Thank you for providing this helpful resource!
Dec 11, 2022
These Line Drawing Art Worksheets are a great tool for refining my drawing skills. They provide a clear and concise way to practice different techniques. Highly recommended!
Sep 20, 2022
I really love these Line Drawing Art Worksheets! They provide a helpful and enjoyable way to practice and improve my drawing skills. They are straightforward and easy to use, allowing me to create beautiful line drawings with confidence. Highly recommended!
Sep 14, 2022
I really enjoyed these Line Drawing Art Worksheets! They provided a great foundation for learning and practicing various line drawing techniques. Thanks for creating such a helpful resource!
Aug 17, 2022
These Line Drawing Art Worksheets are a wonderful tool to enhance my artistic skills. The clear instructions and variety of exercises provide a fun and engaging way to practice different techniques. Highly recommend!
Who is Worksheeto?
At Worksheeto, we are committed to delivering an extensive and varied portfolio of superior quality worksheets, designed to address the educational demands of students, educators, and parents.

Popular Categories

Lines of Symmetry Worksheets
Drawing Contour Lines Worksheet

Blank Printable Timeline Worksheets
Unsupported browser
This site was designed for modern browsers and tested with Internet Explorer version 10 and later.
It may not look or work correctly on your browser.
- Design & Illustration
- Drawing/Illustration
Assignment: Create a Contour Line Drawing
This week the assignment is to work on a contour line drawing. Line is one of the fundamental drawing techniques, both traditionally, and for the vector artist. This assignment will teach you to see lines in subjects, capture them through drawing sessions, and experiment with bringing them into Illustrator, or your favorite vector program.
Today's Assignment
Today's assignment is to draw your hand as a contour line drawing. Why draw your hand? Hands are excellent drawing practice, and your non-drawing hand is always available as a reference. It will be there with you no matter where you are :)
To begin with use a pencil or pen and practice this quite a few times, over the course of multiple drawing sessions. We'll touch on the vector portion of this in another section below.
Think of contour drawing as drawing the edges of the subject. It's the outline of what you're drawing, as well as the internal edges. By drawing the edges you'll start to see the three-dimensional form of the subject. So on a hand, it's the outer edge of the hand, as well as the fingers, creases that go across the palm, or knuckles, joints might show lines, etc.

This is my left hand, one of a few I drew in a recent drawing session.
This is one of the better ones. Most of them I wouldn't want to show anyone. Don't let perfection get in the way of drawing practice. Half of my sketchbook is always filled with rudimentary practice drawings, and then some decent ones, and a couple gems.
Here are some tips for creating this contour drawing:
- Don't get too worried about drawing perfectly, as that comes with time.
- Keep your eyes mostly on your hand, and not so much on your paper.
- Don't invent, avoid meaningless lines, and try to draw accurately only the lines that run along edges.
- Use long bold lines, rather than short indecisive lines, try to keep your pencil in contact with the paper as much as possible.
- Avoid too many corrections, like erasing, or redrawing lines. I know it's tempting.
- Try capturing a bit of the whole before you get into all the detail, which is an effective strategy here.
Taking Your Contour Drawing Into Illustrator
Ideally you would have done quite a few contour drawings already on paper. Now take one you're happy with. Scan it in and place it in Illustrator. Use the Paintbrush Tool to trace over your lines. Obviously, this is more easy if you have a Wacom to draw with. I'm still trying to get used to using mine.
You may need to experiment with brush setting a bit. Try researching some of the tutorials here on Vectortuts+ and experiment with what settings and brushes fit your traditional drawing style.
If you come across any other helpful tutorials on using Illustrator's Paintbrush Tool for drawing leave a link in the comments, and indicate how it helped you. Cheryl has a great one here Create CS5 Width Profile Brushes in any Version of Adobe Illustrator CS that I plan to read again this weekend.
I'm not 100% happy with how the vector hand below turned out, but it was good practice. The settings I was using for the Paintbrush Tool redrew the line a bit too curved, which lost some of the original sketch's characteristics. I also might play more with brush thickness and read some tutorials to learn more about using the Wacom.

My left hand vectorized and then colored with mild effects.
After you've created your lines, experiment with coloring the lines, background, and adding subtle effects. It's often good to see what different feeling you can get by adding just a few changes, as shown above right.
Keep in mind the focus of this assignment isn't perfection, but to practice. To build habits and experience that help you grow as an artist.
Taking This Further
After you've draw your hand multiple times and you're getting bored with the subject, then grab some objects around the house. Coffee cups, plants, pencil holders, staplers, just about anything could make a good subject for a contour drawing.
There are of course more methods to contour drawing. Blind Contour drawing is something I recommend you try. If you were to take a drawing class the teacher would likely have you do this during an in class session. Long term it's a great way to warm up to begin a drawing session.
Blind contour drawing is a little weird, but it's a great way to get better at drawing quickly. It's the same as contour drawing, in that you're capturing edges, however you don't look at your paper - that's the weird part. So of course the final drawing won't turn out perfect (just accept that and consider this practice drawing, which it is), but you'd be surprised at some of the details you can capture while intensely focused on your subject. It really teaches you to see detail and capture it.
Share Your Work
Once you have a contour drawing you're happy with vectorize it, export a final JPG, and then share it with the community by uploading it to the Vectortuts+ Flickr group . Be sure to tag your upload as "vtassignment-contourdrawing" so we can see everyones uploads together, which will make it easier for everyone to comment on each other's work. You're welcome to link to your work in the comments below as well. I'd love to see what everyone puts together.


- all ART-1 lessons
- all classes
- art teacher resource
- art vocabulary
by JuliannaKunstler.com

Learning objectives:
- abstract thinking
- critical thinking
- eye-hand coordination
- fine-motor skills
The purpose of this project is to practice the eye-hand coordination.
An important part of learning how to draw is to develop eye-hand coordination skills. It is not as easy as you might think….
Remember, last time you were drawing… you had a perfect picture in your head…. but once you started to draw it… it did not turn out as you have pictured it. Why? Because along with developing drawing skills and techniques, you need to develop a very basic skill – make you hand draw what you have in mind. How we do that? Practice… practice… practice…..
The following exercise will help you to develop this skill. Please note: YOU HAVE TO WORK SLOWLY. Take your time. Learn how to control your own hand. Tame those lines!
Work with a black pen.
materials used:

laserjet paper

Sharpie ultra fine point

worksheet 1: practice

Use worksheet 1 to practice. Follow the steps:
You start with 3-4 random lines inside the square. These can be straight lines or curves. Each line should start and end at the border of the design or another line.
The startup lines should not be loose. Their purpose is to divide a square into enclosed areas..
Now you concentrate on one area at a time.

If we pick the top left area first - analyze it.
It has 3 sides.
That means that the lines we are drawing can be only parallel to these 3 sides.
Place your first line parallel to one side.
You start at a line and finish at a line. Do not cross lines.

Once you completed the first line - change the direction you are drawing.
Your second line will be parallel to another side.
Get them close together without having them touch (except at the ends).
Once a line touches another line – change the direction.

Once you are done with the second line - start the third line, that is going to be parallel to the third side.
You can continue the process "in a circle" - using all sides, or use only select sides of the area, or use only 2 sides

Once you are done with one area – move to the next one.

Continue the process until your design is done.

worksheet 2: create
Once you are comfortable with the concept - move on to the next worksheet.
This one is to create your own designs, using the same approach.
You start with 3-4 initial lines to divide a square.
Then fill in each ares with parallel lines following the guidelines.

Select your best six.
Cut them out.
Present them on a piece of black board or paper.
Presentation is a part of your grade.

IMAGES
COMMENTS
These cross contour drawings were completed as part of Breadth assignments for AP Studio Art. These drawings show clever use of line thickness, with the line-weight varying in order to create the illusion of tone and show three-dimensional form. ... Wire Sculpture Line Drawing Exercise: This is an excellent activity for middle school students ...
13. Spiral 3D Line Drawing. In this striking line art activity, kids create a radial design by drawing intersecting straight lines and arcs using a ruler and compass. They then fill the shapes with different patterns using black ink. This is a wonderful way to teach kids the concepts of symmetry and radial balance.
1. All assignments must be completed on or before the due date. 2. Unfinished artwork is graded as such. 3. If you are absent, it is your responsibility to make up all work. You can sign out art supplies if needed. 4. If your project requires extra time to be completed, you have to make arrangements with me prior the due date. This is your ...
Line Droving Techniques s ort as es cross- atc ins wavy lines hatching stipp ing Ots scribbles www.stuÄentartsuÄe.com I. use a different line technique to fill each of the 12 small boxes. Invent your own techniques to fill the last 6 boxes. Z. use these techniques to apply tone to the geometric objects drawn to the right.
Background. Line is a mark made using a drawing tool or brush. There are many types of lines: thick, thin, horizontal, vertical, zigzag, diagonal, curly, curved, spiral, etc. and are often very expressive. Lines are basic tools for artists—though some artists show their lines more than others.
Step by Step Sketchbook Drawing Prompts. Practicing basic drawing techniques can help artists of all ages build confidence and sharpen their technical skills. I love having my students keep a sketchbook. It's a great opportunity for students to practice foundational skills, brainstorm artwork ideas, and write and reflect about their own ...
1. A solid, or continuous line. 2. All kinds of Interrupted or broken lines: dashed lines, dotted lines, footprints or tire marks - they all would fit in that category. 3. Implied lines are the lines you assume. These lines are not actually drawn, but you can see them as a border between other elements ….
3 Examples and Simple Line Art Ideas. 1. Simple Botanical Line Art. Botanical line art is one of the most commonly used thanks to its flexibility. Skillshare instructor Peggy Dean shows how easy it is to get started. Botanical and floral designs are some of the most common drawings using the line art style.
Modern line drawings by Ultima Thule: there is a slick contrast in this drawing between the sharp black lines and the dripping green. The application of colour to one area creates a dramatic focal point. ... These cross contour drawings were completed as part of Breadth assignments for AP Studio Art. These drawings show clever use of line ...
Intuitive Drawing: Illustrate Your Own Ink Fairy Tale. Masterclass: Creative Line Art Drawing With Ink Pens. Concept Illustration Practice: Turn Your Fears Into A Surreal Scary Creature! Your Body In Abstract: Mixed Media Illustration As A Self Care Practice. Abstract Drawing Adventure: A Creative Exploration For Mind And Soul
By the end of the semester they must have at least 12 pages completed in their book. The PowerPoint to introduce this project, lesson plan, and rubric are included in this pack. Before the students start longer drawing projects, they complete a shading review. Seven worksheets are included that cover graphite pencils, hatching, cross-hatching ...
These Line drawing worksheets are an excellent way to get started in the field of art and hone your skills. You can use an assortment of tools such as pencils, felt-tip pens, markers, and even charcoal for this exercise. If you love line art like me, we also have Line Art Printables and Minimalist Free One Line Drawing Printables that you can use.
Lesson 1: How to Sketch. If you can make a mark on a piece of paper, you can sketch! -> Go to lesson! Lesson 2: Learn to see things differently. Learn how you can draw more accurately and quickly by breaking complicated objects down into simple shapes -> Go to lesson! Lesson 3: Going from 2D to 3D.
A line is a mark or stroke that is long in proportion to its width. Lines are the fundamental marks used in drawing. There are three uses for line in art: Contour - used to define edges. Divide space - used to separate areas in an image. Decoration - used to adorn or embellish. CONTOUR LINE: FRENCH word meaning "OUTLINE".
Step 4: Go Slow and Steady. It can be tempting to rush through contour drawing exercises, especially if you're used to drawing detailed pieces where the outline is only the first step. Remind yourself to slow down and concentrate on replicating the outline of the object as perfectly as you can. At the same time, don't freeze up while you ...
Have the students draw different types of lines on their papers using oil pastels. Do this by saying out loud the type of line and the direction to draw the line. When each line is complete, ask the children to switch to a new color to get ready for the next line. Once the lines have been drawn, children fill in the spaces between the lines ...
Draw a curvy line across your paper. 2. Make about 8 dots, unevenly spaced, on your line. 3. Next, connect the dots with curved lines. (The lines from the dots at each end should go off the paper, rather than curve back down to the line.) 4. Then, from each of these curved lines, build up a "column" of more curved lines (or "rings ...
Tiger Drawing Symmetry Worksheet. Cross Contour Line Drawing. Drawing Basic Shapes of 5. Duck Clip Art Line Drawings. Leg Outline Clip Art. Van Gogh Starry Night Coloring Page. 18 Images of Line Drawing Art Worksheets. Line Elements of Art Value Worksheet. Drawing Geometric Shapes Worksheet.
Drawing/Illustration Vectors. This week the assignment is to work on a contour line drawing. Line is one of the fundamental drawing techniques, both traditionally, and for the vector artist. This assignment will teach you to see lines in subjects, capture them through drawing sessions, and experiment with bringing them into Illustrator, or your ...
Place your first line parallel to one side. You start at a line and finish at a line. Do not cross lines. Once you completed the first line - change the direction you are drawing. Your second line will be parallel to another side. Get them close together without having them touch (except at the ends).
Drawing&Painting: Sketchbook Assignment 6, Due Friday 10/28. Page 1: Make 15-20 gesture drawings on one page, but only take one minute per drawing. Sketch 2: Set up a still life of 3 or more objects and draw them using shading and value. Try to draw them to scale and with the proportions correct.
Line drawings may seem straightforward, but you can achieve a lot with some practice and attention. "You have to evoke the transition from dark to light with either crosshatching or line weight, heavier lines being more in shadow, lighter lines indicating that the light source is hitting that side of the object," says comic artist Jonathan Case.