Skip to Main Content

4M Crystal Growing Experiment Kit
Use this complete Crystal Growing Experimental Kit to grow seven different crystal types in a variety of sizes and colors. More Info
In Stock & Ready to Ship
Need it fast? See delivery options in cart.
Free Shipping on Most Orders $100+
- Create New Wish List

Product Description

CHOKING HAZARD: Small parts. Not for children under 3 years. Adult supervision required.
What’s Included
Specifications, more details, science standards, videos & guides, shipping & returns.
- Economy Shipping is $7.95 for most orders (some products are not eligible ).
- FREE Economy Shipping on orders $100+ with code 100FREESHIP .
- Orders with 1-day or 2-day shipping placed by 1:00 pm MST ship the same day. All other orders typically ship the next business day.
- See Shipping Information for more details.
- Returns: Return unused products within 60 days. To get started, see our return policy .
Use this complete Crystal Growing Experimental Kit to grow seven different crystal types in a variety of sizes and colors. More Info
DESCRIPTION
Growing beautiful solid crystals from liquid solutions is a great way to get your kids thinking about chemistry! Use this expansive Crystal Growing Experiment Kit to grow seven crystals in different sizes and colors. Watch as the dissolved particles join and solidify in an ordered way to form crystals up to 1" in size.
The 4M Crystal Growing Experimental Kit includes instructions and all the materials needed. Ages 10 and up. Some adult supervision needed.
MORE INFORMATION BOX
CONTENTS TAB
Crystal Growing Experiment* Kit contents:
- 3 bags of crystal compounds
- 3 bags of seeding mixture
- Stirring bowl
- Stirring spoon
- 7 display bases
- 7 display covers
- 7 ring shaped templates
SPECIFICATIONS TAB
You Might Also Like
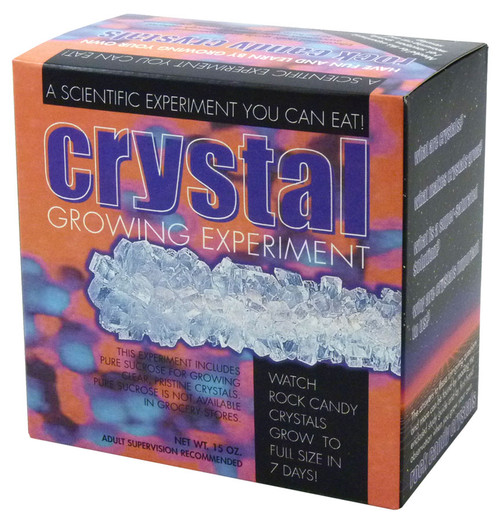
Grow your own rock candy crystals with this unique Crystal Growing Experiment Kit! Kids will love this delicious sugar crystal science experiment; edible science is a perfect way to engage curious learners!
View Details
Need It Fast? See Delivery Options In Cart.

Grow amazing colored crystals almost instantly! Simply set up the multi-colored paper tree in the stand, and pour in a chemical solution.
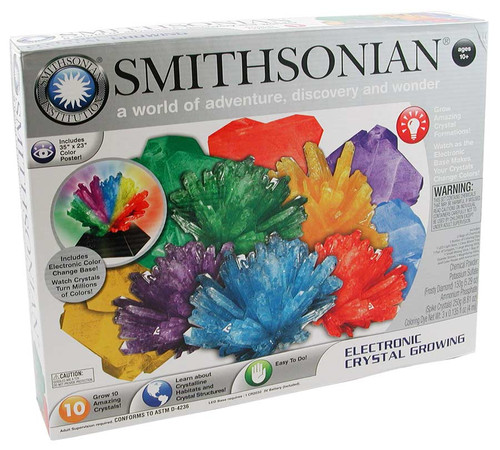
Grow two types of crystals in nine bright colors with this crystal growing kit from Smithsonian.

Use this educational weather kit to keep track of the daily and monthly weather patterns, as a complete unit study, or to develop a neat science fair project!

Learn about and experiment with light and optics.
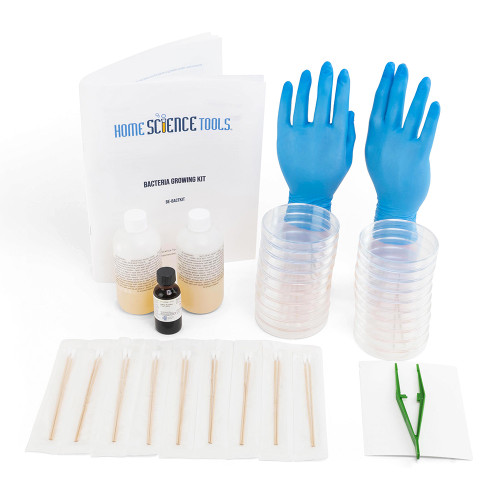
Growing bacteria is easier than you think. Learning about it is even easier with our bacteria growing kit. Use this kit to explore, experiment, and learn about the bacteria in your life.
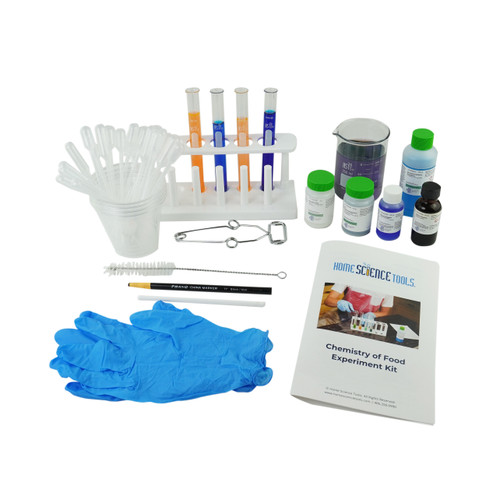
If you are what you eat, what makes up your food? Experiment and learn about the connections between chemistry & nutrition for a meaningful STEM activity.
Item ships to the United States only.

This kit is designed specifically for the Experience Biology curriculum from Journey Homeschool Academy. Includes everything needed (except for a microscope, which can be purchased separately). See contents list below!
This item only ships to a street address in the 50 US states.

Build your own rocket using just a bottle, water, and a bike pump.
We get it. Science can be messy. But Home Science Tools' products and service can handle it.
Our products are durable, reliable, and affordable to take you from the field to the lab to the kitchen. They won't let you down, no matter what they're up against. Whether it's (over)eager young scientists year after year, or rigorous requirements that come once-in-a lifetime.
And if your science inquiry doesn't go as expected, you can expect our customer service team to help. Count on friendly voices at the other end of the phone and expert advice in your inbox. They're not happy until you are.
Bottom line? We guarantee our products and service won't mess up your science study—no matter how messy it gets.
Questions? Get in touch with our Customer Service team.
In-Store and Online
Crystal Growing Experimental Kit
Is £23.00
Product Description
The Crystal Growing Experimental Kit is the perfect way to create crystals of your very own!
Conduct seven unique chemical experiments to grow your own set of aquamarine crystal clusters, glow-in-the-dark moon crystal clusters and a crystal tree. Learn how crystals are formed from solutions and display them as a collection to show to your friends!
The set includes everything you need to create your cool crystal collection, so why not start enjoying practical science right in front of your eyes? It'll be a fascinating way to learn all about how crystals form. Once you've created them, you can show them off on the display bases that are included.
- Pack size: 22 x 24 x 8cm (8.7 x 9.4 x 3.1 inches)
- Features seven experiments
- Includes crystal compound, seeding mixture, display bases, stirring bowl, stirring spoon, templates and instructions
- Suitable for ages 10 years and over
- A great way to learn about crystals
Product Number - 6463951000
Delivery & Returns
Royal Mail strikes may cause delays. Find out more .
Please note: all Click & Collect orders in our Luton store will be available next day.
Bank Holiday may cause delays to home delivery and Click & Collect services.
UK Click & Collect
*Click & Collect is free for orders £10 or more, or £2 if you spend less
Order before 10pm for collection from 1 hour or next day depending on store stock, excluding Sundays and Bank Holidays.
Standard UK Delivery
*Free for orders over £25
UK Next Day Delivery
*Free for orders over £200 £6.95 for orders under £200
Order by 10pm, or 6pm for fabric by the metre (exl. Sunday and Bank Holidays)
Large Items UK Delivery
£6.95 for all orders
International Delivery
Find out more about all delivery options.
FREE Returns to Store
FREE Online Order Returns by Post
Find out more about all returns options.
Specifications
Kids' workshops, kids' ideas.
Find your next project
School Projects
Enjoy exclusive offers.
Join the Hobbycraft Club
Save 15% on your first order
- Crystal Growing Experimental Kit Reviews - page 2
- y_2024, m_11, d_2, h_7
- bvseo_bulk, prod_bvrr, vn_bulk_3.0.42
- cp_1, bvpage1
- co_hasreviews, tv_0, tr_28
- loc_en_GB, sid_6463951000, prod, sort_[SortEntry(order=RELEVANCE, direction=DESCENDING)]
- clientName_hobbycraft
- bvseo_sdk, dw_cartridge, 18.2.0, p_sdk_3.2.0
- CLOUD, getReviews, 4ms
- reviews, product
Craft with us at our workshops
In-Store Workshops
Online Workshops
with Name Here
Cricut Workshops
Related Products
Is £15.00
Is £10.00
Is £17.00
Is £18.00
Is £20.00
Related Items
- botanical mini kit
- science kit
- galt slimy lab
- kidzrobotix tyrannosaurus rex robot
Related Categories
- my living world bugs
- candle making kits
- kids nature gardening kits
- galt science kits
- Login / Register
Menu drawer
- View all Christmas
- Adult Gifts
- Children's Gifts
- Gifts For Young Scientists
- Space Gifts
- Science Museum Gift Card
- Adults Stocking Fillers - Under £18
- Kids' Stocking Fillers - Under £18
- Gifts under £30
- Gifts under £50
- View all Science Kits
- Robotics and Coding
- Physics and Engineering Kits
- Chemistry and Biology
- 3yr - 4yr (Pre-School)
- 5yr - 7yr (Key Stage 1)
- 8yr - 11yr (Key Stage 2)
- 12yr - 14yr (Key Stage 3)
- Adult (15+)
- View all Space
- Telescopes and Microscopes
- Space Homeware and Stationery
- Space-Inspired Clothing
- 0 - 18 Months
- 18 - 36 Months
- View all Toys
- Activity (build and play)
- Games and Puzzles
- Toy Trains & Vehicles
- View all Fashion
- Adult Clothing
- Kids' Clothing
- Accessories
- View all Homeware
- Home Accessories
- Kitchen and Dining
- Calendars and Posters
- Science & Industry Museum
- View all Exhibition Ranges
- Science Museum Exclusives
- Periodic Table Inspired
- View all Railway Museum
- Flying Scotsman
- Railway-Inspired Clothing
- Toys and Puzzles
- Books, Calendars and Posters
Your basket is currently empty.
This item needs to be bought together with other items.
Crystals and Precious Stone Experiment Kit
Usually dispatched within 3 to 4 days
Your wishlist has been temporarily saved. Please log in to save it permanently.
Unleash your inner scientist and explore the world of dazzling, oversized colored crystals with our comprehensive Crystal Growing Set! This extensive kit includes all the essential tools and ingredients needed for creating magnificent, glittering crystals. Delve into the fascinating realm of precious stones, where you can study and collect specimens like amethyst and blue agate, waiting to reveal their natural beauty.
Payment: No modifications can be made to the delivery address once payment is complete.
- UK Mainland & UK Offshore:
- Standard Delivery (3–4 working days) - £5.5
- Express Delivery (1–2 working days) - £7
- Upgraded Delivery *Mainland only (Next working day) - £9
- UK Offshore Express Delivery (1–2 working days) - £10
- International Delivery: For details on USA, Japan, and Australia, click here .
- Orders Containing Alcohol: For delivery costs, click here .
Additional Information:
- Read full delivery information .
- Browse our easy returns information .
For those curious minds, our detailed scientific manual unlocks the secrets behind crystal formation and the chemical reactions of salts, making the learning experience both educational and fun.
Crafted with care in Italy, our Crystal Growing Set provides an enriching and immersive journey into the world of crystals, perfect for aspiring scientists and mineral enthusiasts alike.
6 x 41.8 x 27.8cm
Warning: not suitable for children under 36 months. Choking hazard.
Adults and children
Full Product Description
Specifications, customer reviews.
Really good with young nephews. However, the only negative is the instructions, which could be more precise, especially regarding quantities and times.
Good value and hours. Of fun for my grandson.
Subscribe to our newsletter
Be the first to hear about special offers and new products.

Recommended additions
- Earth Science
- Physics & Engineering
- Science Kits
- Microscopes
- Science Curriculum and Kits
- About Home Science Tools
Science Projects > Chemistry Projects > How to Make Crystals: Grow Your Own Crystals
How to Make Crystals: Grow Your Own Crystals
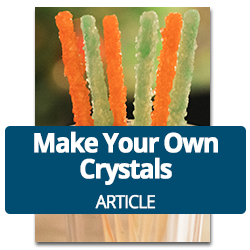
What are crystals and how do they form? With these crystals growing science experiments, you will grow crystals of your own to find out more about these fascinating and beautiful wonders! A crystal is a solid material with atoms and molecules that are arranged in a consistent repeating pattern, creating one of seven geometrical shapes. Crystals can be expensive and beautiful, like amethysts or diamonds. But they can also be found right in your kitchen in the form of sugar and salt! You can easily grow crystals by adding a crystal-forming chemical to water and waiting for the water to cool or evaporate.
Here you’ll find five different methods for how to grow crystals. Science experiments with instructions are provided for each. How does the chemical used affect the crystals grown? Which crystal growing science project is your favorite?
Crystal Growing Science
- Rock Candy Sticks
Get ready to watch some cool crystals grow! And when you’re done, you can eat them or give them away as Christmas gifts! Click here to download a rock candy crystals printable.
What You Need:
- 1 1/2 cups of white sugar
- 1 cup of water
- Small plate
- Several 250 ml beakers or small clean jars
- Cake pop sticks or wooden skewers
- Food coloring pack (optional)
- An adult to help you
Note: You can make Rock Candy without sticks. Use a piece of clean cotton string or thread. Follow steps 2-7 below then dip the string into the solution so that half of the string is coated. Take the string out and let it dry. Once the string has dried, tie the clean end around a pencil and put the dipped end back into the glass of sugar water solution, balancing the pencil across the rim of the glass. Make sure the string does not touch the bottom or the sides of the glass, or your crystals will not form right! When your piece of “rock candy” is as big as you want it to be (about one week), take it out of the glass, let it dry, and enjoy!
1. Fill a glass with water, pour some sugar on a small plate, and lay out a sheet of waxed paper. Dip one end of each stick (cut pointed ends off if you use skewers) into the water and then roll it in the sugar, tapping it gently to remove excess. Set each stick to dry on the waxed paper.
2. Pour the cup of water into the saucepan and add 1/2 cup sugar. Stir it well until no more sugar will dissolve. Add more sugar (1/2 cup at a time) until you can’t get any more to dissolve even after stirring for several minutes. You should end up with about 1 1/2 cups sugar dissolved in the saucepan. It’s OK if there is some undissolved sugar at the bottom of the pan. (You now have a saturated sugar solution.)
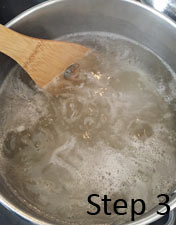
3. Ask an adult to help you heat the sugar mixture on the stove until it boils, stirring the whole time. Turn the heat to medium-low and keep stirring until all the sugar dissolves. (Now you have made a supersaturated solution!)
4. Keep cooking the liquid and stirring it until it becomes clear, but not for more than 5 minutes, or it will get too hot and turn into hard candy! Turn off the stove as soon as it starts to look clear.
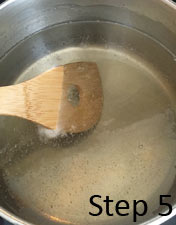
5. Move the pan off the heat and allow it to cool down until the pan is no longer hot (the sugar solution will still be slightly warm).
6. Have an adult slowly pour the thick sugar solution into the jars. Fill each about 2/3 full, or enough so that sugar solution will cover several inches of your sugar-coated sticks.
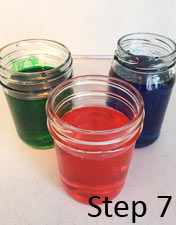
7. Add 5-6 drops of food coloring to each jar and stir. (Optional: Only do this step if you want to make different colors of rock candy!)

8. Once the solution is cool and the sugar-coated sticks are completely dry, place several sticks into each jar.
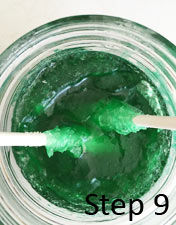
9. Carefully move the jars to a place where they won’t be disturbed. Check them every other day and gently stir the sticks around in the sugar solution to break up any large crystals forming on the surface.
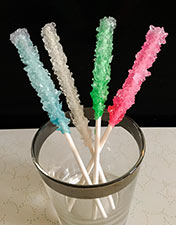
10. Within a few days, you should start to see crystals growing on the sticks. After about one week, you will probably have a lot of crystals. When your “rock candy” crystals are as big as you want them to be, take them out of the jars and set each color of candy in a clean glass to dry.
11. Once they are dry, you can wrap in cellophane food wrap and tie with ribbon for a sweet Christmas gift!
What Happened:
In step two you made a saturated solution—there was so much sugar in the water that it couldn’t dissolve any more sugar and some was left in the bottom of the pan. Once the saturated solution started to heat up, the water was able to dissolve even more sugar and a supersaturated solution was formed in step three. Then, as the solution cooled, the sugar molecules in it started to join with the sugar molecules on the sticks. The sugar on the sticks are called “seed” molecules and the sugar molecules in the solution attached themselves to the seed molecules.
Meanwhile, the water in the solution started to evaporate or dry up into the air, leaving only sugar molecules behind. More sugar molecules gradually joined with the ones already on the stick, forming larger crystals. Because all of the solute molecules are the same (they are all sugar), they all form the same shape of crystals and they all stick together, making a big chunk of sugar crystals that are pretty to look at and tasty to eat!
Note that this is a special science project that is safe to eat because you only used food products, not chemicals. Plus, you used clean dishes from your kitchen. Never eat any experiment unless it is made entirely out of food and you only used clean dishes to prepare it!
Back to top ^
- Sparkly Crystal Ornaments
In this project, you use a chemical called Borax to grow crystals shaped like snowflakes, stars, or candy canes. Then you can use them as pretty decorations!
- Wide-mouth jar
- Pipe cleaners
- 1-cup measuring cup
- Food coloring (optional)
- Glow-in-the-dark paint (optional)
- Ribbon (optional)
What You Do:
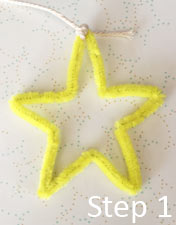
1. Twist pipe cleaners into whatever shape you’d like (we chose a simple star). Note: Make sure your pipe cleaner shape will fit easily into your jar with plenty of space around the mouth of the jar as the shape will be slightly wider once crystals have formed on it, making it harder to remove!
2. Tie a piece of string to one point of the shape. Tie the other end around the middle of a pencil.
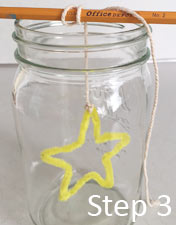
3. Hang the shape in the jar with the pencil resting across the mouth of the jar. Make sure that it hangs without touching any part of the jar. Take it out of the jar and set it aside.
4. Use a 1-cup measuring cup to count how many cups of water you need to fill your jar about 3/4 full. Then microwave the jar of water for 3-5 minutes or until it begins to boil. Have an adult carefully take the jar out using hot pads (the jar will be very hot!) and set it on a heat-safe surface.
5. For every cup of water you put in the jar, measure three tablespoons of Borax. Stir the Borax solution with a spoon until as much of it dissolves as is possible. If you don’t see any tiny pieces of Borax floating around in the jar, add another tablespoon and stir. This will make a saturated solution.
6. Hang your pipe cleaner shape in the jar so that it is completely covered in the solution. Let it sit overnight. Gently remove your now crystal-covered shape in the morning and let it dry by setting it in a dry glass.
7. Optional: To make colored crystals, use colored pipe cleaners and add 5-10 drops of food coloring to the solution in step five. To make your snowflakes glow in the dark, paint the pipe cleaner shape with glow-in-the-dark paint in step one and let it dry completely before continuing. Once the crystals have dried, cut off the string and tie a ribbon to one point of your crystallized shape to make a Christmas tree ornament! These ornaments are fairly sturdy and make lovely Christmas gifts for friends, teachers, or family members.
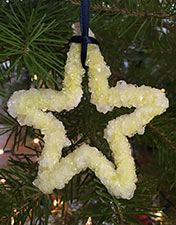
As in the rock candy project, you made a saturated solution of Borax, which is a chemical that forms crystals when the conditions are right. By mixing it with hot water and letting it cool and having something for the Borax (solute) molecules to attach to (the pipe cleaner shape), you gave the solution the right conditions to grow crystals! Once the crystals started to grow on your shape, more and more crystals formed around them. Ice crystals that real snowflakes are made of are not quite like these Borax crystals, but they do look sort of similar and they both are pretty and sparkle when light shines on them.
Real ice crystals are made only of water. The difference is that they are formed when water vapor in clouds freezes and falls to the ground as snowflakes! Frost is another form of ice crystals that you might see on windows and grass on cold mornings. To learn more about snow and ice crystals, check out our Snow and Hail article.
How to Grow Crystals at Home
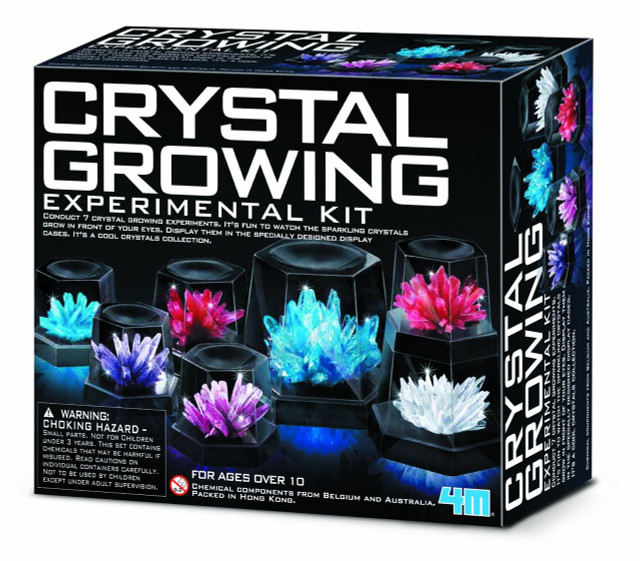
Table of Contents:
Quick Crystal Cup
Growing gems.
- Salt vs. Sugar
Taking It Further
- Crystal Growing Science Kits
Some crystal growing science projects can take several days. But this super-easy recipe gives you a cup full of needle-like crystals in just a few hours!
- Buy magnesium sulfate (Epsom salt)
- Food coloring pack
- 250 ml beaker
- In the beaker, stir 1/2 cup of magnesium sulfate with 1/2 cup of very hot tap water for at least one minute. This creates a saturated solution, meaning no more salt can dissolve in the water. (Some undissolved crystals will be at the bottom of the glass.)
- Add a couple drops of food coloring if you want your crystals to be colored.
- Put the beaker in the refrigerator.
- Check on it in a few hours to see a beaker full of crystals! Pour off the remaining solution to examine them.
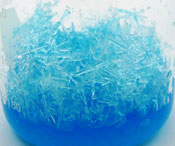
Epsom salt is another name for the chemical magnesium sulfate. The temperature of the water determines how much magnesium sulfate it can hold; it will dissolve more when it is hotter. Cooling the solution rapidly encourages fast crystal growth, since there is less room for the dissolved salt in the cooler, denser solution. As the solution cools, the magnesium sulfate atoms run into each other and join together in a crystal structure. Crystals grown this way will be small, thin, and numerous. To grow large single crystals, you’ll need to follow the evaporation procedure in the next project.
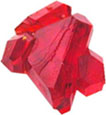
You can grow single, large crystals that look like gems by using a seed crystal. Here’s how to do it:
- Alum (you can often find this in the spice aisle of the grocery store)
- Clean 250 ml beaker or jar
- Saucer or shallow dish ( plastic petri dishes works, too)
- Fishing line
1. In one 250 ml beaker, slowly add alum to 1/4 cup of very hot tap water, stirring to dissolve. Keep adding the alum until no more will dissolve: this is a saturated solution. Pour a little bit of this solution into a shallow dish or saucer and let it sit undisturbed overnight. Make sure you only pour the clear solution, not any of the undissolved material. (You can pour it through a coffee filter if necessary.)
2. The next day you should see small crystals growing in the dish. When they look to be a good size, carefully pour off the solution.
3. Make another saturated alum solution with about 1/2 cup of hot water. Pour the solution into a clean beaker or jar; avoid pouring any undissolved material.
4. Remove the biggest and best-looking of the small crystals from the saucer to use as your seed crystal.
5. Get someone to help you tie the fishing line to the seed crystal. This can be tricky; a pair of tweezers will help! If you need to, you can score a groove in the crystal to hold the line in place.
6. Tie the other end of the fishing line to a pencil, then set the pencil across the top of the jar so the seed crystal is suspended in the alum solution without touching the sides or bottom of the jar. (You may need to adjust the length of the fishing line: just wrap it around the pencil until it is the right length.) Note: if your seed crystal starts to dissolve, that means your solution isn’t saturated enough. Remove the seed quickly and add more alum to the solution, filtering off any undissolved particles.
7. Cover the jar with a paper towel to keep out the dust and let your crystal grow until you are happy with its size. When you take it out of the solution, set it on some plastic wrap to dry.
Note: if you see other crystals growing in the jar, transfer the solution and seed crystal to another clean jar.
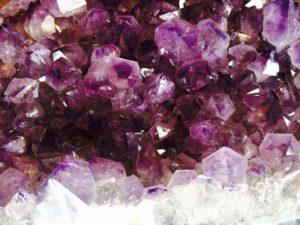
The small crystals that formed in the saucer grew because of nucleation. A few alum molecules found each other in the solution and joined together in a crystal pattern. Other alum molecules continued to join them until enough molecules gathered to become a visible crystalline solid. (Chemists call that a crystal “falling out of” the solution.) If you left these crystals in the solution they would continue to grow, but they wouldn’t get very big because they would all be competing for the remaining alum molecules in the solution. Instead, you took one crystal and used it as the only nucleation site in the solution. It was the primary site for the alum molecules to join together, so the crystal could grow quite large!
#5: Salt vs. Sugar
How can you tell the difference between sugar and salt crystals? They’re both crystals and they look very similar—they are both small, white-colored grains. Of course if you tasted each of them, you would know right away which one was salt and which was sugar because they taste very different. In this project you will find out how to tell sugar and salt apart just by looking at them!
- A teaspoon of table salt
- A teaspoon of white granulated sugar
- Two sheets of black construction paper
- A small magnifying glass
- Crystals worksheet
1. Put a teaspoon of salt on one sheet of black paper and a teaspoon of sugar on the other.
2. Use your fingers to spread the grains apart a little so you can see them better. Now look closely at the grains on each sheet of paper and compare how they look. Do you notice any differences between the two?
3. Now use your magnifying glass to look up close at a few grains of the salt. What shape are they? Are they all about the same shape? Draw their shape in the correct spot on the worksheet.
4. Now take a look up close at a few grains of the sugar. What shape are they? Are they a different shape from the salt crystals? Do you notice anything else that makes them look different from the salt? Draw their shape on the worksheet.
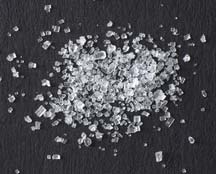
Sugar and salt grains are actually tiny crystals. Can you tell if the picture to the left is salt or sugar? It’s sugar!
If you were to make a saturated solution of salt and one of sugar, you would be able to see them grow into much larger crystals, but they would always have the same shape as these tiny crystals do! The salt crystals are cube shaped (like dice) and have six sides. The sugar crystals are very rough looking and are shaped more like rectangles with pointed ends.
Most of the crystals are the same shape and size and look very similar to each other, but you probably saw a few crystals on your paper that looked a little different. Those crystals probably had pieces broken off of them, or there might even be more than one crystal stuck together, making them look different from the others. Also, the coloring of the crystals is a little different. Sugar crystals look very clear and sparkly while salt is duller and looks more white-colored or frosted.
There are many factors that affect crystal growth, so crystal projects are great for scientific experimentation and science fairs. For example, many crystals are formed because of evaporation. Temperature and humidity are two things that affect the rate of evaporation, so you could design an experiment to see how different temperatures and humidity levels affect the rate of crystal growth and the size of crystals. Another aspect to test is the rate at which your solution is cooled: if you make a solution with boiling water, will crystals grow better if it’s allowed to come to room temperature slowly or if it’s cooled in the refrigerator?
There are many substances that can be used to grow crystals. You could design an experiment to test which one grows larger crystals under the same conditions. Try alum, Epsom salt, table salt, sugar, baking soda, or non-household chemicals like copper sulfate (blue crystals) and potassium ferricyanide (red crystals); adult supervision is required for the last two.
Teaching Homeschool
Welcome! After you finish this article, we invite you to read other articles to assist you in teaching science at home on the Resource Center, which consists of hundreds of free science articles!
Shop for Science Supplies!
Home Science Tools offers a wide variety of science products and kits. Find affordable beakers, dissection supplies, chemicals, microscopes, and everything else you need to teach science for all ages!
Related Articles
Kids First Early Engineering Kits
A Perfect Blend of Fun and Learning In today’s digital world, finding the right balance between screen time and hands-on learning for kids can be a challenge. That’s why educational toys like Kids First Early Engineering Kits have become a popular choice among...
Gift for Biologists
Looking for ideas for gifts that will thrill even the most hard-to-shop-for biologists on your list, whether young or old? (Kids or having a PhD?) We have just the list for you! Read on for favorites (or find top gifts for science lovers of any kind). Biology is...

Cool Gifts for Science Lovers
Looking for the perfect gift for a kid (or adult!) on your list who loves to fiddle with, build, or learn about things? Read on for some cool gifts for any science lovers...whether they actually realize it’s science or not! Browse our best gifts for...

Meet Our HST Alumni
Celebrating Exceptional Learning For 30 years, we've shared our mission to inspire learning through hands-on science with over 1.7 million homeschoolers. Thank you for letting us be your partner in education that goes beyond textbooks or classrooms. Meet three members...
Easy STEM Activities with Paper
Easy STEM Activities with Paper Beneficial STEM activities don't always require expensive materials or fancy equipment–a tool as simple as paper can teach children a range of STEM concepts. In this article, we'll explore STEM activities using paper, from paper...
JOIN OUR COMMUNITY
Get project ideas and special offers delivered to your inbox.

IMAGES
VIDEO
COMMENTS
The 4M Crystal Growing Experiment teaches kids and adults about the beauty and complexity of crystal growth with stunning results. Simply follow the directions to conduct seven different crystal growing experiments.
Growing beautiful solid crystals from liquid solutions is a great way to get your kids thinking about chemistry! Use this expansive Crystal Growing …
FAST GROWING CRYSTALS IN 6 COLORS - Red, Green, Blue, Purple, Yellow, and Glow in the Dark; Crystal Chemistry has never been so fast (grows in 3 - 4 days), fun and colorful! GROWING IS EASY – Easy-to-follow instructions and …
Unleash your inner scientist with our Crystal Growing Kit. Grow four different crystals, mold fun plaster shapes, and conduct 15 experiments. Learn about crystal structures and the chemistry …
Grow dozens of dazzling crystals and conduct 15 illuminating experiments with this classic science kit. Learn about the chemistry of crystal growing: investigate and observe the unique properties, structure, and formation process of four …
A kit containing everything you need to conduct 7 experiments & grow colourful crystals – it’s fun to watch the sparkling crystals grow in front of your eyes.
The Crystal Growing Experimental Kit is the perfect way to create crystals of your very own! Conduct seven unique chemical experiments to grow your own set of aquamarine crystal clusters, glow-in-the-dark moon crystal clusters and a …
Unleash your inner scientist and explore the world of dazzling, oversized colored crystals with our comprehensive Crystal Growing Set! This extensive kit includes all the essential tools and ingredients needed for creating magnificent, …
Learn how to make crystals at home! Find five different ways to grow your own crystals including instructions for each crystal science experiment.