Main navigation
- Project Activities
- Evidence-based Interventions
- Reflections On Our Learning
- Sample Assessment Items
- Mass and Volume
- Mixtures and Pure Substances
- Evolution and Natural Selection
- Photosynthesis
- Soil profiles
- Motion Transmission and Motion Transformation Systems
- Links and Guiding Controls
- Innovative Science Teaching & Learning Activities
- Useful Links

Lesson Plan on Photosynthesis
How do plants get energy, developed by chantier 7 project team members.
Instructional goals:
Students will be able to: 1. Describe the phenomena of transpiration, photosynthesis and cellular respiration 2. Illustrate the relationship between light and photosynthesis (i.e., you need light source for plants to grow; more light more photosynthesis) 3. Illustrate the relationship between carbon dioxide and photosynthesis 4. Gather evidence of inputs and outputs of photosynthesis
Grade level: Grade 7, 8
Duration: 50-150 minutes depending on activities chosen (3-4 periods of 75 minutes)
Instructional Materials: Whiteboard (or smart board, black board) for creating public record for students’ thinking. For the materials needed for specific activities, please see below:
Activity #1: An Oxygen Factory
Plants (both aquatic and terrestrial plants) Plastic bag or plastic wrap Terrarium or 2L plastic bottle Flask 500ml or 1L beaker Water Desk Lamp
Activity #2: Light! Light! (Optional)
Any submersed aquatic plant that is in good health and appears capable of photosynthetic activity (i.e., not dried or wilted). (e.g., Canadian waterweed (Elodea canadensis) or coontail (Ceratophyllum demersum)) – you can buy waterweed from any pet store where they sell fish/aquarium supplies Glass test tubes (20 × 150 mm) Racks to hold test tubes A light source (e.g., desk lamp) Large to medium sized drinking straws Thermometer
Activity #3: More Carbon Dioxide (Optional)
Elodea, an aquatic plant available at many pet or gardening stores Bromothymol blue solution (acid-base indicator available for purchase online. Yellow pH less than 6.0, blue pH above 7.6) Lights with clamp attachment Test tubes (one for each color and two additional as controls) Plastic wrap Aluminum foil
Worksheet: Please see appendices.
QEP POLs for secondary cycle 1 relevant to the concept of photosynthesis:
Elementary school:
Students explain the essential needs of living organisms (e.g. food, respiration) and describe metabolic activity (transformation of energy, growth, maintenance of systems and body temperature). They describe the function of photosynthesis, which they distinguish from respiration.
Secondary cycle 1:
Names the inputs and outputs involved in photosynthesis. Names the inputs and outputs involved in respiration.
Children’s preconceptions relevant to the concept of photosynthesis:
There is no difference between respiration and breathing. The main component of air is oxygen. There is no oxygen in exhaled air. Lighting a candle in a sealed jar with water proves that air is 21% oxygen (the water moves up the jar because the 21 % oxygen is consumed). All essential components for plants are absorbed from the soil via rots. Roots supply plants with energy. The sun keeps plants warm, and so they grow better. Plants breath. They inhale carbon dioxide, and they exhale oxygen. Plants get energy directly from the sun.
(Adapted from: https://scienceinquirer.wikispaces.com/file/view/RespirationCorr.pdf )
Assessment Items to explore or uncover students’ preconceptions around the concept of photosynthesis:
Question 1. Which of the following is TRUE about the sugar molecules in plants? A. The sugar molecules come from the soil. B. The sugar molecules are the result of a chemical reaction. C. The sugar molecules are one of many sources of food for plants. D. The sugar molecules are made from molecules of water and minerals.
(Retrieved from AAAS Item ME095005, http://assessment.aaas.org/items/ME095005#/0 )
Question 2. Where does the food that a plant needs come from? A. The food comes in from the soil through the plant’s roots. B. The food comes in from the air through the plant’s leaves. C. The plant makes its food from carbon dioxide and water. D. The plant makes its food from minerals and water.
(Retrieved from AAAS Item ME029006, http://assessment.aaas.org/items/ME029006#/0 )
Questiom 3. What is TRUE about the inside of a plant cell? A. The inside of a plant cell is completely solid. B. The inside of a plant cell is completely filled with air. C. The inside of a plant cell is completely filled with liquid water. D. The inside of a plant cell contains liquid water and solid structures.
(Retrieved from AAAS Item CE065001, http://assessment.aaas.org/items/CE065001#/0 )
Description of the Lesson:
The goal of this lesson is for students to (1) engage in experiments that enable students to gather evidence of inputs and outputs of photosynthesis, (2) understand the relationship between light and photosynthesis, and (3) understand the relationship between carbon dioxide and photosynthesis. This lesson plan includes the following steps:
Step 1: Introduction – Engage Students in Learning : In this step, teacher introduces the driving question of this lesson: “ Plants need energy to stay alive and grow. How do you think plants get energy? ”
Step 2: Background Knowledge Probes (BKPs) : In this step, teacher use the assessments listed above to elicit students’ prior understanding and ideas of photosynthesis.
Step 3: Collecting and Making Sense of Data : In this step, teacher will conduct the Activity #1 – An Oxygen Factory . Teachers will then choose one of the option activities (i.e., Activity Option #2 – Light! Light! or Activity Option #3 – Role of Carbon Dioxide and Light ) to provide students with more evidences for the upcoming discussion at the end of the lesson. While students are engaging in these activities, teacher can ask discussion questions to track students’ understanding of the concept. Students are also invited to record their observation on the worksheet given.
Step 4: Developing Evidence-Based Explanations : Following the activities, teacher engages in this step by inviting students to share their data with other groups and the whole class. Teacher may also post summary data on a class summary chart on the board.
Step 5: Evaluation : Teacher can assess students’ learning outcomes by choosing one of the post-assessment strategies: (1) Question and Answer/Exit Cards; (2) Create a multimedia poster; (3) Using the assessment questions listed above.
Details and procedures of each step are explained as follow:
Step 1 of The Lesson: Introduction – Engage Students in Learning
In Step 1, teacher will help students to connect the idea of food-web with photosynthesis. The goal of this step is to introduce the important role of photosynthesis plays in our ecosystem.
(1) Introduction of the topic by saying: “ Hello, we are going to learn about photosynthesis today. Before starting the lesson, does there anyone know where plants get their energy from? ”
(2) Teacher can prepare a feed-web (see Figure 1.) on transparency, doc cam, computer screen, or draw the figure on the board. Teacher can than ask the following questions to guide the discussion:
- All living things need energy to survive. How do us, human get energy?
- From this food-web figure (Figure 1), how do fox and rabbits gain their energy from?
- From this food-web figure (Figure 1), how do grass and trees gain their energy from? Do grass and trees ‘eat’ any other organisms?

(3) Based on students’ response, teacher can re-voice students’ responses and write the responses on the board.
(4) After students sharing their ideas about food-web, teacher can begin the class by introducing the driving question of this lesson: “ Plants need energy to stay alive and grow. How do you think plants get energy? ”
Step 2 of The Lesson: Background Knowledge Probes (BKPs) - Eliciting Student Thinking
The goal of this step is to elicit students’ prior understanding and ideas of the topic without evaluating their response or correcting their answers at this point.
(1) Administer the instrument: To help teachers determine effective starting points for the students and to get to know students’ background knowledge, skills, attitudes, experience and motivation, before starting the lesson, you can administer the 3 assessment question provided above, in order to uncover students’ preconceptions around the concept of photosynthesis.
Teacher can use clickers to obtain students’ responses. If the school does not have clickers, teacher can ask the questions to the whole class and ask students to raise their hands for the answer. If there is no answer from students, teachers can also ask students to write their answer on a piece of paper and put them in a box. Teacher will then write some response on a board (or a chart paper) for discussion.
(2) Pressing for explanations: After administering the test, teacher can share the data with students and ask students for the explanations. You may re-voice their explanations and write their response on a board. For example, teacher can ask: “ We see that many of you choose option C as an answer. Does anybody want to share why they chose option C? What is your evidence for saying that? ”
(3) Introducing the term : Teacher can use the term “photosynthesis” to further probe students’ prior understanding. Teacher will then start the lesson by asking students what they think “photosynthesis” means and write down their responses on the board (or a chart paper).
Step 3 of the Lesson: Collecting and Making Sense of Data
The goal of this step is to help students to (1) develop their questions and/or predictions to learn more about the topic, and (2) test their predictions through hands-on inquiries, challenges, problems.
Teacher will first conduct the Activity #1 – An Oxygen Factory . Afterward, teachers can choose one of the option activities (i.e., Activity Option #2 – Light! Light! or Activity Option #3 – Role of Carbon Dioxide and Light ) to provide students with more evidences for the upcoming discussion at the end of the lesson. These optional activities could help teacher to engage in ongoing, formative assessments to track students’ learning (e.g., walking around class to listen to their ideas, recording and displaying their ideas, observations, worksheets, student journals, students’ work products, etc.).
Details and procedures of each activity are explained as follow:
Part 1: Preparation: Teacher will have two different demo stations (i.e., Demo Station #1– Photosynthesis of an aquatic plant and Demo Station #2– Growth factors of a plant ) prepared at least three days prior to the activity. Both teachers and students can create the demo stations.
Demo Station #1: Photosynthesis of an aquatic plant:
(1) Place a submersed aquatic plant (e.g., Canadian waterweed (Elodea canadensis) or coontail (Ceratophyllum demersum) in a flask. (2) Fill a 500mL or 1L beaker with water. (3) Place the flask (with aquatic plants) into the beaker. Make sure that the aquatic plants are submerged in water. (4) Place a light source (e.g., desk lamp) near the beaker.
Demo Station #2: Growth factors of a plant:
(1) Prepare 3 different pots of plants that are the same size (relevantly same size). (2) Prepare 3 terrariums (or 2 Liter soft drink bottles with the top cut off and saved for lid) with soil and 1 plant. (3) Terrarium 1: Add some oxygen gas, and seal the terrarium (or bottle lid). Label the terrarium. Note: If you do not have access to oxygen gas, just seal the terrarium. Make sure the plant had been in a closed system at least for 3 days. (4) Terrarium 2: Add some carbon dioxide gas, and seal the terrarium (or lid for the bottle.) Label the terrarium. Note: If you do not have access to carbon dioxide gas, place alkalizer in water, in an erlenmyer flask with a one-hole stopper, an elbow tube and glass tubing. Insert the tubing into the lid of the terrarium as the carbon dioxide is being produced). (5) Terrarium 3: The third terrarium is a control. Leave the plant in an unsealed terrarium.
Part 2: Observation: Students observe the plants at the two demo stations (i.e., Demo Station #1– Photosynthesis of an aquatic plant and Demo Station #2– Growth factors of a plant ). Teacher can ask questions to elicit students’ ideas.
For example, for the Demo Station #1 , teacher can ask the follow questions:
- What do you think is being produced in the flask?
- What is the evidence for this: Oxygen is being produced.
- The flask is foggy Inside. Why? ”
For the Demo Station #2 , teacher can ask the follow questions:
- What do you observe in the three terrariums?
- Where do you think the bubble comes from in the second terrarium?
- What gas do you think the bubbles are?
- What is happening in the third terrarium? Explain.
- What differences do you see between the first and second terrarium? ”
Part 3: Recording observation: Teacher will ask students to observe the three different terrariums and write down their observation on their worksheet (Appendix A). Note: The following Activity #2 and #3 are optional. These optional activities would allow teachers to help students collect more evidence/data for the final discussions at the end of the lesson.
|
|
| The goal of this activity is to illustrate the causal relationship between light and photosynthesis (i.e., more light, more photosynthetic activity).
(1) . An hour or more before class, place a 5-cm segment of an aquatic plant into each treatment test tube. (2) (e.g., a 5-cm section of a drinking straw). The test tubes with these plant surrogates act as controls. If multiple plant species are available, add an additional test tube for each additional species and place 5-cm cuttings of those species into their own test tubes. Teachers should attempt to have all plant clippings be as similar as possible (i.e., taken from the same location on the stem of multiple plants). (3) .
(1) tubes with plant segments to students. Students may work in a pair or groups. (2) to allow students to understand that the rate of bubble formation is a measure of the rate of photosynthesis. Teacher may ask: (3) at a specified distance from a light source and allow 15 minutes for the plant to acclimate to the new environment. Make sure to plan for enough test tubes to carry out this experiment using multiple distances. (e.g., 15, 30, and 45 cm from the light source). (4) After the test tubes containing plants or plant surrogates (e.g., straws) have been exposed to the light for at least 15 min, ask students to that emerge from the plant and float to the surface and in all tubes at the same time they count the number of bubbles. (5) Ask students to based on their data and .
|
|
|
| (1) the lamps at least several feet apart and away from windows. (3) Cut equal-sized pieces of elodea for each test tube or glass (about 3 inches in length). or glass. of the bromothymol blue solution. Have students to (e.g., #1, 2, and 3). (4) Have students to ; Cover the test tube (aluminum foil works well). Be sure to completely seal the vessel to keep gas from entering or leaving. (5) Have students to completely with aluminum foil to block out any light. Test tube #3 is a control, so it should be left uncovered. (6) Have students to to explain which test-tube the solution will change colour, and to what colour. Teacher can ask: “ ” (7) . The plants should all be 12 inches (30 cm) away from their lamp. (8) for a one-hour to 24 hours. of the solution for each test tube. (9) Ask students to to illustrate their results. Ask students to .
|
Step 4 of the Lesson: Developing Evidence-Based Explanations
The goal of this step is to help students in changing their preconceptions through developing complex evidence-based explanations after their investigations in light of the data they gathered in the above activities. Teacher can ask students to share their data with other groups. Teacher may also post summary data on a class summary chart on the board.
(1) Divide students into groups. (Groups of 2-3). Ask students to answer the questions on the worksheet (Appendix B). For example:
- Where does the water that appears on the side of the terrariums (Activity 1 – An Oxygen Factory) come from?
- Which conditions are necessary for bubbles to appear in the water (Activity 2 – Light! Light!)?
- Which gas in the atmosphere encourages plant growth?
Facilitate the discussion as teacher walk around the classroom. Note: The important aspect here is that you allow students to make connection between evidence/data provided from the activities and their explanations for their answer.
(2) Once students are finished with the worksheet, facilitate a class discussion. Teacher can lead a discussion about the similarities and differences in the group analysis. Note: Teacher may go over the questions with students and have them present their answers and explanations. Or, teacher may ask students to present their data to the rest of class while teacher write down similarities and differences emerging from different groups’ data.
(3) Go back to the driving question on the board: “ Plants need energy to stay alive and grow. How do you think plants get energy? ” Ask students if their view have changed and ask why. Again, encourage students to draw their explanations from the evidence/data from the activities. Teacher can use the following strategies:
Ø Orienting students to each other’s thinking: For example, teacher can ask: Do you agree with what Student A said? and Why? Ø Pressing for explanation : For example, teacher can ask: Group A and B , both of you found results/data that are different than your previous predictions. Why do you think so?
Note: If time allows, you can show your students “photosynthesis song”: this video summarizes the process of photosynthesis, offering visual and musical sources: https://www.youtube.com/watch?v=C1_uez5WX1o https://www.youtube.com/watch?v=C1_uez5WX1o
Step 5 of the Lesson: Evaluation
Three strategies can be used to do a post-assessment; they are:
Option #1: Question and Answer/Exit Cards : Have students to fill out the worksheet page individually (see Appendix). After students fill out most part of the worksheet, ask them to discuss in a small group (3-4 students). Teacher can facilitate the group discussion while walking around the classroom by asking questions such as: “ With regards to Input and its origin: Why do you think so? What evidence do you have from the activities we have done in class? ” After going of worksheet page. 100 together, teacher may give the assessment items tested in the beginning and/or have them write exit cards (i.e., write a short reflection on what they learned and what they still unsure about).
Option #2: Create a multimedia poster: By creating a multimedia poster on what students have learned in lessons, they can draw various ways of representing ideas (e.g., write summaries of the facts, create visual arts, add sound). This will be done as a group project. As a group, students have another opportunity to discuss about their understandings on photosynthesis with their peers in informal ways. Specific steps are describe as follow:
(1) In a group of 3-4, students will make a multi-media poster. The poster should represent their understanding of photosynthesis using multi-media of their choice (e.g., podcast, songs, YouTube, visual arts etc.). Students can draw from already existing sources (e.g., song from YouTube, pictures from encyclopedia).
(2) Ask students to connect what they observe in their daily life to the concept of photosynthesis.
(3) In their everyday life (e.g., home, school garden, or on the way to school), students can take a photo, make a collage, or draw a painting to connect the concept of photosynthesis to a moment in their daily life.
(4) With the photo/collage/drawing, students are instructed to write a short essay or record a podcast that explains how their photo/collage/drawing (e.g., photos of flowers, collages of cows eating grass, cooking meals) relates to the concept of photosynthesis.
For example, a group of students may write: “ The meals we eat are the products of photosynthesis. Vegetables grow because of photosynthesis. Meat is a product of animals eating producers or other consumers. Energy from photosynthesis is transferred to the consumer. Humans eat both vegetables and meat which are both products of photosynthesis. ”
(5) Teachers give specific guidelines and rubrics for students to follow. It is important for students to include the following key points in their short essays:
- The process of photosynthesis;
- Inputs and outputs of photosynthesis;
- Factors influencing the photosynthesis and the connection with their daily life experience.
(6) After the completion of the multimedia posters, class can have a symposium, where students will have an opportunity to present their multimedia posters to other students in the classroom.
Option #3: Assessment question : administer the same question and to see if students’ responses had been change. Teacher can use the clickers to obtain students’ responses. If the school does not have clickers, teacher can ask the questions to the whole class and ask students to raise their hands for the answer. If there is no answer from students, teachers can also ask students to write their answer on a piece of paper and put them in a box. Teacher will then write some response on a board (or a chart paper) for discussion. Note: You may re-voice their explanations and write their response on a board.
This lesson plan is inspired by the following sources: Education.com: http://www.education.com/pdf/photosynthesis-of-elodea/ Eureka!: Science and Technology, Secondary Cycle One; Student Textbook B (Activity 8: An Oxygen Factory, pp. 36-37); Worksheet (U1 38, U1 39); Teaching Resource Guide, Volume 1 (p.53). Ray, A. M., & Beardsley, P. M. (2008). Overcoming student misconceptions about photosynthesis: A model-and inquiry-based approach using aquatic plants. Science Activities: Classroom Projects and Curriculum Ideas , 45 (1), 13–22.
Department and University Information
Science education project- chantier 7.
- Faculty of Education
- Department of Integrated Studies in Education
- WOW Lab Blueprints
- Dr. Anila Asghar, Principal Investigator
- Dr. Kenneth Elliott, Researcher
- Ying-Syuan (Elaine) Huang, Graduate research assistant
Photosynthesis Lesson Plan: Structures and Processes
*Click to open and customize your own copy of the Photosynthesis Lesson Plan .
This lesson accompanies the BrainPOP topic Photosynthesis , and supports the standard of explaining the role of photosynthesis in the cycling of energy in and out of organisms. Students demonstrate understanding through a variety of projects.
Step 1: ACTIVATE PRIOR KNOWLEDGE
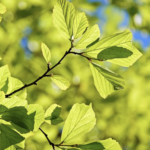
Display an image of a plant, like this one:
Ask students:
- What do you think makes this plant green?
- What does this plant need to survive?
- How does it get its energy?
Step 2: BUILD KNOWLEDGE
- Read the description on the Photosynthesis topic page .
- Play the Movie , pausing to check for understanding.
- Assign Related Reading .
Step 3: APPLY and ASSESS
Assign the Photosynthesis Challenge and Quiz , prompting students to apply essential literacy skills while demonstrating what they learned about this topic.
Step 4: EXTEND and DEEPEN
Students express what they learned about photosynthesis while practicing essential literacy skills with one or more of the following activities. Differentiate by assigning ones that meet individual student needs.
- Make-a-Movie : Produce a movie from the point of view of a plant. Have the plant answer these questions: What does it need to survive? How does it produce energy?
- Make-a-Map : Create a concept map identifying how plants use sunlight, air, and water.
- Creative Coding : Code a museum with artifacts representing each part of a plant and its role in photosynthesis.
- Primary Source Activity : Analyze images of plant cells and use evidence to answer accompanying questions.
More to Explore
Related BrainPOP Topics: Deepen understanding of plant life with these topics: Plant Growth , Seed Plants , and Seedless Plants .
Teacher Support Resources:
- Pause Point Overview : Video tutorial showing how Pause Points actively engage students to stop, think, and express ideas.
- Learning Activities Modifications : Strategies to meet ELL and other instructional and student needs.
- Learning Activities Support : Resources for best practices using BrainPOP.
Lesson Plan Common Core State Standards Alignments

- BrainPOP Jr. (K-3)
- BrainPOP ELL
- BrainPOP Science
- BrainPOP Español
- BrainPOP Français
- Set Up Accounts
- Single Sign-on
- Manage Subscription
- Quick Tours
- About BrainPOP

- Terms of Use
- Privacy Policy
- Trademarks & Copyrights

- Share on Facebook
- Tweet This Resource
- Pin This Resource

Photosynthesis
Students explain what the experiments of van Helmont, Priestley and Ingenhousz reveal. They view a video of photosynthesis and draw the structure of the chloroplast with labels. In addition, they explain the functions of the two photosystems: photosystem II and photosystem I and ATPsynthase.
Start Your Free Trial
Save time and discover engaging curriculum for your classroom. Reviewed and rated by trusted, credentialed teachers.
- Collection Types
- Activities & Projects
- Assessments
- Graphics & Images
- Handouts & References
- Interactives
- Lab Resources
- Learning Games
- Lesson Plans
- Presentations
- Primary Sources
- Printables & Templates
- Professional Documents
- Study Guides
- Instructional Videos
- Performance Tasks
- Graphic Organizers
- Writing Prompts
- Constructed Response Items
- AP Test Preps
- Lesson Planet Articles
- Online Courses
- Interactive Whiteboards
- Home Letters
- Unknown Types
- Stock Footages
- All Resource Types
See similar resources:
Where do plants get their food, what should i know about photosynthesis, photosynthesis: an overview, ap: chapter 10: photosynthesis, a photosynthesis timeline, raven chapter 10 guided notes: photosynthesis, photosynthesis - a survival guide, the discovery of photosynthesis, khan academy: the light dependent reactions.
- Français
- Preparatory
Lesson Plan: Photosynthesis
This lesson plan includes the objectives, prerequisites, and exclusions of the lesson teaching students how to outline the process of photosynthesis, state where it occurs, and describe how a plant obtains the materials it needs.
Students will be able to
- state that plants, algae, and some microorganisms make their own food by a process called photosynthesis,
- state that energy is transferred from sunlight through absorption by the green pigment chlorophyll to carry out photosynthesis,
- recall that photosynthesis takes place in chloroplasts inside the cells of plant leaves,
- give the word equation for photosynthesis as carbon dioxide + water ⟶ oxygen + glucose,
- describe how a plant obtains the carbon dioxide and water it needs and how oxygen leaves the plant.
Prerequisites
Students should already be familiar with
- the basic structure of a plant cell,
- the concept of energy transfer.
Students will not cover
- the balanced chemical equation for photosynthesis.
Join Nagwa Classes
Attend live sessions on Nagwa Classes to boost your learning with guidance and advice from an expert teacher!
- Interactive Sessions
- Chat & Messaging
- Realistic Exam Questions

Nagwa uses cookies to ensure you get the best experience on our website. Learn more about our Privacy Policy
- Lesson Plans
- Technology in Education
Welcome to the Visible Body Blog!
Teaching photosynthesis with visible body: a free lesson plan.
Posted on 10/8/21 by Laura Snider
In any introductory biology class, photosynthesis is a big topic—that’s hardly surprising, given just how important photosynthesis is to all life on Earth! It can also be challenging to teach, since there’s so much information students need to not just memorize but understand, from plant structures to chemical equations.
Fortunately, Visible Body Suite 's got you covered! Today, we’ll walk you through a free lesson plan and set of lab activities on photosynthesis.
Ultimately, after finishing the lesson and labs, students should be able to answer these three questions:
- What are the reactants and products of photosynthesis? What is the photosynthesis equation?
- Why is photosynthesis important for a plant’s survival?
- What are the main steps in the process of photosynthesis?
1. Introduce the reactants and products of photosynthesis
Our lesson plan begins with a zoomed-out view of photosynthesis—identification of the reactants and products. If you want to assign some before-class reading on this topic, the Reactants and Products article on Visible Body’s Biology Learn Site and the Photosynthesis Overview chapter of OpenStax’s Concepts of Biology are both good resources.
You can have students use the Photosynthesis interactive simulation in VB Suite to identify the following:
- carbon dioxide (CO 2 ) molecules
- a glucose (C 6 H 12 O 6 ) molecule
- oxygen (O 2 ) molecules
- photons of light
- water (H 2 O) molecules

Photosynthesis models and simulations in the Energy Unit in VB Suite .
These animated 3D models show how each reactant enters the plant, and what happens to each (by)product.
A preview of the photosynthesis simulation models in VB Suite .
2. Walk through the roles of plant structures involved in photosynthesis
Next, use the dicot leaf 3D model in Visible Biology to show students the leaf structures they’ll need to know:
- The upper and lower epidermis that contain the stomata and their guard cells
- The palisade and spongy mesophyll, where photosynthesis takes place
- The phloem and xylem, which move nutrients and water through the plant.
For more information on these structures, students can read the Leaf Structures Involved in Photosynthesis article on the Biology Learn Site.

3. Get into more detail with light-dependent and light-independent reactions inside the chloroplast
For those instructors who want to give students a more detailed look at the chemical reactions taking place during photosynthesis, the chloroplast simulation in Visible Biology shows the light-dependent and light-independent reactions of photosynthesis, as well as the internal structures of the chloroplast where these reactions occur.
Students will be able to identify the following:
- The reactants and products of photosynthesis as well as chlorophyll
- The inner and outer membrane of the chloroplast
- Thylakoids, organized into grana
They will also be able to see how oxygen is produced when water molecules are broken down in the light-dependent reactions, and how the light-independent reactions use carbon dioxide to produce glucose.
Video footage of the chloroplast simulation in VB Suite .
Students can brush up on their knowledge of these structures and processes by reading the Light-Dependent and Light-Independent Reactions of Photosynthesis article on the Biology Learn Site . The Light-Dependent Reactions of Photosynthesis and Calvin Cycle chapters of OpenStax Concepts of Biology are also great background reading. If you want to introduce students to how photosynthesis compares to and relates to cellular respiration, check out this post from the Visible Body Blog.
4. Check students' knowledge with Lab 1: Plant Structures, Reactants, and Products of Photosynthesis
Now that your students have completed the introductory lessons and readings, it’s time to assess their understanding of photosynthesis with this first lab. The official VB lab contains five activities, which take about 45 minutes total to complete. There is also a set of more general background questions, which could be assigned as pre-lab homework along with the reading and structure identification lessons. Students can conveniently access the photosynthesis models for help during the lab activities with the Study tab in Visible Biology.

The photosynthesis simulations and models students will need for the photosynthesis lab activities are located in the Lab Activities section under the Study tab in VB Suite .
In Lab 1, students will review what they learned about products and reactants and plant structures from the reading and from the 3D models and simulations. They will need to label the following:
- The reactants and products of photosynthesis
- The leaf structures involved in photosynthesis
- A chloroplast within a plant cell
- The internal structures of a chloroplast
They will also be asked to match different plant structures to their roles in photosynthesis and to complete a chart detailing each product, reactant, and step of photosynthesis.
5. Observe photosynthesis with Lab 2: Floating Leaf Disk Experiment
Once students have a thorough understanding of the reactants and products of photosynthesis, as well as the structures of the plant that allow it to occur, the floating leaf disk experiment will show them photosynthesis in action and lead them to deduce the conditions under which it can occur. Check out this video to see an overview of the procedure for the floating leaf disk experiment activity.
In this lab, students will submerge leaf disks in different solutions and environments (a bicarbonate solution in light conditions, a bicarbonate solution in dark conditions, and distilled water in light conditions). They will then measure how many leaf disks sink and how many remain floating at the end of each minute for 20 minutes. Afterwards, they will graph their results and answer several short answer questions to evaluate their significance.
6. Put it all together with Lab 3: Photosynthesis in the Chloroplast
The final lab activity gives students the chance to demonstrate their knowledge of photosynthesis by drawing a chloroplast and illustrating the light-dependent and light-independent reactions. They will need to explain the process of photosynthesis and its equation in their own words, showing that they understand each component and step.
All in all, Visible Biology’s content and lab activities bring the process of photosynthesis to life and put students in the driver’s seat, letting them manipulate 3D models and simulations to find the answers they need, helping them draw connections to other biology topics (like cellular respiration), and engaging their writing and critical thinking skills to explain what they’ve learned.
You can download the lesson plan and lab activities here . For a free instructor trial of Visible Biology, contact our Education Team . Happy teaching!
NGSS Standards
The above lesson plan fits these Next Generation Science Standards (NGSS):
HS-LS1 From Molecules to Organisms: Structures and Processes. Students who demonstrate understanding can:
- Develop and use a model to illustrate the hierarchical organization of interacting systems that provide specific functions within multicellular organisms. (HS-LS1-2)
- Use a model to illustrate how photosynthesis transforms light energy into stored chemical energy. (HS-LS1-5)
HS-LS2 Ecosystems: Interactions, Energy, and Dynamics. Students who demonstrate understanding can:
- Develop a model to illustrate the role of photosynthesis and cellular respiration in the cycling of carbon among the biosphere, atmosphere, hydrosphere, and geosphere. (HS-LS2-5)
Did you know that the Visible Body Education Team has created a library of lesson plans and lab activities? Here's where you can find these resources , complete with NGSS standards.
Be sure to subscribe to the Visible Body Blog for more anatomy awesomeness!
Are you an instructor? We have award-winning 3D products and resources for your anatomy and physiology course! Learn more here.
- Technology in Anatomy Education ,
- Lesson Plans ,
Get free instructor access to Courseware
Subscribe to the visible body blog, most popular.

For students
For instructors
Get our awesome anatomy emails!
When you select "Subscribe" you will start receiving our email newsletter. Use the links at the bottom of any email to manage the type of emails you receive or to unsubscribe. See our privacy policy for additional details.
- Teaching Anatomy in 3D
- Teaching Biology in 3D
- For K-12 Instructors
- K-12 Funding Guide
- Premade Courses
- Anatomy Learn Site
- Biology Learn Site
- Visible Body Blog
- eBooks and Lab Activities
- Premade Tours
- Premade Flashcard Decks
- Customer Stories
- Company News
- Support Site
- Courseware FAQ
- Submit a Ticket
©2024 Visible Body. All Rights Reserved.
- User Agreement
- Permissions
Science 9 Quarter 1- LIVING THINGS Module 5: Ecosystem: Life Energy
This module was designed and written with you in mind. It is here to help you master Ecosystem: Life Energy. The scope of this module permits it to be used in many different learning situations. The language used recognizes the diverse vocabulary level of students. The lessons are arranged to follow the standard sequence of the course. But the order in which you read them can be changed to correspond with the textbook you are now using.
The module focuses on achieving this learning competency:
- Differentiate basic features and importance of photosynthesis and respiration. S9LT-lg-j-31
After going through this module, you are expected to:
1. Relate physical plant characteristics (chloroplast, pigments, stomata, etc.) to their functions;
2. Differentiate light dependent/light independent reaction in terms of the raw materials, processes and end product;
3. Explain the factors that affect the rate of photosynthesis;
4. Describe the parts of mitochondrion;
5. Explain how cell release energy from food;
6. Describe the Krebs cycle;
7. Explain the electron transport chain;
8. Differentiate photosynthesis and respiration in terms of cell structures involved, raw materials, end product and energy requirement.
Can't Find What You'RE Looking For?
We are here to help - please use the search box below.
Leave a Comment Cancel reply
It seems JavaScript is either disabled or not supported by your browser. To view this site, enable JavaScript by changing your browser options and try again.
Jump to main content
Photosynthesis Seen From Space

©NASA/GSFC/Jeff Schmaltz/MODIS Land Rapid Response Team
Observations inspire scientific questions and drive discoveries. In this activity, students will watch a visualization of empirical scientific data to explore seasonal changes in primary productivity on the earth. They will then formulate and research their own scientific questions about primary productivity on the earth and present their research in a classroom scientific poster session.
- What factor(s) control(s) changes in primary productivity on land and in the oceans over time?
- How do plants respond to seasonal changes in sunlight?
- What questions can we formulate from empirical scientific data?
After this activity, students will be able to:
- Relate changes in primary productivity in terrestrial and aquatic ecosystems to seasonal changes in sunlight.
- Observe empirical scientific data and formulate hypotheses to describe patterns in the data.
- Formulate researchable scientific questions to better understand or explain observed phenomena.
- Obtain, evaluate, and communicate scientific information from credible sources.

- Timelapse: Photosynthesis Seen from Space visualization clip and projector
- One computer per group of 2 students or access to the school library for research
- One piece of poster board or a large piece of butcher paper per group of 2 students
- Markers, glue sticks, tape, and other craft materials for students to use in constructing their posters
- Test the video quality on your school’s internet connection. Note that you can click the Settings cog in the footer to adjust the Quality to up to 1080HD, and you can also toggle on Full Screen.
- Gather craft materials (see Materials list) for Part II.
- producer: an organism, such as a plant, that can make its own food
- empirical : based on observation, experience, or experimentation; not theoretical
- photosynthesis: the process by which a cell capture energy in sunlight and uses it to make food
- primary productivity (in the context of photosynthetic producers as opposed to chemosynthetic producers) : a measure of the rate at which new organic matter is developed through photosynthesis in producer organisms based on the oxygen released and carbon taken in; the transformation of solar energy to biomass
- phytoplankton: plant-like plankton, primarily microscopic algae and protozoa, that carry out photosynthesis
- hypothesis: a possible explanation for a set of observations or answer to a scientific question; must be testable
Observations inspire scientific questions and drive discoveries. In Part I of this activity, students will watch a short visualization clip showing global seasonal changes in photosynthesis on the earth to practice making observations and formulating hypotheses using empirical scientific data. Students will witness how scientific questions evolve from observations, and in Part II they will practice forming their own science questions.
- Show students the Timelapse: Photosynthesis Seen from Space visualization clip. Pause the clip BEFORE 00:30 . (If you want to keep the topic a secret, skip past the title slides.)
- Ask students to describe what they are seeing in the clip. Facilitate the process of focusing on observations (and not yet making interpretations) by giving the students sentence structures to work with, such as “I observe…”, “I notice…”, or “I wonder why…”
- After a brief discussion about their observations, ask students to make a hypothesis (tentative interpretation) about what the clip is showing. Write down some of the hypotheses on the board.
- Continue playing the clip, and pause it again BEFORE 01:00 .
- Ask students to describe what carbon absorption might mean. What processes in nature that occur both on land and in the oceans absorb carbon? One of the processes that absorbs carbon in nature is photosynthesis (see more in the Carbon Cycle Role-Play ) . The blue and green colors in this clip represent net primary productivity , which is the total carbon produced by plants through photosynthesis minus the carbon respired by the plants.
- Encourage students to notice how the colors on the map change through time as they watch the rest of the clip . At the end of the clip, have students write down their observations about these changes. You may need to play the entire clip again for students to give them more time to make observations.
- Have students get together with a partner and share their observations.
- Ask students to think about what might control where and when photosynthesis occurs on the earth.
- Ask students to discuss their thoughts with their partners for a few minutes, and then share their ideas with the class.
- This brief video illustrates how the Earth’s tilt and rotation changes the angle at which sunlight hits the surface of our planet, creating the different seasons we experience here on Earth.
- Teacher Tip: There are many other questions that could be posed around the information presented in the Timelapse: Photosynthesis Seen From Space visualization. Scientists ask a lot of questions about the world, and these questions are what guide their research. After scientists have conducted their research, they often present their results to other scientists at scientific conferences (like really big science fairs) . At these conferences, scientists may bring posters describing their research to share with their peers. In the second part of this activity, students will create their own scientific posters for a scientific poster session with their classmates.
- Why do some regions stay dark/black while other regions are more productive?
- Why are the centers of ocean basins less productive than other regions of the ocean?
- Where is primary productivity the most prevalent and why?
- Why are the regions around the coastlines of the continents generally very productive?
- Are there other factors that influence or affect productivity in some of these regions besides sunlight?
- How is this data collected? How do scientists ‘see’ photosynthesis from space?
- Do El Niño and La Niña years change these patterns?
- Has climate change affected these patterns over time?
- Assign research as individual homework, so that students can return with information and sources they can synthesize and critique as a group.
- What their question is and what about the information/data presented in the visualization clip led them to asking this question.
- Background information
- Supporting research they found that provided insight or answers to their question
- Any uncertainties in the scientific community surrounding their question
- If your students could design an experiment to find an answer to their question, what it might look like
- Bibliography of sources
- Any other points you would like your students to address
- Students can either type up information for their poster, print it out, and glue it onto their posters, or write the information directly onto their posters with pens or markers. Encourage students to write information in their own words, include pictures or diagrams they find or draw on their posters, and make their posters colorful and interesting.
- Give students 20 minutes for their ‘poster session.’ For the first ten minutes, one partner will stand by the poster ready to answer questions while the other partner walks around to see the other posters, and for the last ten minutes the partners will switch. To encourage engagement and interaction, you can ask the students to write down one thing they learned from each of the posters that were presented, or to provide constructive feedback to their classmates using sticky notes (see this tool for Ambitious Science Teaching ).
- Did anything surprise them?
- How were the other scientific questions similar to or different from their own?
- Were there any questions that did not have a solid answer?
- Discuss with students the difference between ‘scientific questions’ and other general questions. The answers to scientific questions come from investigations, data, and evidence. Ask your students to describe the evidence they found in their research that helped them answer their scientific question.

- Follow this lesson with another based on a similar visualization: Why Do Birds Migrate?
- Relate patterns in net primary productivity to a map of earth’s biomes. Have students try to identify the locations of various biomes on a global map using the information in the Photosynthesis Seen From Space clip.
- Choose Your Own Citizen Science Project
- Modern Media Blitz
Living plants play an extremely important role in regulating the amount of carbon dioxide (CO 2 ) in the atmosphere. Through photosynthesis, plants take in CO 2 and convert the carbon into sugar molecules (carbohydrates) using water and energy from the sun. In the process of breaking down these molecules and creating food for themselves, plants release oxygen back into the atmosphere for humans and animals to breathe. This process occurs in land plants, in algae, and in other primary producers of our oceans, such as microscopic phytoplankton.
Although CO 2 is broken down during photosynthesis, some CO 2 is released back into the atmosphere as plants respire. The amount of CO 2 taken in by vegetation during photosynthesis minus the amount of CO 2 put out during respiration equals Net Primary Productivity (NPP), or the total amount of CO 2 absorbed by plants (NASA, retrieved May 2015):
CO 2 taken in – CO 2 respired out = Total CO 2 absorbed by vegetation = Net Primary Productivity
The chemical reaction by which plants produce complex food molecules requires an energy input from sunlight to occur. On land and in the ocean, the availability of light from the sun limits the amount of energy plants can use for photosynthesis, in turn limiting the amount of CO 2 they are able to take in. The seasonal variability of light and its effect on NPP is illustrated in the Timelapse: Photosynthesis Seen from Space visualization. An increase in NPP is reflected in both the Northern and Southern Hemispheres during their respective summer months. Each hemisphere is exposed to more direct sunlight during its summer season because it is tilted towards the sun, therefore increasing the amount of energy available to producers.
While sunlight has a great impact on NPP, there are some variations in productivity due to other factors on land and in water that also influence the amount of CO 2 plants are able to absorb (Lindsey, 2003) Notice that some land regions on the map show very little NPP year round. Some deserts, such as the Sahara in Africa, may receive an abundance of sunlight depending on their distance to the equator; however, the lack of available water limits the extent plants can photosynthesize during the daytime for fear of desiccating, resulting in a lower amount of carbon absorbed by plants living in these climates.
In the ocean, the availability of nutrients, especially nitrogen, greatly impact NPP (Behrenfeld, 2006). Water bodies with an abundance of nutrients tend to have a higher phytoplankton population. An increase in the distribution of phytoplankton means an increase in the amount of CO 2 being absorbed during photosynthesis, and an increase in the NPP of that region.
In addition to providing oxygen and regulating carbon levels, plants contribute immensely to the success of human culture and economies. Both on land and in the ocean, plants provide energy and nutrients vital to the growth of consumers higher on the food chain (National Wildlife Federation, retrieved May 2015). For humans, these plants provide more than just energy and nutrients in the form of food. Plant products like paper, clothing, and medicine have significantly shaped and influenced the development of human cultures and contribute greatly to the foundation of human economies.
Disciplinary Core Ideas (6-8)
- LS1.C: Organization for Matter and Energy Flow in Organisms: Plants, algae (including phytoplankton), and many microorganisms use the energy from light to make sugars (food) from carbon dioxide from the atmosphere and water through the process of photosynthesis, which also releases oxygen. These sugars can be used immediately or stored for growth or later use.
- The chemical reaction by which plants produce complex food molecules (sugars) requires an energy input (i.e., from sunlight) to occur. In this reaction, carbon dioxide and water combine to form carbon-based organic molecules and release oxygen.
- Cellular respiration in plants and animals involve chemical reactions with oxygen that release stored energy. In these processes, complex molecules containing carbon react with oxygen to produce carbon dioxide and other materials.
Science and Engineering Practices (6-8)
- Use graphical displays (e.g. maps, charts, graphs, and/or tables) of large data sets to identify temporal and spatial relationships.
- Analyze and interpret data to provide evidence for phenomena.
- Ask questions that arise from careful observation of phenomena, models, or unexpected results, to clarify and/or seek additional information.
- Critically read scientific texts adapted for classroom use to determine the central ideas and/or obtain scientific and /or technical information to describe patterns in and/or evidence about the natural and designed world(s).
- Integrate qualitative and/or quantitative scientific and/or technical information in written text with that contained in media and visual displays to clarify claims and findings.
- Communicate scientific and/or technical information in writing and/or through oral presentations.
Cross-Cutting Concepts (6-8)
- Graphs, charts, and images can be used to identify patterns in data.
- Patterns can be used to identify cause and effect relationships.
- Empirical evidence is required to make claims about specific causes and effects.
- Within a natural or designed system, the transfer of energy drives the motion and/or cycling of matter.
- Concept a: Students need to know that natural systems proceed through cycles and processes that are required for their functioning.
Behrenfeld, M. J., O’Malley, R.T., Siegel, D.A., McClain, C.R., Sarmiento, J.L., Feldman, G.C., Milligan, A.J., Falkowski, P.G., Letelier, R.M., & Boss, E.S. (2006). Climate-driven Trends in Contemporary Ocean Productivity. Nature 444 , 752-755.
Lindsey, R. (2003) Global Garden Gets Greener. Retrieved August 2015 from the NASA Earth Observatory website: http://earthobservatory.nasa.gov/Features/GlobalGarden/
National Wildlife Federation (n.d.). Food Webs and Bioaccumulation. Retrieved May 2015 from http://www.nwf.org/Wildlife/Wildlife-Conservation/Food-Webs.aspx
NASA (n.d.) Global Maps: Net Primary Productivity. Retrieved May 2015 from http://earthobservatory.nasa.gov/GlobalMaps/view.php?d1=MOD17A2_M_PSN

In this active model, students will simulate sugar molecule production to store energy—using ping pong balls!

"Morganza Spillway" © 2011 NASA Earth Observatory
Can we use a model to predict the impacts of nutrient pollutants on an aquatic ecosystem?

"Giant Kelp Forest" © 2010 Tom Thai
Could you describe the kelp forest food web as a system?
COMMENTS
The lesson plan details a science lesson on photosynthesis for 9th grade students. It includes 3 learning objectives, subject matter from references, and a detailed procedure. The procedure involves preliminary activities like prayer and attendance. A review of the prior lesson is conducted and students are grouped and motivated with a game. A presentation on photosynthesis is given through ...
The document outlines a lesson plan for teaching 9th grade science students about photosynthesis. The plan includes objectives to define photosynthesis, describe organelles involved, and identify affecting factors. A variety of teaching methods are outlined like using a plant example, concept mapping, learning stations, group presentations, and a drawing activity. Student assessment includes a ...
Demo Station #1: Photosynthesis of an aquatic plant: (1) Place a submersed aquatic plant (e.g., Canadian waterweed (Elodea canadensis) or coontail (Ceratophyllum demersum) in a flask. (2) Fill a 500mL or 1L beaker with water. (3) Place the flask (with aquatic plants) into the beaker.
ydrogen (H), oxygen (O) and carbon (C).Photosynthesis is the process of turning three ingredients — water, carbon dioxide and energy from sunlight — into. glucose, which the plant uses for food.• The chlorophyll in the chloroplasts uses the energy from the sunlight to break apart the water molecules into O2 and H, produci.
Dlp-science 9 Photosynthesis - Free download as Word Doc (.doc / .docx), PDF File (.pdf), Text File (.txt) or read online for free. The document is a detailed lesson plan for a 9th grade science class discussing photosynthesis. The plan outlines objectives to describe photosynthesis and respiration, discuss the importance of photosynthesis, and create an infographic on urban gardening.
Step 3: APPLY and ASSESS. Assign the Photosynthesis Challenge and Quiz, prompting students to apply essential literacy skills while demonstrating what they learned about this topic. Step 4: EXTEND and DEEPEN. Students express what they learned about photosynthesis while practicing essential literacy skills with one or more of the following ...
Students will be able to. state the word and symbol equation for photosynthesis, describe photosynthesis as a biological process carried out by producers (primarily plants and algae) to make their own food, recall that photosynthesis is an endothermic reaction, explain how plants obtain the reactants they require for photosynthesis, explain how ...
This Photosynthesis Lesson Plan is suitable for 9th - 12th Grade. Students explain what the experiments of van Helmont, Priestley and Ingenhousz reveal. They view a video of photosynthesis and draw the structure of the chloroplast with labels.
During photosynthesis, oxygen—a gas that many living beings need to survive—is released. This makes photosynthesis one of the most important biological processes on Earth. In Part 1 of this lesson plan, students will utilize the floating leaf disk assay to demonstrate the production of oxygen gas during photosynthesis.
Attend live sessions on Nagwa Classes to boost your learning with guidance and advice from an expert teacher! This lesson plan includes the objectives, prerequisites, and exclusions of the lesson teaching students how to outline the process of photosynthesis, state where it occurs, and describe how a plant obtains the materials it needs.
1. Introduce the reactants and products of photosynthesis. Our lesson plan begins with a zoomed-out view of photosynthesis—identification of the reactants and products. If you want to assign some before-class reading on this topic, the Reactants and Products article on Visible Body's Biology Learn Site and the Photosynthesis Overview ...
North Dakota Science Content Standards (April 2014 Draft) • From Molecules to Organisms: Structures and Processes o HS-LS1-4: Use a model to illustrate how photosynthesis transforms light energy into stored chemical energy . Objectives: 1. The students will investigate the reactions of photosynthesis and cellular respiration by organizing a ...
Objectives. Through this kinesthetic model, students will learn: that plants need carbon dioxide, water, and sunlight to carry out photosynthesis. that photosynthesis produces sugar molecules that store energy. that plants and animals can use that energy after breaking apart the sugar molecules through cellular respiration.
This lesson plan outlines a science lesson on photosynthesis for 9th grade students. The objectives are for students to describe the process of photosynthesis and differentiate the basic features and importance of photosynthesis and respiration. The lesson will begin with an introduction activity to engage students, followed by a discussion of the concepts, chemical equation, organelles ...
After 5-7 days, review part one of the photosynthesis lesson, including the Study.com lesson and the key vocabulary terms. Break students back into their groups and return their plants to them ...
3. Explain the factors that affect the rate of photosynthesis; 4. Describe the parts of mitochondrion; 5. Explain how cell release energy from food; 6. Describe the Krebs cycle; 7. Explain the electron transport chain; 8. Differentiate photosynthesis and respiration in terms of cell structures involved, raw materials, end product and energy ...
Through photosynthesis, plants take in CO 2 and convert the carbon into sugar molecules (carbohydrates) using water and energy from the sun. In the process of breaking down these molecules and creating food for themselves, plants release oxygen back into the atmosphere for humans and animals to breathe.
Read More. Lesson Plan Grade: 6th-8th. Students learn a simple technique for quantifying the amount of photosynthesis that occurs in a given period of time, using a common water plant (Elodea). They use this technique to compare the amounts of photosynthesis that occur under conditions of low and high light levels.
The document provides a detailed 60-minute lesson plan for teaching 9th grade science students about photosynthesis and respiration. The objectives are for students to identify the basic features of photosynthesis and respiration, explain their importance, and draw a simple diagram showing their differences. The lesson includes motivational activities using pictures, a video presentation on ...
LAC PLAN 2022-2023 - LAC PLAN 2022-2023. BSED Major in English. Mandatory assignments. 97% (68) ... Science- Grade 9 Alternative Delivery Mode Quarter 1, Wk 6-7 - Module 6: Photosynthesis and Cellular Respiration ... In this lesson, you will learn how photosynthesis takes place and what are the needed materials for it to take place.
1. The document outlines a science lesson plan on photosynthesis and respiration for grade 9 students. It includes the objectives, content, procedures, and resources for the 10-day lesson delivered either online or through modular learning. 2. The objectives are for students to understand the structure and function of plant parts in photosynthesis, the role of mitochondria in respiration, and ...
Cot-1 Lesson Plan (Grade 9) - Free download as Word Doc (.doc / .docx), PDF File (.pdf), Text File (.txt) or read online for free. The document summarizes a science lesson on photosynthesis taught by Teacher Marlon Baranggan to a Grade 9 class. The lesson covered the key processes, stages and importance of photosynthesis. It involved student activities to identify plant structures, raw ...