- Skip to primary navigation
- Skip to main content
- Skip to primary sidebar
- MEMBER LOGIN
Hands On As We Grow®
Hands on kids activities for hands on moms. Focusing on kids activities perfect for toddlers and preschoolers.

3 Super Simple Light Experiments for Kids to Do
Literacy & ABCs Science Toddlers Grade School Kindergartners Preschoolers Experiment Paper Plates 19 Comments
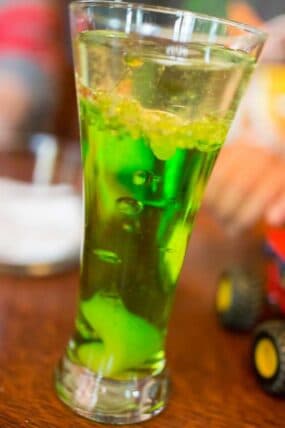
Science experiments are always a big hit in my house and this light experiment for kids will brighten everyone’s day – literally!

3 Super Simple Light Experiments for Kids
What three things can light do? This is the guiding question for this simple and fun light experiment for kids.
To Set up Your Own Simple Light Science Experiment, You’ll Need:
- Magnifying glass
- Paper plate or anything opaque
- Piece of paper
Try our favorite 50 simple science experiments .

Talking About Science Basics with Kids
Science activities are always a great time to practice using fun science terms. This simple light science experiment introduces three new ones:
- penetrate: or when light will pass through an object to be visible on the other side
- reflect: or when the light bounces back at you, like with a mirror or something shiny
- stop: or when the light is blocked, not reflecting or penetrating
- variable: what changes in different steps on the experiment
It can help if you write down these words and their meanings on a piece of paper or flashcards.
You could use actual words or draw a picture.
For older kids, you could also dive a little bit deeper. I love this quick explanation about the properties of light from Ducksters .
Before Your Light Experiments for Kids
This simple science experiment includes an opportunity for making predictions and recording observations.
Predicting is just making a guess based on what you already know.
You could get started by asking your kids: “What do you know about light?”
Create a quick and simple legend for the light experiment.
Write down your children’s predictions and make a quick chart. One column is for the prediction and the other is for the observation, plus some rows for the variables.
Label the rows with the names of your three objects, or variables (what’s changing each time). Hint: mirror, magnifying glass, plate, etc.
At the top of one column write: “What will the light do?” . (Prediction)
And then above the other column, write: “What does the light do?” . (Observations)

As you experiment, you’ll also jot down what happens with the light, or what you observe. Observe and observation in science is just a fancy way to explain telling what you saw happening during the experiment.
Ask these helpful questions as you predict what happens:
- Will the light penetrate the paper plate or will it stop?
- Will the light reflect off of the magnifying glass or penetrate?
- And will the mirror stop the light?
Take time to look at each object, discuss the three terms associated with light (penetrate, reflect, stop).
Make predictions, or guesses, about what the light will do with each object.
Write your predictions in the first column of the chart.

Now Experiment with Light Together
Once your predictions are made and the properties of light have been discussed, it’s time to do the experiment.
Choose the first object and have your kids shine the flashlight at the object.
Watch how the light reacts with the object. Does it shine through, shine back at you, or stop completely?
Record on your observation chart what the light did with that object. Check to see if your predictions were correct.
Keep going with the rest of the objects, making sure to observe and record your findings.
Our Easy Light Experiments for Kids
We chose the mirror first. My son held the mirror and my daughter used the flashlight.

I encouraged them to explain what they noticed about the light. Both recognized that the light was shining back at us, or reflecting.
We talked for a minute about using “refect” to describe what the light was doing.
Keep shining with a simple indoor reflection activity !
My daughter wrote “reflect” in our observation column on our chart. I helped her with the spelling, but only a little.
The Paper Plate
Our second variable for the light experiment was the paper plate. This time my kids switched roles with my daughter holding the plate and my son shining the flashlight at the object.

My kids quickly noticed that the light didn’t go anywhere except for on the plate.
We discussed together how this showed that the light stopped because the plate blocks or stops the light. I also added in the word “opaque,” which means that light does not pass through.
My son recorded “stop” for the plate.
You can also introduce the word “absorb” to your kids at this point in the experiment, as that is another term for stopping the light.
Originally, the kids had thought that the plate might reflect the light. Our prediction was incorrect and we talked about that for a minute or so.

Learn more about opaque objects with a fun shadow play activity !
The Magnifying Glass
Our final object was the magnifying glass. It was my turn to shine the light as both my kids held the object.
This time the light went through the magnifying glass, shining onto the floor below. I shared the term “transparent,” meaning that light passes completely through, as we talked about this part of the experiment.

I recorded our findings on the chart. We reviewed each object and outcome together while comparing our observations to our predictions.

Keep Playing with Light!
Even though we had finished the “formal” experiment, my kids kept the learning going! They ran through the house, shining the flashlight on all sorts of objects and saying whether the light reflected, stopped, or penetrated.
I love how much ownership they took of their learning!

We love playing with a fun flashlight scavenger hunt for kids !
This fun extension activity went on for quite a while. And it’s something that I know I can keep returning to again and again, adding more challenging terminology as they grow.
What are some other fun science experiments for kids you have done? We’d love to check-out your creative learning ideas!
About alisha warth.
I have raised my children doing activities with them. As a homeschool mom, I am always looking for ways to make our learning fun. I'm honored to be able to contribute my ideas to the awesome site that is Hands On As We Grow.
More Hands on Kids Activities to Try

Reader Interactions
19 comments.
Stacey A Johnson says
November 24, 2020 at 8:46 pm
This is fantastic! Thank you for sharing! I have been putting science bags together to send home for my kinders because we are doing online school….I was looking for some light activities because we are going to tie them into the holidays we study in December. (The idea that most celebrations, customs, rituals, use some sort of light) I can’t wait to do this with them!
MaleSensePro says
February 10, 2020 at 11:29 pm
Its a great learning experience.. its indeed the best kind of way kids should learn, thanks for sharing :)
Leave a Comment Cancel reply
Your email address will not be published. Required fields are marked *
This site uses Akismet to reduce spam. Learn how your comment data is processed .

What Parents Have to Say…
Shop ebooks of activities.

Get activity plans delivered to your inbox, every week!
Activities that hands-on parents absolutely love.

6 Different Activities for 6 Lines of Tape
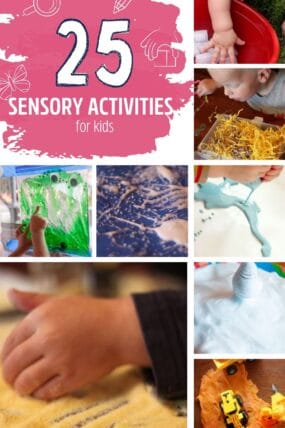
25 Sensory Activities for Kids with Sensory Tubs & Further Exploration
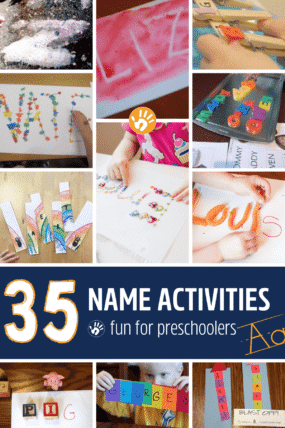
35 Name Activities For Preschoolers
How to Make a Lava Lamp Experiment Without Alka Seltzer

What Toddler Crafts & Art Projects Can We Do? 30 Ideas

Top 15 Light Related Science Experiments
Light experiments lets us unlock some of nature’s most intriguing riddles and appreciate the magic that illuminates our everyday experiences.
We have carefully selected the best light-related experiments, prioritizing fun and educational experiences that will surely engage young minds.
Our compilation of light experiments will illuminate the minds of students and teachers alike. This curated collection offers an extraordinary opportunity to explore the captivating world of light through hands-on activities.
1. Potato Light Bulb

Prepare to be amazed by the power of potatoes in our extraordinary potato light bulb experiments! In these captivating experiments, students will discover the remarkable ability of a humble potato to generate electricity and light up an LED bulb.
Learn more: Potato Light Bulb
2. Bending Light
In these mesmerizing light experiments, students have the opportunity to unravel the mysteries of refraction and explore the wonders of bending light.
3. Light Refraction
By engaging in these experiments, students will not only witness the mesmerizing effects of light refraction but also gain a deeper understanding of the scientific principles behind it.
4. Newton’s Light Spectrum Experiment
Step into the fascinating world of light and color with Newton’s Light Spectrum Experiment! Inspired by the groundbreaking discoveries of Sir Isaac Newton, these captivating experiments will take students on a journey to explore the nature of light.
5. Newton’s Prism Experiment
Learn about optics and unravel the mysteries of light with Newton’s Prism Experiment. Inspired by Sir Isaac Newton’s groundbreaking discoveries, these experiments offer a thrilling opportunity for students to explore the phenomenon of light dispersion and the creation of a vivid spectrum of colors.
6. Total Internal Reflection
These experiments provide a hands-on opportunity for students to observe and investigate how total internal reflection can be harnessed in practical applications such as fiber optics and reflective surfaces.
7. Colored Light Experiments
Prepare to immerse yourself in a vibrant world of colors with these captivating colored light experiments! In these hands-on activities, students will uncover the magic of colored light and its intriguing properties.
8. Capture a Light Wave
By employing innovative techniques and tools, students will learn how to capture and analyze light waves, unraveling the secrets hidden within their intricate patterns.
9. Home-made Kaleidescope

Unleash your creativity and embark on a mesmerizing journey of light and patterns with our homemade kaleidoscope experiments! By constructing your very own kaleidoscope, you’ll unlock optical wonders.
Learn more: Home-made Kaleidescope
10. Push Things with Light
Through engaging hands-on activities, students will experiment with the fascinating principles of photon momentum and the transfer of energy through light.
11. Erase Light with a Laser: The Photon Experiment
Can light be erased? Through hands-on activities, students will discover surprising answers. By utilizing lasers, students will learn about the principles of photon absorption and emission, investigating whether it is possible to erase light.
12. Exploring Shapes and Patterns on a Mirror Box

By creating your own mirror box, you’ll learn about optical illusions and reflections. In these experiments, students will explore the fascinating interplay between light, mirrors, and geometry.
Learn more: Exploring Shapes and Patterns on a Mirror Box
13. Electromagnetic Spectrum Experiment
Get ready for an illuminating adventure as we dive into the fascinating world of visible light where students will have the opportunity to explore the electromagnetic spectrum and unravel the mysteries of light.
14. Light Patterns in a Box

By manipulating light sources and objects, students will witness the magic of shadows, diffraction, and interference, resulting in a dazzling display of intricate patterns and colors.
Learn more: Light Patterns in a Box
15. Light Maze
Prepare to navigate a mesmerizing journey through the enchanting world of light with our captivating light maze experiments! In these immersive activities, students will learn about the magic of manipulating light to create intricate mazes and pathways.
Similar Posts:
- 68 Best Chemistry Experiments: Learn About Chemical Reactions
- Top 100 Fine Motor Skills Activities for Toddlers and Preschoolers
- Top 58 Creative Art Activities for Kids and Preschoolers
Leave a Comment Cancel reply
Save my name and email in this browser for the next time I comment.
Cool Science Experiments Headquarters
Making Science Fun, Easy to Teach and Exciting to Learn!
Science Experiments
Cool Light Refraction Science Experiment – Arrow Changes Direction!
Magic trick? No, but the results of this experiment are pretty surprising. Kids (and adults) will stare in amazement and scratch their heads wondering what causes the arrow in this experiment to change direction right before their eyes! The secret is light refraction.
Exploring light refraction couldn’t be easier or more fun, simply preview the experiment with our demonstration video below and find an easy to understand explanation of how it works below.

JUMP TO SECTION: Instructions | Video Tutorial | How it Works
Supplies Needed
- Piece of Paper
Light Refraction Science Lab Kit – Only $5
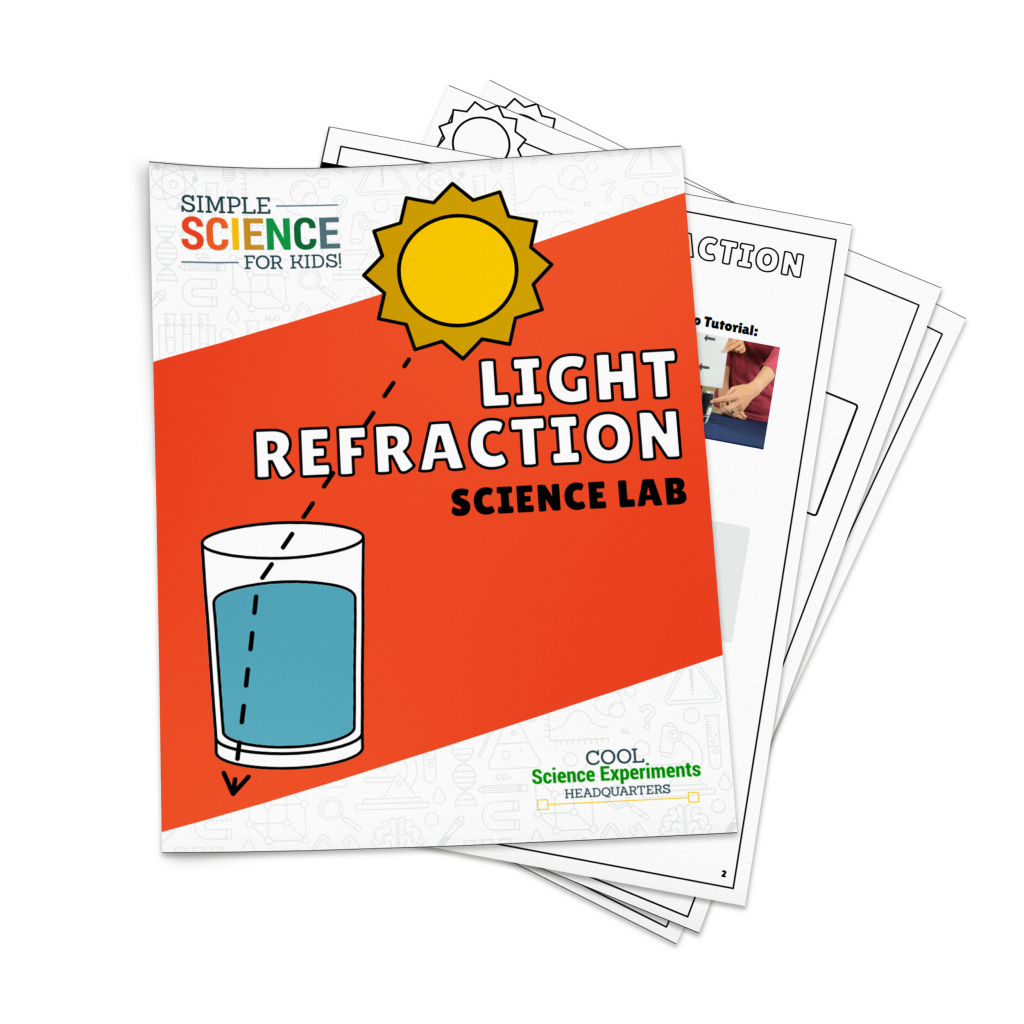
Use our easy Light Refraction Science Lab Kit to grab your students’ attention without the stress of planning!
It’s everything you need to make science easy for teachers and fun for students — using inexpensive materials you probably already have in your storage closet!
Light Refraction Science Experiment Instructions
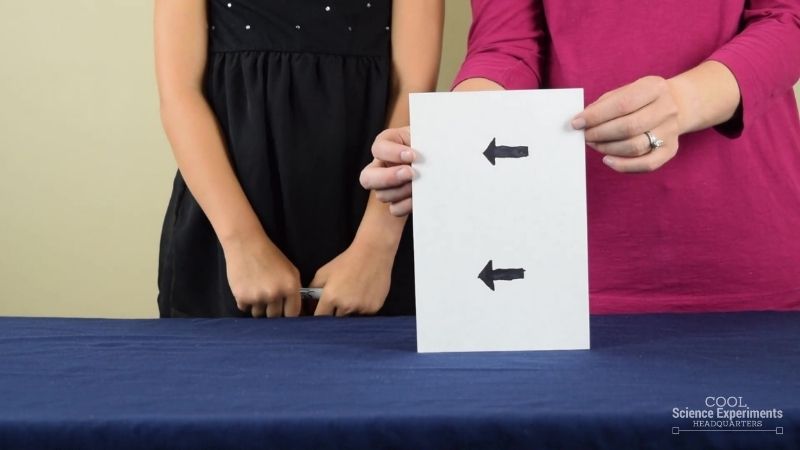
Step 1 – Get a sheet of paper and draw two arrows on it. One arrow near the top and one arrow near the bottom. Make the arrows point in the same direction.

Step 2 – Fill a glass with water.
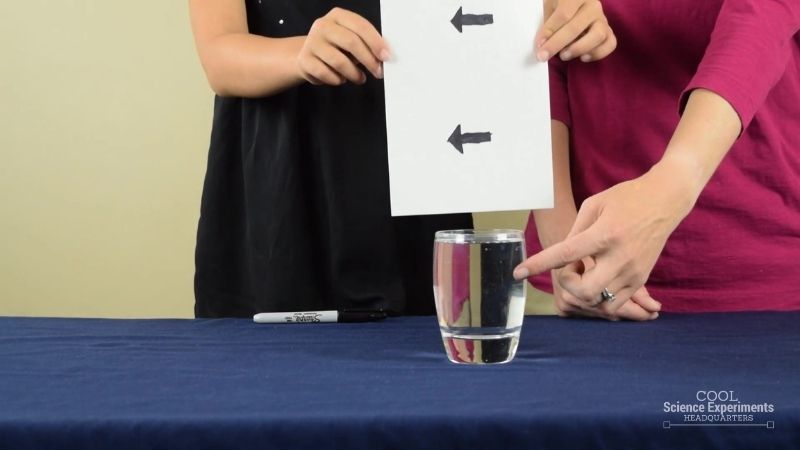
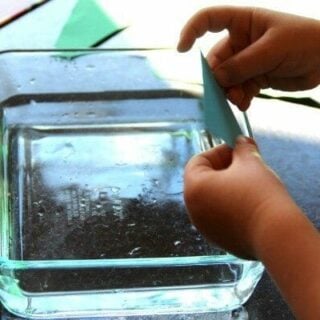
Step 3 – Slowly lower the piece of paper behind the glass of water.
Step 4 – Look through the glass of water and watch what happens. Do you know why the arrow appears to change directions? Find out the answer in the how does this experiment work section below.
Video Tutorial
How Does the Science Experiment Work
The scientific concept that is at work in this experiment is called refraction. Refraction is the bending of light. Refraction occurs when light travels from one medium to another (ie. air to water, water to air).
During the experiment, the light traveled from the image through the air, then through the glass cup into the water, and finally out of the glass cup and into the air once more before it reached our eyes. Light refracts as it passes from one medium to the next because it travels at different speeds through those mediums. Light travels fastest through air, a little slower through water, and even slower through glass.
This means that the light bends once when it travels through the glass cup into the water, and then it bends again when it travels out of the glass cup and into the air. As a result, the light paths cross and the image appears to be flipped horizontally (left/right).
Light Refraction Examples
The following are examples of refraction that occur all around us.
- Glasses or Contacts – The lenses of glasses and contacts are designed to bend light in ways that help a persons improve vision.
- Rainbow – Rainbows are formed when the rays of sunlight bend (refract) when they travel through rain drops.
- Cameras – A camera works because the lens causes the light rays to refract.
More Experiments that Show Light Refraction
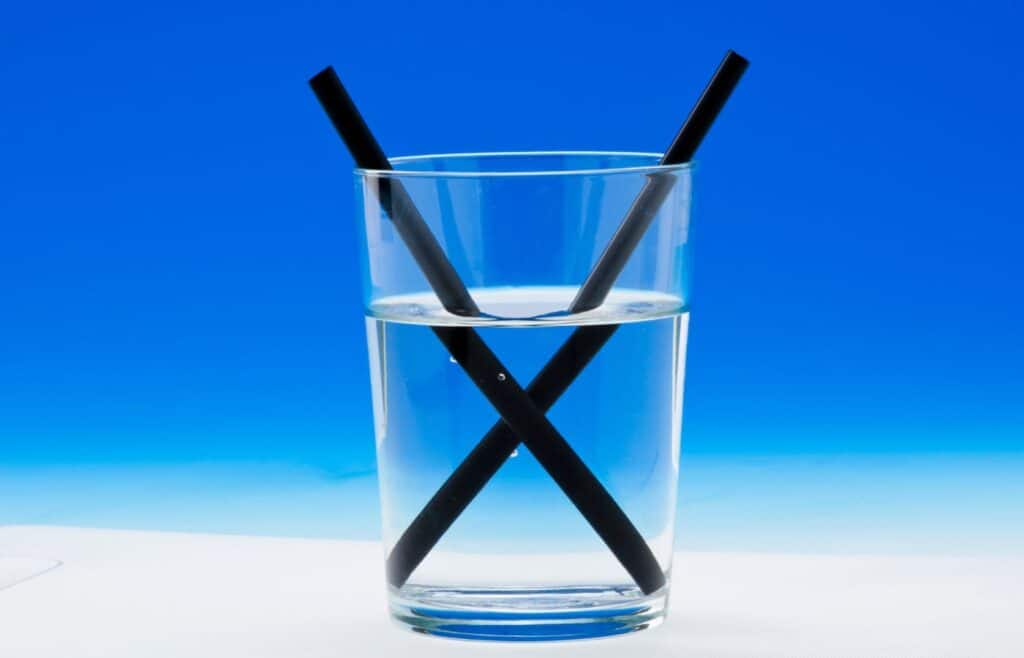
Refraction of Light Science Experiment – Watch as the straw appears to bend in this experiment that shows refraction in action.
Ruler Changes Size Science Experiment – Observe how the size of an object changed when viewed through different liquids.
I hope you enjoyed the experiment. Here are some printable instructions:

Light Refraction Science Experiment
Instructions.
- Get a sheet of paper, and draw two arrows on it. One arrow near the top and one arrow near the bottom. Make the arrows point in the same direction.
- Fill a glass with water.
- Slowly lower the piece of paper behind the glass of water.
- Look through the glass of water and watch what happens.
Reader Interactions

February 5, 2017 at 9:25 am
THIS IS COOL. MY DAUGHTER WON THE SCHOOL WIDE SCIENCE PROJECT. THANK YOU SO MUCH FOR DOING THIS EXPERIMENT!

April 20, 2018 at 3:07 pm
Cause of the reflection of the water.

September 10, 2019 at 11:45 am
*refraction

January 7, 2021 at 3:53 pm
I can’t get this to work. I have used a round glass and a square plastic container. I’ve moved the piece of paper close to the container of water and father back. I have lowered the paper quickly and very slowly. Clearly it works, so what am I missing? The size of the arrows? The size of the paper?
Help! I teach a science class to elementary school children and would love to do this. Please answer [email protected]

May 23, 2018 at 7:33 am
This is because of refraction

January 22, 2019 at 3:42 am
Wonderful. Thanks for sharing

May 29, 2019 at 8:03 am
It was very useful and unique. It impressed my teacher a lot.
January 7, 2021 at 4:11 pm
I was finally able to get the arrow to change direction, but it appears that the mechanism is not the water, but the shape of the glass. It did not work with a square or wide straight sided glass. It did work in a straight sided narrow glass, but the arrow was distorted and could be manipulated back and forth by moving the paper.

March 2, 2022 at 2:52 am
Wow, this helped me for my school project i won second place thank you so much

August 4, 2022 at 7:27 pm
I tried this in a square glass container and the arrow does not change direction.
Does the concave/convex shape of the glass have something to do with the result?

May 22, 2023 at 10:07 am
That’s a great question. Do you have multiple glass containers to try the experiment with? That way you can test to see if the shape of the contain changes the results of the experiment. If you try it, come back to let us know what you find.

July 31, 2023 at 6:30 pm
It was refraction that caused the change of direction

It is caused by the refraction or the shape of the glass.

September 28, 2023 at 6:22 am
Thnx, I got 3rd position in my competition! 🤤
Leave a Reply Cancel reply
Your email address will not be published. Required fields are marked *
Save my name, email, and website in this browser for the next time I comment.

- Privacy Policy
- Disclosure Policy
Copyright © 2024 · Cool Science Experiments HQ
- MKE FUN MAP

Light Refraction Magic: A Simple Science Experiment For Kids
Hello, young scientists! (And their parents.)
Today, I’m sharing a science experiment that blurs the lines between magic and the marvels of physics.
You’ll turn a simple drawing into a captivating optical illusion with just a glass of water.
This activity, perfect for kids and adults alike, dives into the phenomenon of light refraction.
It’s so straightforward yet so astonishing, it’ll have everyone begging for an encore.
Let’s explore how to bend light to our will, shall we?
What You’ll Need
- A piece of paper
- A clear glass
Steps to Unveil the Magic
- Create Your Artwork : Grab your sheet of paper and draw two large arrows on it. Position one near the top and the other near the bottom, making sure both arrows point in the same direction. This is where your artistic flair meets science!
- Prepare the Glass : Fill your clear glass with water. This isn’t just any glass of water; it’s about to become a magical tool in our experiment.
- The Reveal : Slowly lower the piece of paper behind the filled glass. Now, take a moment and look through the glass of water at your arrows. Prepare to be amazed as you witness the direction of the arrows seemingly change right before your eyes!
The Science Behind the “Magic”
What you’re witnessing is the phenomenon known as light refraction.
This occurs when light passes from one medium to another, altering its speed and direction. In our experiment, light travels from the paper (through air) into the glass and water, then back into the air before finally reaching our eyes. Because light travels fastest through air, slower through water, and even slower through glass, it bends at each transition between these mediums.
The bending of light, or refraction, causes the light paths to cross, flipping the image of the arrows as viewed through the water-filled glass. It’s a brilliant demonstration of how the speed of light changes in different materials and the visual effects those changes can produce.
For visual learners, here’s a video that dives into the details of this fun experiment:
Similar Experiments
Dancing Raisins
Traveling Rainbows
Pepper & Soap Experiment
Rainbow Celery
Sink or Float
100 Easy Science Experiments Your Kids Can Do At Home
This simple experiment is not only a fun party trick; it’s a window into understanding the basic principles of physics and the behavior of light.
It’s a perfect way to spark curiosity in young minds and introduce them to the wonders of science in the most enchanting way possible.
So, gather your materials, draw your arrows, and let the light-bending magic begin.
Happy experimenting, Calie

Calie Herbst, Editor-in-Chief of Milwaukee With Kids, has spent over a decade combining her experiences as a parent of three to create a hub for Milwaukee’s family adventures.
Her decade-long teaching career in Milwaukee Public Schools and academic background, including a Master’s in Teaching from Marquette University and dual B.A.s in Sociology and Spanish from the University of Wisconsin – Madison, fuel her passion for inclusive and engaging family content.
Calie is also a recognized voice in local media, contributing to WISN Channel 12 News, WTMJ Wisconsin Morning News, Fox 6’s Real Milwaukee, and B93.3.
Discover more about Calie’s journey and editorial approach on her About Page and Editorial Policy Page .
Related Posts
- Pumpkin Patches Near Milwaukee: Choose the Perfect Fall Adventure
- Brookfield’s First Inclusive Playground Opens at Wirth Park
- Introducing The Play Retreat: A New Family-Friendly Space in Milwaukee

- Best Resources for Special Needs Kids Around Milwaukee
- 50 Backyard Haunted House Ideas Your Kids Will Love (2024)
- Swing Park Set For Changes: New Playground, River Theater, & More
Recent Posts
- Exploring 1st and Bowl: A Unique Family Entertainment Venue in Milwaukee
- The Banned Wagon Tour Comes to Milwaukee and Beyond
- Top 5 Most Haunted Houses in Milwaukee to Visit This Halloween (2024 Edition)
- Scarecrow Lane Returns to Retzer Nature Center: Fall Fun For All Ages
- Best Little Pit Stop: Concord General Store & Petting Zoo
- Creekside Valley Farm: A Perfectly-Sized Fall Adventure in Mequon
- Cozy Nook Farm: Authentic Farm Experience With Cows, Tours, & Fall Fun
- Cedarburg Creek Farm: Free Hay Wagon Rides and Affordable Family Fun
- Buffalo Bill’s: U-Pick Pumpkins, Straw Mountain, and More
- Bear Den Petting Zoo: Hold a Baby Kangaroo and More
- Koz’s Mini Bowl: A Family-Friendly Throwback to Milwaukee’s Past
- Top 10 Family-Friendly Tours at Doors Open Milwaukee 2024
- China Lights Festival Returns to Boerner Botanical Gardens: A Family Favorite! (2024)
- Goldfish Swim School: Free Trial Lessons & an Exciting Giveaway!
- Best Playgrounds
- Family-Friendly Restaurants
- Museums and Educational
- Art, Music, & Theater
- Indoor Play & Entertainment
- Sports & Recreation
- Gardens & Parks
- Hiking & Nature
- Spring Adventures
- Fall Fun in Milwaukee
- Holiday Cheer
- Milwaukee Family News
- Family Resources
- Special Needs
- Day Trips From Milwaukee
- Family Vacation Spots
- Science Experiments
- Crafts & DIY
- Birthday Parties
- Book Recommendations
- Outdoor Activities For Kids
- Educational Activities
- Games & Entertainment
Ignite Your Kids’ Curiosity with These 16 Dazzling Light Experiments
Activities » Science » Ignite Your Kids’ Curiosity with These 16 Dazzling Light Experiments
SHARE THIS POST:

I earn commissions from my affiliated links. Please see my disclosure policy for more details.
From rainbow light refractions to exploring the visible spectrum, there are so many fascinating and fun science projects about light for children to explore.
Whether you’re a teacher in need of activities that will engage your students or a homeschooler who wants to find new methods of educating your little ones, this ultimate list of light experiments for kids is sure to keep them happily learning!
With easy-to-follow instructions and simple materials, these exciting experiments dive into basic concepts such as reflection, absorption, diffusion, and much more.
I scoured the internet to discover the BEST activities for experimenting with light. This post includes dozens of fun science light experiments for kids to keep you and your kids busy. These science lessons are so good that kids have fun, are engaged, and want to learn more!

Light Science Experiments for Kids
Build your diy spectroscope from buggy & buddy.
Kids will LOVE to make their DIY spectroscope! The best part of this science activity is that it can be done with a few simple materials and explore the spectrum of different light sources.
The author offers a step-by-step, easy-to-follow approach, which is always helpful!
This light science activity for kids makes a great addition to a unit on light or weather. You get to see rainbows, so add it to an April preschool unit or St. Patrick’s Day-themed unit.

Sky Science – Why does the sky change colors? from Steam Powered Family
Finally, have an answer to the age-old question: why is the sky blue? Even better, explore why the sky changes color at sunrise and sunset.
You can explain until you’re blue in the face about the science of the sky colors, but experimenting brings the understanding to a new level.

Learning about Optics with Two Fun Light Experiments! by From Engineer to Stay at Home Mom
Explore how light behaves with this activity! Furthermore, explain the concept of OPTICS as the study of how light works. This water and light experiment showed him how light works.

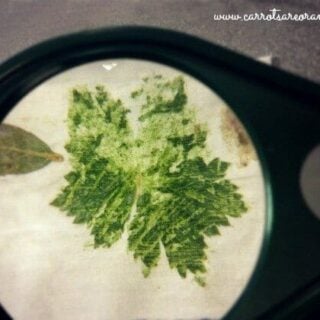
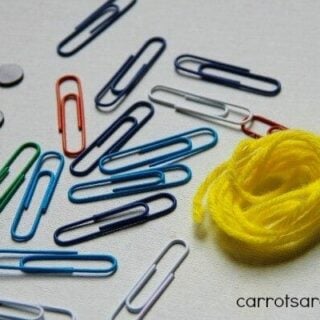
Explore the Eye’s Blind Spot from Carrots Are Orange
The blind spot is a little spot of the eye. Everyone has a blind spot. The blind spot is the point in the eye where all the nerves in the eye come together.
The nerves form a bundle called the optic nerve, which runs from the eye to the brain.
So, why makes the blind spot “blind’?

Simple Light Refraction Experiment from Look We’re Learning
This simple light refraction experiment teaches kids an easy way to teach kids about light!

Light Activities for Preschoolers from Carrots Are Orange
This post includes loads of light energy experiments and ideas to explore.

DIY Sundial from KC Adventures
Learn an easy way to make a sundial using simple materials.

UV Light Experiment from Inspiration Laboratories
Try this simple exploration to explore ultraviolet light with your child.

Exploring Science Through Art: Colour & Light by Childhood 101
This activity is sweet and to the point—what a lovely hands-on way to explore color and light.

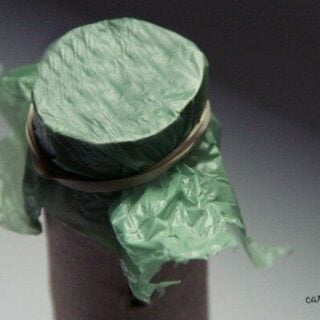
Reflection Science with Light Patterns in a Box from Buggy & Buddy
A super cool and remarkably easy-to-put-together light energy experiment.

Rainbow Science for Kids: Exploring Prisms from Buggy & Buddy
Prisms are one of the most beautiful and simple materials. Learn ways to explore light reflection with this simple object!

Easy Motion Science Experiment from Carrots Are Orange
Learn how movies are made with this easy motion science experiment . My sons have been on a “how does this work?” kick. This easy science experiment was one answer to “how do movies get onto a screen?”

Science for Kids: How to Make a Kaleidoscope
Kids love light reflection experiments! Learn how to make a kaleidoscope in this fun & easy science activity and a craft for kids. Kids love to explore light, reflections, and symmetry by creating their kaleidoscope.

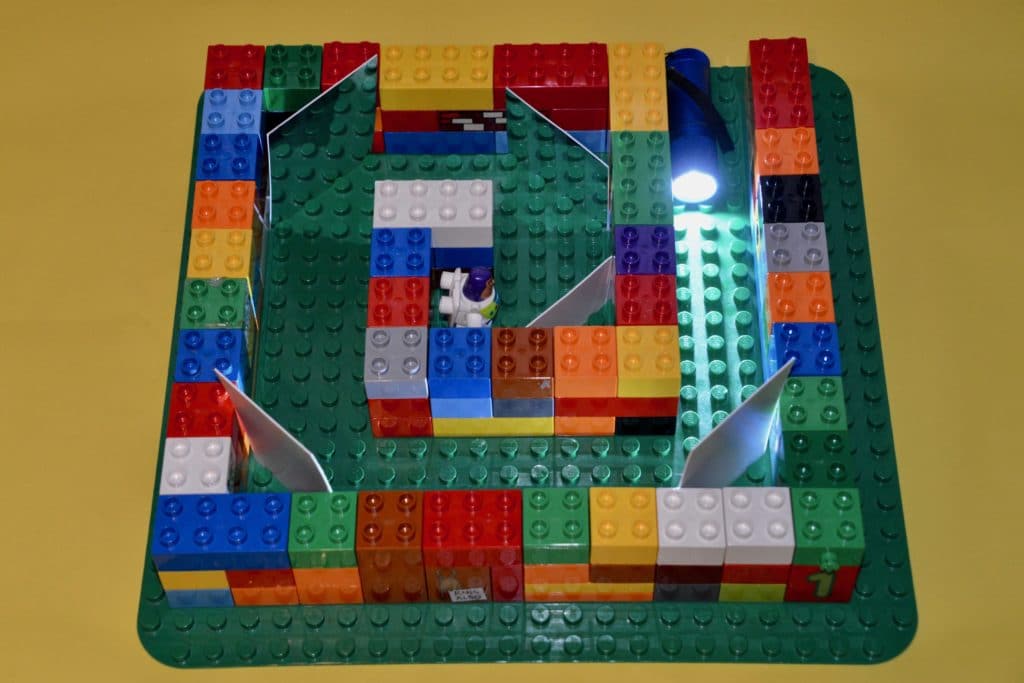
Build a Light Maze
This science experiment on light is unique and embraces imagination (and a flashlight experiment which is always fun!). My son LOVED this “build a light maze activity,” and I bet your child will enjoy it, too.

Candy Wrapper Science – Color Mixing
Kids will have a lot of fun exploring color mixing and light with this hands-on science exploration.

Laser Science for Kids: The Glowing Lollipop
Learn about light refraction with this cool laser pointer lollipop experiment.
As you can see, there are a ton of great light experiments for kids that are both fun and educational. We hope this list has inspired you to try out some of these activities with your children or students.
If you end up trying one (or more) of them, we’d love to hear about it. Which activity jumped out at you? Share it with your friends!
Other Science Activities:
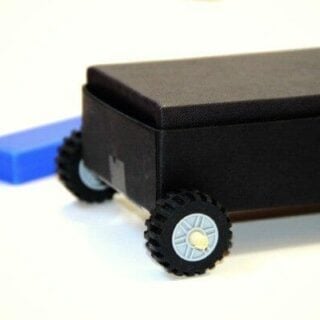
How to Build a Magnetic Car with Your Kids

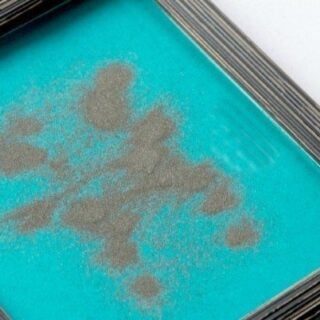
DIY Magnetic Sand Table
Magnetism Science Experiments for Kids: Magnetic Board
Light Activities for Preschoolers - Learning about Light Energy
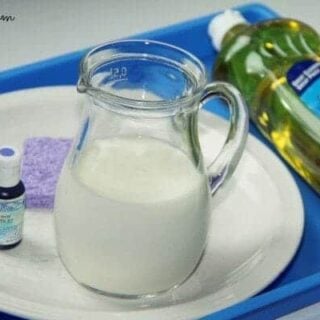
Science Activity with Milk & Food Coloring
Science of Flight Activities for Kids
Easy Science Activity with Balloons - How to Build a Balloon Rocket
Easy Science Experiments for Kids - Surface Tension
Easy Motion Science Experiment that Will Wow Your Kids
10+ Amazing Science Activities for Preschoolers
Arctic Animal Science Experiment for Preschoolers
Super Cool Easy Science Experiments for Kids - Learn about Sound
Preschool Physical Science Activity - Leaf Pounding
The Coolest Preschool Science Activity - Surface Tension
What Do Germs Look Like - Science Activity for Kids
Explore How Cats Eyes Glow with this Science Activity
How to Make a Pulley with Kids - Easy Science Activity
Electricity Experiments with Kids: Super Easy Science Experiments
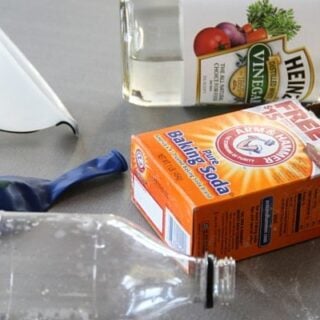
[Baking Soda and Vinegar] Experiment with Balloons - Earth Day Science
This site uses Akismet to reduce spam. Learn how your comment data is processed .
Get Your ALL ACCESS Shop Pass here →
Simple Mirror Activity: Exploring Reflections
Set up a simple mirror activity for preschool and kindergarten science play! Explore light and reflections through hands-on play. Add a flashlight, spinning tops, a smaller mirror, and other objects to create an easy science lesson. Preschool science experiments can be super simple to do!

Reflection Of Light For Kids
Try this simple mirror activity for exploring reflections and light with young kids! Exploring reflections is a fantastic science activity for young learners! Please supervise as you fell comfortable!
What is a mirror? What is reflection? What is light? Are there other surfaces that reflect?
We looked around the house, and he named quite a few, including the heart on my silver necklace! Also, have them look at themselves and describe what they see to you. Mirrors can be great for practicing and discussing emotions !
Preschool science ideas are for developing thoughts, questions and observations! Plenty of time to come for definitions and facts!
Hands-on science play, like our mirror play, opens doors to critical thinking and language skills while having fun in a very hands-on play way!
What Is Reflection?
Reflection simply means to send back light, heat or sound without absorbing it. That’s how a mirror works! Or any object that has a reflective surface. The light is not absorbed and instead bounces off the surface.
Smooth, shiny surfaces such as mirrors and polished metals reflect light well. Dull and dark surfaces like dark fabrics don’t reflect light well.
Simple Mirror Activity
TIP: Make sure to engage in conversations with kids about their observations. Ask open-ended questions, such as “What happens when you shine the light on the mirror?” or “Can you describe how the reflections change?”
- Large mirror (child safety glass)
- Hand-held mirror (child safety glass)
- Objects with reflective surfaces
- Optional – flashlight
Instructions:
STEP 1. Collect a variety of items with reflective surfaces. Encourage children to explore everyday objects like metal utensils, CDs, aluminum foil, or any shiny materials.
STEP 2. Begin by introducing the materials and explaining that the goal is to explore how light reflects off different surfaces. Highlight the importance of using the torch and mirror to discover how light interacts with each item.
STEP 3. Invite children to pick up each item one by one and examine its reflective properties. Encourage them to observe how the light from the torch interacts with the surface.
STEP 4. Turn on the torch and demonstrate how it emits light. Show children how to direct the beam of light onto the reflective surfaces to see how they shine and reflect.
STEP 5. Introduce the mirror and explain that it can be used to redirect or focus the light onto different surfaces. Encourage children to hold the mirror at different angles and observe how it changes the reflection.
Extend The Activity: Encourage creativity by asking children to experiment with creating patterns or shadows using the reflective items and the torch. They can project shapes onto surfaces or create interesting effects with the mirror. You can find more shadow activities for preschoolers here.
Our Experience
For this simple mirror activity, we talked about reflection while we played around! He told me it is all about light bouncing around and bouncing back onto him! He enjoyed angling my little compact mirror with two sides so that he could examine each object.

He also wanted shiny objects to shine his flashlight on to show the light bouncing off and onto him. We used the mirror and flashlight to make reflections on the wall and changed angles to see where we could get the light to hit!

Additional Mirror Activity Ideas
Preschoolers can engage in various fun and educational activities with mirrors to explore reflection and light. Here are some ideas:
Mirror Me: Play a game where children mimic each other’s movements using mirrors. This helps them understand the concept of reflection and promotes social interaction.
Mirror Drawing or Painting: Using erasable markers, let kids draw on a vertical surface like a mirror. Or try painting with shaving cream on a mirror. This activity promotes fine motor skills and spatial awareness.
Loose Pieces: Set out a basket of translucent acrylic gems and shapes for kids to create patterns and designs on the surface of a child-safe mirror. You can include number, shape, and letter cards to add a learning component to the mirror activity.
Nature Reflections: Take child-safe mirrors outdoors and explore reflections in natural settings. Kids can observe the reflection of trees, clouds, or even themselves in the mirror.
More Fun Ways To Teach Kids About Light
- Explore reflection of light with a simple DIY kaleidoscope .
- Learn about refraction of light in water .
- Explore rainbows with a prism , and other supplies.
- Make easy shadow puppets (free printable included).
- Explore shadows with your body .

More Fun Preschool Activities
- Preschool Science Experiments
- Preschool Science Centre Ideas
- Sensory Science Activities For Preschoolers
- 5 Senses Activities
- All About Me
- Shape Activities
- Four Seasons Activities

Printable Preschool Pack
Get ready to explore this year with our growing Preschool STEM Bundle ! Or grab the individual packs.
What’s Included:
There are ten fun preschool themes to get you started. This is an ” I can explore” series! You’ll find both seasonal and non-seasonal themes appropriate to preschool learning throughout the year.
Each unit contains approximately 15 activities, with instructions and templates as needed. Hands-on activities are provided to keep it fun and exciting. This includes sensory bins, experiments, games, and more! Easy supplies keep it low cost, and book suggestions add the learning time.

Why Is Science Important For Preschoolers?
Kids are curious and always looking to explore, discover, check things out, and experiment to find out why things do what they do, move as they move, or change as they change!
Indoors or outdoors, science is amazing! Let’s introduce our younger kiddos to science at a time in their development when they are curious about the world around them!
Science surrounds us, inside and out. Preschoolers love looking at things out with magnifying glasses, creating chemical reactions with kitchen ingredients, and, of course, exploring stored energy! Check out 50 awesome preschool science projects to get started!
There are lots of easy science concepts that you can introduce kids to very early on! You might not even think about science when your toddler or preschooler pushes a cart down a ramp, plays in front of the mirror , laughs at your shadow puppets, or bounces balls over and over again.
See where I am going with this list! What else can you add if you stop to think about it? Science starts early, and you can be a part of that with setting up science at home with everyday materials.
Or you can bring easy science to a group of kids! We find a ton of value in cheap science activities and experiments. Check out our helpful science resources below.
Helpful Science Resources To Get Your Started
Here are a few resources that will help you introduce science more effectively to your kiddos or students and feel confident yourself when presenting materials. You’ll find helpful free printables throughout.
- Best Science Practices (as it relates to the scientific method)
- Science Vocabulary
- 8 Science Books for Kids
- All About Scientists
- Science Supplies List
- Science Tools for Kids

Love the gift bows on the mirror!
- Pingback: Preschool Science Experiments and Science Activities
Comments are closed.

Subscribe to receive a free 5-Day STEM Challenge Guide
~ projects to try now ~.

- Skip to primary navigation
- Skip to main content
- Skip to primary sidebar

- FREE Experiments
- Kitchen Science
- Climate Change
- Egg Experiments
- Fairy Tale Science
- Edible Science
- Human Health
- Inspirational Women
- Forces and Motion
- Science Fair Projects
- STEM Challenges
- Science Sparks Books
- Contact Science Sparks
- Science Resources for Home and School
Science Fair Project – Easy Light Maze
September 9, 2019 By Emma Vanstone 2 Comments
Light travels in straight lines through empty space. If it hits an object some of it is reflected back and the rest is absorbed by the object. It is this reflection of light that allows us to see objects around us. The walls, tables and chairs in your room don’t emit their own light, you can see them because they reflect light either from the sun or artificial light.
When light hits a transparent object ( a window is a good example of this ) some is absorbed and reflected but most passes through.

How does light travel?
Light comes from a light source. This could be the Sun, a torch, a fire or a candle.
Light travels in straight lines and cannot bend. In the mazes below, we used mirrors to reflect light around corners.
When a light ray hits a mirror, it is reflected off the mirror which changes the direction of the light. The angle of the reflected light is the same as the angle of the incoming light.

If the path of the beam of light changes ( you move the torch or the mirror ) the path of the reflected beam also changes.
How to make a light maze
This activity helps children understand that light travels in straight lines but can be reflected.
What you need to make a light maze
Modelling clay – to hold the mirrors
Card and pens ( optional )
Light mazes can be set up as a structured exercise or completely open ended.
I slightly themed our mazes, but that’s obviously completely optional.
Light Maze 1 – Light up the road
This one is set up like a road. The idea is to find a way for the grey car to light up the road around both corners.

Two mirrors allow this to work nicely.

You can see here how each mirror reflects the light.

Light Maze 2 – Light up a safe route
This maze uses just one mirror. The idea is for children to find a way to help the toy soldiers see a safe path around the water and crocodile.

You can see in the photo how one mirror does this nicely.

Light Maze 3 – LEGO Light Maze
We used DUPLO for speed, but Lego would work just as well. I used lots of small mirrors to fit in the corners and had to cut some down to size.
Light Maze Extension Task
Try to create a light maze without using the flashlight to test as you go along. Does it work when you turn on the light source?
Can you create a coloured maze using coloured sheets of cellophane ?
Facts about light
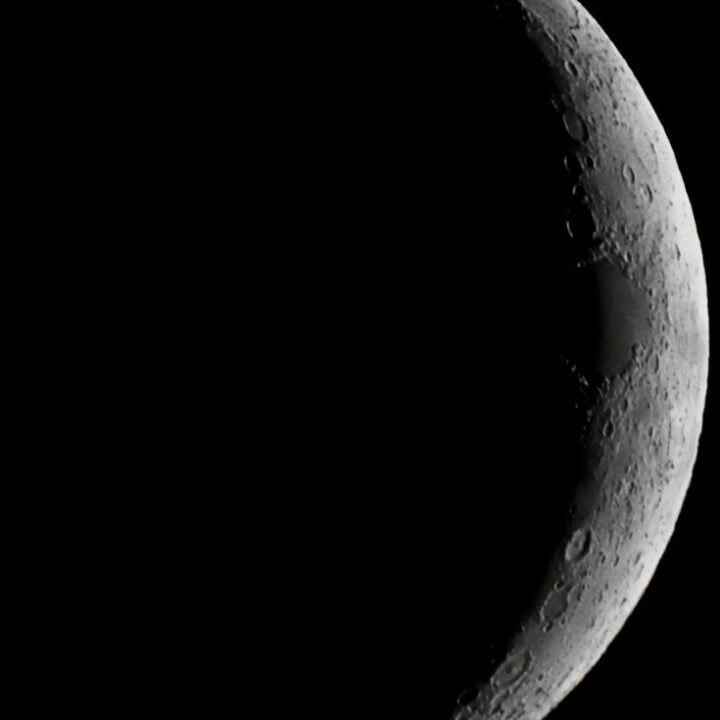
We can see the moon as it reflects light from the sun.
Some animals make their own light! Fireflies are a good example of this.
You can split light into the colours of the rainbow using a prism.
Light travels at 299,792,458 meters per second.
Light from the sun takes 8 minutes and 20 seconds to reach the Earth
Did you know most animals don’t recognise their reflection and often attack it?
More light experiments
Create circuits to light up a model village .
Make a rainbow with a prism
Find out why the sky looks blue .

Last Updated on April 29, 2024 by Emma Vanstone
Safety Notice
Science Sparks ( Wild Sparks Enterprises Ltd ) are not liable for the actions of activity of any person who uses the information in this resource or in any of the suggested further resources. Science Sparks assume no liability with regard to injuries or damage to property that may occur as a result of using the information and carrying out the practical activities contained in this resource or in any of the suggested further resources.
These activities are designed to be carried out by children working with a parent, guardian or other appropriate adult. The adult involved is fully responsible for ensuring that the activities are carried out safely.
Reader Interactions
April 29, 2024 at 8:49 am
Hi! Fantastic website and terrific resource! My students loved it! On your light maze experiment though, it says that the speed of light is 299,792,458 miles per second. That is not correct. It is 299,792,458 METERS per second, or 186,282 miles per second.
Sorry to be picky, but I’m a science teacher and I used your experiment in class. I was not the one who saw your error originally, it was one of my seventh grade students. Now I know that they were paying attention!
Dave Wilson Science Teacher
April 29, 2024 at 1:06 pm
Thank you, that is now corrected!
Leave a Reply Cancel reply
Your email address will not be published. Required fields are marked *
5 Phenomenal Ideas to Teach Light: Reflection and Refraction in 5th Grade

Let’s teach about the reflection and refraction of light for 5th grade. Even though this can be a confusing topic, your students will reach mastery in no time with these interactive activities for reflection and refraction, as well as absorption.
What are reflection and refraction?
I’ll be honest ; before I started teaching 5th grade, the behavior of light never crossed my mind. As a 5th grade teacher, though, I think about it ALL THE TIME!
Reflection is the process by which light bounces off of a surface. When light hits a reflective surface, such as a mirror or a polished metal object, the light waves bounce off of the surface and return to the source. This is why we are able to see images in mirrors – the light waves are reflected back to our eyes.
Refraction is the process by which light changes direction as it passes through different materials. When light travels through a different material, such as water or glass, the light waves are bent as they pass through the material. This is why things often appear distorted or bent when viewed through water or glass – the light waves are refracted as they pass through the material.
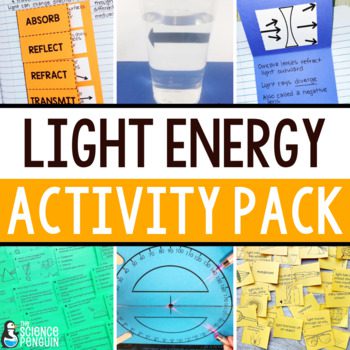
Here’s a collection of resources I’ve used to teach students about the behavior of light.
1. Light and Matter
In primary science (k-2), students learn how light from a flashlight interacts with matter.

In upper elementary, students look around the room to find examples of items (media) that transmit, reflect, refract, and absorb light.

With small groups, I’ve also reviewed reflection and refraction with a light hunt. I put a few items out around the room. After students visit and interact with those materials, they can add other items in the classroom.
After we go over how light behaves with each of the items, we discuss the following question: What do the items in each group have in common? This helps us identify similarities and tendencies in each group.
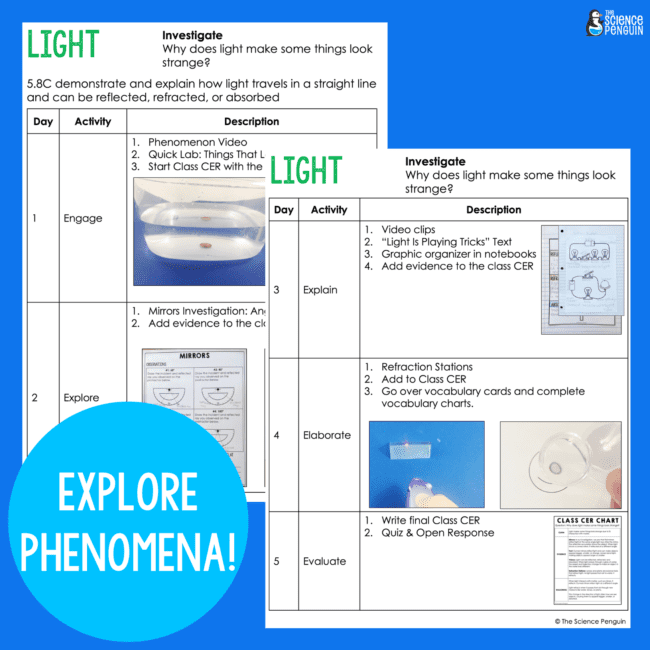
2. Light Phenomenon-Based Unit for Deeper Learning
Includes 5 days of 45-minute lessons:
- Engage: Phenomenon video and Things That Look Strange Quick Lab
- Explore: Angle of Reflection Lab and curved mirror demonstration
- Explain: Read the text together, watch the video clips, and complete an entry in notebooks
- Elaborate: Refraction Stations
- Vocabulary: Vocabulary posters and student page
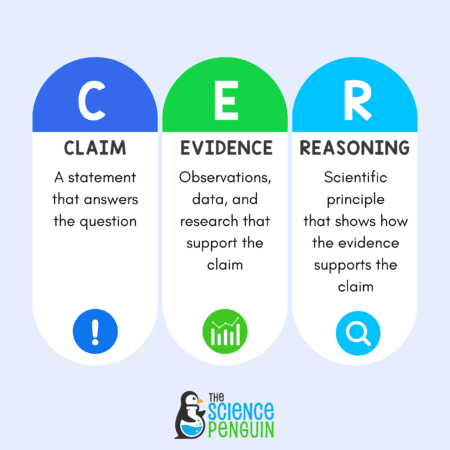
- Evaluate: Support a claim with supporting evidence and reasoning in a CER
- Assess: 5-question multiple choice quiz and differentiated open response prompt including Google Forms option
See it on TPT: Light Phenomenon-Based Science Unit
3. Reflection and Refraction Worksheet Alternative
So you need to review and practice the concepts but don’t want to use another worksheet? Try task cards and sorts!
These light vocabulary task cards are super fun and can be used in many ways for games, pairs work, and more!

Sorting Cards
Your students will also love this Reflection vs. Refraction sort . Listen in to the conversations as teams work through all 27 sorting cards.

4. MUST-HAVE Observation Stations for Teachers Short on Time
Reflection Observation Stations
In these Observation Stations, student teams use a protractor on the station directions page, a laser, and a mirror to observe and draw the reflected ray for a given incident ray.

Refraction Observation Stations
In these Observation Stations, student teams observe what occurs when light strikes 6 different objects. Expect a lot of “ooh”s and “wow”s!
5. Small Group Science Intervention
See it on TpT! Force & Energy Small Group Science

TEKS 5.6C demonstrate that light travels in a straight line until it strikes an object and is reflected or travels through one medium to another and is refracted
Top Teaching Tools
Sign up for the Free Resource Library
This is an exclusive library of 40+ science printables, labs, activities, and games for grades 3-6. Sign up and check your email for immediate access.
- Read more about: 5th Grade , Physical Science
You might also like...
The Science Penguin Mini PD
CER (Claim Evidence Reasoning) in 3rd, 4th, and 5th Grade Science
5th Grade Science STAAR: 3 Tips to Master Short Constructed Response (SCR)
8 thoughts on “5 phenomenal ideas to teach light: reflection and refraction in 5th grade”.
I love how you have broken this down. I already have your products and now I know exactly how to use them! Thank you so much!
Rachel Mrs O Knows
Thanks, Mrs. O!
I’m new to science penguin. Is this a unit I can purchase on TpT?
Martha, These are either ideas or separate products I have listed on TpT. The images that are products are links to the resource. Thanks!
I have found the very coolest lights to use for teaching about light – I don’t like using filters and flash lights and these colored LEDs are very affordable. They are called Light Blox from Laser Classroom. I love them!
I have spent the day looking for these things, not knowing their name … Thank you!
This is really great. What are some of the hand signals you use for the vocab words.
I love it teach me please
Comments are closed.

Hi, I'm Ari!
As a new teacher, I struggled to plan engaging, rigorous science lessons. Throughout my time teaching upper elementary and in my graduate studies, I discovered what worked well and developed science curriculum for busy teachers. Now, teachers across the country use Science Penguin activities every single day in their classrooms!
Want access to The Science Penguin Free Resource Library?
This is an exclusive library of 40+ science printables, labs, activities, and games for grades 3-6! Enter your personal email so your resources don't get stuck in a district filter!
Light Science Experiment L01: Reflection with spoons

Start your understanding of the wonders of light by investigating how it travels and bends.
Light Science Experiment: Reflections
What you will need:.
Spoons, shiny metal ones.
What you will do:
1. Stand in a well lit room or outside. Hold the spoon by the handle just like you would when you are eating, but flip it over so that the back of the spoon is facing you. Look at yourself in the curved end, what do you look like?
2. Now turn the spoon so that the back of the spoon is still facing you but the curved part is pointing at the ceiling or sky. Have another look at yourself.
3 Next, turn the spoon over and look at yourself in the front of the curved part where the food normally goes. What do you see?
What is going on?
The shiny spoon is like a mini mirror, but with a curve in it. The front of the spoon is a CONCAVE surface, and the back is a CONVEX surface.
Light that goes into a normal mirror bounces back in a straight line, so you see yourself as you are, but reversed. Light that goes onto a convex surface is bent out as it bounces back, the more curved the surface, the more the light is bent. This is why the image you see is changed from the real you.
When light bounces off a concave surface it is bent inward. If it is bent enough it can cross over itself, making the image appear upside down!
Monster Challenges
Repeat the experiment with spoons of different sizes and shapes, away from the spoon. How do your results change? Also, try getting closer and further. Can you get an image that is right way up from a concave surface?
Teaching Notes: Monster Sciences Experiment: Light L01
Key concepts:.
- Light travels in rays
- Rays travel in straight lines until they contact something
- The shape and structure of what light rays hit affects the rays in different ways eg light is bent when it hits a curved reflective surface
- Concave and convex mirrors
- Investigation Record IR01– one copy per student
- Experiment Description Light L01– one copy per student
- Spoons of assorted sizes and shapes
Lesson Notes:
Begin the lesson by reviewing that light travels in rays. This is prior knowledge for this experiment. This can be as simple as drawing the sun on the board and drawing light travelling from the sun in straight lines.
Remind students to listen carefully to instructions, and to OBSERVE their experiment.
As a class discuss the experiment prior to undertaking it, and students should complete the sections of their Investigation Report IR01 from ”Title to “Hypothesis”.
What should happen in this experiment, and why?
When the students look at the back of the spoon it is reflecting back a distorted, but right side up image. When the spoon is held horizontally the image will be short and wide, held vertically it will be tall and thin.
When the students look into to front of the spoon their image is upside down, however it is possible to get close enough to see an image that is right side up. If they are unable to get close enough with their faces, they could mark one side of the end of a pencil and move it closer and further from the spoon within their line of sight, watching for the point where the image reverses. Different spoons will reverse the image at different distances from the mirror, depending on how curved the bowl of the spoon is. Encourage them to try the same experiments with different spoons, then ask them to explain the different results.
Remember that the best way for students to learn is to try things for themselves, so pose the challenges and let them experiment. They may surprise you with their answers and observations!
Follow up discussion questions:
- What is different between the big spoons and the little spoons? What about the deep spoons and the shallow spoons?
- What other surfaces would have the same effect on light rays?
- What sort of things could this be useful for?
- Have you seen this effect before? Where?
- What do you think might happen if the spoon wasn’t shiny?
Get this experiment here or as part of a bundle of Light Experiments here .

Written by admin

View all posts by: admin
Choose an Account to Log In

Notifications
Science project, plane mirror reflection experiment.

Plane (flat) mirrors have a reflective surface that bounces back light within 180 degrees of the mirror's face. We use these mirrors every day in our bathrooms, bedrooms, and cars. When you look in a plane mirror, you see a mirror image that is flipped backwards and opposite to the objects it is reflecting.
You’ve been tasked with projecting a line of text onto a glass screen for a magic show. However, the projector can’t be on stage, and is instead around a corner, and it’s too bright for the trick. You only have two mirrors. How can you project an image of the text on the glass screen that is dim but readable? Let’s do a mirror physics experiment and see if you can use what you learn to think of a clever solution!
How does the angle of two mirrors change the reflection of an object?
- Two identical, small plane mirrors
- Modeling clay
- Small object (coin, small figure, etc.)
- Strip of paper
- Plastic packing tape
- Tape your mirrors together so that they can be opened and closed like a hinge. You want to leave a slight gap between the two edges (around 1/16th of an inch) to do this.

- Mark angles of 30, 36, 45, 60, 90, 120 and 180 degrees on a piece of paper using your protractor.
- Place the hinge of your mirrors at the vertex of your marked angles.
- The first angle you will test will be 180 degrees.
- Place your object (you can embed it in modeling clay if it won’t stand up on its own) in the middle of the mirrors and look at the reflection. How many objects do you see, including both reflected and real?
- Keeping the object equally between the two mirrors, move the mirrors together into the other angles you marked out with your protractor. How many objects do you see at each angle? Is there something about the angle can help you predict how many objects you will see? Is every reflected image the same brightness?

- Write a word on a piece of paper, and place it in between the mirrors at 60 degrees. Look closely at the second reflection (the reflection of the reflection). Can you read the text? Why do you think this is happening?
You will see an ever-increasing number of objects as you move the mirrors closer together (reducing the angle between them). Whenever you can see a whole number of images reflected, the angle of the mirrors will perfectly divide into 360 degrees. When you look at the reflection of a reflection you will be able to read the text in the mirror, as if you pointed a camera at the object. The reflections should get dimmer (more silvery) as the number of times they are reflected increases
The mirrors reflect the reflections of other mirrors within 180 degrees of the mirror’s face. When mirrors reflect, the reflected image will be backwards, but if you reflect something twice, it will look normal.
Because light is traveling in a straight line to and from each mirror, the light will bounce a number of times back and forth between the mirrors before it travels from the object to your eye. The number of times the light bounces (and the number of objects that you see) will correlate to the number of times the angle divides into 360. As the mirrors get closer and closer to having zero angle between them, more and more images appear. At an angle of 0 degrees, or when the two mirrors are facing each other, there are an infinite number of reflections.
So, how are you going to accomplish your trick? You can make the text appear by lining up your mirrors and your projector so that the light bounces an even number of times before it gets to your eyes. Using multiple mirrors will also dim the image before it hits the glass plate for the trick.

Related learning resources
Add to collection, create new collection, new collection, new collection>, sign up to start collecting.
Bookmark this to easily find it later. Then send your curated collection to your children, or put together your own custom lesson plan.
Buggy and Buddy
Meaningful Activities for Learning & Creating
May 2, 2016 By Chelsey
Reflection Science with Light Patterns in a Box
This box of light patterns is absolutely the coolest science activity for kids we’ve made yet! We explored how different colors of light are reflected in mirrors and observed the various patterns of light created. This is definitely a must try!
Follow our Science for Kids Pinterest board!

Exploring mirrors and reflections is always fun for kids of all ages. When Lucy was a preschooler, I remember how intrigued she was when I gave her a couple mirrors to experiment with . She was noticing how letters looked reversed in the mirror and was determined to figure out why! Even little Theo as a toddler loved using a mirror during play .
As the kids have gotten older, their interest in the science of reflections has only increased. (Be sure to check out our collection of light science activities for kids !) When I came across this awesome light box pattern science activity, I knew we had to try it!
(This post contains affiliate links.)
Want to see it in action?
Exploring Reflections with Light Patterns in a Box
This science activity definitely is one of our favorites! Although it’s more appropriate for elementary-aged children to actually make, kids of all ages will enjoy using it for exploration.
Materials for Light Pattern Box Science
- Tracing paper
- Clear, transparent plastic wrap
- Mylar sheeting
- Optional: Paint or washi tape to decorate your light box
Directions for Making Your Light Pattern Box
1. Cut off the top flaps and bottom flaps of a small, cardboard box so you’re left with just a box frame. If your box frame is really tall, you can cut it down so it’s a bit shallower. (If you want to paint your box, now is a good time. Let it dry before going on to the next step.)

2. Tape tracing paper securely over one side of the box.

3. Flip the box over so it’s open at the top and the tracing paper side is face down.
4. Cut your mylar sheeting into strips. You want the strips to be as tall as the box. (The more accurate, the better.)
5. Fold each mylar segment into a tear drop share (or cylinder) and tape it to hold in place.

6. Make several of these in various sizes and place them inside the box. Make as many as will fit snuggly in your box.
7. Cover the top of the cardboard box with a sheet of plastic wrap . Tape it into place as taut and securely as possible.

8. Optional: Decorate the outside of your box with markers , washi tape , or other art materials.

How to Use Your Pattern Light Box
Reminder: Do not look directly at the sun. This can cause permanent damage to the eyes.
Explore various sources of light around your home or classroom with your light box. (We angled our light box toward our reading lamp light, our kitchen light, and at a window where sun was NOT directly shining in.) Hold the light box so the tracing paper side is facing you and the light source is on the other side. Experiment with holding your light box at different angles near the light and observe all the cool patterns it makes!

The colored light patterns moved and changed with the movement on TV.

What’s Going On?
The mylar tubes you created are reflecting light. As you change the angle of your light box, the angle of reflection changes, creating various patterns on your tracing paper.

Advertisement
Science Projects for Kids: Reflection and Refraction
- Share Content on Facebook
- Share Content on LinkedIn
- Share Content on Flipboard
- Share Content on Reddit
- Share Content via Email

Science Projects for Kids: Reflection and Refraction provides the opportunity to look more closely at the world you. For example, light is all around us. But have you stopped to consider what colors are inside pure white light?
In this article, you'll learn how to experiment with light. Sir Issac Newton discovered that light can be split into many colors -- red, orange, yellow, green, blue, indigo, and violet -- by using a prism. Keep reading to learn how to use a prism.
Find the end of the rainbow when you use a prism and a simple beam of light.
Click to the next page of science projects for kids: reflection and refraction to discover all the colors within a simple ray of white light.
For more exciting and fun science projects for kids, check out:
- Science Projects for Kids: States of Matter
- Science Projects for Kids: Spectrum of Colors
- Science Projects for Kids: Light and Heat
White light is composed of all the rainbow colors. You can break light down by using prisms.
What You'll Need:
- White paper
Cut a slit in a large piece of cardboard. Place the cardboard in a sunny window so that a shaft of sunlight shines through the slit. In one hand, hold a prism in front of the cardboard so that the sunlight passes through it. With your other hand, hold a sheet of white paper so that the light passing through the prism shines on it. You will see a rainbow of colors on the paper.
Please copy/paste the following text to properly cite this HowStuffWorks.com article:
- Sign in / Register
- Administration
- Edit profile

The PhET website does not support your browser. We recommend using the latest version of Chrome, Firefox, Safari, or Edge.
Refraction of Light Experiment: Easy Science for Kids
By: Author Jacquie Fisher
Posted on Published: February 1, 2019
Categories Kids Activities & Crafts , Science Experiments
Learn about refraction of light with this easy science experiment that can be done at home or in the classroom.
Our easy science experiments are back and this week, we’re adding a touch of ‘magic’!
In my experience, you can AMAZE kids with two types of science activities — the first type are those that show some behind-the-scenes phenomenon like this How Does a Leaf Breathe? experiment!
And the second type are those that seem to work like magic.
Today we’re going to play with that sense of wonder and highlight the science behind light refraction as we bend a pencil without breaking it !

Refraction & Light Experiments: Easy Science for Kids
In the 28 Days of STEM series, this week’s topic is STEM Challenges so we thought we would introduce a science challenge that ‘tricks’ your eyes.
Similar to our Optical Illusion science experiment , light experiments also rely on what our eyes see.
This quick experiment (actually 2) is so fun to do with kids, takes only 5 minutes and is SUPER EASY — all you’ll need is a pencil and a glass of water. We’re also including affiliate links to some great books and items we used for this experiment.

Since we always pair our experiments with books (it’s a great way to explain & extend the science 😉 here are a few of our favorites on light:
Light is All Around Us – a great introduction to sunlight, shadows and the speed of light. This is from a great set of early science books which always include a ‘Learn More’ section and easy experiments kids can do after reading the book. You can see all the books in this series here: Let’s Read & Find Out Science series for kids !
Explore Light & Optics with 25 Great Projects – includes a number of other cool activities and experiments kids can do with light! I love the Explore Your World project books — so many awesome themes & topics!
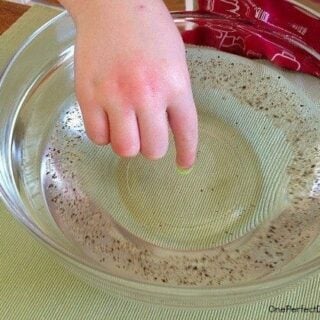
The Bending Pencil Experiment: Light Refraction
Step 1: Fill a drinking glass or glass jar with water.
We used a mason jar since all of our drinking glasses have an etched design in them. You’ll get the best results with a clear, glass container for this experiment.

Step 2: Hold the tip of the pencil while inserting it into the water
You can already see that the pencil appears larger once in the water (as water is also a magnifier — learn more about that in this pine cone experiment ).

Step 3: Look at the pencil through the side of the glass or jar — did it bend?
You may have to lean the pencil closer to the front of the glass but you should see a distinct ‘break’ in the pencil when you peep through the side of the glass. As you can see above, the part of the pencil in the water appears to be shifted to the left of where you would expect to see it.
You can tell kids that this is an optical illusion — your eyes are being ‘tricked’ because the pencil still looks the same when you pull it out of the water.
Pretty darn cool, huh!?!
Here’s the science behind this cool experiment …

Why Does a Pencil Look Bent in Water?
Refraction is a physics concept that refers to how a wave travels through a medium.
In this case, we’re looking at how light waves travel through the air, through water and through glass.
Light waves travel faster thought air (which is a less dense material) than they do through water or glass (a more dense material). So as the light waves enter the glass and water, they slow down and bend into the water.
Since the light waves are no longer traveling at the same angle, this makes the pencil appear to ‘break’ when you look at it through the glass of water.
How Light Waves Travel through Water
We’re going to try a second cool science experiment: The Glowing Jar!
We’ll use a jar, some water and a flashlight to get an close-up look at refraction.

Let’s look at light waves without the pencil.
Since both the glass and the water are more dense materials than air, when you shine a flashlight into the glass (on the left), the light waves will slow down slightly as they enter and then return to normal as they exist the other side so you see one round spot of light.
However, once you add water to the glass (on the right), you can see that the light shining through the glass is more dispursed — now there is BOTH a spot of light and a ‘glowing’ outline of the jar showing on the wall due to how the light waves are refracting (or bending) as they travel through the water.
If you’ve ever been on a boat and looked over the side into the water, this explains why you can see so much below the water — sunlight is refracting (bending) to illuminate a wider area.

One way to explain this to kids is to think about running at the beach and into the water. When you run on the sand, you can move quickly because you are only running through air.
However, when you continue to run into the water, you will not be able to move as quickly because water is more dense and slows you down.
The same applies to beams of light — as they enter water, they slow down and can’t move as quickly.
If you want to see another refraction experiment, visit my friend Erica at What do We do all Day to see how they made an arrow change directions with a glass of water !

If you’d like to explore more with light science and optical illusions, a few fun items along with affiiliates links include:
More Easy Science Experiments!
The Science of Sound: Create Your own Gong
How do Leaves Breathe?

Be sure to join us for the 28 Days of Hands-on STEM Activities hosted by Left Brain, Craft Brain this month!
Every day, you can find new activities that cover science, technology, engineering and math perfect for kids from preschool thru middle school!
NOTIFICATIONS
Reflection of light.
- + Create new collection
Reflection is when light bounces off an object. If the surface is smooth and shiny, like glass, water or polished metal, the light will reflect at the same angle as it hit the surface. This is called specular reflection.

Types of reflection
Light reflects from a smooth surface at the same angle as it hits the surface. For a smooth surface, reflected light rays travel in the same direction. This is called specular reflection. For a rough surface, reflected light rays scatter in all directions. This is called diffuse reflection.
Diffuse reflection is when light hits an object and reflects in lots of different directions. This happens when the surface is rough. Most of the things we see are because light from a source has reflected off it.
For example, if you look at a bird, light has reflected off that bird and travelled in nearly all directions. If some of that light enters your eyes, it hits the retina at the back of your eyes. An electrical signal is passed to your brain, and your brain interprets the signals as an image.
Specular reflection
The angle at which light hits a reflecting surface is called the angle of incidence, and the angle at which light bounces off a reflecting surface is called the angle of reflection

Lake reflection
This photo of Lake Matheson shows specular reflection in the water of the lake with reflected images of Aoraki/Mt Cook (left) and Mt Tasman (right). The very still lake water provides a perfectly smooth surface for this to occur.
If you want to measure these angles, imagine a perfectly straight line at a right angle to the reflective surface (this imaginary line is called ‘normal’). If you measure the angle of incidence and the angle of reflection against the normal, the angle of incidence is exactly the same as the angle of reflection. With a flat mirror, it is easy to show that the angle of reflection is the same as the angle of incidence.
Water is also a reflective surface. When the water in a lake or sea is very still, the reflection of the landscape is perfect, because the reflecting surface is very flat. However, if there are ripples or waves in the water, the reflection becomes distorted. This is because the reflecting surface is no longer flat and may have humps and troughs caused by the wind.
It is possible to make mirrors that behave like humps or troughs, and because of the different way they reflect light, they can be very useful.
Concave mirrors
The inside curve of a spoon is an example of a concave mirror

Concave mirror
When parallel light rays hit a concave mirror they reflect inwards towards a focal point (F). Each individual ray is still reflecting at the same angle as it hits that small part of the surface.
Concave mirrors are used in certain types of astronomical telescopes called reflecting telescopes. The mirrors condense lots of light from faint sources in space onto a much smaller viewing area and allow the viewer to see far away objects and events in space that would be invisible to the naked eye.
Light rays travel towards the mirror in a straight line and are reflected inwards to meet at a point called the focal point.
Concave mirrors are useful for make-up mirrors because they can make things seem larger. This concave shape is also useful for car headlights and satellite dishes.
Convex mirrors
Convex mirrors curve outwards, like the outside of a balloon.

Convex mirror
When parallel light rays hit a convex mirror they reflect outwards and travel directly away from an imaginary focal point (F). Each individual ray is still reflecting at the same angle as it hits that small part of the surface.
Parallel rays of light strike the mirror and are reflected outwards. If imaginary lines are traced back, they appear to come from a focal point behind the mirror.
Convex mirrors are useful for shop security and rear-view mirrors on vehicles because they give a wider field of vision.
Scattering of light
Some light is scattered in all directions when it hits very small particles such as gas molecules or much larger particles such as dust or droplets of water.
The amount of scattering depends on how big the particle is compared to the wavelength of light that is hitting it. Smaller wavelengths are scattered more.
“Why is the sky blue?” is a common question. Light from the sun is made of all the colours of the rainbow. As this light hits the particles of nitrogen and oxygen in our atmosphere, it is scattered in all directions. Blue light has a smaller wavelength than red light, so it is scattered much more than red light. When we look at the sky, we see all the places that the blue light has been scattered from.
This is similar to the question: “Why are sunsets red?” When the Sun appears lower in the sky, the light that reaches us has already travelled through a lot more of the atmosphere. This means that a lot of the blue light has been scattered out well before the light arrives at us, so the sky appears redder.
Clouds appear white because the water droplets are much larger than the wavelengths of light. For this situation, all wavelengths of light are equally scattered in all directions.
Activity ideas
In Light and sight: true or false? students participate in an interactive or paper-based ‘true or false’ activity that highlights common alternative conceptions about light and sight.
In Investigating reflection students investigate specular and diffuse reflection by looking into a dark box and shining a torch at various objects, coloured paper and a mirror.
To model blue sky and a red sunset, try shining white light from a torch or a projector into a glass container of water with a few drops of milk in it. You should see a blue haze from the sides. If you look to the far end of the container, you should notice the light has a reddish hue .
See our newsletters here .
Would you like to take a short survey?
This survey will open in a new tab and you can fill it out after your visit to the site.
FREE K-12 standards-aligned STEM
curriculum for educators everywhere!
Find more at TeachEngineering.org .
- TeachEngineering
- Exploring Light: Absorb, Reflect, Transmit or Refract?
Hands-on Activity Exploring Light: Absorb, Reflect, Transmit or Refract?
Grade Level: 8 (7-9)
Time Required: 45 minutes
Cost includes LED flashlights that may require replacement after extensive use.
Group Size: 3
Activity Dependency: Learning Light's Properties
Subject Areas: Physics, Science and Technology
NGSS Performance Expectations:


Curriculum in this Unit Units serve as guides to a particular content or subject area. Nested under units are lessons (in purple) and hands-on activities (in blue). Note that not all lessons and activities will exist under a unit, and instead may exist as "standalone" curriculum.
- The Mummified Troll: Devising a Protection Plan
- Lasers, Let's Find 'Em!
- Construct It!
| Unit | Lesson | Activity |
TE Newsletter
Engineering connection, learning objectives, materials list, worksheets and attachments, more curriculum like this, pre-req knowledge, introduction/motivation, vocabulary/definitions, investigating questions, activity extensions, activity scaling, user comments & tips.

In designing laser-based security systems, engineers consider the implications of the penetrating properties of electromagnetic radiation. The concepts of wave absorption and transmission are fundamental in the design of laser based security systems, and have additional applications in biomedical engineering. In x-ray imaging, various tissue types result in a range of transmittances that can be recorded to depict bones on x-ray film. Engineers must also be aware of safety concerns; even low doses of high-energy radiation can be dangerous, especially in the case of gamma radiation. For cancer radiation treatments, control of high-energy radiation can be beneficial, but must be carefully managed. Students consider the potential real-world uses of various types of radiation in questions 2 and 5-9 of the post-activity assessment handout.
After this activity, students should be able to:
- Explain the properties of light as related to security systems.
- Describe which objects reflect, absorb or transmit light.
- Explain light refraction as applied to rainbows that appear in nature.
- Identify a number of applications of radiation to science and technology today.
This activity also meets the following Tennessee Foundations of Technology educational technology content standards: 2.0, 3.0, 4.0, 5.0, 6.0, 7.0 and 8.0.
This activity also meets the following National Science Education Standards (NSES) teaching standards: A, B, C, D, E, F; see https://www.nap.edu/topic/
Educational Standards Each TeachEngineering lesson or activity is correlated to one or more K-12 science, technology, engineering or math (STEM) educational standards. All 100,000+ K-12 STEM standards covered in TeachEngineering are collected, maintained and packaged by the Achievement Standards Network (ASN) , a project of D2L (www.achievementstandards.org). In the ASN, standards are hierarchically structured: first by source; e.g. , by state; within source by type; e.g. , science or mathematics; within type by subtype, then by grade, etc .
Ngss: next generation science standards - science.
| NGSS Performance Expectation | ||
|---|---|---|
| MS-PS4-2. Develop and use a model to describe that waves are reflected, absorbed, or transmitted through various materials. (Grades 6 - 8) Do you agree with this alignment? Thanks for your feedback! | ||
| This activity focuses on the following aspects of NGSS: | ||
| Science & Engineering Practices | Disciplinary Core Ideas | Crosscutting Concepts |
| Develop and use a model to describe phenomena. Alignment agreement: Thanks for your feedback! | A sound wave needs a medium through which it is transmitted. Alignment agreement: Thanks for your feedback! When light shines on an object, it is reflected, absorbed, or transmitted through the object, depending on the object's material and the frequency (color) of the light.Alignment agreement: Thanks for your feedback! The path that light travels can be traced as straight lines, except at surfaces between different transparent materials (e.g., air and water, air and glass) where the light path bends.Alignment agreement: Thanks for your feedback! A wave model of light is useful for explaining brightness, color, and the frequency-dependent bending of light at a surface between media.Alignment agreement: Thanks for your feedback! However, because light can travel through space, it cannot be a matter wave, like sound or water waves.Alignment agreement: Thanks for your feedback! | Structures can be designed to serve particular functions by taking into account properties of different materials, and how materials can be shaped and used. Alignment agreement: Thanks for your feedback! |
International Technology and Engineering Educators Association - Technology
View aligned curriculum
Do you agree with this alignment? Thanks for your feedback!
State Standards
Tennessee - science.
- Exploring Light Properties! Worksheet , one per person
- What have you learned today? Handout , one per person
Station 1: Making Rainbows (Consider making several of these stations, depending on class size.)
- glass bell jar filled with water
- small, compact mirror
- LED flashlight
- aluminum foil
- plastic wrap
- finger or hand
- tissue paper, various colors
- notebook paper
For teacher use:
- printout(s) of the Electromagnetic Spectrum Visual Aid
A basic understanding of light properties as presented in lesson 2, Learning Light's Properties.
Today's activity brings a little fun and excitement to the concepts we have recently learned. The purpose of today's hands-on exploration is to reinforce your understanding of how different materials respond to a beam of light. We will explore light absorption, transmission, reflection and refraction. To explore refraction, you will create your own rainbow in the classroom. For the activity, you will spend 15 minutes at each of four stations set up throughout the classroom, answering questions and recording your predictions and observations on a worksheet.
With an understanding of the properties explored in this activity and an understanding of lasers gained in a future lesson and activity, you will be able to design your invisible laser security system to protect our mummified troll.
This activity provides students with a hands-on means of exploring the light properties of reflection, absorption, transmission and refraction.
Before the Activity
- Gather materials and make copies of the attached Exploring Light Properties!Worksheet and What have you learned today? Handout, one each per student.
- Tip : Once you gather the materials to do this activity with your students, go through the activity first yourself. That way, you can fill in the results for the worksheet chart, based on the exact materials and light source (flash light) that your students will be using, essentially creating your own answer key.
- Set up the stations as described in the Materials List section. Set up station 1 in the darkest area of the room. Depending on class size, more than one station 1 may be helpful.
- Divide the class into groups of three students each for exploring each station; assign each group to a starting station.
With the Students
- Hand out the worksheets.
- For station 1: Direct student teams to follow the instructions on their worksheets and record both their predictions and observations.
- For station 2-4: Direct student teams to fill out their worksheets by first predicting whether the light will be absorbed, transmitted or reflected, as well as the color of the resultant light. Then experiment to find the results and record their observations.
- Lead a class discussion in which students share and compare their results and conclusions. See the Assessment section for a description of typical results.
- To conclude, have students individually complete the handout.
absorptance: The ratio of the amount of radiation absorbed by a surface to the amount of radiation incident upon it.
absorption: The removal of energy or particles from a beam by the medium through which the beam propagates.
opaque: Impenetrable by light, resulting in complete reflection.
reflectance: The ratio of the intensity of reflected radiation to that of the radiation incident upon the surface.
reflection: The return of light, heat or sound after striking a surface.
refraction: The change of direction of a ray of light, heat or sound in passing from one medium into another in which its wave velocity is different.
transmittance: The ratio of the radiation transmitted through and emerging from a body to the total radiation incident on it. Also equivalent to one minus the absorptance.
transparent: Having the property of transmitting rays of light through its substance.
Activity Embedded Assessment
Worksheet & Discussion : As students go through the stations, have them complete the worksheet chart with their predictions and results. In a class discussion, have students share and compare their results and conclusions. Results will vary, depending on the exact materials and light sources used, but in general, expect:
- reflective materials, such as aluminum foil and the mirror, to reflect the light
- solid, non-transparent materials, such as wax paper, body parts, notebook paper and cardboard paper, to absorb the light
- materials that have varying degrees of transparency, such as plastic saran wrap and tissue paper, to transmit the light
- the lighter colored tissue paper to most likely transmit more light than the darker colored tissue paper
- materials such as cheeks and notebook paper to transmit some light, although most likely absorbing most of the light
Post-Activity Assessment
Concluding Handout: After the activity, have students return to their desks and individually complete the What have you learned today? Handout . This assessment contains both content questions and application questions in which students consider applications to designing a security system.
- Considering our objective to protect our mummified troll, how could light absorption, reflection or transmission apply?
- If we shine a light forward and you walk in front of it, it suddenly disappears. What is happening?
- How can we use this concept to protect the troll?
- What type of sensor would we need to detect the presence of a burglar?
- Where would the light from a flashlight fall on the electromagnetic spectrum?
- What happens if we used a different type of energy along the electromagnetic spectrum?
- What else must we consider for safety constraints?
Direct students with unanswered questions to explore the internet for further answers.
Loan flashlights to students who are interested to explore shining the laser light on other objects at home.
Suggest that students show their families the indoor rainbow, as described at the Indoor Rainbow at Weather Wiz Kids at: http://www.weatherwizkids.com/rainbow1.htm
- For lower grades, introduce group discussions exploring objects as a class. Also complete the indoor rainbow demonstration as a class, instead of in small groups.
- For upper grades, ask further investigating questions with respect to laser security systems and what types of lasers students suspect to be the most appropriate. Also ask additional investigating questions on the application of laser technology to medicine.

Students learn the basic properties of light — the concepts of light absorption, transmission, reflection and refraction, as well as the behavior of light during interference. Lecture information briefly addresses the electromagnetic spectrum and then provides more in-depth information on visible li...

Through two classroom demos, students are introduced to the basic properties of lasers through various mediums. Students will gain an understanding of how light can be absorbed and transmitted by different mediums.

Students learn about the science and math that explain light behavior, which engineers have exploited to create sunglasses. They examine tinted and polarized lenses, learn about light polarization, transmission, reflection, intensity, attenuation, and how different mediums reduce the intensities of ...

Students apply everything they have learned about light properties and laser technologies to designing, constructing, defining design limitations and presenting laser-based security systems that protect the school's mummified troll. In the associated activity, students "test their mettle" by constru...

Dictionary.com. Lexico Publishing Group, LLC. Accessed December 29, 2008. (Source of vocabulary definitions, with some adaptation)
Other Related Information
Browse the NGSS Engineering-aligned Physics Curriculum hub for additional Physics and Physical Science curriculum featuring Engineering.
Contributors
Supporting program, acknowledgements.
The contents of this digital library curriculum were developed under National Science Foundation RET grant nos. 0338092 and 0742871. However, these contents do not necessarily represent the policies of the NSF, and you should not assume endorsement by the federal government.
Last modified: April 29, 2020
Simple Reflection of Light Experiment for Kids
Try this reflection of light experiment with your kids. It’s easy! Just grab a flashlight and some everyday objects. Then ask kids to reflect the beam onto the wall.

Ms. Sneed Prepares Her Reflection of Light Experiment
Our favorite fourth grade teacher sat at the side table with her teaching partner. “Let’s continue planning our light energy unit . Next up: reflection of light. It’s another science station, so kids will work in their lab groups.”
“Okay, I’ll pull up the lab sheet,” Mr. Frank replied.
Gathering the Materials
As usual, Ms. Sneed headed toward the science cupboard. Before too long, she returned with a flashlight and a baggie full of everyday objects.
“What do we have here?” she said as she dumped the contents of the bag. “Yep, some shiny, some dark or bumpy, and some in between.”
Mr. Frank chuckled. “Looks like everything but the kitchen sink. But seriously, what an easy lab! With just a flashlight and some random materials – all found right in our classrooms – we can conduct this simple experiment.”
“Yes, and keeping it in a baggie from year to year saves us a bundle of time.”
Positioning the Flashlight
“Hmm,” said Mr. Frank. “I can’t remember exactly how this reflection lab goes.” He picked up a Christmas ornament and the flashlight. Then he walked toward the wall.
“I know that we shine the beam on the object.” He turned on the flashlight. Holding the ornament directly in front of him, he shone the light on it. Unfortunately, the beam bounced off the ornament and onto his dark sweater, where it was absorbed.”
“No,” Ms. Sneed giggled. “Let me show you.” Without a beat, Mr. Frank handed her the flashlight and ornament. Then, as she stood perpendicular to the wall, Ms. Sneed trained the flashlight beam so that it bounced onto the side of the ornament and onto the wall.
“Aha. You shone it almost straight at the wall but with the ornament in between. Maybe at a 140 degree angle? Obviously, I’ll have to model this for my students. Otherwise, they’ll spend too much time figuring it out.”
“Good idea. In my opinion, the actual angle doesn’t matter. Just so the beam bounces onto the wall. That way, kids can analyze how much light actually reflected off of the object.”
Categorizing Reflection of Light
Mr. Frank looked at the screen of his laptop. “The reflection lab sheet has three columns. For the first, kids list stuff that reflects. In other words, all or most light bounces back. For the second, they write objects that partially reflect. And in the third, they place items that absorb.”
Experiment with Reflection of All (or Most) Light
As Ms. Sneed picked through the pile of objects, she pushed shiny things to the side. “When the flashlight shines on the CD, mirror, metal lid, and ornament, all or most of the beam will bounce onto the wall.”
Mr. Frank nodded. “At the bottom of the page, kids have to list words that describe objects that reflect all or most light. Looking at these objects, I’d say ‘shiny.’ What other words could they use?”
“Words like ‘smooth,’ ‘dense,’ and ‘hard’ would also work.”

Experiment with Reflection of Some Light
Next, Ms. Sneed pulled out items that had a little – but not much – luster: a piece of Styrofoam, a plastic lid, and a base-ten block. “For this reflection of light lab, I’d say these fall into the partial column.”
Mr. Frank looked at the remaining items. “Hey, what about this hand lens? It’s dense and smooth, but when the beam hits it, part of it will pass through. That will really make kids think.”
As he spoke, Ms. Sneed picked up a white paper plate. “Hmm, I suppose this will also go in the middle column. Some light will reflect when the flashlight beam hits it.”

Experiment with Absorption of Light
Both teachers looked at the remaining items in the pile: a wadded up piece of paper towel and a sock.
“Because they are bumpy and porous, these should absorb. But as they experiment with reflection of light, kids could argue that a little bit bounces off of them – especially if we darken the room. Additionally, our students may already know that white tends to reflect while black absorbs,” said Mr. Frank.
“Hmm, both of these objects are white. Let’s add a piece of black fabric or a black sock to the bag.”
“Can we take this a little farther? To really make them think, let’s also add something black that’s smooth and has some luster. You know, like a black pool ball or a mini chalkboard. That way, they will find out that a variety of conditions allow light to be absorbed.”
“Great idea,” said Ms. Sneed, “because objects that totally absorb are dark and bumpy.”
The two teachers looked at each other and smiled. Oh how they loved making kids think!

Extending Reflection of Light Lab
“In this p hysical science activity ,” said Mr. Frank, “kids will also rotate through centers that explore characteristics of light , opacity , refraction , and color . If kids finish this station early, they can experiment with reflection of light with objects around the room.”
Enjoy Teaching
“Great!” Ms. Sneed responded. “I love this set of light activities . It lets kids experiment with reflection of light – and more.”
“Not only that,” her teaching partner responded. “They also work independently and become totally engaged.”

Reflected images
I can describe and explain the properties of reflections in a plane mirror, and draw diagrams to show how reflections form.
Lesson details
Key learning points.
- Reflections are the same size as the object, upright, and the same distance behind the mirror as the object is in front.
- In a plane mirror, reflections appear laterally inverted compared to the object when it is facing us.
- Mirrors reflect what is in front of them. Reflections are laterally inverted as objects are turned to face a mirror.
- Reflections are virtual images; they appear where light rays seem to have come from, not where they actually come from.
- Virtual rays show where light rays appear to have come from; they are drawn as dashed lines.
Common misconception
Mirrors must somehow turn images around or ‘flip’ them to make reflections laterally inverted.
Explicitly teach that a mirror merely (and passively) reflects what is directly in front of each part of it. Pupils can observe the reflection of text on clear plastic: the image is the same as what is seen looking through the back of the text.
Image - a representation of an object
Reflection - (1) the process of light ‘bouncing off’ a surface (2) an image seen in a mirror
Laterally inverted - describes an image that has been ‘flipped’ horizontally
Virtual ray - a dashed line drawn to show where light seems to be (but is not actually) coming from
Virtual image - an image that can be seen but not projected onto a screen
Teachers could consider making mirrors, clear plastic and pens (for writing on clear plastic) available for use this lesson to demonstrate some of the ideas covered.
This content is © Oak National Academy Limited ( 2024 ), licensed on Open Government Licence version 3.0 except where otherwise stated. See Oak's terms & conditions (Collection 2).
Starter quiz
6 questions.

COMMENTS
3. Reflections in a Mirror. In the Mirror, Mirror on the Wall... lesson, students experiment to see how reflective surfaces like mirrors change the direction of light. Using what they learn, students experiment with bouncing light from a flashlight off of reflective surfaces and then see if they can redirect light in a series of mirror bounces to reach from a starting point to a target ...
This simple light science experiment introduces three new ones: penetrate: or when light will pass through an object to be visible on the other side. reflect: or when the light bounces back at you, like with a mirror or something shiny. stop: or when the light is blocked, not reflecting or penetrating. variable: what changes in different steps ...
Here's a fun collection of light science for kids! You'll find light science experiments about both light refraction and light reflection in this science roundup. Follow our Science for Kids Pinterest board! Because we have been having so much fun with our most recent light science activities, I decided to round up some more …
Remove the eyedropper from the oil in the jar and squeeze out the excess oil. Slowly and gently pour the oil from the oil jar into the jar with the water. If you do this very carefully, the oil will sit right on top of the water! (It's ok if they mix though, they will separate once you stop pouring). Allow the oil and water to settle and ...
This light refraction experiment might be one of the most simple to set up science experiments we've ever tried. It is a bit tricky to explain, but impressive even if you can't quite get your head around it! ... Or try our light maze to learn about reflection. Last Updated on February 22, 2021 by Emma Vanstone « Strong Shapes - how ...
Learn about optics and unravel the mysteries of light with Newton's Prism Experiment. Inspired by Sir Isaac Newton's groundbreaking discoveries, these experiments offer a thrilling opportunity for students to explore the phenomenon of light dispersion and the creation of a vivid spectrum of colors. 6. Total Internal Reflection
Light Refraction Science Experiment Instructions. Step 1 - Get a sheet of paper and draw two arrows on it. One arrow near the top and one arrow near the bottom. Make the arrows point in the same direction. Step 2 - Fill a glass with water. Step 3 - Slowly lower the piece of paper behind the glass of water.
The Science Behind the "Magic" What you're witnessing is the phenomenon known as light refraction. This occurs when light passes from one medium to another, altering its speed and direction. In our experiment, light travels from the paper (through air) into the glass and water, then back into the air before finally reaching our eyes.
Candy Wrapper Science - Color Mixing. Kids will have a lot of fun exploring color mixing and light with this hands-on science exploration. Laser Science for Kids: The Glowing Lollipop. Learn about light refraction with this cool laser pointer lollipop experiment. As you can see, there are a ton of great light experiments for kids that are ...
Preschool science experiments can be super simple to do! Pin. Reflection Of Light For Kids. Try this simple mirror activity for exploring reflections and light with young kids! Exploring reflections is a fantastic science activity for young learners! Please supervise as you fell comfortable!
Light from the sun takes 8 minutes and 20 seconds to reach the Earth. Did you know most animals don't recognise their reflection and often attack it? More light experiments. Create circuits to light up a model village. Make a rainbow with a prism. Find out why the sky looks blue. Last Updated on April 29, 2024 by Emma Vanstone
These light vocabulary task cards are super fun and can be used in many ways for games, pairs work, and more! Sorting Cards. Your students will also love this Reflection vs. Refraction sort. Listen in to the conversations as teams work through all 27 sorting cards. 4. MUST-HAVE Observation Stations for Teachers Short on Time.
Light Science Experiment: Reflections What you will need: Spoons, shiny metal ones. What you will do: 1. Stand in a well lit room or outside. Hold the spoon by the handle just like you would when you are eating, but flip it over so that the back of the spoon is facing you.
Tape your mirrors together so that they can be opened and closed like a hinge. You want to leave a slight gap between the two edges (around 1/16th of an inch) to do this. Mark angles of 30, 36, 45, 60, 90, 120 and 180 degrees on a piece of paper using your protractor. Place the hinge of your mirrors at the vertex of your marked angles.
Let it dry before going on to the next step.) 2. Tape tracing paper securely over one side of the box. 3. Flip the box over so it's open at the top and the tracing paper side is face down. 4. Cut your mylar sheeting into strips. You want the strips to be as tall as the box. (The more accurate, the better.)
Cardboard. Prism. White paper. Cut a slit in a large piece of cardboard. Place the cardboard in a sunny window so that a shaft of sunlight shines through the slit. In one hand, hold a prism in front of the cardboard so that the sunlight passes through it. With your other hand, hold a sheet of white paper so that the light passing through the ...
To support this effort, please update your profile! Explore bending of light between two media with different indices of refraction. See how changing from air to water to glass changes the bending angle. Play with prisms of different shapes and make rainbows.
The Bending Pencil Experiment: Light Refraction. Step 1: Fill a drinking glass or glass jar with water. We used a mason jar since all of our drinking glasses have an etched design in them. You'll get the best results with a clear, glass container for this experiment. Step 2: Hold the tip of the pencil while inserting it into the water.
Reflection of light. Reflection is when light bounces off an object. If the surface is smooth and shiny, like glass, water or polished metal, the light will reflect at the same angle as it hit the surface. This is called specular reflection. Diffuse reflection is when light hits an object and reflects in lots of different directions.
Cool Light Refraction Science ExperimentIn this Video we show you the steps to conduct this cool science experiment and you can follow along at home using a ...
reflection: The return of light, heat or sound after striking a surface. refraction: The change of direction of a ray of light, heat or sound in passing from one medium into another in which its wave velocity is different. transmittance: The ratio of the radiation transmitted through and emerging from a body to the total radiation incident on it.
Extending Reflection of Light Lab "In this physical science activity," said Mr. Frank, "kids will also rotate through centers that explore characteristics of light, opacity, refraction, and color. If kids finish this station early, they can experiment with reflection of light with objects around the room." Enjoy Teaching "Great!"
In this fun and easy science experiment for kids, our 'Fantastic Science' teachers demonstrate what happens when light is shone on different everyday materia...
Reflection - (1) the process of light 'bouncing off' a surface (2) an image seen in a mirror. Laterally inverted - describes an image that has been 'flipped' horizontally. Virtual ray - a dashed line drawn to show where light seems to be (but is not actually) coming from. Virtual image - an image that can be seen but not projected onto ...