
How to Recover Unsaved PowerPoint Presentations
Always happens five minutes before the meeting
It’s not uncommon to lose hours of work in PowerPoint because of an unexpected system crash, shutdown, or power failure. Microsoft knows that, which is why the program comes with AutoRecover. It’s a feature that helps you retrieve unsaved PowerPoint presentations.
This tutorial will teach you how to use Microsoft PowerPoint’s AutoRecover feature in Windows and macOS, including other tips to recover lost or deleted PowerPoint presentations.

Recover Unsaved PowerPoint Presentations on Windows
Whenever you work on a presentation in Microsoft PowerPoint for Windows 10 and 11, the program’s built-in AutoRecover functionality makes periodic backups to a temporary file once every 10 minutes.
If you forgot to save a Microsoft PowerPoint document because of an unexpected issue, you can get it back. There’s no guarantee it may contain the most recent changes, though.
By default, AutoRecover opens the unsaved presentation when you relaunch PowerPoint after a system or application crash. If you see a Recovered Unsaved File banner, select the Save button inside to save it permanently.

In Microsoft Office 2021 and earlier versions of PowerPoint, a Document Recovery pane should show up to the left of the PowerPoint window, letting you pick the file you want to recover.
If that does not happen, you can view the AutoRecover folder with the following steps:
- Open PowerPoint and select Open on the Start Screen.
- Select the Recover Unsaved Presentations button.

- On the File Explorer pop-up, open the folder related to the PPT file you want to restore.
- Select the file and choose Open .

- Review the presentation and save it to your PC’s hard drive.
If the Recover Unsaved Presentations option is not visible or PowerPoint repeatedly crashes before you can do anything, visit the program’s AutoRecover file location and retrieve the presentation via File Explorer.
- Open File Explorer.
- Copy and paste the following into the address bar, replacing <username> with your Windows user name. Then, press Enter :
C:Users <username> AppDataRoaming Microsoft PowerPoint

- Copy the unsaved PPT file you want to recover to another directory, then double-click to open it in PowerPoint.

To increase the frequency with which AutoRecover backs up your PowerPoint presentations and improve the chances of retrieving the most recent unsaved changes, you must:
- Select the File tab and choose Options (or More > Options ).

- Select the Save category on the PowerPoint Options sidebar.
- Modify the box next to Save AutoRecover information every x minutes .

For example, enter a value of 1 if you want the PowerPoint recovery tool to back up unsaved changes every minute.
Recover Unsaved PowerPoint Files on macOS
Like on Windows, AutoRecover is available on Microsoft PowerPoint for macOS. If you’re working on a PowerPoint presentation on a Mac and experience a sudden crash or shutdown, you should be able to use it to recover the unsaved changes and prevent data loss.
Just re-open PowerPoint. AutoRecover should automatically re-open the presentation you were last working on, allowing you to save the changes permanently.
Suppose that doesn’t happen. Just:
- Open the Home button and choose Open .
- Select Recover Unsaved Presentations .
- Double-click the PPTX file you want to recover.
If the Recover Unsaved Presentations button is not visible, manually visit PowerPoint’s AutoRecover temp folder and retrieve the presentation via Finder.
- Open Finder and select Go > Go to Folder on the menu bar.

- Copy the following path and press Return :
~/Library/Containers/com. Microsoft.Powerpoint /Data/Library/Preferences/ AutoRecovery

- Copy the file you want to recover to a different location.

Manually recovered AutoRecover backups for the Mac do not have a specified file type, so you must go through the following steps to view them in PowerPoint.
- Right-click the auto-recovered PPTX file and select Open with > Other .

- Select All Applications on the drop-down menu next to Enable .
- Select Microsoft PowerPoint within the list of applications and choose Open .

By default, AutoRecover saves your presentations every 10 minutes. If you want to increase the chances of recovering the most recent changes:
- Open PowerPoint and select PowerPoint > Preferences on the menu bar.

- Select Save .

- Modify the box next to Save AutoRecover information every x minutes and enter a new value—e.g., 1 to make AutoRecover back up your presentation every minute.

Other Methods to Recover PowerPoint Files:
Unsaved PowerPoint presentations aside, you might have to deal with misplaced or deleted PowerPoint files every now and then. When that happens, here are several ways you can try to get them back.
Check PowerPoint’s Recents List
If you can’t remember the location of a PPTX file, just check PowerPoint’s Recent list on the Start Screen. If the presentation is listed there, select to open it.
Use Windows Search or Spotlight
Your PC or Mac keeps an index of whatever’s in its internal storage. If you can remember the file name of a lost presentation (or even part of it), try searching for it through Windows Search or Spotlight Search.
Check the Recycle Bin or Trash
Windows and macOS store deleted items for 30 days, so check the Recycle Bin or Trash if you can’t find a presentation. If the PPTX file is inside, you can restore it to its original location.
Use File History or Time Machine
You should be able to recover a lost PowerPoint file if your PC or Mac is set to back up to an external hard drive. Learn how to retrieve deleted files or previous versions using File History or Time Machine.
Use a File Recovery Tool
If all else fails, use data recovery software to retrieve deleted PowerPoint files. Check our list of top file recovery programs for the PC and Mac .
Don’t Forget to Save or AutoSave Your Presentations
Losing an unsaved PowerPoint presentation can be a frustrating experience, but with AutoRecover, you can recover your work and stop having to start over from scratch.
Regardless, it’s best not to leave things to chance, so remember to always save your work frequently. If you prefer storing your presentations on OneDrive, use the AutoSave feature in Microsoft Office to avoid lost data.

Dilum Senevirathne is a freelance tech writer and blogger with three years of experience writing for online technology publications. He specializes in topics related to iOS, iPadOS, macOS, and Google web apps. When he isn't hammering away at his Magic Keyboard, you can catch him binge-watching productivity hacks on YouTube. Read Dilum's Full Bio
Read More Posts:

- Shop Early Amazon Prime Day Deals
- I Tried Both: Ring vs Nest Doorbell
How to Recover an Unsaved PowerPoint
Get that PowerPoint presentation back
:max_bytes(150000):strip_icc():format(webp)/ryanperiansquare-de5f69cde760457facb17deac949263e-180a645bf10845498a859fbbcda36d46.jpg "how to recover a powerpoint presentation")
- Western Governors University
In This Article
Jump to a Section
- AutoRecover
- Alternate Method
- Recover Deleted Presentation
- Enable AutoSave
- Frequently Asked Questions
What to Know
- File > Open > Recover Unsaved Presentations .
- Or: File > Info > Manage Presentations > Recover Unsaved Presentations .
- Check your Recycle Bin and automatic backup folders for deleted presentations, or use recovery software.
This article explains how to recover an unsaved PowerPoint. These instructions apply to PowerPoint 2019, 2016, 2013, and Microsoft 365 .
How Do I Recover a PowerPoint That Was Not Saved?
There are a few ways to recover an unsaved PowerPoint. If one method doesn't work, you should try the other options outlined below.
PowerPoint has a feature called AutoRecover which periodically stores data from your presentations. In newer versions of PowerPoint, you can access AutoRecover files from within PowerPoint:
Go to the File tab.
Select Open .
Select Recover Unsaved Presentations at the bottom of the list of recent files.
Select your presentation to open it. If you don't see it, move on to the next section to try a different method.
Alternate Way to Recover an Unsaved PowerPoint
Depending on your version of PowerPoint, the steps for recovering unsaved presentations might be different:
Select Info .
Select Manage Presentations > Recover Unsaved Presentations .
Select your presentation to open it.
If you don't see the Recover Unsaved Presentations option in PowerPoint, you might find your presentation in the following folder on Windows:
On Mac, you can find AutoRecover data in this folder:
Copy and paste the above file path in the File Explorer or Finder address bar; then press Enter to open the folder. Replace User with your Windows or Mac username.
If you still don't see your file, try looking in the following folder on Windows:
Alternatively, press Windows key + R to bring up the Run command and enter %temp% in the Run prompt to open the Temp folder. To find your presentation, search for ppt files.
How Do I Get My Deleted PowerPoint Presentation Back?
If you previously saved a presentation and it got deleted, there are a few things you can try to recover your PowerPoint.
First, check your Windows Recycle Bin or Mac Trash folder. Depending on how long ago a user deleted it, you may be able to restore files from the Recycle Bin or recover files from the Trash on Mac . If successful, the file should return to its original folder.
If you use automatic backup software , check your backup folders. You can also restore your file using recovery software like Recuva or Disk Drill .
Enable PowerPoint AutoSave
PowerPoint includes an AutoSave feature that backs up your work every few seconds. Select the AutoSave toggle switch in the upper-left corner of your presentation to turn it On , or go to go to File > Options > Save and check the AutoSave box.
To recover an unsaved Word document , go to File > Manage Documents > Recover Unsaved Documents . If you see the document listed, select it. Or, search for a backup of the file by going to File > Open > Browse . You can also use Windows Explorer to search for recovered or temporary files.
To recover an unsaved Excel file , if you have AutoSave enabled, view the Document Recovery interface when you launch Excel. In the section called Available Files , you'll see all your autosaved workbooks and document files. To recover a file, select the arrow next to the file details and choose Open .
To recover a deleted or unsaved Notepad file, go to your Windows 10 search function, type %AppData% , and press Enter . The Roaming folder will open. Search for files that end in .txt to find your unsaved Notepad file.
Get the Latest Tech News Delivered Every Day
- How to Recover an Unsaved Word Document
- How to Recover an Excel File
- How to Fix It When Microsoft Word Is Not Responding
- How to Recover Deleted Facebook Posts
- Tips for Solving Common PowerPoint Problems
- How to Turn on AutoSave in Excel
- EaseUS Data Recovery Wizard v18 (A Free Undelete Tool)
- How to Use the Samsung My Files App to Find Your Downloads
- The 21 Best Free Data Recovery Software Tools of 2024
- How to Find Deleted Phone Numbers on Android
- How to Find Trash on an Android
- How to Recover Deleted Files on a Mac
- How to Recover Deleted Files (Easy, 5 to 25 Minutes)
- How to Save PowerPoint Presentations as PDF Files
- How to Merge PowerPoints
- Why Doesn't the Music or Sound Play in My PowerPoint Presentation?
How to Recover a Deleted or Unsaved PowerPoint File
After hours of piecing together the perfect presentation, disaster happens the next morning as you go present it: It’s gone. No matter how frantically you search File Explorer, your precious PowePoint presentation is gone. Microsoft, though, has your back. As long as you haven’t disabled autorecovery, the file should still be on your machine -- or in the cloud, if you’re an Office365 user. It’s not foolproof, but you can often recover these accidentally deleted files.
Next time, however, you might want to save a redundant copy to the cloud, just in case.
1. Open a blank Microsoft PowerPoint document and click the File tab .

2. Click the Options link at the bottom.

3. Choose the Save option from the left .

4.Once you find the section with a path showing where your autosaved documents go, select and copy it . In my case, it’s here: C:\Users\Bryan\AppData\Roaming\Microsoft\PowerPoint\

5. Open File Explorer and paste in the copied file path . Hit enter .
Stay in the know with Laptop Mag
Get our in-depth reviews, helpful tips, great deals, and the biggest news stories delivered to your inbox.

6. Here, we’ll see the last save of the document I was working on, which starts with the name “MYPRESENTATION.” Click it to open the file .

7. Right click the Microsoft PowerPoint file, and select Open with .

8. Choose PowerPoint, and click Ok .

Microsoft PowerPoint Tips
- Previous Tip
- Change Templates in PowerPoint
- Upload a PowerPoint Presentation to YouTube
- Change a Presentation to Portrait Orientation
- How to Insert a Screen Recording in PowerPoint
- Change Slide Size in PowerPoint
- How to Make a Picture Transparent in PowerPoint
- Convert a Presentation to PDF in PowerPoint
- Add a YouTube Video in PowerPoint
- How to Print Notes with Slides in PowerPoint 2016
How to convert PDF to JPG, PNG, or TIFF
How to add Outlook Calendar to Google Calendar
Gaming on the Lenovo Yoga Slim 7x isn’t so bad — here’s how I made it work
Most Popular
- 2 After a week with the new Razer Blade 14, here's the gaming laptop I would buy instead
- 3 This Windows 11 setting can ruin your Copilot+ PC gaming — how to turn off Automatic Super Resolution
- 4 External hard drive not showing up? Here's how to fix it.
- 5 Save $300! The popular Gigabyte Aorus 15 gaming laptop is at its all-time low
How-To Geek
How to view and restore old versions of powerpoint files.

Your changes have been saved
Email Is sent
Please verify your email address.
You’ve reached your account maximum for followed topics.
The Best Point-and-Shoot Cameras of 2024
Hackers are targeting this router, and d-link won't patch it, 10 years later, i'm still using this popular android automation app, quick links, requirements, how to see older versions of your powerpoint presentations.
Microsoft PowerPoint lets you view and switch to older versions of your presentations. If you accidentally deleted something important and it got overwritten in PowerPoint, here's how to restore it.
Before you get started, make sure that you have a Microsoft 365 subscription. The ability to view and restore previous versions of PowerPoint presentations can be accessed only through a Microsoft 365 subscription.
Fortunately, this subscription also gives you access to all other Office apps, along with 1TB of OneDrive storage. You can put the cloud storage to good use by automatically saving your presentations to OneDrive.
Also, enabling auto-save on PowerPoint is required for accessing version history. To do so, you'll need to create a new PowerPoint presentation and then turn the "AutoSave" switch on in the document's title bar. When PowerPoint shows you a confirmation pop-up, select "OneDrive."
Related: How to Automatically Save PowerPoint Presentations to OneDrive
Now that you've sorted out the basics, open PowerPoint and load any PowerPoint presentation. There are two ways to check version history here, and we'll show you both.
First, click "File" in the menu bar.

In the left pane, click "Info."

Click "Version History" on the right.

Alternately, you can click the file name at the top of the document that you've opened and select "Version History" from the pop-up menu.

No matter which method you choose, a new pane labeled "Version History" will open up on the right-hand side of your presentation in PowerPoint.
Microsoft PowerPoint sorts older versions of the document by date and time here. To load a previous version of the presentation, click the "Open version" button below the version that you need to go back to.

This will open a read-only file that shows an older version of your PowerPoint presentation. Right below the ribbon menu, you'll see a button labeled "Restore." Click it to go back to the previous version.

Note that this will overwrite your PowerPoint presentation. You can always repeat the same steps to visit the modified version of your document in case you want to copy any additional changes to the older version.
If you use Microsoft 365 apps frequently, you might also be interested in knowing how to restore previous versions of Excel workbooks or Word documents .
Related: How to View and Restore Previous Versions of a Word Document
- Microsoft Office
- Microsoft PowerPoint

Recover an earlier version of an Office file
If the AutoRecover option is turned on, you can automatically save versions of your file while you’re working on it. How you recover something depends on when you saved it.
If you’ve saved the file
Open the file you were working on.
Go to File > Info.
Under Manage Workbook or Manage Presentation , select the file labeled (when I closed without saving) .
In the bar at the top of the file, select Restore to overwrite any previously saved versions.

Tip: In Word, you can also compare versions by clicking Compare instead of Restore .
If you haven’t saved the file
Go to File > Info > Manage Document > Recover Unsaved Workbooks in Excel, or Recover Unsaved Presentations in PowerPoint.

Select the file, and then select Open .

In the bar at the top of the file, select Save As to save the file.

View historical versions of Office files
What is AutoSave?
View the version history of an item or file in a SharePoint list or library
How does versioning work in a SharePoint list or library

Need more help?
Want more options.
Explore subscription benefits, browse training courses, learn how to secure your device, and more.

Microsoft 365 subscription benefits

Microsoft 365 training

Microsoft security

Accessibility center
Communities help you ask and answer questions, give feedback, and hear from experts with rich knowledge.

Ask the Microsoft Community

Microsoft Tech Community

Windows Insiders
Microsoft 365 Insiders
Find solutions to common problems or get help from a support agent.

Online support
Was this information helpful?
Thank you for your feedback.
- Data recovery for Mac
- Data recovery for Windows
- All Articles
How to Recover Deleted or Unsaved PowerPoint File
- Recover Deleted Files on Windows
- Recover Deleted Files on Mac OS X
- Hard Drive Recovery Tips
- SD Card & Flash Drive Recovery Tips
- All About Data Recovery
- All about iOS
- All about Android
- Recovering File Types & Formats
- Data Recovery in Your City
- Mac OS X Tips & Troubleshooting
- Windows Tips & Troubleshooting
- Software Reviews
- Best Software & Services
- Tech Related Articles
Have you lost your PPT file due to a system crash or deletion and aren’t sure how to retrieve it? Don’t worry, this is the place for you. Data loss scenarios are quite common, and several methods are available to help recover your PPT file back. Follow our instructions for quick and easy methods to restore your deleted files.
What is the PowerPoint File Type (PPT, PPTX)
PPT stands for the Microsoft PowerPoint Presentation binary format, and it is the main file extension that saves PowerPoint presentations. The software is widely used to design presentations for educational and business purposes. All slides, videos, texts, images, etc., are stored within the PPT file.

Introduced in 1987 with the release of PowerPoint, the PPT extension used to be the primary file type to save your presentations for versions 2003 and older.
How to Recover Deleted PowerPoint (PPT, PPTX) Files
There are many possible fixes to assist you in restoring your lost PPTX files. Go through the table below for an overview of available recovery methods:
| Unsaved PPT Files | Use the Go to Check the |
| Deleted PPT Files | Restore from the Use |
| PowerPoint crashed | Restore from a Use the Go to Check the |
| Accidentally closed PowerPoint without saving file | Use the Go to |
| Operating System Malfunction | Recover files with Recover using |
| Device corruption/formatting | Recover files with Recover using Restore from a |
| Virus attack | Recover files with Restore from a |
While these solutions can be convenient, it is also important to keep certain practices in mind while working on your PPTX file. A few tips and tricks that can be helpful in data-loss situations are:
- 💾 Keep more than one backup of your PPTX file. In case of an unexpected file loss, having backups would ensure a smooth recovery process.
- ❌ If your device crashes or you want to retrieve your file, avoid writing new data to that drive. It can lead to complications while restoring the desired file.
- ⏩ Start the data recovery process as soon as you can. The longer you wait to attempt getting the file back, the restoration chances would become more uncertain.
- 💯 Try the most sure-shot method of file recovery first. It would increase the possibility of successful recovery and might prevent permanent file damage.
Being mindful of these pointers can help avoid severe data loss and make the recovery process quite efficient.
How to Recover PowerPoint (PPT, PPTX) Files with Software
Although various data recovery methods are available to help you restore your PPTX files, third-party software is perhaps the most effective. Instead of relying on temporary folders, these solutions can permanently retrieve your files. While it may seem challenging at first, most file recovery software like Disk Drill is relatively user-friendly.
Steps to recover your PPT, PPTX files with Disk Drill:

- While it is faster than most recovery software, Disk Drill will take some time to scan your device for lost data. You can choose your recovery method — Quick Scan or Deep Scan . ⏯️ You can also pause and resume scans halfway to glance through the files found.

Recover PPT, PPTX Files from Windows Recycle Bin and Mac Trash
If you wish to retrieve your deleted PPT, PPTX files, there’s a simple solution to help you get them back. You can use the Windows Recycle Bin or Mac Trash to restore your files to their original location.
Both these folders in your system temporarily store your deleted files. This makes it easy to recover your data without much effort.
Recovering PPT, PPTX files from the Windows Recycle Bin

- Once you’ve opened the folder, find and select the PPT or PPTX file you wish to recover.

Recovering PPT, PPTX files from Mac Trash

Restore from a Recent Files Folder
While the Windows Recycle Bin and the Mac Trash folders offer effortless data recovery, they can only recover deleted files — whether accidental or voluntary. However, you don’t necessarily need to download software to retrieve your data. There are other solutions within your system that can help you restore your lost PPT, PPTX files.
Let’s go through both the options one by one:
Recovering Files Using Windows File History

- Make sure you have turned on the File History option. If not, select an internal or external drive to which you want to backup your information, and turn it on.

- Go through available backups and locate the PPT or PPTX file you want to recover.

Recovering Files Using Mac Time Machine

- Navigate through the folders to locate your PPT or PPTX file from available backups.

Having backups of your data is a valuable practice that always comes in handy in the long run. The techniques mentioned above can assist you with the convenient recovery of your PPT, PPTX files only if you’ve saved them. It may seem like a limitation in comparison with the data recovery efficiency of software. However, there is a bonus feature on PowerPoint that can help recover your lost files.
Recover PPT, PPTX Files using Windows File Recovery
Windows File Recovery is Microsoft’s command-line recovery utility and is available for free download from the Microsoft Store. Since it doesn’t have a graphical user interface, users must enter the corresponding command prompt to recover lost files. This utility supports various file systems and types and is a helpful tool for data recovery.
Here’s how you can recover PPT, PPTX files with Windows File Recovery:
- Download Windows File Recovery from the Microsoft Store and Install it on your PC.
- Launch Windows File Recovery and click the Run as administrator option.
- Once the Command Prompt window opens, enter the command in the following format: winfr source-drive: destination-drive: [/mode] [/switches]
- You need to specify a mode in the format mentioned above, according to what’s suitable for your file system. You can use two basic modes to recover files – Regular and Extensive .
- You can also mention any specific file extensions according to the files you wish to retrieve. For instance, enter a similar command to retrieve PPT, PPTX files: winfr C: E: /extensive /n *.ppt /n *.pptx
- Note that the source and destination drives must be different. After you’ve entered, Microsoft automatically creates a recovery folder on the destination drive.

Recover PPT, PPTX Files from your Temporary Files Folder
Another method that you can use to retrieve your unsaved PPT, PPTX files is through the temporary files folder. Windows has this temporary folder dedicated to saving files from various applications. Here’s the path to the temporary files folder: C:\Users\USERNAME\AppData\Local\Temp
There are other ways to access this folder as well. Follow these steps to recover your lost or unsaved PPT, PPTX files from the temporary files folder:

- Once you run the command, the folder window will open in File Explorer. To narrow down your search options, you can filter through the results by using the following extensions – *.pptx, *.ppt, ppt*.tmp .

Recover PPT, PPTX File from a Local Backup
An easier way to retrieve your PPT, PPTX files is to look for them in a local backup. However, turning to this method will only be feasible if you’ve created backups of your files either on hard drives, or on the cloud. In this article, we shall look at the steps to recover PPT, PPTX files from a local backup:
- Connect your backup drive to your computer.
- Open it using File Explorer.
- Look through the data to find your PPT presentation.
- Copy it to your computer and access the backed up version.
Recovering PPT, PPTX Files with PowerPoint Features
Did your presentation disappear? PowerPoint provides features that can help recover your unsaved or deleted files. All versions from 2010 and onwards have the Auto Recovery feature and the Recover Unsaved Presentations option. The former saves the file you’re working on at regular time intervals. Both features help the user ensure they have a place from which they can retrieve their lost files.
Auto-Recovery
If you haven’t saved the PPT or PPTX file you’re working on; PowerPoint creates a temporary folder to save these files. You can navigate to the Auto-Recover File Location and look for your file there. However, to enable this feature, you must ensure that the AutoRecover information option is turned on.

Recover Unsaved Presentations
If PowerPoint or your system crashes while you’re working or before you have the chance to check a saved version, you can use this feature. Once you click on the Recover Unsaved Presentations option, it will open your missing file.

On Windows: Open File > Info > Manage Versions > Recover Unsaved Presentations .
You can find more information on these features at the Microsoft Community.
How to Open PPT, PPTX on Mac and Windows
Microsoft PowerPoint is the most suitable application to open your PPT, PPTX files. It supports all the texts, transition effects, images, clipart, videos, etc., which are vital assets to format the presentation. It is available on both Windows and Mac operating systems as well as on Android and iOS. You can purchase a subscription to Microsoft 365 from Microsoft’s official website.

You can also view PowerPoint files in several other presentation programs. Some examples are Apple Keynote, Corel Presentations, or PPTX viewer. If you have a Microsoft Account or a Microsoft 365 account, it will allow you to view and edit your presentations in the web browser.
Programs that Open PPT, PPTX Files
While Microsoft PowerPoint works best, multiple applications can support PPT, PPTX files. You may not be able to edit them using these applications, but you can view them easily. Some programs that support PPT, PPTX files are:
On Windows: Microsoft PowerPoint 354 Corel Presentations 2021 File Viewer Plus
On Mac: Microsoft PowerPoint 354 Apple Preview Apple Keynote
Android: File Viewer by Android Microsoft Office Microsoft PowerPoint Google Drive Google Slides
iOS: Microsoft Office Microsoft PowerPoint Google Drive Google Slides
Tips to Avoid PPT, PPTX File Loss
While it is quite possible to recover your lost PPT, PPTX files conveniently, it is advisable to try and avoid data loss situations. Here are a few tips you can follow to keep your files safe:
- 💿 Save your work manually – While technological advancements have made it easier to recover files, it is good to keep saving your file manually while working. If the system crashes or an unforeseen problem arises, you can seamlessly get back your precious presentations.
- 💾 Keep multiple backups – Ensure that you have backups of your files. You can either backup your PPT, PPTX files to a different storage device or use the backup features on your systems. Both Windows and Mac OS offer some advanced features that allow you to back up your files safely.
- ☁️ Enable AutoRecover and AutoSave – Verify that AutoRecover has been turned on in PowerPoint. This feature can help you recover your deleted or unsaved files without hassle. A lot of users fret that they forgot to save their presentations. This is where the AutoSave option is a real gamechanger: It automatically saves the changes you continue to make onto the OneDrive cloud storage.
- 🩺 Install a good Antivirus – It is crucial to have reliable antivirus software installed on your computer. It will protect your files from malware and prevent file corruption.
- 🔋 System and Power compatibility – It is suggested that you ensure your system’s compatibility with the software. With constant technical developments, outdated software versions would not work on newer systems. To avoid data loss due to sudden power outages, invest in an Uninterrupted Power Source (UPS).
- 🗄️ Separate software from other data – You should keep your software and other data, including your media files and documents on different drives. If this isn’t followed, your system can crash, or you risk disk failure. It can thus result in significant data loss.
This information can help you avoid losing your data. However, if a data-loss situation arises, the methods mentioned above can help you recover files or other data.
How to recover unsaved PowerPoint files in Windows 11?
PowerPoint comes ready with features that actively work to keep a record of your presentations, even if you haven’t saved it yet. To do this, PowerPoint takes regular snapshots of your file, which allows you to recover it in the event of sudden power or application failure.
To recover an unsaved PowerPoint file, follow these steps:
- Open PowerPoint .
- Click File , then Open . At the bottom of the recent files list, click Recover Unsaved Presentations .
- Select the unsaved presentation file in the UnsavedFiles folder, then click Open .
Once opened, save the presentation file like normal.
Where are PowerPoint AutoSave files stored?
If you’re not a Microsoft 365 user, the AutoSave feature that automatically saves your presentation almost immediately after any change won’t be available to you. Instead, you must rely on the AutoRecover feature.
AutoRecover, when enabled, will automatically make a copy of your file every 10 minutes by default. The path to this AutoRecover folder is typically C:\Users\USERNAME\AppData\Roaming\Microsoft\PowerPoint\ , but the below instructions will show you how to find the exact location for you.
- Click File , then Options .
- Click Save .
- Copy the path in the AutoRecover file location box and open it in File Explorer .
How to recover unsaved PowerPoint files on OneDrive?
If your PowerPoint presentation crashes before you get a chance to save it in OneDrive, you may still be able to recover it from a version that was automatically saved. To do so, follow these steps.
- Click File , then Open .
- Click Recover Unsaved Presentations .
- Select your unsaved presentation and click Open .
Going forward, if you’re a Microsoft 365 user, consider saving your file in OneDrive immediately after creating it. This way, the AutoSave feature will be enabled from the beginning, which will save your file every few seconds.
How do I recover PowerPoint history?
Follow these steps to recover PowerPoint file history:
- Open the file you want to view.
- Click File > Info > Version history .
- Select a version to open it in a separate window.
- If you wish to restore a previous version you’ve opened, select Restore .
Where are temporary PowerPoint files stored?
Temporary PowerPoint files are stores under the following path: C:\Users\USERNAME\AppData\Local\Temp
Follow these steps to recover temporary PPT, PPTX files:
- Press Win + R and type in %temp% in the Run prompt.
- You can filter through the results in File Explorer by using the following extensions – *.pptx, *.ppt, ppt*.tmp .
- If the presentation is located within the temporary files folder, it should show up in the results and you can recover it.
How to recover PowerPoint files that were not saved on the iPad?
All PowerPoint presentations are saved automatically on iOS devices. In the event that the AutoSave feature was manually disabled, there will be no way to recover an unsaved presentation.

Joshua Solomon
Technology, SaaS, and digital marketing are Joshua's go-to niches. He understands the need for simple and easy-to-read articles on the internet. As technologies grow in complexity, guides and how-to pieces must remain com...

Brett Johnson
This article has been approved by Brett Johnson, Data Recovery Engineer at ACE Data Recovery. Brett has a Bachelor's Degree in Computer Systems and Network, 12 years of experience.
- June 7, 2023 How to Restore Deleted Photos on Your Sony Camera
- September 21, 2022 The Ultimate Guide to Recovering Deleted Emails
- August 11, 2022 How to Recover Deleted Items in Outlook for Mac
- July 18, 2022 How to Recover Deleted iMovie Projects on a Mac
- December 10, 2021 Stellar Data Recovery Review - An Honest Look in 2021
- June 13, 2022 How to Recover Deleted Emails on a Mac
- February 21, 2024 How to Recover Deleted Files on Windows 11
- October 12, 2022 How to Recover a Formatted Compact Flash (CF) Card
- Basic Features and Usage
How to Recover an Unsaved PowerPoint?
Written by: Bill Whitman
Last updated: April 9, 2024

Recovering an Unsaved PowerPoint Presentation
Losing an unsaved PowerPoint presentation can be frustrating. Whether it happened due to a sudden shutdown, crash, or simply forgetting to save your work, there are several methods to recover your unsaved PowerPoint file. One effective way is by using the AutoRecover feature in PowerPoint, which automatically saves a backup copy of your presentations at a set interval. Additionally, checking the Temporary Files folder on your computer can also yield potential recovery options. Here at LearnPowerpoint.io, we provide you with trusted advice on how to navigate this issue effectively.
Quick summary
- Use the AutoRecover feature in PowerPoint to recover unsaved files.
- Check the Temporary Files folder for backups of your presentation.
- Utilize Document Recovery to restore unsaved changes when PowerPoint restarts after a crash.
Step-by-Step Guide to Recover Unsaved PowerPoint Presentations
Using autorecover to retrieve your presentation.
AutoRecover is a feature designed to protect your work in case of a power outage or crash. To recover your unsaved presentations through AutoRecover, follow these steps:
- Open PowerPoint and navigate to File > Open .
- Click on Recover Unsaved Presentations at the bottom of the menu.
- Select the presentation you wish to recover and click Open .
Remember, AutoRecover needs to be enabled in the settings for this to work. You can verify or adjust the settings by going to File > Options > Save and ensuring that the AutoRecover option is checked.
Finding Your Presentation in Temporary Files
Sometimes, your unsaved work might end up in the Temporary Files folder. Here’s how to access it:
- Open the Run dialog box by pressing Windows key + R .
- Type %temp% into the box and press Enter . This will open the Temporary Files folder.
- Look for files with a .ppt extension or a similar name to your lost presentation.
- If you find a relevant file, open it with PowerPoint and save it immediately.
Utilizing Document Recovery
If PowerPoint crashes or shuts down unexpectedly, the Document Recovery pane might appear when you restart the program. This pane displays any recovered files. Simply click on the file you wish to recover, then save it promptly.
Tips for Preventing Future Loss
To minimize the chances of losing important presentations in the future:
- Enable AutoSave if you are using PowerPoint for Microsoft 365.
- Regularly save your work by pressing Ctrl + S .
- Adjust the AutoRecover interval to a shorter time frame to ensure more frequent automatic saves.
At LearnPowerpoint.io, our trusted advice aims to not only help you recover your unsaved PowerPoint presentations but also to educate you on measures to prevent similar issues. Remember, regular saves and taking advantage of PowerPoint’s built-in recovery features can significantly decrease the risk of losing your precious work.
Recovering an unsaved PowerPoint presentation is usually manageable with the right steps. Whether through the AutoRecover feature, checking the Temporary Files, or using Document Recovery, it’s often possible to retrieve your work. By following the advice provided by LearnPowerpoint.io and enabling preventive measures like AutoSave and regular saving habits, you can safeguard your presentations against future losses.
Other Categories
- Advanced Features and Interactivity
- Media and Design
- Slides and Organization
- Text and Formatting

How to Link Slides in PowerPoint?

How to Merge Shapes in PowerPoint?

How to Create a Portfolio in PowerPoint?

How to Superscript in PowerPoint?

How to Use PowerPoint on iPad?

How to Edit Footer in PowerPoint?

How to Insert a GIF in PowerPoint?

How to Change Slide Size in PowerPoint?

How to Animate a Chart in PowerPoint?
Featured posts.

- Get started with computers
- Learn Microsoft Office
- Apply for a job
- Improve my work skills
- Design nice-looking docs
- Getting Started
- Smartphones & Tablets
- Typing Tutorial
- Online Learning
- Basic Internet Skills
- Online Safety
- Social Media
- Zoom Basics
- Google Docs
- Google Sheets
- Career Planning
- Resume Writing
- Cover Letters
- Job Search and Networking
- Business Communication
- Entrepreneurship 101
- Careers without College
- Job Hunt for Today
- 3D Printing
- Freelancing 101
- Personal Finance
- Sharing Economy
- Decision-Making
- Graphic Design
- Photography
- Image Editing
- Learning WordPress
- Language Learning
- Critical Thinking
- For Educators
- Translations
- Staff Picks
- English expand_more expand_less
PowerPoint Tips - Recover Unsaved Presentations
Powerpoint tips -, recover unsaved presentations, powerpoint tips recover unsaved presentations.

PowerPoint Tips: Recover Unsaved Presentations
Lesson 7: recover unsaved presentations.
/en/powerpoint-tips/spell-check-and-thesaurus-shortcuts/content/
Recover unsaved presentations
Sometimes you don’t get the chance to save your presentation before your computer crashes or you lose power. Thankfully, PowerPoint can help you recover unsaved presentations .
Watch the video below to see how you can restore your work.
- If PowerPoint recovers any unsaved files when you open it, a Document Recovery window will appear.
- Click on the file to open it and then close the window.
- If the Document Recovery window does not appear, click on the File tab in the PowerPoint menu.
- Select Open at the bottom of the recent presentations.
- Click on Recover Unsaved Presentations .
- Select the unsaved file that you want to recover and open it.
We also recommend saving the recovered file in order to prevent losing it in the future. Keep this shortcut in mind next time you have computer trouble, and hopefully, your hard work won't be lost!
Now let’s go over the steps for compressing media files in PowerPoint.
/en/powerpoint-tips/compress-media-files/content/

How to Recover Deleted/Unsaved PowerPoint Files (Multiple Methods for Windows)
No robots used , our articles are crafted by humans under strict Editorial Guidelines .
In that situation, you can use the methods below to recover the PowerPoint file and save yourself a lot of time.
Quick Navigation
|
|
Unsaved PowerPoint files |
|
Deleted PowerPoint files |
|
How to Recover Unsaved PowerPoint File
Forgetting to click the save button when creating a PowerPoint presentation is a fairly common problem, which is why Microsoft made it possible to recover unsaved presentations directly from PowerPoint.
Method #1: Click Recover Unsaved Presentations
As soon as you create a presentation, PowerPoint saves it in a special folder, called UnsavedFiles. The presentation is stored in this folder until you click the Save button and provide your own directory. Here’s how you can recover unsaved PowerPoint presentations that are still located in the UnsavedFiles folder:
- Launch PowerPoint.
- Open the File menu and click Open.

- Open your presentation and save it someplace safe.
If the UnsavedFiles folder is empty, then you need to try the other methods described in this article.
Method #2: Use the AutoRecover Feature
Located inside the Save section of PowerPoint Options is the AutoRecover feature. When enabled, this feature stores information about opened PowerPoint files every X minutes, and when PowerPoint is closed without saving.

The recovery files created by the AutoRecover feature can be found in the following location (USERNAME = your username):
You can recover them from this location by copying the path and pasting it in the File Explorer address bar.
Then, simply move the PPT or PPTX file to a safe location.
Method #3: Check the Temp Folder
Windows allows any application to store temporary inside the following folder:
You can quickly open this folder by pressing Windows key + R on your keyboard and typing %temp% in the Run prompt.

Since the Temp folder tends to be rather messy, we don’t recommend you go through it manually. Instead, enter the following search queries in the search box located in the top-right corner of File Explorer:
If these search queries fail to yield any results, then it’s possible that your PowerPoint files are deleted. The good news is that there are several ways to recover deleted PPT files, and we explore them in the next section of this article.
How to Recover Deleted PowerPoint File
The three methods we’ve described so far can help you recover a presentation that was closed without saving, but what about presentations that were saved, only to be deleted? Well, that’s where the following three methods come in.
Method #1: Look Inside the Recycle Bin
The Recycle Bin should be the first place you look for lost PowerPoint files:
- Press Windows key + R to open the Run prompt.
- Enter: explorer.exe shell:RecycleBinFolder

- Find your PowerPoint file.

No luck finding your PowerPoint document inside the Recycle Bin? Then it’s most likely permanently deleted .
Method #2: Retrieve Your File from a Backup
It would be beyond the scope of this article to describe all popular backup applications available to Windows users, so we decided to narrow them down to just three:
- Local backup:
- OneDrive backup:
- File History:
- Connect your backup drive to your computer.
- Open it using File Explorer.
- Find your PPT presentation.
- Copy it to your computer.
- Open a web browser.
- Visit: https://onedrive.live.com/
- Log in with your username and password.
- Download it to your computer.
- Open the Start menu.
- Type “file history.”
- Select Restore your files with File History.
- Navigate to where your PPT file was located and restore it.
Don’t have a backup of your lost PowerPoint file? Don’t despair! There’s still one method that you can try, and it works even if you don’t back up your files.
Method #3: Use Data Recovery Software
Data recovery software can undelete even permanently deleted files, as long as they haven’t been overwritten by new data. Such software applications are available from many different vendors, some of which are targeting enterprise customers, while others are focusing on individual home users.
To recover a PowerPoint presentation with Disk Drill :

- Add the lost PPT/PPTX file to the recovery queue by clicking the checkbox next to it.

Tips to Avoid Losing PowerPoint (PPT, PPTX) Files
Creating PowerPoint presentations is hardly ever fun, but having to recreate a lost presentation from scratch can be a torturous ordeal. Here’s what you can do to avoid losing your PowerPoint files:
- 💾 Enable AutoSave : If you’re using the latest version of PowerPoint (2016 or 2019) and have a Microsoft 365 subscription, then you can enable the AutoSave feature to save your files automatically, every few seconds, as you work. All you need to do is sign in with your Microsoft account and click the AutoSave button in the top-left corner. Unfortunately, the AutoSave feature is not present in PowerPoint 2003/2007/2010/2013.
- 💻 Back up your presentations : It’s never a good idea to keep just a single copy of an important presentation. Instead, consider using the 3-2-1 backup strategy , which states that you should always have three copies of your data, stored on two different media, with one copy off-site.
- ⚡ Buy a UPS : An uninterrupted power supply, or UPS for short, is essentially a battery that sits between your computer and the wall outlet the computer draws power from. In case of a power outage, the UPS quickly turns on to power your computer, allowing you to save your work.
- 💀 Avoid pirated versions of PowerPoint : Obviously, you should never use a pirated version of any software, but it’s especially dangerous to use a pirated version of PowerPoint and other Office applications because you never know if it hasn’t been tampered with and infected with malware.
- 🔧 Maintain your system : Unless your operating system is rock-solid, there will always be a chance of PowerPoint crashing at the worst possible moment. That’s why you should avoid installing dubious software applications from the internet. Instead, try to keep your system as clean as possible by following basic system maintenance tips .
How to recover deleted PowerPoint files?
Follow these simple steps to recover deleted PowerPoint presentations:
- Download, install & run Disk Drill on your PC.
- Select the disk containing the deleted PowerPoint files.
- Start the scan & wait for it to finish.
- Select the PPT files you want to recover & click “Recover”.
- Choose a safe recovery destination & hit “Confirm”.
How to recover a PowerPoint file after a crash?
To recover a PowerPoint file after a crash, open PowerPoint on your computer, click the File menu > Open > Recover Unsaved Presentations.
Can you recover deleted slides from PowerPoint?
No, even the latest version of PowerPoint doesn’t make it possible to recover deleted slides. The best you can do is restore an older version of the PowerPoint file, which can be easily done using OneDrive.
How to recover a corrupted PowerPoint file?
PowerPoint has a built-in file repair option, and you can access it by opening the File menu and selecting > Open > Browse > Open and Repair (accessible after clicking the small arrow next to the Open button).
How to recover a PowerPoint file that was saved over?
Unfortunately, you can’t recover a PowerPoint file that was saved over unless you have a backup safely stored somewhere on your computer or in the cloud.
In this article, we’ve described multiple methods that you can use to recover deleted and unsaved PowerPoint files, so all you need to do is pick the one that best fits your situation by consulting the Quick Navigation section at the start of this article.
This article was written by David Morelo , a Staff Writer at Handy Recovery Advisor. It was also verified for technical accuracy by Andrey Vasilyev , our editorial advisor.
Curious about our content creation process? Take a look at our Editor Guidelines .
- Skill Assessments
- AI Course Builder
- Free Courses
- PowerPoint 2019 Basic
Recover an Unsaved PowerPoint

Start Free Trial
Or log in with:
How to Recover an Unsaved PowerPoint

Computers don’t always work the way they’re supposed to. Nothing is more frustrating than when a program locks up and stops responding, or worse, completely crashes—especially if you lose progress on an important presentation that you’re working on.
Fortunately, PowerPoint will try to automatically save backup copies of your presentations. If PowerPoint 2019 encounters a problem and stops responding, you can restart PowerPoint or your computer and try to recover your lost presentations.
Recover a Presentation
If an unsaved presentation can be recovered, a Recover unsaved presentations heading will appear on the Welcome screen.

The Document Recovery pane appears, listing all recovered presentations that were found.
The last autosaved version of that presentation opens.

The Document Recovery pane closes, and you can get back to work.
AutoRecovery Settings
You can further protect your work by using the AutoRecover feature to periodically save a temporary copy of the presentation you're working on. To recover work after a software failure, you must have turned on the AutoRecover feature before the problem occurred. You can set the AutoRecover save interval to occur more frequently than its default setting of every 10 minutes.

- Click Save .
- Make sure the Save AutoRecover information check box is checked.
You can’t specify the interval if the check box is not selected.

Even with PowerPoint’s recovery features, the best way to ensure that you don’t lose much progress is to save your work regularly.

FREE Quick Reference
Free to distribute with our compliments; we hope you will consider our paid training.
- LinkedIn-ready certificate
- Skill assessments
- Bite-sized, interactive lessons
- Saved progress
- Files & Documents

How to Recover a Deleted or Unsaved PowerPoint Presentation
Last update: March 22, 2023
PowerPoint is very popular presentation software. It can be disastrous to lose or delete an important PowerPoint file. Fortunately, there are ways to get lost PowerPoint presentations back. Read on to see how you can recover your valuable data.
Ways to Recover Deleted or Unsaved PowerPoint Presentations
There are multiple ways to recover deleted or lost PowerPoint files. Let’s take a look at the various methods you can use to get back deleted or unsaved PowerPoint files.
Method 1: Use Operating System Features
The first place to look for any lost files is in the special folders that the Windows and Mac operating systems provide to temporarily store deleted items.
To recover a PowerPoint presentation from the Windows Recycle Bin , follow these steps:
- Open the Recycle Bin by clicking on its icon.
- Find the file you wish to restore.
- Click or tap on Restore to recover the file to its original location.

Mac users can use the Trash to recover recently deleted PPT files with these steps:
- Open the Trash by clicking on its icon.
- Locate the item you want to recover.
- Right-click on the PowerPoint file and click Put Back.

Method 2: Try Native PowerPoint Features
PowerPoint provides two powerful native methods of recovering data. You can use the PowerPoint Autorecover feature or the Recover Unsaved Presentation feature. Here’s how they work.
AutoRecover – PowerPoint automatically saves files temporarily via the AutoRecover feature. Recovering them requires navigating to the appropriate folder and searching for your file. To see where PowerPoint is storing the files, use the following steps in PowerPoint.
- Open File > Options > Save.
- The file is specified in the AutoRecover file location field.

You can also enable or disable AutoRecover from this window and modify the elapsed time between automatic saves of your PowerPoint files.
Recover Unsaved Presentation – If PowerPoint crashes before you have a chance to save your presentation, you can use this feature to recover your work. Just follow these steps:
- Open the File tab in PowerPoint.
- Select Recent.
- Click on the Recover Unsaved Presentation icon on the bottom-right of the window.

Recover from temporary PowerPoint files – You may be able to manually save files that have been temporarily saved by the application. Look in these locations for your operating system if you have lost a PowerPoint file.
- Windows – C :\ Documents and Settings\<username>\Local Settings\Temp
- Mac – /Users/<username>/Library/Containers/com.Microsoft.Powerpoint /Data/Library/Preferences/AutoRecovery
Method 3: Use PowerPoint Recovery Software
In cases where the previous recovery methods are not successful, specialized software may help you restore a lost PPT file. Data recovery software works by taking advantage of the way modern operating systems delete data. When a file is deleted on a Windows or Mac machine, the data is not immediately removed from a disk-based storage device. The operating system disables logical access to the deleted data but it remains on the disk until it is overwritten by new information.
Our editorial team has extensively used licensed copy of Disk Drill data recovery software, which has proven to be a reliable solution for various data loss situations. The steps with other recovery applications will be similar to the following procedure that we use with Disk Drill for Windows.
- Download and install the software. Don’t use the disk that contained the lost PowerPoint files or you risk overwriting them.
- Launch the application and select the disk with the missing PowerPoint presentations from the list of available devices.

- Click the Recover button to сhoose a safe storage location that is not on the disk being recovered.

There are many data recovery software solutions available for Mac and Windows computers. Some are freeware applications while others are commercial products. When you are tasked with recovering a lost PowerPoint file, you want to choose the right software tool. Here are some things to keep in mind when making your choice.
Freeware solutions such as Disk Drill data recovery software provide more features than free alternatives.The only real benefit of free tools is the price. The features included with a commercial solution are generally far superior to free alternatives. When faced with a data loss situation, you want to use the best tool available, and a paid/freeware solution will give you a better chance of successful recovery.
Method 4: Recover PowerPoint Presentation From a Backup
If you are following accepted best practices and backing up your computer regularly, you may have a copy of the lost PowerPoint available on backup storage media. Whatever tool you choose to use for making backups, the recovery process is essentially the same and will follow these general steps.
- Connect the storage media containing the backup files to your computer.
- Start the backup and recovery application.
- Search for the PowerPoint presentation you want to recover.
- If found, restore the file to your computer.
The fact that the last resort may be to use a backup copy to recover your files demonstrates the importance of making it a regular practice to back up your data. Take the time to do it. Someday you will be very happy that you did.
Why Do PowerPoint Files Get Deleted?
Just as with any other type of file living on your computer or laptop, there are many ways that PowerPoint presentations can be lost or deleted. Here are some of the most common reasons you might lose one of these important files.
- Human error is involved in a large majority of data loss incidents. It’s very easy to inadvertently delete the wrong file and then empty the Trash or Recycle Bin. You may also accidentally format a drive or partition that contained some PowerPoint files.
- An infection with a virus or malware can be responsible for the loss of data on a Mac or Windows 7/8/10/11 machine. Files may be randomly deleted or the filesystem can become corrupted depending on what type of malware has entered your system.
- Physically damaged disks will often exhibit lost and deleted data. Disks can be damaged due to simple wear and tear or by treating them badly and exposing the devices to excessive moisture or heat.
Protecting Your PowerPoint Files
There are several measures that you can take to protect your PowerPoint files.
| Verify that you have the AutoRecover enabled in PowerPoint. This feature offers a quick way to recover unsaved or deleted PowerPoint files on your Mac or Windows computer. To enable this feature, click on File > Options > Save and make sure the AutoRecover checkbox is selected. | |
| As previously mentioned, having a backup of your PowerPoint presentations available can save the day in the event of a data loss. Make it a regular habit to backup all your files. It’s an easy way of protecting your valuable work. | |
| Keeping an updated and reliable antivirus tool running on your computer is an essential form of protection for all your files. With the prevalence of malware circulating on the web, it’s crazy not to protect your system with antivirus software. | |
| Reduce the probability of human error by double checking your work before any activity that can potentially destroy data. This includes deleting files and emptying the Trash or Recycle Bin. Slow down and make sure it’s safe to act before clicking that button. | |
| If you hear strange noises coming from your hard drive or start experiencing missing or corrupted files, your disk may be telling you it’s getting ready to fail. Make a backup of the data as soon as possible. Creating a byte-level backup that can be used to recover deleted data is recommended in this situation. |
The information presented in this section should help you protect your PowerPoint presentations and recover them if you are impacted by a sudden data loss. Here are a few more points of interest regarding recovering deleted PowerPoint files.
Frequently Asked Questions
How do i recover a powerpoint that i have overwritten.
Once you have saved a PowerPoint over an older copy, the best way to recover it is with a backup. Windows users may also be able to use the Restore Previous Version feature that also depends on restore points being saved by the operating system.
How can I recover deleted PowerPoint files from an iPad?
Data recovery software can be used to restore a PowerPoint file deleted from an iPad. Connect the iPad to your computer and let the recovery software scan it as it would any other disk-based device.
How can I recover a file if PowerPoint crashes?
Use the Recover Unsaved Presentation feature to recover files that you were working on when PowerPoint stopped responding or crashed. Alternately, you can use PowerPoint’s Autorecover feature which can be configured to automatically save presentations on a time-frame of your choosing.

- 12 publishings
Robert is a freelance writer and technology enthusiast who graduated from Pace University in New York with a degree in Computer Science in 1992. He is a former computer specialist at IBM. During his long career in IT, he has worked for a number of major service providers in various roles related to data storage, management, and protection.
- How to Recover Data from an External Hard Drive
- How to Recover Data From a Dead External Hard Drive
- How to Recover Deleted Music, Songs & Audio Files on Windows
- How to Recover Deleted Files From a Flash Drive
- How to Recover Files From an SD Card on Mac
- Frisco, Texas, United States
Yevgeniy Tolkunov is Hardware Engineer at ACE Data Recovery. Yevgeniy has a Master's Degree in Physics, Information Technology; 15+ years of experience.
Unsupported browser
This site was designed for modern browsers and tested with Internet Explorer version 10 and later.
It may not look or work correctly on your browser.
- Productivity
How to Recover an Unsaved PowerPoint
We’ve all been there: working on a presentation in PowerPoint, when suddenly, the app crashes!
Remember that moment of panic, thinking all of your hard work has been lost? You need to know how to recover unsaved PowerPoint files to save you time and a headache.

Not every PowerPoint is recoverable. But with a few steps, you can recover unsaved PowerPoint files in most cases. We'll cover that in this tutorial. Plus, you'll learn how to avoid lost PowerPoint files altogether.
How to Recover Unsaved PowerPoint Files
When you learn how to recover unsaved PowerPoint slides, you can avert a crisis. In moments, you can be back to work, without losing content.
Consider times when you need to know how to recover unsaved PowerPoint presentations. You may accidentally close a file before saving, resulting in lost changes and edits. Or PowerPoint might crash. This could be caused by the app itself, or another issue.
When you learn how to recover unsaved PowerPoint decks, you can work stress-free. Even if an incident happens where PowerPoint closes, you’ll be comfortable knowing that you can recover your work.

Recovering unsaved PowerPoint files helps you save the best presentations you build. But how do you build amazing presentations? Easy.
With the Novate PowerPoint Presentation Template , you can build stunning slides every day. It's part of Envato Elements , an all-you-can-download creative subscription. We’ll use the Novate template to learn how to recover unsaved PowerPoint files. Download it today to follow along.
No matter which operating system you use, PowerPoint attempts to recover unsaved files. This will occur automatically when you reopen the app. In many cases, this instantly brings back your lost work. But sometimes, you have to dig deeper. Keep reading to learn how.
1. Recover Unsaved PowerPoint Files on Windows
First, we’ll learn how to recover unsaved PPT decks on Microsoft Windows. The first step I like to take doesn’t always solve the issue, but it’s quick and easy. That’s because sometimes, you may actually have a saved copy of your slide deck.
Does PowerPoint autosave? Let's find out.
To check, click on the File tab in PowerPoint. Then, on the Home tab, look under Recent . If your presentation is listed there, click on it, and save it under a new name to start editing again.
Unfortunately, chances are that unsaved PPT files won’t appear in your Recent list. But you’re well on your way to getting them back.

Stay in the File > Home > Recent section, now scrolling to the bottom. You’ll see a message there labeled Recover Unsaved Presentations. Go ahead and click on it.
Depending upon how many PPT decks you’ve opened recently, you may not see this option. The Recover Unsaved Presentations button hides when you've got many recent files. To find it, click on More Presentations , and you’ll now see it at the bottom of the list of files.

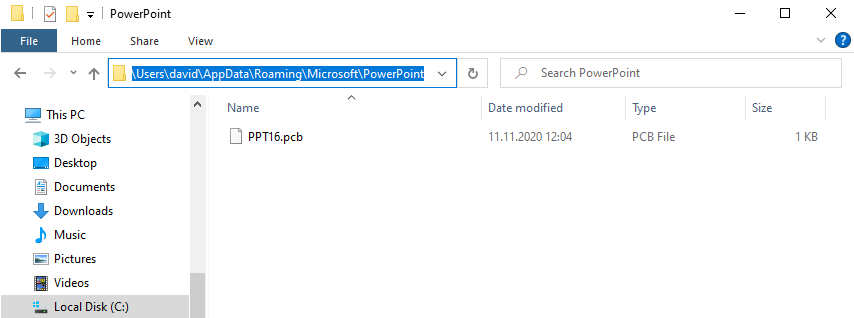
PowerPoint launches the Open file browser. It's pointed to the folder where unsaved, temporary PPTX files are kept. In many cases, this file path is AppData > Roaming > Microsoft > PowerPoint. If you have an unsaved file here, click it, then choose Open . Your missing slides open.
Before doing anything else, be sure to go to File > Save As. Rename the presentation and save a new copy. Now, it’s safe to start working and editing again.
This recovery technique uses a powerful PPT feature called AutoRecover. It's built to help you get back lost work. In essence, it answers "does PowerPoint autosave?" By default, the app saves a recovery file every ten minutes that you have the slide deck open.
2. Recover Unsaved PowerPoint Files on macOS
PowerPoint works great on macOS, too! It’s growing more popular, and you may find yourself with an unsaved file on your Apple computer. Luckily, there are good Mac-based options to recover your unsaved work. Let’s work through some of them now.
To begin, you can check your Recent files, just in case there's a saved copy of your slide deck on your Mac. With PowerPoint back open, go to the File drop-down menu in the upper left. Click it, then hover over Open Recent.
If you see your missing slides, click on them and PowerPoint opens the deck. Again, you’ll want to save a new copy of the file to ensure it’s editable and won’t become lost once more.

When you cannot find your missing file in your Recent list, you’re not out of options. Your next best step is to find where PowerPoint stores temporary files on your Mac. There’s a good chance that your lost PPT will be held there.
To get started, open Terminal on your Mac. To reach Terminal, open your Other folder in Launchpad. Or, you can simply launch it by opening a Spotlight search and typing in Terminal .
With Terminal open, paste in the following where the cursor is positioned by default:
echo $TMPDIR
Then, press Return on your keyboard. Next, paste in the following and hit Return again:
open $TMPDIR

Your Mac launches the T (Temporary) folder, which contains many subfolders. Scroll down until you see the one labeled com.microsoft.Powerpoint. Open it up, and inside, you’ll see the TemporaryItems folder.

If PowerPoint has kept a recovery copy of your slides, you'll find it there.
As you can see, there are good options to recover unsaved PowerPoint files. They vary between operating systems, but they’re available for both Windows and Mac. It’s a good idea to familiarize yourself with these techniques before you need them. That way, you can act fast when a slide deck goes missing!
How to Prevent Loss of PowerPoint Files
In PowerPoint, there are two distinct ways that files are saved or archived. These are the AutoSave and AutoRecover options. AutoSave is the easiest and best option.
It does exactly what the name suggests. Whenever you make a change to your slide deck, a copy is automatically saved. Even if PowerPoint (or your computer) crashes, you’ll be able to easily retrieve your slides. However, AutoSave isn't enabled by default in Microsoft PowerPoint.
Turning on AutoSave works identically on both Windows and Mac. With PowerPoint open, look in the upper left corner of the screen, on the orange menu bar. You’ll see a toggle button labeled AutoSave . To enable AutoSave , click on the button so that it reads On .
Now, any time you make a change in your PPT slide deck, it'll be saved automatically. If PowerPoint crashes, your finished presentation is saved and ready to work with.

Windows and Mac both support PowerPoint’s other leading way to retrieve lost files. That’s AutoRecover , and you saw it demonstrated above where we retrieved temporary files.
As mentioned, by default, AutoRecover saves files every ten minutes. That means that if you’ve made just a few quick edits, you might lose your work if PPT crashes.
Fortunately, you can change the interval so that AutoRecover saves a backup of your PPT more often. To do this, use the following steps on Windows:
- Go to File > Options .
- Click on the Save tab in the PowerPoint Options sidebar.
- In the Save Presentations group, ensure that the S ave AutoRecover Information box is checked. Then, lower the time from the default of 10 minutes to a lower value, like every 2 minutes.

Now, an AutoRecover file of your PPT will be retained more frequently. This enables you to rescue your lost PPT files easily.
Working on a Mac? To step up the pace of AutoRecover , follow these steps:
- Click on the PowerPoint button in the top left corner of your screen.
- From the drop-down, choose Preferences.
- In the Output and Sharing group, click Save .
- Change the time interval using the arrow buttons.

As you can see, it’s easy to avoid the loss of PowerPoint files. Before you get to work building presentations, be sure to enable AutoSave.
Does PowerPoint autosave? With this tweak, absolutely!
And it’s always a good idea to generate AutoRecover save points more frequently. When you do, you can work with peace of mind knowing that you’ll never lose any work in Microsoft PowerPoint.
The Best Source for Simple PowerPoint Templates (With Unlimited Use)
Envato Elements is a subscription that offers an unlimited variety of PowerPoint templates . These templates come in a variety of styles and designs, making it easy to find one that fits your specific needs.
Find PowerPoint Templates

When you use Envato Elements, you’ll enjoy:
- Access to a large library of templates. With Elements, you'll have thousands of templates at your fingertips. These modern, professional designs that are sure to make your presentations stand out.
- Regular updates. New templates are constantly being added to the library, so you'll never run out of options. Check back often for new favorites!
- Ease of use. All templates are easy to customize and are fully editable in PowerPoint. This makes them accessible, flexible options for users of all skill levels.
By joining Envato Elements, you'll have unlimited access. That includes professional PowerPoint templates that'll help you create engaging, visually appealing presentations.
Join today to enjoy the benefits of Envato Elements. You’ll be glad you did!
Keep Learning Microsoft PowerPoint
Now, you know how to recover unsaved PPT files. This valuable skill is a great one to build on with more helpful articles. Keep learning, even after you've mastered how to recover unsaved PowerPoint files.
Check out more top tutorials with the links below. We've compiled the best PowerPoint resources in our guide, How to Use PowerPoint (Ultimate Tutorial Guide.)

More Top Templates for Microsoft PowerPoint
Let's say that our steps for how to recover unsaved PPT files didn't work. It's regretful, but unfortunately, it happens.
What you can do at this point is rebuild in an efficient way. That means starting not from scratch, but with the help of a template. These templates have most of the work done for you . Just fill them in with your content. See more of the best templates in these articles:

Now You Know How to Recover Unsaved PowerPoint Presentations
You know now how to recover unsaved PowerPoint files if at all possible. Remember: if you lose your PowerPoint, restart with a premium template. It helps you make your deadline without starting from a blank slate.
You may not need this skill today, but it's an important one to know for the future. Bookmark this tutorial on how to recover unsaved PPT for when disaster strikes. You might just be able to save the time versus rebuilding your slide deck!

Data Recovery
6 Actional Solutions to Make PowerPoint File Recovery 100% Successful
When your PowerPoint file is lost for crashing, not responding, unsaved operation, overwritten, accidental deletion, corruption, etc. you should come here and acquire the best 6 skills to recover PowerPoint file right now.
PowerPoint is the easy and common way to present your work in the meeting or course. However, the sudden crash or corruption, even the accidental deletion will destroy your efforts to make the PowerPoint file.
There is nothing worse than the sinking feeling you get after losing something important, except maybe the thought of never getting it back.
The lost PowerPoint file can be recovered here. That's the point we will talk today.
You will get the best and efficient 6 approaches to getting the PowerPoint file recovery . There is always one approach is exactly for you.

Recover PowerPoint File
This post comes to be a little longer, and an outline is given to you first.
Jump to the part that you need exactly.
#1. Recover powerPoint presentations deleted/unsaved/overwritten/disappeared (Easiest)
#2. undelete powerpoint file from recycle bin (deleted powerpoint file), #3. recover powerpoint file from recent (unsaved powerpoint file).
- #4. Get back PowerPoint file from AutoRecover (files closed before saving)
#5. Find back PowerPoint document from temporary files (saved-over PowerPoint file)
#6. restore powerpoint file from previous version (overwritten powerpoint), #7. faqs about recovering powerpoint file.
The first method is the the easiest way to recover the PowerPoint file, whether your PowerPoint file is deleted, unsaved, disappeared, etc.
You just need to use the professional PowerPoint File Recovery software to help you the lost file.
- Recover the deleted PowerPoint file in 1997, 2000, 2002, 2003, 2007, 2010, 2013, and 2016 in pptx, ppt, pps, ppsx, etc.
- Retrieve the PowerPoint file that is crashing, not responding, corresponding, corrupted, unsaved, overwritten, etc.
- Get back the lost Word (even from previous version) , PowerPoint, RTF, TXT, HTML, etc.
- Find the lost images, videos, emails, audio and other data from your computer.
- Undelete the lost or deleted files from memory card, flash drive, removable drives, etc.
Now, let's see how it works.
Step 1 Free download this software on your computer, install and run it immediately. In the main interface, click "Document" and select the hard drive where you lost the PowerPoint file. Click Scan to start to scan the lost document files including PowerPoint.

Step 2 In the scanning result, you will see the Document folder. Click it to find the PPT or PPTX folder.

Step 3 Click the PowerPoint folder, and checkmark the files that you want to restore. Click Recover to start to save the lost PowerPoint files to your computer.

Recycle Bin is the first place to store your deleted PowerPoint document. If you find your PowerPoint is lost, just go to Recycle Bin to see if it is there.
If it is there, just right click it, select Restore to drag it to its original place.

If you cannot find it in Recycle Bin, just move on the reading.
If your PowerPoint is unsaved because your system is forced shut-down or PowerPoint is not responding, etc. you could find back the unsaved PowerPoint file from Recent.
Now, let's check the steps.
Run a PowerPoint file, click File > Recent and you will see all recent presentations in the list. Select the one that you need and click Recover Unsaved Presentations.

You should note that once you close all the recent PowerPoint presentations, you will be given no change to open it gain.
If you did that, just move to the next solution.
#4. Get back PowerPoint file from AutoRecover (files closed before saving))
AutoRecover is the built-in feature from all Microsoft Office products, including PowerPoint. It will automatically save your PowerPoint files in the frequent time.
For recovering the lost PowerPoint file, you just need to make sure it is enabled.
Step 1 Open a PowerPoint document, click File tab > Options.

Step 2 Choose Save options from the left, copy and paste the location of AutoRecover file location.

Step 3 Navigate the location to find your AutoRecover PowerPoint file, click it to see if it is the recovery PowerPoint file.

When you open the restored PowerPoint document, you may notice that there may be some data missed within it. Why?
It is because the restored PowerPoint file is saved in a certain time frequency. The changes you made may fail to be saved beyond the time.
When your PowerPoint file is saved over, and you may find you still want the old one, then you can refer to this method, recover PowerPoint file from temporary (temp) file.
Step 1 Find temporary files by clicking Start > Type CMD in the search box > Right click on CMD and choose Run as Administrator > Input %Temp% in the command prompt.

Step 2 Find the lost PowerPoint file, and copy it in another place. Change the extension to pptx or ppt as you created it before. Then you can recover the PowerPoint file again.
When you open the PowerPoint file, it will give you the option to restore the PowerPoint file from the last saving. Otherwise, you will find no one file.
If you overwrite your PowerPoint in a new document, then you need to restore the PowerPoint file from Windows backup files.
Previous versions are either copies of files and folders created by Windows Backup or copies of files and folders that Windows automatically saves as part of a restore point. You can use it to restore files or folders.
Find the replaced PowerPoint file, right click it to choose Restore previous versions. Then a pop-up window will be given to you to select the PowerPoint file version that you want to recover. Select it and click Open to view the PowerPoint recovery.

1. Does PowerPoint save automatically?
Yes. The new feature AutoSave in PowerPoint, Excel and Word will help you save files automatically, every 10 minutes, as you work.
2. Where are Autosaved PowerPoint files stored?
The temporary files for PowerPoint can be saved in "C:\Users\<username>\AppData\Local\Microsoft\Office\UnsavedFiles" on Windows 8/Windows 7/Windows Vista.
3. Can you recover a PowerPoint you didn't save?
Yes. You can go to File > Recent, and click on Recover Unsaved Presentations to recover unsaved file. If you have enabled AutoRecover function before, you can go to File > Options > Save, and check the AutoRecover file location to find the lost file.
Now we are coming to the last part in this post. This page mainly talks about the best 6 solutions to help you recover the lost or deleted PowerPoint files. Not everyone (the first five) method is your cup of tea, but you can choose the best one method (the last one method) to help you to get the PowerPoint document recovery.
I'd also like to hear from you: have you used any of these strategies to get PowerPoint file recovery?
Leave a comment and let me know.
What do you think of this post?
Rating: 4.8 / 5 (based on 235 votes)

January 11, 2021 17:21 / Updated by Amanda Brown to Recover Windows Data

Want to find some PowerPoint alternatives? We list some best alternatives to PowerPoint presentation like Prezi and online PowerPoint presentation in this post.

What is the best PowerPoint viewer to read PPT files? This post will share you free PowerPoint viewer for Mac/online and for mobile.

Want to insert some vivid GIF to your PowerPoint? Just refer to the following article about the proper ways to insert GIF files into PowerPoint.
About | Privacy | Resource
Copyright © 2024 Aiseesoft Studio. All rights reserved.
- Data Recovery for Windows
- Data Recovery for Mac
- Data Recovery for Free
- Repairit for Desktop AI
- Repairit Online AI
- Repairit for Email
- UBackit Data Backup
- Office Document Solutions
- Photo/Video/Audio/Camera Solutions
- Email-Related Solutions
- Windows Computer Solutions
- Mac Computer Solutions
- Linux Solutions
- Hard Drive Solutions
- SD Card Solutions
- USB Drive Solutions
- NAS Disk Solutions
- Data Backup Solutions
- File Format
- File System
- Storage Media
- Disk Parition
- DOWNLOAD DOWNLOAD
- Buy Now Buy Now

PowerPoint File Recovery
- Recovers deleted, lost, and unsaved PPT files effectively and completely.
- Handles 500+ data loss scenarios, including accidental deletion, system crash, disk corruption, virus attack, etc.
- Recovers lost documents, photos, videos, music, and other 1000+ file types with a high success rate.
- How to Fix Missing DLL files in Windows 10
- 4 Methods to Fix the Cannot Delete Files Error
- How to Recover Shortcut Files in USB
- How to Recover Unsaved or Deleted Wordpad Document
- How to Restore Corrupted Files on Windows?
- How to Use Testdisk to Recover Files on Windows?
- [2024] Top 10 Free Data Recovery Software for PC (Windows 10/11 & Mac)
- How To Recover a Deleted or Unsaved PowerPoint on Mac
- How To Recover Unsaved Word Document | 7 Ways
- How to Recover Unsaved Excel Files | 6 Methods
PowerPoint File Recovery: How To Recover Unsaved or Deleted PowerPoint Files
- How to Backup QNAP to QNAP NAS
- How to Backup Windows 10 to QNAP NAS
- How To Back Up Your QNAP NAS Using Veeam Backup & Replication?
- Guide to Setup and Configure RAID on QNAP NAS
- What Is Plex Media Server for QNAP and How to Use it?
- Everything You Need to Know About Veeam NAS Backup and Recovery
- Linux vs. Windows - What are the differences between Linux and Windows
- How to Repair Linux Disk Using FSCK and Recover Linux File?
- Recovering Deleted Linux Files for Free – Best Tools to Get It Over Within a Heartbeat
- How to Sync Files between Two Linux Server?
- How to Mount Linux Drive on Windows for Free
- How to Access Windows Partitions from Linux/Ubuntu?
- How to Recover Deleted Windows Files With Linux
- How To Delete Files in Linux/Unix
- How to Recover Files Deleted from the Recycle Bin?
- How to Empty the Recycle Bin on Windows
- The Quick and Easy Way to Delete Windows Update Files
- How to Fix Microsoft Excel cannot Paste the Data Error
- How to Recover Permanently Deleted Files from PC
- 4 Easy Solutions To Delete Downloads From Any Device
- How to Recover Deleted Files from Computer
- How to Recover Permanently Deleted Folders | 5 Ways
- Top 15 Undelete Freeware to Help You Recover Lost Files
- 5 Easy Ways to Delete Undeletable Files
- How to Clear Playlist and Library in Windows Media Player
- How to Clear Cache and Cookies in Safari
- How to Clear Cookies in Internet Explorer
- How to Remove Bookmarks from Firefox
- How to Permanently Delete Files from Windows
- How to Recover Files from Emptied Recycle Bin or Trash on Mac
- How to Recover Deleted Folders and Files
- How to Fix Missing DLL Files? [2024]
- How to Get Wondershare Recoverit Crack/ Gratis/Coupon?
- How to Get Wondershare Recoverit 10 Activation/Serial Key?
- How To Fix the Terraria "Load Failed, No Backup Found" Error
- How To Recover Deleted Minecraft Worlds (Java & Bedrock)

Since its release in 1987, PowerPoint has been a go-to platform for creating presentations that support speeches with graphical data. The app first used the PPT format, which was replaced by PPTX in 2007 and brought numerous improvements.
However, neither the PPTX format nor the PowerPoint app are perfect. The files are prone to corruption and viruses, and forgetting to save your work or experiencing a system crash when working with PowerPoint can lead to data loss.
Fortunately, Microsoft has fixed most issues with AutoSave and AutoRecovery features, but there's still a need for a reputable data recovery solution.
Table of Content
How powerpoint files get lost.
- Recover Deleted/Lost/Unsaved PPT With Wondershare Recoverit
- Look for Your Unsaved PowerPoint Files in Temporary Folder
- Use PowerPoint's Recover Unsaved Presentations Feature
- Recover an Unsaved PPT File Using PowerPoint AutoRecover
- Recover a Deleted PowerPoint File From Recycle Bin
- Recover a Lost PowerPoint File Using Windows File History
How To Ensure You Don't Lose PowerPoint Files in the Future
To help you navigate various data loss scenarios, we've created a detailed table explaining how PowerPoint files get lost, the causes behind these issues, and their appropriate solutions.
| PowerPoint File Loss Scenario | Cause | Solution |
| Accidentally Deleted PPT/PPTX Data or Formatted HDD/SSD | . . . | |
| Accidentally Closed PowerPoint Without Saving | . . | |
| Crashed PowerPoint App | . . . | |
| Crashed Operating System | . . . | |
| Viruses and Malware | . | |
| PowerPoint File Corruption | . . |
How To Recover Deleted or Unsaved PowerPoint Files
Now that we know more about the possible issues related to PowerPoint files and their respective causes and solutions, we can dive straight into the steps for applying each solution. In this article, we are focusing on recovering a deleted or unsaved PowerPoint file on Windows 11/10. If you are a Mac user, you can refer to our guide for PowerPoint file recovery on Mac .
Method 1. Recover Deleted/Lost/Unsaved PPT With Wondershare Recoverit
Situations where your deleted or unsaved PowerPoint files are gone can be particularly frustrating. Fortunately, dedicated data recovery solutions like Wondershare Recoverit can help and work wonders in numerous data loss cases.
- Recover deleted, unsaved, or lost PPT/PPTX files effectively, safely, and completely.
- Manages over 500 data loss situations, such as accidental deletion, app or system crashes, virus infection, and hard drive failure.
- Repairs corrupted PowerPoint file automatically in the preview process.

Using the app is also incredibly straightforward. Here's how you can do that:

Accidentally deleting data like PowerPoint presentations can be scary. Still, there's nothing to fear when you have a dedicated data recovery tool like Wondershare Recoverit. Recovering deleted files is quick and effortless - as you can see, it only takes a few clicks and minutes of your time.
It can recover over 1,000 file types, including photos, videos, music, and documents, and works wonders with over 2,000 different storage devices like internal and external drives, NAS servers, USBs, etc.
Method 2. Look for Your Unsaved PowerPoint Files in Temporary Folder
Windows and macOS systems have a temporary file folder, also known as a cache folder, which stores the most recent data the user or system uses. This folder is often filled with recently downloaded Windows or macOS updates, files downloaded through the browser, and items currently in use, like PPT/PPTX files.
Therefore, looking into these folders on either operating system for PowerPoint presentations is an excellent idea. On Windows, you can access the folder by following these steps:
- Open File Explorer and navigate to C:\Users\ YourUserName \AppData\Roaming\Microsoft .

- Copy and paste these files to the desktop and change their extension from ".tmp" to ".ppt" or ".pptx" depending on your Microsoft Office version, with PPTX being the default format for versions from 2007 and newer.
For macOS, you'll need to follow different steps:
- Close down all your active applications.
- In Finder, click on Go > Go to Folder , and enter the following command: ~/Library/Caches
- Once inside the cache folder on Mac, locate PPT/PPTX files and drag them to the desktop, or open them and save your presentations elsewhere.
It's worth noting that deleting temporary files and cache is also an excellent way to increase your storage space, but it should only be done after you've found the data you need.
Method 3. Use PowerPoint's Recover Unsaved Presentations Feature
Temporary or cached PPT/PPTX files can also be found in the Microsoft PowerPoint app through the Recent feature, which requires similar steps on Windows and macOS. Here's how you can find it:
- Launch the Microsoft PowerPoint app after it or the system has crashed.
- Click the File menu and then select Open .

- Choose the unsaved recent PowerPoint presentation and open it.
It's highly recommended that you save the file to a safe location as soon as you open it to avoid app or system crashes affecting your files again.
Method 4. Recover an Unsaved PPT File Using PowerPoint AutoRecover
The last few versions of PowerPoint include a nifty little feature called AutoRecover. Microsoft added this feature into a few Office apps to allow users to recover files in case of system or app crashes. You can find the AutoRecover feature by following these steps on Windows or macOS:
- Open a PowerPoint presentation and navigate to File > Home > Options > Save .

- Open Windows Explorer, paste the path on the address bar and hit"Enter" to search the lost unsaved PowerPoint file.

You can also change the frequency of the Autorecover feature by modifying the Save every X minutes box. The AutoRecover File Location box is also here, allowing you to change the location where PowerPoint files are saved.
Method 5. Recover a Deleted PowerPoint File From Recycle Bin
If you've accidentally deleted PowerPoint presentations that you still need, these PPT or PPTX files have likely wound up in Windows' Recycle Bin, so you can effortlessly recover them. Here's how:
- Open the Recycle Bin.

- Find the restored PPT/PPTX files in the folders they've previously occupied before deletion.
If you have emptied the Recycle Bin , you'll need to go back to the Wondershare Recoverit solution and use that, as a dedicated data recovery app is the only thing that can help in such situations.
Try Wondershare Recoverit to Recover Unsaved/Deleted PowerPoint
Method 6. recover a lost powerpoint file using windows file history.
If you're a Windows user, you're likely aware of the built-in backup and recovery tools by the name File History. This tool is handy in situations related to accidental file deletion, failing disk drives, and mistakenly formatted storage devices.
Here's how to use File History on Windows 10 to recover your lost or unsaved PowerPoint presentations:

- Click it, then you will get the list of the backed up files. Find the unsaved powerpoint file you wish to recover, then click the green icon to restore it.
If you have upgraded your system to the latest Windows 11 version, follow these steps:

- If you didn't use File History before, you need to turn it on and select a drive to backup.

- Check the avaiable backup files and find the powerpoint file you are trying to recover.
- Once you find it, click the green icon and restore it.

Remember that you can only use File History if you've previously set up these features and use them as backup options. If that's not the case, you'll have to use the mentioned data recovery method.
Although recovering PPT/PPTX nowadays is effortless, with numerous solutions that can help regardless of how you lost data, prevention is still better than treating. We've included a few tips to help you avoid PowerPoint data loss in the future:
- Manually Save Files - While Microsoft's AutoSave and AutoRecover features are fantastic, and you should undoubtedly keep them enabled on supported apps, manually saving your work is still relevant and necessary. Creating a habit of hitting CTRL + S whenever you get up from the PC or every few minutes can be immensely helpful.
- Use Reliable Backup Software - Windows and macOS provide decent and helpful built-in backup tools like Backup and Restore , File History , and Time Machine . However, a dedicated backup tool like Wondershare UBackit is even better, providing more options and features like scheduled and automatic backups.
- Install a Trustworthy Antivirus - Keeping a reliable AV or anti-malware tool on your computer is vital for protecting yourself from digital threats. And since viruses and malware can cause chaos, delete data, encrypt files, and lead to corruption, there are even more reasons to get a proper security app.
- Invest in a UPS - System crashes are often caused by power loss, and if you live in an area where power surges are common, investing in a UPS is a terrific idea. Not only will it save you from losing valuable data, but it'll also keep your hardware components healthy, as power surges can damage them.
Separating your OS, applications, media, and vital or work files is also a great option, and you can do that by dividing your disk drive into partitions. Alternatively, you can invest in multiple HDD/SSDs, each with different types of files.
Microsoft PowerPoint is one of the most widely used applications for creating graphical presentations that support speeches. It uses PPT and PPTX files, which, although massively improved over the years, are still prone to accidental deletion, viruses, or corruption. The app can also suffer from power losses and system crashes, resulting in deleted or unsaved PowerPoint presentations.
There are numerous culprits behind PowerPoint presentation data loss, and we've included a detailed table with the most common cases and their causes and appropriate solutions.
From utilizing PowerPoint's AutoSave and AutoRecover features to looking through temporary files to using dedicated data recovery tools like Wondershare Recoverit, there are numerous methods for retrieving PPT/PPTX data, and we've included the top solutions for recovering deleted and unsaved PowerPoint files.
Easily recover deleted or lost files from 2000+ storage devices like HDDs, SSDs, external drivs, USB drives, memory cards, and more. The software confidently retrieves all data types, regardless of how they went missing.
You May Also Like

Related articles
Free All-in-One Office Suite with PDF Editor
Edit Word, Excel, and PPT for FREE.
Read, edit, and convert PDFs with the powerful PDF toolkit.
Microsoft-like interface, easy to use.
Windows • MacOS • Linux • iOS • Android

- Articles of PPT
2 Easiest Ways to Recover Unsaved PowerPoint (Step-by-Step Guide)
Working with PowerPoint and other office software is becoming increasingly popular, especially since the onset of COVID-19. Alongside this trend, users facing challenges have become more common, with their presentations occasionally getting lost due to errors or unexpected interruptions in PowerPoint. However, there's no need to worry; PowerPoint presentations can be recovered. In this article, we will discuss methods to recover unsaved presentations on both Mac and Windows. So, let's proceed to recover your presentation!
How to Recover Unsaved PowerPoint on Windows (In Easy Steps)
In this section, we will learn how to recover unsaved PowerPoint files on Windows, so, let's get started!
Method1: Using the “Recover Unsaved Presentations” Feature in PowerPoint
In this method, we will utilize PowerPoint's built-in feature called "Recover Unsaved Presentations:
Step 1: Open the PowerPoint app on your Windows system and go to the "Open" tab in the sidebar. There, you will find the option for "Recover Unsaved Presentation".
Step 2: The system will then prompt you to the location of unsaved files within File Explorer. You can also manually navigate to the directory.
Step 3: In the directory, you will see a list of recoverable PPT files. Select the latest version to restore.
Step 4: Make sure to save your recovered PowerPoint file in a safe and easily accessible location. It's recommended to save it as a copy.
Method 2: Using the AutoRecover Feature to Recover Unsaved PowerPoint
Step 1: Open PowerPoint, click "File" in the upper left corner, and select "Options" from the dropdown.
Step 2: In the PowerPoint Options window, choose "Save" from the left-hand menu, locate "AutoRecover file location", and copy the following path:
C:\Users\username\AppData\Roaming\Microsoft\PowerPoint
Step 3: Open File Explorer, then paste and browse the copied path to locate the unsaved file you need.
Step 4: Copy the unsaved file to a secure location, change its file extension to .pptx or .ppt, and attempt to open and save it in another location.
How to Recover Unsaved PowerPoint on Mac (Easy & Quick)
Mac users can recover their unsaved presentation files easily as follows:
Method 1: Check Recent Files on Mac
Step 1: Start the PowerPoint application on your Mac.
Step 2: Navigate to the menu bar at the top of your screen. Click on "File" and select "Open Recent" from the dropdown menu. Click on Presentation to move forward.
Step 3: Choose the file you need, and it will open in PowerPoint.
Step 4: Now, go to "File" again, but this time, select "Save As" and pick your desired location to save the file.
Method 2: Using AutoSave Feature on Mac (If Enabled)
Step 1: Open PowerPoint on your Mac, then go to "Preferences".
Step 2: In the Preferences menu, click on "Save" in the Preference window.
Step 3: Make sure the box next to "Save AutoRecover info every" is checked, this enables AutoSave.
To Find the AutoRecovery Folder:
Step 1: Quickly locate the PowerPoint AutoSave folder on your Mac. Open Finder, click "Go" in the menu, and select "Go to Folder".
Step 2: Copy and paste the following folder path in the search field, replacing "username" with your username:
/Users/username/Library/Containers/com.Microsoft.Powerpoint/Data/Library/Preferences/AutoRecovery
Step 2: Once you find the necessary file, you can either drag and drop it into a different folder or open the PPT presentation and click "File" > "Save as".
How to Avoid PowerPoint from Being Unsaved Again
What is wps office and why choose it.
Unexpected power outages and computer crashes can disrupt your work at any moment. To maintain productivity and safeguard your work, it's crucial to utilize the right resources. WPS Office offers a solution by providing cloud storage options that automatically save your work as you progress. This comprehensive office suite is highly compatible, allowing you to seamlessly work on documents, presentations, and spreadsheets without any concerns. Plus, its compatibility with Microsoft Office ensures smooth collaboration and hassle-free document sharing.
Edit Your PowerPoint Presentations with WPS Office
Step 1: To kickstart the editing process, the initial step involves downloading WPS Office. Head to the official WPS Office website to initiate the download.
Step 2: Open the WPS Office application once it has been successfully downloaded.
Step 3: After launching WPS Office, choose "Slides" from the Side Bar, and then you’ll see the “Open” icon, click on it to open your PowerPoint Presentation.
Step 4: Elevate the quality of your presentation with ease by making use of the diverse editing tools available in WPS Presentation!
Step 5: Once your presentation is ready, click on the menu in the top left corner. Then, select the "Save" option to store your presentation safely on your computer.
Use Cloud Storage Service
WPS Cloud is a comprehensive document storage and management service integrated with WPS Office. It offers users 1GB of free storage space for files and rich media. Documents are automatically saved to WPS Cloud, allowing file roaming and cross-device accessibility.
Creating a New Folder:
Step 1: In WPS Office , click on "Files" in the sidebar menu.
Step 2 : Select "WPS Drive." You'll see all your files stored in WPS Cloud. Now, click on "New" and then choose "Folder" to create a new folder in WPS Cloud.
To delete a single file:
Step 1: Go back to "WPS Drive" and locate the file you want to delete.
Step 2: Right-click on the file, then choose "Delete" from the context menu to remove it from WPS Drive.
Downloading Files:
Step 1: In "WPS Drive", locate the file you wish to download.
Step 2: Right-click on the file and select "Export" from the context menu.
Step 3: Choose the location to save the file and click "Save".
Use Word, Excel, and PPT for FREE, No Ads.
Edit PDF files with the powerful PDF toolkit.
Microsoft-like interface. Easy to learn. 100% Compatibility.
Boost your productivity with WPS's abundant free Word, Excel, PPT, and CV templates.
Q1. What is the standard storage space provided for a WPS account?
A standard WPS account comes with 1 GB of storage in the cloud. You can save documents, spreadsheets, and other files there. But if you need additional space, you can get a Premium account. You get 20 GB of storage with a Premium account. You have to pay for Premium every month for a monthly subscription. It is practical if you usually make and save big files using WPS.
Q2. Do PowerPoint presentations save automatically?
Yes, PowerPoint presentations do have an autosave feature. By default, PowerPoint autosaves your work every 10 minutes. This feature protects your work in case of unforeseen issues like power outages or program crashes. But it's still a good practice to save your work yourself regularly. If you want to retrieve an autosaved file, you can do so from the Backstage view in PowerPoint.
Q3. How do I change the AutoSave frequency in PowerPoint?
To modify how often PowerPoint saves your work automatically, follow this straight-forward step-by-step guide:
Step 1: Open PowerPoint and click on the "File” menu. You can locate this on the Left side.
Step 2: From the menu that displays, select "Options".
Step 3: In the Options window, click on "Save".
Step 4: Look for the "Save AutoRecover information every [X] minutes" field under "Save presentations".
Step 5: Adjust the number in this field to set how often PowerPoint saves your work automatically.
Remember that saving more frequently will secure your work but may slow down the PowerPoint. Therefore, find the ideal option that suits your preferences.
Empower Your PowerPoint Journey with Recovery and Enhancement
However, sometimes, due to power outages or app malfunctions, our hard work in crafting a presentation isn't saved. In this article, we have explored how to recover our unsaved presentations. WPS Office offers the convenience of cloud storage, allowing you to seamlessly recover unsaved presentations. Download WPS Office today and streamline your presentation-making process.
- 1. 3 Easiest Ways to Convert Text to Number in Google Sheets (Step-by-Step)
- 2. 3 Easiest Ways to Separate First and Last Name in Google Sheets (Step-by-Step)
- 3. 2 Easiest Ways to Run Microsoft Office on Linux for Free in 2024 (Step-by-Step)
- 4. How to Recover Drive Windows 10 A Comprehensive Guide
- 5. How to Recover Unsaved Word Documents on Android A Comprehensive Guide
- 6. How to Recover Deleted Word Documents on Android: A Comprehensive Guide

15 years of office industry experience, tech lover and copywriter. Follow me for product reviews, comparisons, and recommendations for new apps and software.
How to Recover a PowerPoint Presentation That Was Closed Without Saving

Accidentally closing a PowerPoint presentation without saving can be a frustrating and time-consuming experience. If you find yourself in this situation, it is important to know that there are several methods you can try to recover your work. In this article, we will explore the various methods for recovering a PowerPoint presentation that was closed without saving, as well as provide tips on how to prevent data loss in the future.
This Article
Why You Should Always Save Your PowerPoint Presentations
Methods for recovering a powerpoint presentation that was closed without saving, using the autorecover feature in powerpoint, troubleshooting tips for powerpoint recovery, preventing data loss in the future: best practices for saving powerpoint presentations, previous articles.
- Length of Literature Review: Guidelines and Best Practices
- Best Way to Use a Plagiarism Checker – Grammarly
- Is time management important?
- Freelance Medical Writing: 7 Most Frequently Asked Questions by Aspiring Medical Writers
- How to Change a PDF File Into a Word Document
- Literature Reviews vs Systematic Reviews: What’s the Difference?
- Online Medical Writing Courses: What You Need to Know Before Taking an Online Medical Writing Course
Before we delve into the recovery process, it is important to understand the importance of saving your PowerPoint presentations. Here are a few reasons why you should always save your work:
- To prevent data loss: Accidentally closing a PowerPoint presentation without saving can result in the loss of all the work you have done since the last time you saved. By saving your work regularly, you can prevent this from happening.
- To avoid losing time: If you lose your work due to an unsaved PowerPoint presentation, you will have to start from scratch or try to recover your work, which can be time-consuming and frustrating. By saving your work regularly, you can avoid this potential time drain.
- To maintain version control: Saving your work regularly can also help you to maintain version control. By saving different versions of your presentation as you work, you can easily go back to a previous version if necessary.
If you have accidentally closed a PowerPoint presentation without saving, there are several methods you can try to recover your work. Here are a few options:
Check the Recycle Bin:
If you have closed a PowerPoint presentation without saving it and have not yet emptied the Recycle Bin, you may be able to recover the file from there. To do this, open the Recycle Bin, find the file you want to recover and select “Restore.”
Check for a Temporary File:
When you create or edit a PowerPoint presentation, a temporary file is automatically saved on your computer. This file is deleted when you save the presentation, but if you close the presentation without saving, the temporary file may still exist. To check for a temporary file, follow these steps:
- Open PowerPoint and go to the File menu.
- Select “Open” and then click the “Browse” button.
- In the “File name” field, type “$” followed by the name of the file you are trying to recover (e.g. “$mypresentation.pptx”).
- Click “Open” to open the temporary file.
If you are able to open the temporary file, you can then save it as a new PowerPoint presentation.
Use a File Recovery Software:
If you are unable to recover the file using the methods above, you may need to use a file recovery software. There are many options available, and these programs can often help you to recover files that have been deleted or lost.
Using the AutoRecover Feature in PowerPoint:
PowerPoint has a built-in feature called AutoRecover that can help you to recover unsaved presentations. To use AutoRecover, follow these steps:
- In the “File name” field, type “*.asd” (without the quotes).
- Click “Open” to open the AutoRecover file.
If you are able to open the AutoRecover file, you can then save it as a new PowerPoint presentation.
The AutoRecover feature in PowerPoint is a useful tool for recovering unsaved presentations. When enabled, AutoRecover saves a copy of your presentation every 10 minutes, so if you accidentally close the presentation without saving, you may be able to recover your work using this feature. Here is how to use AutoRecover in PowerPoint:
1. Enable AutoRecover:
To enable AutoRecover, go to the File menu and select “Options.” In the “Options” window, go to the “Save” tab and check the box next to “Save AutoRecover information every X minutes.” You can adjust the number of minutes between saves by clicking the arrow next to the field.
2. Recover an unsaved presentation:
If you have closed a PowerPoint presentation without saving, you can try to recover your work using AutoRecover. To do this, open PowerPoint and go to the File menu. Select “Open” and then click the “Browse” button. In the “File name” field, type “*.asd” (without the quotes). This will display any AutoRecover files that are available. Select the file you want to recover and click “Open.”
3. Save the recovered presentation:
If you are able to open the AutoRecover file, you will need to save it as a new PowerPoint presentation. To do this, go to the File menu and select “Save As.” Choose a location for the file and give it a new name, then click “Save.”
It is important to note that the AutoRecover feature is not foolproof and may not always work. If you are unable to recover your work using AutoRecover, you may need to try other methods, such as using a file recovery software or checking for a temporary file.
To ensure that you don’t lose your work in the future, it is a good idea to enable the AutoRecover feature and save your presentations regularly. This will give you a backup in case of an unexpected shutdown or other issues. Additionally, consider saving your presentations to a cloud storage service or external hard drive to protect your work further. By following these best practices, you can help to ensure that you don’t lose your work due to an unsaved PowerPoint presentation.
If you have tried the methods for recovering a PowerPoint presentation that was closed without saving and are still unable to recover your work, there are a few troubleshooting tips you can try. Here are a few options to consider:
- Check for a temporary file: As mentioned previously, when you create or edit a PowerPoint presentation, a temporary file is automatically saved on your computer. This file is deleted when you save the presentation, but if you close the presentation without saving, the temporary file may still exist. To check for a temporary file, follow these steps:
- In the “File name” field, type $” followed by the name of the file you are trying to recover (e.g. “$mypresentation.pptx”).
- Use a file recovery software: If you are unable to recover the file using the methods above, you may need to use a file recovery software. There are many options available, and these programs can often help you to recover files that have been deleted or lost.
- Check for a recent backup: If you regularly back up your work, you may be able to recover your presentation from a recent backup.
Accidentally closing a PowerPoint presentation without saving can be frustrating and time-consuming, but there are steps you can take to prevent data loss in the future. Here are some best practices for saving PowerPoint presentations:
1. Save your work regularly:
One of the most effective ways to prevent data loss is to save your work regularly. This will ensure that you have a recent version of your presentation in case of an unexpected shutdown or other issues. You can set PowerPoint to save your work automatically by going to the File menu and selecting “Options,” then going to the “Save” tab and checking the box next to “Save AutoRecover information every X minutes.” You can adjust the number of minutes between saves by clicking the arrow next to the field.
2. Save your presentations to the cloud:
Another way to prevent data loss is to save your presentations to a cloud storage service, such as OneDrive or Google Drive. This will allow you to access your work from any device with an internet connection, and you won’t have to worry about losing your work due to a hard drive failure or other issues.
3. Use a backup service:
If you have important presentations that you can’t afford to lose, consider using a backup service. These services can automatically save copies of your work to a remote location, ensuring that you have a secure backup in case of an unexpected issue.
4. Use external storage:
In addition to saving your work to the cloud or using a backup service, you may also want to consider using external storage, such as an external hard drive or USB drive. This will provide an additional layer of protection for your work and will allow you to easily transport your presentations from one location to another.
By following these best practices, you can help to prevent data loss and ensure that your PowerPoint presentations are always backed up and secure.
In conclusion, if you have accidentally closed a PowerPoint presentation without saving it, there are several methods you can try to recover your work. These include checking the Recycle Bin, looking for a temporary file, using a file recovery software, and using the AutoRecover feature in PowerPoint. If you are unable to recover your work using these methods, there may be other options available, such as checking for a recent backup or using a backup service.
To prevent data loss in the future, it is important to save your work regularly, save your presentations to the cloud or an external storage device, and consider using a backup service. By following these best practices, you can help to ensure that you don’t lose your work due to an unsaved PowerPoint presentation.
Similar Posts

Is Time Management a Skill?
No one can deny that time management is a critical skill in today’s fast-paced world. But do you just learn time management skills or are they skills that some people are naturally good at? If you’re anything like most people, then time management skills are probably one of your biggest challenges. After all, you have…

Need For Storyboard Videos in Businesses
Introduction Storytelling is an essential part of human culture. It can be used to help build trust, create memorable experiences, and more. In marketing, storytelling is particularly effective when paired with visual images or video. Therefore, storyboard videos are a great way to get your message across quickly without sacrificing the quality of the content….

How to Become a Successful Medical Writer
The journey to becoming a medical writer isn’t an easy one. You need to be proficient in many areas and understand what different types of niches you’d like to write in. The pay is great, but to become a successful medical writer, you have to be able to play the game if you want a…

Medical Writing Job Description
When you explore the world of medical writing, you may wonder, among many other things, what a medical writing job description is. What does the role mean? Does it matter what kind of medical writer you want to be? With so many options, how do you know which one is right for you? The truth…

How to Embed a Video in PowerPoint: 5 Best Ways
Do you need to embed a video in your next MS Powerpoint presentation? Maybe you’re giving a talk on the latest advances in artificial intelligence, or perhaps you’re selling aeroplanes and want to illustrate the various parts of an aircraft using PowerPoint. In any case, it is great to embed video in Powerpoint. Adding a…

How to Maximize Productivity as a Medical Writer
As a medical writer, you constantly juggle multiple projects, deadlines, and clients. It can sometimes be overwhelming, and it’s easy to get bogged down and lose productivity. Thus, understanding how to maximize productivity is so crucial for success. It is also essential to produce high-quality content efficiently and effectively. Not only is it important for…
Privacy Overview
| Cookie | Duration | Description |
|---|---|---|
| cookielawinfo-checkbox-analytics | 11 months | This cookie is set by GDPR Cookie Consent plugin. The cookie is used to store the user consent for the cookies in the category "Analytics". |
| cookielawinfo-checkbox-functional | 11 months | The cookie is set by GDPR cookie consent to record the user consent for the cookies in the category "Functional". |
| cookielawinfo-checkbox-necessary | 11 months | This cookie is set by GDPR Cookie Consent plugin. The cookies is used to store the user consent for the cookies in the category "Necessary". |
| cookielawinfo-checkbox-others | 11 months | This cookie is set by GDPR Cookie Consent plugin. The cookie is used to store the user consent for the cookies in the category "Other. |
| cookielawinfo-checkbox-performance | 11 months | This cookie is set by GDPR Cookie Consent plugin. The cookie is used to store the user consent for the cookies in the category "Performance". |
| viewed_cookie_policy | 11 months | The cookie is set by the GDPR Cookie Consent plugin and is used to store whether or not user has consented to the use of cookies. It does not store any personal data. |
Home Blog Design How to Repurpose Your Content on Presentations
How to Repurpose Your Content on Presentations

Working with presentation slides doesn’t mean that the sole purpose of your content is to be delivered in big talk. Sometimes, presenters come up with extremely valuable information that can be lit through different channels: websites, forums, videos, e-books, etc. But the big question arises: how can we actually repurpose a PowerPoint presentation?
This article will discuss the potential of content curation from presentations to other mediums and vice-versa. Join us to learn how to extract the very best of your work and maximize its distribution.
Table of Contents
What Does it Mean to Repurpose Your Presentation?
In which mediums can a presentation be repurposed, benefits of repurposing a presentation, transforming presentations into blog posts and articles, creating infographics from presentations, turning presentations into videos and webinars, developing podcasts or audio content from presentations, converting presentations into social media posts.
- Turning Presentations into E-books or PDFs
What Are Other Possible Formats to Repurpose Your Presentations?
Converting blog posts and articles into presentations, transforming reports and whitepapers into presentations.
- Turning Books and e-books into Presentations
Adapting Case Studies into Presentations
Converting social media content into presentations.
Repurposing means to give a new destination to the content you already created. The core idea behind this action is to reach a new audience, mostly people who didn’t participate in your presentation either for lack of awareness of the event, timezone differences, agenda difficulties, or just because they prefer different mediums to consume information. Presenters basically extract the content that gave life to the presentation slides and tailor that amount of information to the new medium in which they will be distributed. This sometimes implies creating new auxiliary content, such as images, audio files, infographics, videos, etc., to deliver the information through the new channel.
Depending on your interests and niche, presentations can be adapted to a multitude of formats:
- Visual mediums: Infographics, brochures, social media posts (Facebook, Instagram), videos.
- Audiovisual mediums: Podcasts, video courses, and social media posts (Instagram, YouTube, TikTok).
- Written mediums: Blogs, online magazines, whitepapers, business reports, research articles, forums, etc.
- Editorial distribution: e-books, PDFs, magazines, newsletters, etc.
In our experience, reutilizing the contents of your presentation in different mediums can offer the following benefits.
Improved SEO
Whenever we extract a presentation’s images, text, and resources into a web blog format, we generate new content around a group of keywords in which we may already have authority. As a result, this helps a website to grow based on the E-E-A-T algorithm by Google.
Most likely, structure of your presentation and the presentation speech was trimmed down to fit into the allotted time for the talk, so it requires expanding that information to fit in a written copy format with a curated selection of keywords to target. In other cases, instead of expanding the information, it will be necessary to summarize the presentation and adapt it to a medium where smaller pieces of information predominate, as is the case of Twitter posts or other social media posts.
Time Efficiency
Since we’re already working with content previously created, it’s not making content for new mediums from scratch but reusing the material we own. For example, if we talk about converting the slides into social media posts, we can work with templates and save countless hours. It would be taking the text or the images from the slides and fitting them into the new size format . The color scheme for both visual channels is precisely the same; thus, branding consistency is granted.
Extended Reach
Another benefit of repurposing your presentations into other content is to boost your visibility and reach a wider audience.
Let’s say we belong to a local community, and we recently delivered a talk about a potential business solution that addresses the pain points of a 10M people market. Our reach to share our research, proposed solutions, and close business deals will be significantly smaller in a local community than engaging with users across the internet, getting an endorsement from authority websites that can find our solution a cutting-edge technology or even cost-effective.
That kind of reach can only be accomplished by extending the mediums through which we share content, taking a multi-platform approach, and interacting closely with our target audience. In other words, we can build on the reach of our initial presentation by extending the potential network.
Ways to Repurpose Your Presentation or Slide Deck

How do you make your presentation into new content? This section will present tactics to convert presentation slides into different formats. The methodology used is as follows:
- Extracting the key points and text from the slides.
- Repurposing images and other graphics generated for the slides.
- Using the presentation’s outline to guide the newly created content.
- Specific requirements from the new medium.
- How to cater to different audiences.
Our first approach to content repurposing from presentation slides is written copy. Although more flexible than a book, both blog posts and articles have their requirements to grab the audience’s interest and be accepted in a community (this applies explicitly to articles since they go through a moderation process by the editorial team).
From Slide Deck to Blog Post
Start by reviewing each slide in your deck, assuming each slide represents one topic or point. Write down the main points, statistics, quotes, and critical information. Copy significant text and descriptions that explain the slides’ content; if there’s a reference slide, be sure to extract all that information, as it will serve as your reference section at the end of the blog post.
Pro Tip: In Microsoft PowerPoint, you can use Outline View (go to View -> Outline View) to see the structure of your presentation, and in this way extract an initial structure that you could use for your blog post.
Gather all the images, charts and graphs used in the presentation. Sometimes, where the graphics may be insufficient for the post’s length, we can hire a graphic designer to generate new pieces, use AI to generate images ( Midjourney , DALL-E, etc.), or use the templates provided by SlideModel. The visuals should support your narrative and not feel disconnected from what you’re explaining in the blog article. Regarding their quality, the images should be web-optimized to avoid lengthy loading times that can hurt your SEO performance regarding Core Web Vitals.
The outline of the presentation will be the basis for the blog post’s structure. Each slide can become a section or a subheading in the blog.
- Introduction: Introduce the topic and state the purpose of the blog post.
- Body: Use the main sections of the presentation as headings. Under each heading, elaborate on the points made in the corresponding slide. Consider relevant keywords and optimize the copy for SEO.
- Conclusion: Summarize the key takeaways and provide a call to action or final thoughts.
Avoid overusing bullet points; use short phrases, considering the context and potential explanations. Remember to format the content properly since readability is a factor, so remember to use headings, subheadings, and white balance. Unlike the presentation’s speech, preserve a conversational tone so the content doesn’t feel dense—particularly important in technical-styled articles.
From Slide Deck to Article
If we discuss academic articles, the context becomes a bit more restricted since we ought to follow the typical framework for presenting the content. After reviewing the slides, note the main arguments, hypotheses, methodologies, results, and conclusions. Copy significant text, definitions, and explanations that form the backbone of your academic argument.
Process the graphics in the same manner as you did for the blog post, but consider that quality is the most important aspect. Adjust visuals to meet academic standards (high resolution, properly labeled, and cited). If your presentation meets these standards, such as citing APA references in PowerPoint , you have already come a long way.
Base your academic article’s structure on the presentation’s outline. Typically, academic articles follow a structured format:
- Title: Create a concise and informative title.
- Abstract: Summarize the main points and findings.
- Introduction: Introduce the topic, provide background information, and state the research question or hypothesis.
- Methodology: Describe the methods and procedures used in the research.
- Results: Present the findings of the study.
- Discussion: Interpret the results, discuss their implications, and relate them to existing research.
- Conclusion: Summarize the key findings and suggest future research directions.
- References: List all sources cited in the article.
Adhere to the academic standards regarding styling citations (APA, Chicago, MLA, Harvard, etc.) and write in a formal and objective tone appropriate for scholarly work.
Consider the academic audience, including researchers, scholars, and students. Use technical language and in-depth explanations. Explain concepts thoroughly to ensure readers from various educational backgrounds can understand.
Infographics remain amongst the most sought-after pieces of visual communication . Professional graphic designers often work with agencies to transform their presentations or reports into sharable infographics that can easily acquire viral distribution through social media. For this purpose, you need to extract the contents of your presentation (text, graphs, images, icons, and anything else you can find relevant) and convert them into a sort of content brief to deliver to the person in charge of creating the infographic .
Focus on the most impactful and relevant main points, statistics, and essential information. Select brief, punchy text that conveys the main message clearly and can be easily read on an infographic. Then, create an infographic outline based on your presentation’s outline:
- Title: A compelling title that summarizes the infographic’s content.
- Introduction: A brief introductory section to set the context.
- Main Sections: Use key points from the presentation as the main sections of the infographic.
- Conclusion: A concise summary or call to action at the end.
Although graphic designers are well-seasoned at detecting elements with higher visual hierarchy, if there’s any element you consider worth highlighting, please indicate it. Ask for a consistent color scheme; matching your branding’s color palette is best.
Video presentations are a common audiovisual medium, allowing the presenter to introduce many facts engagingly. However, we can repurpose those same videos to create webinars, upload them to social media platforms, and even upload them to our websites.
The first element to consider is deciding whether you intend to repurpose existing videos or if you’re making a video from scratch out of a presentation. In the first case, consider your video’s format, extension, and aspect ratio – then check if it’s suitable for your destination. If yes, upload it, considering the required captions, description, and SEO optimization. If the video requires adjustments, opt for high-quality editing software like Adobe Premiere, Sony Vegas, or similar to perform the necessary tweaks to ensure it meets the destination’s guidelines.
In the second case, you should check all the written or graphical elements and use them as a script for your video. Images such as photos, graphs, charts, etc., can be used. AI video-making tools can make the job easier as you just upload a script and let a human prop speak in your name. The results may look off-putting for some niche audiences, as the characters typically don’t blink during the speech’s length.
How do you convert your presentations into videos? You can easily repurpose your existing PowerPoint presentations into videos by exporting the presentation to video format . Go to File -> Export -> Create Video and create a video presentation with or without your own narration.
Off-camera audio is an option while you present reels or images describing the scenario extracted from your presentation. This is an option used by camera-shy people who intend the focus to be on the content rather than themselves. Finally, you can go all in and record yourself delivering the presentation but to a much deeper level of detail, as there are virtually no time constraints except the ones assigned by you.
In some cases, live webinars may not adhere to the concepts explained above due to the spontaneity with which users can ask questions. In such cases, it’s best to speak with the event’s organizers beforehand and get in touch with the protocols to moderate questions and answers , as well as the allotted time for your talk and if you need to present a handout out of your presentation.
Podcasts are rich experiences in which the audience consumes knowledgeable content at multiple venues, such as at home, driving, at the gym, etc. For this reason, your tone must be attuned to boost audience engagement with the target audience.
First, consider your presentation outline and craft a speech based on it. Depending on how much content you can extract, you can structure the presentation as a one-episode podcast or a series of episodes covering one chapter of your presentation in much broader detail. This last take tends to work better as you can pour in more knowledge and content than what you used for the slides, probably reviewing your research data. Once you have repurposed your presentation as a podcast, you can publish the podcast to distribution platforms, such as Spotify and Anchor.
If your presentation contained audio files, such as brief interviews, you can trim them to fit into the podcast’s episode as an interview you did in the past but currently fits your context. Another approach is to use multiple audio files from the same presentation and create a sort of “guide” covering content you have already delivered. This approach requires a greater editing effort in terms of transitions, balancing volume, and where your new input will be added.
Although they work in different aspect ratios, presentation slides can be repurposed into social media posts quite easily. From the 16:9 aspect ratio of the PPT slide, we ought to transform it to a 1:1 square format if the distribution channel is Instagram or LinkedIn. For example, a presenter can work with our PowerPoint Carousel Templates , which emulate the look of a LinkedIn Carousel. Then, the slides can be exported directly as JPGs and uploaded to LinkedIn or Instagram.
Facebook posts require some additional tweaking, as it admits the following sizing options:
- Square: 2048 x 2048 pixels
- Portrait: 2048 x 3072 pixels
- Landscape: 2048 x 1149 pixels
- Featured image: 1200 x 628 pixels (this is the preferred sizing for Facebook Ads)
NB: If you intend to use your slides as Facebook Ads, be mindful of the rule that ad images should contain less than 20% text.
Turning Presentations into e-books or PDFs
Finally, we can convert our presentation slides into an e-book or a distributable PDF file. This method converts your graphics and written content into something easy to deliver to the target audience, aiming for networking.
Consider which elements inside your slide deck bring the highest value, then decide the length of the PDF or e-book. In the case of a concise PDF, the job is much faster as you have to condense the data into 2 to 3 pages at the top. An e-book, on the other hand, most certainly requires more content than what you already produced. Hence, the outline of your presentation can easily become the book’s outline.
Take graphics into account, as no one would read a dull e-book no matter how interesting your topic may sound (especially if you are a newcomer as an author). Dedicated software like Adobe InDesign makes the job much faster as you can seamlessly integrate text with graphics, allowing you to repurpose graphs, charts, and illustrations without worrying about altering the layout.
Always include your branding information and contact channels for social media, as this printed/digital medium is another networking source. If your e-book falls into the academic/technical side, hire the services of a professional proofreader or editor to ensure the quality standards.
The possibilities for repurposing your presentations in other formats are vast, limited only by your creativity and the needs of your audience. By thinking outside the box and adapting your presentation content to different mediums, you can ensure that your message reaches a wider audience with your content. Here are some other creative ideas and formats for repurposing your presentations.
- Checklists: Develop actionable checklists or cheat sheets from the presentation’s action items or steps.
- Guides: Create step-by-step guides, training manual , or how-to documents from the presentation content.
- Case Studies: Turn any real-life examples or case studies from the presentation into standalone documents.
- Interactive PDFs: Design interactive PDF documents with links, videos, and other multimedia elements.
- Workshops: Use the presentation content to conduct in-person or virtual workshops.
- Quizzes: Develop quizzes or assessments based on the presentation content for educational purposes.
- Slide Decks for Sharing: Optimize and share the slide deck on platforms like SlideShare or LinkedIn.
- Press Releases: Craft a press release highlighting key findings or announcements from the presentation.
- Online Courses: Develop an online course or training program using the presentation material.
- Visual Quotes: Extract impactful quotes or statistics and design them into shareable content and visuals for social media.
Ways to Repurpose Other Content as Presentations
As we reached the second part of this article, we explored multiple options for converting presentations into another format. Now, it’s time to talk the other way around: when we have multimedia elements, reports, articles, etc., that we consider can fit into a presentation format.

Experience tells us it’s best to consider the following questions before approaching this task:
- Is the content ready-made for a presentation slide?
- Do I need to cite sources or request permission to divulge data/research?
- Are there royalty limitations? (In terms of images to be used)
- How can I build a narrative around this point?
Using blog posts or articles as a content source for a presentation follows the same structure, so the instructions work for both origins. First and foremost, we have to grab our reference notes in terms of:
- Cited sources
- Royalty-bound images
Then, for an article, we should consider a storytelling approach , as in Freytag’s Pyramid , where an initial exposure to the topic is made, the rising action leads to the story’s climax, and then the falling action takes us to the resolution.
If you want to save time, you can try out SlideModel.AI, the AI presentation maker by SlideModel . With SlideModel.AI, you can create a presentation starting from a text prompt or convert a text document into a presentation format.
Some images used in blog posts may fit the presentation, although we should check sizing and resolution, as web-optimized images may usually look pixelated in large-screen projectors. Instead, reuse the source files that you worked on to create the web images
Content retrieved from academic articles may require some extra effort to cull the tone for the presentation, but that’s nothing that a presenter with some well-trained presentation skills cannot accomplish.
Reports and whitepapers are technical documents. This means we ought to consider all possible scenarios of data presentation to embellish the information and work with a clean layout—that is unless your aim is to deliver death-by-PowerPoint as your presentation style.
The information extracted from reports and whitepapers must be legible, easy to relate to the original report data, and accompanied by contextual information on its repercussions and how they can influence decision-making . Use the same aesthetic across your slide deck and avoid flashy transition effects. These professional-cut presentations focus on content rather than ‘wowing’ the audience with graphics.
If a chart or graph must be introduced, do not copy/paste it into the slides, as it will most likely not look legible. Instead, search for a presentation template that emulates the same model used and recreate it inside your slide deck. Check out some of our slide deck templates for an appropriate presentation design.
Turning Books and E-books into Presentations
Large-format written media like books and e-books require an additional effort in condensing information. Not all data is relevant to the audience, so you must clearly see the presentation’s objectives and your target audience’s interests. Synthesis skills are important here since you must summarize the important information in a few slides.
You can use chunks of highly important text as a self-quotation, but proceed to explain in your own words rather than reading out loud and leaving the topic as such. Avoid bullet points and excessive walls of text. Instead, opt to include infographics from the content you condensed – that balances texts and graphics well.
Case studies can be theoretical or factual. If the second option is to present, ask for permission from all interested parties before laying out your content in a slide.
Repurposing a case study into a presentation can be an effective way to communicate key insights and findings to an audience in a more engaging and visual format than text content. Here’s a step-by-step guide to help you convert a case study into a compelling presentation:
- Identify key components of the Case Study
- Structure your presentation
- Create visual aids and graphics for your slides
We have created a detailed guide on creating and delivering case study presentations , which we invite you to visit.
Finally, social media posts can be repurposed into presentation slides, as in the case of product presentations where we show the social proof or teaser images released to craft an investor pitch deck .
From our experience, we can recommend using mockups of smartphones, laptops, or tablets to introduce social media content in your presentations. You can directly screenshot the publication, displaying the number of likes, comments, and interactions as clear social proof of the value of your product or service. Working with a highly visual slide deck makes the job easier, but you must mix and match the social media content with the slide deck’s color theme . Use call-to-action slides to boost the potential of your social media content.
We saw multiple methods for recycling content from different mediums into presentation slides and vice versa. The idea is not to let the original source condition your work and hinder your creativity. Rather, consider the content a plus that you can alter to meet your new required conditions.

Like this article? Please share
Presentation Approaches, Presentation Ideas Filed under Design
Related Articles

Filed under Design • July 1st, 2024
Calculating the Slide Count: How Many Slides Do I Need for a Presentation?
There’s no magical formula for estimating presentation slides, but this guide can help us approximate the number of slides we need for a presentation.

Filed under PowerPoint Tutorials • June 28th, 2024
How to Represent Branching Scenarios in PowerPoint
Do you have a situation to expose with multiple possible outcomes? If so, check our guide on branching scenarios in PowerPoint.
![How to Make a Financial Presentation [Templates + Examples]](https://cdn.slidemodel.com/wp-content/uploads/00-financial-presentation-cover-640x360.png "how to recover a powerpoint presentation")
Filed under Business • June 13th, 2024
How to Make a Financial Presentation [Templates + Examples]
Learn how to make a stellar financial presentation by discovering which slides should be included, the best templates to make your job easier, and more.
Leave a Reply
IMAGES
VIDEO
COMMENTS
To manually open an AutoRecover file: Click the File button in the ribbon and then click the Home tab in the menu. Click the Recover Unsaved Presentations button at the bottom of the screen to navigate to the folder where AutoRecover files are stored.
Open PowerPoint and select Open on the Start Screen. Select the Recover Unsaved Presentations button. On the File Explorer pop-up, open the folder related to the PPT file you want to restore. Select the file and choose Open . Review the presentation and save it to your PC's hard drive.
In newer versions of PowerPoint, you can access AutoRecover files from within PowerPoint: Go to the File tab. Select Open. Select Recover Unsaved Presentations at the bottom of the list of recent files. Select your presentation to open it. If you don't see it, move on to the next section to try a different method.
Open a blank Microsoft PowerPoint document and click the File tab. 2. Click the Options link at the bottom. 3. Choose the Save option from the left. 4.Once you find the section with a path showing ...
There are two ways to check version history here, and we'll show you both. First, click "File" in the menu bar. In the left pane, click "Info." Click "Version History" on the right. Alternately, you can click the file name at the top of the document that you've opened and select "Version History" from the pop-up menu.
To recover a PowerPoint file, go to File -> Open and click Recover Unsaved Presentations or via File -> Info -> Manage Presentations -> Recover Unsaved Presentations. Recover Unsaved Presentations in PowerPoint. Select the file version to recover from the list to autorecover PowerPoint. Recover .pptx from temporary folder in PowerPoint.
Go to File > Info > Manage Document > Recover Unsaved Workbooks in Excel, or Recover Unsaved Presentations in PowerPoint. Select the file, and then select Open. In the bar at the top of the file, select Save As to save the file. See Also. View historical versions of Office files.
Recover Unsaved Presentations. If PowerPoint or your system crashes while you're working or before you have the chance to check a saved version, you can use this feature. Once you click on the Recover Unsaved Presentations option, it will open your missing file. On Windows: Open File > Info > Manage Versions > Recover Unsaved Presentations.
To recover your unsaved presentations through AutoRecover, follow these steps: Open PowerPoint and navigate to File > Open. Click on Recover Unsaved Presentations at the bottom of the menu. Select the presentation you wish to recover and click Open. Remember, AutoRecover needs to be enabled in the settings for this to work.
Steps. If PowerPoint recovers any unsaved files when you open it, a Document Recovery window will appear.; Click on the file to open it and then close the window. If the Document Recovery window does not appear, click on the File tab in the PowerPoint menu.; Select Open at the bottom of the recent presentations.; Click on Recover Unsaved Presentations.; Select the unsaved file that you want to ...
In this video tutorial, we will discover how to recover unsaved PowerPoint presentation. 📊 Recover deleted PPT file: https://bit.ly/3w66Qd3Timestamps:00:00 ...
In this video, you'll learn how to recover unsaved presentations in PowerPoint. Visit https://www.gcflearnfree.org/powerpoint-tips/recover-unsaved-presentati...
Suitable solutions. Unsaved PowerPoint files. Method 1: Click Recover Unsaved Presentations Method 2: Use the AutoRecover feature Method 3: Check the Temp folder. Deleted PowerPoint files. Method 1: Look inside the Recycle Bin Method 2: Retrieve your file from a backup Method 3: Use data recovery software.
If PowerPoint 2019 encounters a problem and stops responding, you can restart PowerPoint or your computer and try to recover your lost presentations. Recover a Presentation. Following a crash, restart PowerPoint. If an unsaved presentation can be recovered, a Recover unsaved presentations heading will appear on the Welcome screen.
To recover a PowerPoint presentation from the Windows Recycle Bin, follow these steps: Open the Recycle Bin by clicking on its icon. Find the file you wish to restore. Click or tap on Restore to recover the file to its original location. Mac users can use the Trash to recover recently deleted PPT files with these steps:
You may open the Recycle Bin on your computer's desktop and search for the deleted PowerPoint presentation. If you find it, right-click on the file and select "Restore" to recover it to its original location. b. If you saved it in OneDrive, you may go to OneDrive Online Recycle bin and look for the file. You may also check the second-stage ...
Go to File > Options. Click on the Save tab in the PowerPoint Options sidebar. In the Save Presentations group, ensure that the Save AutoRecover Information box is checked. Then, lower the time from the default of 10 minutes to a lower value, like every 2 minutes.
Step 2 In the scanning result, you will see the Document folder. Click it to find the PPT or PPTX folder. Step 3 Click the PowerPoint folder, and checkmark the files that you want to restore. Click Recover to start to save the lost PowerPoint files to your computer. #2. Undelete PowerPoint file from Recycle Bin (deleted PowerPoint file)
Find and click on Recent Presentations . Choose the unsaved recent PowerPoint presentation and open it. It's highly recommended that you save the file to a safe location as soon as you open it to avoid app or system crashes affecting your files again. Method 4. Recover an Unsaved PPT File Using PowerPoint AutoRecover.
Step 1: Open the PowerPoint app on your Windows system and go to the "Open" tab in the sidebar. There, you will find the option for "Recover Unsaved Presentation". PowerPoint Recover Unsaved Presentation option. Step 2: The system will then prompt you to the location of unsaved files within File Explorer.
Thank you for querying in this forum. From your description, it seems that you have deleted a slide accidently from a saved PowerPoint file and you want to recover that slide. If you have not closed that PowerPoint file after deleting slide, you can click Undo button to undo your action. If you saved this PowerPoint file in OneDrive for ...
To use AutoRecover, follow these steps: Open PowerPoint and go to the File menu. Select "Open" and then click the "Browse" button. In the "File name" field, type "*.asd" (without the quotes). Click "Open" to open the AutoRecover file. If you are able to open the AutoRecover file, you can then save it as a new PowerPoint ...
Pro Tip: In Microsoft PowerPoint, you can use Outline View (go to View -> Outline View) to see the structure of your presentation, and in this way extract an initial structure that you could use for your blog post. Gather all the images, charts and graphs used in the presentation.
recover with stewardship and time. All guests, from adults to students, are given the opportunity to listen and relax to the sounds of our waterfall. ... PowerPoint presentation with imbedded video, followed by 5+ minutes Q&A. Sleek, unique and secretive, Chimney Swifts build their nests, raise their families and sleep just ...