- Editorial Process
- Why Trust Us?
- Affiliate Linking Policy
- Privacy Policy
- Terms of Service

Weekly Must-Reads View All
7 things to do if you spilled water on your macbook.
Quick steps to save your MacBook from water damage
How to Boot Your Mac Into Verbose Mode: 4 Best Ways
Boot your Mac into Verbose Mode with this step-by-step guide
How to Fix Your Mac Shutting Down Randomly: 16 Fixes to Try
Troubleshoot random shutdowns on Mac with effective solutions
How Much Space Does macOS Take On Your Mac?
Understand macOS size and analyze your Mac's storage usage
Popular Topics
What to do with your old macbook 13 useful ways to reuse an old mac.
- What Is the MacBook Flexgate Issue and How to Fix It
- What Is the MacBook Flexgate Issue
- Uninstall Java
- Safely Transfer Files from Mac to Mac
- Safari Bookmarks Disappeared on Mac: 10 Best Ways to Restore Them
- Repairing disk permissions
- Old MacBook
Trending Now View All

- Mac Tips and Tricks
How to Make a Slideshow on a Mac: 3 Quick Ways
Hashir Ibrahim
Reviewed by
Last updated: November 13, 2023
Expert verified
To make a slideshow on a Mac, use built-in tools like the Photos app, Preview, and Keynote, each offering unique features and levels of customization.
- Create instant and custom slideshows with music and themes using the Photos app.
- Make more intricate presentations with text, transitions, and multimedia integration using Keynote.
- Preview app, known for viewing and annotating PDFs and images, also offers a basic slideshow feature for quickly viewing images.
Ever wanted to transform your photos into a captivating visual story on your Mac? Whether it’s for that big presentation, a personal diary, or simply reliving holiday memories, a slideshow can bring your vision to life.
With your Mac’s intuitive tools, creating a slideshow becomes easy and fun. In this guide, I’ll unveil the quickest ways to make a slideshow on a Mac. Ready to impress and express? Let’s dive right in!
How to Make a Slideshow on a Mac
Mac offers an unparalleled platform for creating slideshows. Below, I’ve shared three quick and easy ways to make a slideshow on a Mac.
1. How to Create a Slideshow in Photos
The Photos app on Mac lets you easily create slideshows. You can select a series of photos, arrange them in a sequence, add music, and choose from various themes to give the slideshow a professional touch. Once created, you can preview the slideshow, export it as a video, or share it directly from the app.
a. Create an Instant Slideshow in Photos
Here’s a step-by-step guide on how to create a slideshow using the Photos app on a Mac:
- Launch the Photos app by searching for it in Spotlight search.

- Navigate to the photos you want to include in your slideshow. You can select individual photos by holding down the Command ⌘ key while clicking each photo. To select a range, click the first photo, hold down the Shift ⇧ key, and click the last photo in the range.
- With your photos selected, click File in the menu bar and choose Play Slideshow .

- A new pop-up menu will appear. You can choose a Theme and Music for your slideshow. Once you’re done, click the Play Slideshow button.

- It will start the slideshow in fullscreen.
- You can navigate the slideshow using your keyboard. Press the left and right arrow keys to switch between slides. Tap the Spacebar to stop the slideshow and the Escape key to close it.
b. Create a Custom Slideshow in Photos
You can use the slideshow project tool within the Photos app to create a custom and more sophisticated slideshow with enhanced configurations and playback features. This lets you organize slides, incorporate text, embed music, fine-tune slide timings, and save and export the video.
Here’s how to create a custom slideshow in Photos:

- Click File in the menu bar and navigate to Create > Slideshow > Photos .

- A new window will appear. Select New Slideshow from the dropdown and give the slideshow a name. Then, click OK .

- Select the photos you want to include in the slideshow and click the Add button in the top-right corner.

- To customize your slideshow’s appearance, you can click the icons in the right strip.
- To modify slide transitions, positioning, font style, and zoom level, click the Theme icon and pick from the list.

- Click the Music icon to select your slideshow’s music.
- To tweak the slideshow’s length, access the Duration menu and drag the Custom slider. Alternatively, check the Fit to Music feature to synchronize the slideshow’s duration with your chosen soundtrack.
- Configure transitions via the Transition dropdown, which will be applied to all slides.
- Check the Scale photos to fit screen option to ensure images are displayed optimally.
- Activate the Loop feature if you want the slideshow to replay indefinitely, restarting after the concluding slide.
- Click the Preview button to view your slideshow. Click it again to stop the slideshow.

- The Play button also initiates the slideshow.
- To exit the slideshow, press the Escape key.
How to Add or Remove Photos and Text in a Slideshow on Mac
You can also customize slideshows on your Mac. Here’s how to add or remove photos and text in a slideshow on Mac:
a. Adding Photos
- Launch the Photos app and open your slideshow.
- Click the + (plus) icon at the bottom-right corner of the slideshow.
- Select the Add Photos option from the menu that appears.

b. Removing Photos
- Navigate to the slide containing the photo you want to remove.
- Right-click the photo and select Delete Slide .

c. Adding Text
- Open your slideshow and select the slide you want to add text to.
- Select Add Text from the menu.
- A text box will appear on your slide. You can modify the Default Text by clicking it and typing your desired text.

d. Removing Text
- Navigate to the slide with the text you want to remove.
- Click the text box to select it or the T icon preceding the photo in the thumbnail lineup, and hit the Delete key.
- Alternatively, right-click the T box and select Delete Text .

2. How to Make a Slideshow on a Mac With Preview
The Preview app on a Mac is primarily known for viewing and annotating PDFs and images. However, it also offers a simple slideshow feature. While it doesn’t have the advanced customization options found in dedicated slideshow software, it’s perfect for quickly viewing a series of images in a slideshow format.
Here’s how to make a slideshow on a Mac in the Preview app:
- Launch the Preview app from the Dock or the Applications folder.

- A new window will open. Navigate to the location where your images are saved and select the ones you want in a slideshow. Click Open .

- This will open all selected images in a Preview window. Select all the images in the left sidebar by pressing Command ⌘ + A .

- With all your images open in Preview, go to View in the menu bar and select Slideshow .

- Navigate through the slideshow using the left and right arrow keys on your keyboard.
- Press the Spacebar to pause or play the slideshow.
- Use the Escape key to exit the slideshow.
3. How to Make a Slideshow in Keynote
Keynote is Apple’s answer to presentation software and is known for its sleek designs and smooth animations. While primarily used for presentations, it’s also an excellent tool for creating slideshows, especially if you want to incorporate text, transitions, and other advanced features.
Here’s how to make a slideshow on a Mac using Keynote:
- Open Keynote by searching for it in the Spotlight search.

- Upon opening, Keynote will present you with various templates. Choose one that fits the style of your slideshow.

- Click Slide in the menu bar and select New Slide .

- Alternatively, click the Add Slide button in the top toolbar.

- You can choose different slide layouts based on content (e.g., title slides, content slides, photo slides).
- Drag and drop photos, videos, or text into the slide placeholders.
- Use the Media button in the toolbar to insert images, videos, and music directly from your library.

- Click a slide, then choose the Animate button in the toolbar.
- Select Add an Effect to choose from various slide transitions. You can also add object animations for individual elements within a slide.

- If you want the slideshow to play automatically, go to Document > Document in the top right corner and check Automatically play upon open . Adjust the slide duration as desired.

- Click the Play button in the top toolbar to view your slideshow.

- Save your project by going to File > Save .

- To export the slideshow as a video or another format, go to File > Export To and choose your desired format.

Why Make a Slideshow on a Mac?
Making a slideshow on a Mac not only provides a seamless experience but also ensures a polished and professional outcome. Creating a slideshow on a Mac offers several advantages, like the following:
- 🖥️ User-Friendly Interface : Mac’s operating system, macOS, is known for its intuitive and user-friendly design. This makes the process of creating slideshows straightforward, even for beginners.
- 🌈 High-Quality Graphics : Mac computers are renowned for their superior display quality. This ensures that your slideshows will look crisp, vibrant, and professional.
- 📦 Integrated Software : Macs come with pre-installed software like iMovie and Photos, which offer slideshow creation tools. This means you don’t need to invest in additional software.
- ✨ Customization : With a Mac, you have a plethora of customization options at your fingertips, from transitions to music integration, allowing for a personalized touch.
- ☁️ Seamless Integration : If you’re using other Apple devices, such as an iPhone or iPad, you can easily sync and share your slideshows across devices via iCloud.
- 🎥 Multimedia Capabilities : Macs handle multimedia content efficiently, allowing you to incorporate videos, music, and high-resolution images without compromising performance.
- 🔒 Security : macOS is known for its robust security features, ensuring that your content remains safe from potential threats.
Create Slideshows on Your Mac Quickly
Whether you’re using the Photos app for a quick and simple presentation, Preview for a rapid image display, or Keynote for a more intricate and interactive experience, Mac ensures a seamless and efficient process.
Here are some more tips for you:
- If you want to add a voice-over to your slideshow, learn how to record audio on your Mac .
- If you want to upload a slideshow video to your social media, you might have to compress a video on Mac .
- You can take a screenshot on your Mac and add that to a slideshow.
Frequently Asked Questions
How do i delete a slideshow on mac.
To delete a slideshow on Mac, locate the specific slideshow file or project in the relevant application (e.g., Photos or Keynote). Right-click it and select Move to Bin or Delete . Empty the Bin on your Mac to permanently remove it from your Mac.
Can I add animations to my slideshows on Mac?
You can add animations to your slideshows on Mac using Keynote. Keynote offers a variety of transition effects and object animations, allowing you to enhance your presentation and make it more dynamic and engaging. However, you cannot add animations in Photo app slideshows.
Can I share my slideshow on social media?
Yes, you can share your slideshow on social media. Most slideshow creation tools on a Mac let you export your project as a video or link. Once exported, you can easily share it on various social media platforms like Facebook, Instagram, Twitter, and more.
How do I export my slideshow as a video?
To export your slideshow as a video, open the slideshow software, navigate to the File menu, select Export or Export To , and choose the Video option. Follow the prompts, adjust settings as needed, and save the video to your desired location.
Can I add videos to my slideshow on Mac?
You can add videos to your slideshow on Mac. Applications like Keynote and the Photos app support video integration, allowing you to enhance your presentation with dynamic video content alongside images. It’s a great way to make your slideshow more engaging and interactive.
Can I add text to my slides on Mac?
Yes, you can add text to your slides on Mac using slideshow applications, like Keynote and Photos. Simply select the desired slide, click the Add Text or similar option, and input your text. Customize fonts and styles for a personalized touch.

I'm Hashir, a tech journalist with a decade of experience. My work has been featured in some of the top tech publications like MakeUseOf and MakeTechEasier. I have a bachelor's degree in IT, a master's in cybersecurity, and extensive knowledge of Apple hardware, specifically MacBooks. As the senior writer at MacBook Journal, I write in depth guides that help you solve any issues you have with your mac and unbiased reviews that help you make the right buying decisions.

Hi there! I'm Ojash, a tech journalist with over a decade of experience in the industry. I've had the privilege of contributing to some of the world's largest tech publications, making my mark as a respected Mac expert. My passion lies in exploring, using, and writing about MacBooks, and I enjoy sharing my expertise to help others make informed decisions and get the most out of their MacBook experience. Join me as we delve into the fascinating world of MacBooks together!
You May Also Like

How to AirPlay From a Mac to TV: 3 Quick and Easy Methods
AirPlay from Mac to TV and stream content seamlessly

Written by Hashir Ibrahim Reviewed by Ojash Last updated: August 26, 2023 Expert

How to Start Mac in Internet Recovery Mode
Written by Hashir Ibrahim Reviewed by Ojash Last updated: September 6, 2023

What Is AirPlay? Everything About Apple’s Streaming Technology
Unlock the power of Apple's AirPlay for seamless streaming
You are using an outdated browser. Please upgrade your browser to improve your experience.
Everything you need to start making videos on Mac in 2022

We're not saying you'll wow the crowds at your local multiplex IMAX screen with movie you actually filmed using your Mac mini's webcam. But even before you start adding iPhone cameras into the mix, the Mac was built for filmmakers.
Regardless of what type of video you're making, there are certain elements in common. But overall, you need to start with deciding exactly what kind of video it is you want to end up with.
Typically you can categorize videos as:
Screen recordings with voiceover
Basic zoom-style to-camera pieces, more elaborate youtube videos.
In each case, you need a Mac. In every case, you want more, but the Mac is key.
Which Mac to use
The flippant answer is to use whichever Mac you've got. Every Mac made for at least the last decade can get the job done, and there are Macs that come so complete you may not need anything more.
You'll want more, but if you have a 14-inch MacBook Pro or a 16-inch MacBook Pro, then it's possible you won't have to buy anything else. That's partly because those machines are fast enough for video editing, and partly because they have great screens built-in.
But mostly because they also what are, possibly generously, described as studio-quality microphones. No matter what your video, you're going to need audio to go along with it.
Depending on the length and complexity of your video, any Apple Silicon Mac will do — but you should prefer the new M2 MacBook Air to last year's M1 version. Even though the M1 in the MacBook Air is the same as in certain models of the MacBook Pro , the older Air's wedge-shape design makes for a limitation with video editing.
That's because even though the M1 MacBook Air can be used as a fast video editing machine, after a time it will start to run hotter — and the wedge limits its ventilation. The new M2 MacBook Air doesn't have the wedge, so it shouldn't have this problem.
But then the new MacBook Air also doesn't have the studio quality microphones of the MacBook Pro.
In practice, though, you're soon going to want a separate, external microphone, no matter what Mac you've got — and no matter what type of video you're making.
You can never have enough storage
You need lots of storage space, but storage space is expensive. It's more expensive still if you need storage drives that work fast — and you do.
And it's yet more expensive if you buy it from Apple.
Any kind of video, absolutely any kind, takes up a lot of room so first there is the straight issue of where to keep it. Then when you're working on it, slow drives are a frustrating bottleneck.

An ideal is to get a Mac with the absolute maximum internal SSD you can, but as ideals go, that one has problems. First, that would add many thousands of dollars to the Mac's price, which is enough to stop most people.
But then, second, it's still not going to be enough — and that stops everyone else.
The optimum now is to get a reasonable sized internal SSD, say 1TB, and then use fast external drives, such as Thunderbolt 3 ones. External drives, especially sold by anyone but Apple, will automatically be much more cost effective.
Plus, when you're done, you can take those external drives away and keep them as backups somewhere.

Editing videos on the Mac
This is the part of the process that comes last, but you still need to think about it early on. There are broadly two choices for video editing software, and it's really a case of iMovie versus everything else.
Apple's iMovie is underrated. Free, usually pre-installed on the Mac and easily downloadable if it isn't, iMovie aims to be quick to learn and to use. It does that chiefly by having fewer features and options than other video editors, although it is adding more .
Yet that also has the extra advantage that iMovie tends to be faster than alternatives. It's faster to use and quicker to learn, so there is a huge amount to be said for iMovie.
At some point, though, you are going to want more. Apple's Final Cut Pro is the obvious next step because works in very similar ways to iMovie, but adds a plethora of extra features.
For instance, you can now track items in your video in Final Cut Pro. That means you can highlight one person's face, or pick out a car number plate, and then apply an effect like a blur.

You blur them out in one frame, and Final Cut Pro can blur them out for the rest of the video clip.
There's enough extra like this in Final Cut Pro that it is dramatically the better video editing software compared to iMovie — but it's also more complex. Going from iMovie to Final Cut Pro can be a daunting step.
It's not as daunting, though, as going from iMovie to other professional video editing software such as Adobe Premiere. Simplicity is going to keep you hanging on to iMovie, not to mention that most professional video editor apps cost.
Final Cut Pro is a one-time cost of $300 , and is available from the Mac App Store. Adobe Premiere is a subscription, starting at $20.99/month . DaVinci Resolve is another powerful option, and it's free .
Getting down to making videos
Maybe you're making a tutorial video and just want people to see, for instance, how to find their way around Microsoft Word. You obviously need Microsoft Word for that particular example, but otherwise, you're set.
You can use QuickTime Player to record your screen. For speed, use the keyboard combination Command-Shift-5.
It used to be that you would launch QuickTime Player, then choose File , New Screen Recording . Now you can just use that keystroke, and click on the Record button on the control bar that appears.

Ultimately, it's the same result, but that control bar gives you quicker access to some options. You can choose where your finished recording will be saved, for instance, and you can decide whether you want to film all or part of the screen.
You can also decide here whether to record audio through one of the microphones you have, or not.
It's the microphone that you're going to want to upgrade first, if you need to make videos with any voice over. AppleInsider has guides to buying microphones for video, and just for getting the best audio .
Whether or not your screen-recording video has a voiceover, though, there are reasons to look at alternatives to QuickTime Player. Buy Screenflow, for instance, and can make videos where you zoom in to show your audience a particular part of the screen.
And Screenflow is increasingly a video editing app, so it can be a case of investing in an app that grows with your needs.
Screenflow costs $149 and is currently on version 10. Whenever version 11 comes out, incidentally, you'll know it. Chiefly because you will have to dismiss an increasingly aggravating advert for the new one.

You've seen videos made by people who unfortunately can't be with us tonight to accept their award in person. And you've seen YouTube videos with one person talking to camera delivering a lecture.
Plus you've been on a lot of Zoom calls.
When this is all you need to do — so no cutting to different footage, no adding music or voiceover — then you might be tempted to just stick with the Zoom footage. After all, Zoom, Teams, and the rest, can be set to automatically record sessions.
The picture quality doesn't tend to be all that great, though. And particularly with Zoom, the image can snap away from you talking to one of your attendees scratching their nose, if they're doing it loudly enough.
Nonetheless, it does all that recording while you're concentrating on delivering your session and, at least until macOS Ventura comes out, anything else takes more effort. Even before that macOS's Continuity Camera does it automatically, you can already pop your iPhone in front of your Mac's screen and use Zoom through the phone's better camera.
It just won't necessarily improve the quality of the recording Zoom makes. So now you start having to think about screen recording your iPhone.
And then you have to start thinking about how to separately record your audio because iOS screen recording is video-only. So really, the basic Zoom-style video is either an actual video conference recording, or it's a to-camera piece with a better webcam.
This isn't a case where, as soon as you need to do more than the minimum that the Mac provides, there is one single thing you have to do. This time there are three upgrades to consider, and they are best done together.
For one, there's the camera. You definitely need an iPhone now, and if you're going to be using the selfie camera on one, get an iPhone 11 Pro or later for its better front-camera quality.
Then as soon as your image quality is good enough, you find your lighting definitely isn't. Start by looking at what you can achieve with AppleInsider 's home video lighting recommendations .
And again, upgrade your microphone . Somehow we are all a little more accepting of poorer audio on a video conference than we ever will be on a video.
There's no difference to the software you may choose to use to edit this type of video. But you could look at using a Teleprompter app on your iPhone, if you're using the front-facing selfie camera so that you can also see the screen.

Perhaps if you just want a YouTube video with two presenters who are side by side, you could use Center Stage on the Apple Studio Display . But really, even before you start considering multi-camera shoots and drone footage, your thoughts have to be on how to make the video varied and interesting.
Which always means editing together multiple elements. It could just be that you shoot an interview with someone and then when they're gone, turn the iPhone around and film yourself asking the questions.
But for YouTube, it could be multiple cameras, it could be graphics and animation. You could have just one camera, but also use it for background or B-roll shots that you cut in to your final video.
All of that takes time. But it also takes a good camera, and if an iPhone is more than fine for this — then a second or third iPhone is even better.
Then, once again, you have to think about lighting and sound. This time you could be recording multiple people, in which case you need multiple mics and multiple lights.
Or maybe you're filming in environments that are alike only in that they're all noisy. Then it's time to start looking at Lavier or lapel mics, and wind breaks.
Again, there's no change to the software you have to use to edit videos made this way. But Final Cut Pro is particularly strong on multicamera work, syncing up different cameras and letting you switch instantly between them.
And there are better camera apps than Apple's own. Look at Filmic Pro, which costs $14.99 .
This app takes more getting used to than Apple's point and shoot video camera, but it offers more features — and it looks better. Even though it's using the same camera hardware in the iPhone, it looks better.
Making films
You can make a Hollywood film and edit it on a Mac. You can shoot a Hollywood film on an iPhone and edit it on the Mac.
Not very many years ago, that would've been more hyperbole than true, but now it's straight fact. You can do it, and it is being done.
Once you're even heading toward this level of video making through, it's probable that your real first choices are to do with the crew you hire. There's also the issue of how you work that crew, how you make sure everyone who needs to can see and work on the video.

But there is also an issue of just when you move from iPhone to shooting video via DSLR. You won't be surprised that you need to be thinking about lighting, too, and especially audio.
Yet the only difference you're going to need with your Mac, compared to the previous types of videos, is in storage. You do always need the fastest processor you can, but with this type of video, the sheer volume of storage becomes an issue.
What never changes
Whether you're shooting a thirty-second screen recording to explains some arcane function of Microsoft Word, or whether you're genuinely making a Hollywood film, some things are the same.
You need better and faster, you always want better and faster, but the Mac at the heart of the whole job remains the same as it always was. The Mac you already have is able to help you make videos.
Top Stories

Get Apple's 10th-gen iPad for the all-time low price of $299.99

iOS 18 Freeform app getting giant navigation & object positioning upgrades

iOS 18 Project Greymatter will use AI to summarize notifications, articles and much more

Apple and OpenAI allegedly reach deal to bring ChatGPT functionality to iOS 18

Apple's AI plans involves 'black box' for cloud data to guarantee privacy

Bigger and brighter: iPhone 16 & iPhone 16 Pro rumored screen changes
Featured deals.

Apple's 16-inch MacBook Pro drops to all-time low price of $1,798
Latest news.

AirTag crucial to recovery of $5 million of stolen tools in Metro DC
After getting fed up with overnight thefts of tools, a Northern Virginia carpenter planted AirTags on his tools, leading police to series of storage facilities full of stolen goods.

Sponsored Content
How to convert YouTube to MP3 on Mac with iTubeGo
There's a near-unlimited number of YouTube videos that you might want to have an offline MP3 copy of, like podcasts or instructional audio. Here's how to convert YouTube to MP3 with iTubeGo.

Get a year of Peacock streaming on your Apple TV for $19.99
Stream the 2024 Olympics and Sunday Night Football on Peacock, with a year of access dropping to $19.99 with coupon.

New video highlights ongoing struggles between Apple and union members
The conflict between Apple and its Reston retail store union members is on full display in a new video, highlighting negotiation struggles, discipline disparities, and more.

Apple may add some text effects to iMessage in iOS 18
Apple's changes to iMessage in iOS 18 could introduce new text effects, which may include stylized text that could be sent to Android users.

System Settings getting shuffled again in macOS 15, among other UI tweaks
Apple is going to rearrange menus and app UIs across macOS 15, with System Settings seeing the biggest reorganization since the app was redesigned.

Apple loses to Samsung in Q1 global smartphone shipments
Apple isn't on top of the worldwide smartphone market in 2024 so far, though the iPhone did benefit from customers buying more premium models.

New emoji in iOS 18, iPad Pro, and patented Apple Store trees, on the AppleInsider Podcast
Apple is slowly adding more to watch on Apple Vision Pro, it's gearing up for AI, emoji, and more at WWDC, and yet another Apple Store has opened — but it's made out of Lego.
Xencelabs Pen Display 16 review: A compact digital art masterpiece
The Xencelabs Pen Display 16 is a great alternative to Wacom for digital artists who want to level up artistry on the Mac.

This Lego Apple Store model needs votes for a slim chance of getting made
A Lego Apple Store has surfaced on Reddit as its creator hopes to get enough votes to make it into an official Lego set — but it probably won't happen.
Latest Videos

Retro gold rush: which emulators are on the App Store, and what's coming

More Metal: Apple's iPad Pro Magic Keyboards, compared

iPad, iPad Air, iPad Pro buyer's guide May 2024: which iPad to buy for any budget
Latest reviews.

TerraMaster D8 Hybrid drive enclosure review: Lots of data, not enough bandwidth

Waterfield Shield Case for Apple Vision Pro review: Way better for travel than Apple's case

{{ title }}
{{ summary }}
Presentations that stand out. Beautifully.
With its powerful tools and dazzling effects, Keynote makes it easy to create stunning and memorable presentations, and comes included with most Apple devices. Use Apple Pencil on your iPad to create diagrams or illustrations that bring your slides to life. And with real‑time collaboration, your team can work together, whether they’re on Mac, iPad, iPhone, or a PC.
See what’s new in Keynote
Present your story. Your way.
Keynote sets the stage for an impressive presentation. A simple, intuitive interface puts important tools front and center, so everyone on your team can easily add beautiful charts, edit photos, and incorporate cinematic effects. And Rehearse Mode lets you practice on the go, with the current or next slide, notes, and clock — all in one view.
Start with a gorgeous layout.
Choose from over 40 eye‑catching themes that instantly give your presentation a professional look. Or create your own slide designs, background images, and page‑by‑page customization.
Create next-level animations.
Add drama to your presentation with more than 100 cinematic transitions and effects. Make your words pop by adding textures, color gradients, and even photos — with just a tap. And animate objects along a path using Apple Pencil or your finger on your iPhone or iPad.
Make every slide spectacular.
Add subtle movement to your slides with dynamic backgrounds. Illustrate your point with over 700 Apple-designed shapes, or add photos, videos, music, image galleries, and charts. Easily remove backgrounds from supported images and live videos or manually refine adjustments as needed. You can even use your iPhone to take a photo or scan a document, and Continuity Camera can send it straight to Keynote on your Mac.
What’s new in Keynote.
Learn about everything you can do in Keynote
Get the updates. Then get in touch.
Stay up to date when people join, edit, or comment in collaborative presentations and easily get in touch with your team using Messages and FaceTime.
Get more done on iPad.
Quickly insert objects, find settings, and get to your favorite tools with the customizable toolbar. And Stage Manager makes it easy to multitask across multiple presentations and apps at the same time. 1
Make backgrounds disappear.
Now you can more easily remove backgrounds from supported images — and even live videos — or adjust them to your liking.
Add live video feeds to any slide.
Appear in a window, right on your slides, with a picture-in-picture display during remote presentations. Or include a live feed of your iPhone or iPad screen to show off apps.
Get started with dynamic themes.
Start with one of three beautiful new animated themes, then customize it to set the tone for each slide with 18 adjustable background presets — from understated to highly visual, monochrome to colorful, calm to energetic.
Captivate your audience with dynamic backgrounds.
Make your presentation stand out by adding stunning color and visual interest to your slides. Create motion on a title or closing slide for a bold statement, and keep viewers engaged with subtle movement throughout the presentation.
Present with your team. Seamlessly.
For slideshows with multiple presenters, you can take turns controlling a single deck — from anywhere — on Mac, iPad, and iPhone.
Play YouTube and Vimeo videos right in Keynote.
Embed a video from YouTube or Vimeo, then play it right in your presentations, without the need to download or open the video in a media player. 2
Present over video conference. Like a pro.
Play a slideshow in its own window so you can access other apps while you present. You can view your presenter notes, upcoming slides, and navigation in a separate window as well.
Outline your presentation. Easier.
With outline view for iPhone and iPad, quickly jot down your thoughts, restructure ideas, and move concepts from slide to slide. Then switch to slide view and start designing.
Present like never before. From anywhere.
With Keynote, presenting remotely can be just as seamless as presenting in person. Say goodbye to saying “Next slide, please” — now multiple people can present together, even remotely, with each person taking control of their section of the deck. Add a live video feed of yourself to any slide for a picture-in-picture experience. Or when presenting on your Mac, include a live feed of your iPhone or iPad screen to walk through your apps. You can even play a slideshow in its own window, so you can simultaneously access your notes and other apps.
Any presentation. Any device. Anytime.
You don’t work in one place on just one device. The same goes for Keynote. Work seamlessly across all your Apple devices. The slides you create using a Mac or iPad will look the same on an iPhone or web browser — and vice versa.
You can also work on presentations stored on iCloud or Box using a PC.
Start using Keynote at iCloud.com
Create and present together. Even when apart.
Work together in the same presentation, from across town or across the world. You can see your team’s edits as they make them — and they can watch as you make yours, too. You can even get notifications when people join, edit, or comment. When presenting as a team, you can also take turns controlling a single deck from anywhere.
Use Apple Pencil when inspiration strikes.
Add color, illustrations, and handwritten comments for more beautiful presentations with Apple Pencil on your iPad.
Plays well with Office.
Teaming up with someone who uses Microsoft PowerPoint? Keynote makes it a great working relationship. You can save Keynote presentations as PowerPoint files. Or import and edit PowerPoint presentations right in Keynote.
Learn more about Microsoft PowerPoint compatibility
See everything that’s new in Keynote
- What’s new in Keynote for iPhone and iPad
- What’s new in Keynote for Mac
- Keynote for iCloud release notes
Additional Resources
- Get Keynote support
- Learn about Microsoft Office compatibility
- Learn about collaboration for Pages, Numbers, and Keynote
- Use Keynote in a video conference app
Keynote User Guides
- Keynote User Guide for Mac
- Keynote User Guide for iPad
- Keynote User Guide for iPhone
- Keynote User Guide for Web
Build spreadsheets that are bottom-line brilliant.
Create documents that are, in a word, beautiful.
From ideas to screen: How to make presentation videos that shine

What type of content do you primarily create?
Visuals can mean the difference between a killer presentation and a lost opportunity.
For salespeople, it’s difficult to close a deal without business presentations to back up your pitches. For marketers and business owners, video presentations help communicate ideas and share results from projects to ensure future success.
Customers also love high-quality visuals, like branded explainer videos and product tours. They’re the fuel that drives eight in 10 people to make online purchases.
But what makes a good presentation? And how can you engage viewers throughout your video? This guide covers what you need to know about creating video presentations, no matter the purpose.
What is a video presentation ?
A video presentation refers to a sequence of visuals combined with audio to convey information, arguments, ideas, or narratives. It can be about a product, service, internal business reports, or even a topic of interest.
Video presentations can range from simple slideshow-style videos with voiceovers to more complex productions involving animations, live-action footage, music, sound effects , and more.
A good video presentation provides information clearly and concisely. But the best video presentations engage your target audience with professional video quality: a good camera and mic, skilled editing, and a confident presenter.
There are a ton of different types of video presentation formats you can choose from, including:
- Animated explainer videos
- Employee onboarding videos
- Screen recordings
- Training videos
- Product demos
- Microsoft PowerPoint presentations with a talking head
- Sales presentations
- Awards presentations
Benefits of a video presentation
These are great reasons to put in the effort to produce this type of video content.
Enhanced engagement
Video recordings—whether on social media or hosted on your website—are great for engagement and getting your audience’s attention. Wyzowl found that 95% of marketers have said video marketing has helped them increase brand awareness, 90% say it has helped generate leads, and 87% said it has helped them increase sales.
Visual clarity
There's a reason many people suggest something like "If you can learn it, you'll find it on YouTube." The presentation video format is unique in its ability to teach and demonstrate, similar to the in-person experience you'd get with a tutor or salesperson.
The same Wyzowl report found that 96% of marketers say videos have helped increase user understanding of products and services. In short: video helps customers retain your information.
Global reach and accessibility
Video presentations are a great way to reach a global audience. More than half of people say they’re more likely to share a video with others than any other type of content.
A video presentation is also better for accessibility than other content types. With video editing software , you can:
- Easily add subtitles and annotations to your video footage for those with hearing loss.
- Add an audio description voiceover for those with sight loss.
- Change the color filters for those with color blindness.
Personal connection
Building a personal connection with your audience is critical for overall brand engagement. A video presentation, especially one with a person in the video, helps you do that. Research shows that students have positive feelings for videos presented by an instructor, for example.
How to create a video presentation
Step 1. plan and prepare.
Proper planning and preparation can help the rest of your presentation creation process run smoothly.
Think about what you’ll say, and use a storyboard to build out a visual plan of your presentation ideas. Storyboarding your presentation, instead of making it on the fly, will help you stay focused when you fire up your presentation software. (You don’t need to be an artist; just set out the scenes in a way that makes sense to you.)
At this point, start writing the video script for your presentation. You’ll know what to say and when to say it, and won’t fill your presentation up with filler words like “um” and pauses when trying to think about what to say next.
Step 2. Gather resources
After you’ve completed your paper storyboard and script, it’s time to go digital. With Descript, you can build your slideshows into the video editor just like any slideshow tool .
To create a presentation video in Descript:
- Hit New project .
- Import any media (images, infographics, short video clips, GIFs, or sounds) you want to include in your presentation.
- Drop your visuals into the script and edit them into a sequence, or work scene by scene by adding a / at the beginning of each slide.
- Add the background of your presentation, then your script in the left panel.
- Add captions to your presentation by hitting the T icon at the top and choosing Captions.
When you've set up all your slides, you can get fancier and add transitions, extra media, and special effects later.
But maybe you’d prefer to create the presentation using more familiar software, like Prezi, PowerPoint slides, or Google Slides. In that case, you can import the presentation into Descript later or use its screen recording functionality. (If you upgrade your Descript plan, you can create your own video presentation templates to use over and over again, if that’s your style.)
Step 3. Record your presentation video
With your slides all set up, it’s time to turn them into a video. This step is pretty straightforward if you’ve used Descript to make the presentation slides. All you’ll need to do is go to the beginning of the presentation and hit the Record button at the top of the screen:
If, like in the image example above, you’ve written your script into the scenes, change the default setting Record into script to Record new layer . This preserves your script so you can read from it whil recording your presentation video.
Decide if you want to record a voiceover only (leaving the record option as Audio only ), or add a floating head video with your webcam to show yourself as the speaker by clicking the Screen option. Either way, go through your script as the slides move along.
If you created your presentation in another software like Google Slides, there may be no built-in option to record your presentation over the slides. In that case, use Descript’s screen recorder to film your screen with audio. The video file will be ready and waiting for you in the video editor when you finish recording.
Step 4. Edit and enhance
At this point, you’ve got the basic presentation down. It’s time to bring out your inner filmmaker and turn the slideshow into something special.
With Descript’s free video editor, you can:
- Add title screens to introduce your presentation.
- Choose from a library of background music.
- Change the fonts of your captions and any other text layer.
- Add cool slide transitions.
- Improve audio quality with Studio Sound .
Descript’s video editing is different (and easy) since you can edit the video using the script instead of a traditional timeline editor. This makes the process super efficient since you can quickly identify what needs cutting. Simply delete the part of the script you don’t want, and the accompanying video will disappear.
Step 5. Review and fine-tune your video
What makes Descript extra special is the ability to edit your audio by taking out filler words you might have accidentally recorded. Remove “ums,” “uhs,” and awkward pauses in a single click with filler word removal .
If, like me, you also have a habit of forgetting to say something important, you can use Descript's Overdub feature to add those few missed words without re-recording the whole scene. The software will create an AI clone of your voice to fix audio mistakes.
With your video presentation fine-tuned, you’re ready to save and share it with the world. Click the Publish button in the top right corner and download the MP4 file, or export it directly to a platform like YouTube or Wistia.
6 key elements for crafting a great video presentation
Now you know the practical how-tos of making a presentation video, let’s look at some key elements that turn a good video presentation into a great one.
Clear and engaging content
Visual appeal, narration and voice quality, engagement techniques, structure and flow.
- Audience-centric approach
No one likes feeling confused. If your presentation isn’t clear, you’ll end up frustrating your audience. A nice trick for clarity is to imagine you’re explaining your presentation to a child; don’t use big words to sound smart. Presentations that are clear from the start are naturally more engaging.
Gone are the days of 360p Nokia footage. Even if you don’t have a professional camera setup, you can still record a video on a PC, phone, or webcam with high quality. But don’t forget about the images and text overlays. No one wants to try deciphering pixelated visuals—use the highest quality video resolution you can.
Even the best-quality video presentation can be ruined by bad audio. Poor-quality narration is hugely frustrating to viewers. Prioritize your audio quality, especially for information-rich videos like presentations, and use Studio Sound to remove distracting background noise from your presentation video.
When it comes to video presentations, you should think like a salesperson. You can't expect your audience to believe the information you give them if they don't trust you. Engage your audience by telling a personal story, describing relatable scenes, or emphasizing important points throughout your video.
Treat your presentation like a story with a beginning, middle, and end. Information should flow nicely from one point to the next. Do a test run through your slides before you start recording to ensure any questions don't crop up prematurely because the viewer thinks you haven't covered it (when you do a few slides later).
Learn: Narrative structure: How to compose the best story for your footage
Audience-centric approach
It's pretty much always to the audience's benefit when you make a presentation video, so you shouldn't focus too much on yourself. Address your audience's needs and go above and beyond to answer any questions they may have. Otherwise, why would they listen to you?
5 tips to help you craft remarkable video presentations
Now we know what makes a great presentation video, here are five bonus presentation tips to create yours.
1. Practice and rehearse
You won’t always get it right the first time, and that’s okay. But the more you practice before hitting record, the better your presentation video will be—and the less legwork you’ll need to do throughout the video editing process.
2. Invest in good equipment
Top-notch equipment makes your life easier throughout the video creation process. Replace your webcam with your iPhone to improve picture quality, and invest in editing tools that allow you to record and edit in the same dashboard.
3. Optimize lighting
Another area where you can improve the quality of your video is the lighting technique . If you have the budget, you can use a simple ring light, but if you don’t have the cash to invest in video equipment, use natural light (such as a window) behind your camera.
4. Engage with eye contact
If someone was talking to you and they weren’t looking at you, you’d probably be a little confused or uncomfortable, right? It’s the same with video. Look into the camera when making video presentations to simulate real eye contact with your audience. If you forget, use Descript’s Eye Contact AI effect to fix it.
5. Keep it concise
If you waffle on with unnecessary information or get sidetracked on a story, you’ll lose your audience’s attention, and they’ll click away or switch off. Stick to your video script and keep your presentation concise.
Elevate your video presentations with Descript
Creating an informative and engaging video presentation isn’t the easiest task in the world. You’ve got to know your audience and what they want, present the information confidently, and do it with visually appealing content.
With Descript, you can take your presentation video to the next level with an editing experience that allows you to:
- Record your screen on a Mac or Windows device
- Create and record slides (with voiceover) in one dashboard
- Remove filler words with a single click
- Use Studio Sound to remove background noise from your presentation
- Turn your presentation into a YouTube video, or download it as an MP4 file
Take a free tour of Descript and see why thousands of creators love its video editing platform.
How to make presentation videos FAQ
How do i make a presentation video for free.
- Choose a slideshow software like Descript
- Create your slides
- Add transitions
- Record your voiceover
- Edit your presentation
- Share your video
How do I video myself when presenting a PowerPoint?
Use PowerPoint’s built-in recording feature and choose the “Cameo” option to record yourself when presenting. Or, use Descript’s screen recording feature and have the presentation ready for editing when you finish recording.
How do I make an audio-video presentation?
If you don’t want to record yourself on video, use a screen recorder to film your presentation slides. Video presentation makers like Descript allow you to record a voiceover.
Related articles

Featured articles:
Articles you might find interesting
Product Updates
New in Descript: Custom video thumbnails, word gap control and more
n the newest version of Descript, you'll be able to set up custom thumbnails on your shared videos, control silence between sentences, and we've made improvements to Studio Sound.

Marketing Campaigns: Touch Your Audience in a Creative Way
What is a marketing campaign, and how do you use it to increase brand awareness with your target audience? We break down the basics right here.

Learn the 10 best video cuts every pro editor should know
Video cuts are used to edit transitions in films and videos, they play a key role in storytelling. It’s on the editor to choose the best types of cuts for the narrative.

For Business
How to Create an Amazing Product Demo Video
Product demo videos are an excellent opportunity for you, the maker. Your product demonstration video should aim to answer a viewer’s burning question: “What can this product do for me?”

YouTube marketing: The ultimate guide in 2024
YouTube is a powerhouse. Here’s how to make the most of it and craft a YouTube marketing strategy that makes you more money.

Social Media Manager Tools for Reaching Your Audience
Social media managers develop and execute a social media strategy, usually to gain followers or drive engagement. They'll need a few tools to create and execute the social media strategy.

Join millions of creators who already have a head start.
Get free recording and editing tips, and resources delivered to your inbox.
Related articles:
Share this article
- PRO Courses Guides New Tech Help Pro Expert Videos About wikiHow Pro Upgrade Sign In
- EDIT Edit this Article
- EXPLORE Tech Help Pro About Us Random Article Quizzes Request a New Article Community Dashboard This Or That Game Popular Categories Arts and Entertainment Artwork Books Movies Computers and Electronics Computers Phone Skills Technology Hacks Health Men's Health Mental Health Women's Health Relationships Dating Love Relationship Issues Hobbies and Crafts Crafts Drawing Games Education & Communication Communication Skills Personal Development Studying Personal Care and Style Fashion Hair Care Personal Hygiene Youth Personal Care School Stuff Dating All Categories Arts and Entertainment Finance and Business Home and Garden Relationship Quizzes Cars & Other Vehicles Food and Entertaining Personal Care and Style Sports and Fitness Computers and Electronics Health Pets and Animals Travel Education & Communication Hobbies and Crafts Philosophy and Religion Work World Family Life Holidays and Traditions Relationships Youth
- Browse Articles
- Learn Something New
- Quizzes Hot
- This Or That Game
- Train Your Brain
- Explore More
- Support wikiHow
- About wikiHow
- Log in / Sign up
- Computers and Electronics
- Operating Systems
How to Add a Video to Powerpoint on a Mac
Last Updated: February 6, 2024 Tested
This article was co-authored by Mitch Harris . Mitch Harris is a Consumer Technology Expert based in the San Francisco Bay Area. Mitch runs his own IT Consulting company called Mitch the Geek, helping individuals and businesses with home office technology, data security, remote support, and cybersecurity compliance. Mitch earned a BS in Psychology, English, and Physics and graduated Cum Laude from Northern Arizona University. The wikiHow Tech Team also followed the article's instructions and verified that they work. This article has been viewed 347,412 times.
Video clips saved to a computer hard drive or streamed over the Internet can easily be imported into a Microsoft PowerPoint slideshow presentation on a Mac, using the different video embedding options available to OSX users. This wikiHow shows you how to use the Mac version of PowerPoint to add videos to your presentations.
Importing a Video from a File into PowerPoint

Importing a Video from the Movies Folder, iMovie or iTunes

Embedding a Hyperlink to a Video Stream on the Web

Editing the Playback Settings of a Video File in Mac

Expert Q&A

- MS PowerPoint will only accept video files with the .mov, .avi or .wmv extensions. Other video formats will need to be converted to 1 of these formats in order to be embedded into a PowerPoint slideshow. Thanks Helpful 0 Not Helpful 0

You Might Also Like

- ↑ Mitch Harris. Consumer Technology Expert. Expert Interview. 16 July 2021.
About This Article

- Send fan mail to authors
Is this article up to date?

Featured Articles

Trending Articles

Watch Articles

- Terms of Use
- Privacy Policy
- Do Not Sell or Share My Info
- Not Selling Info
Keep up with the latest tech with wikiHow's free Tech Help Newsletter
How to Make a PowerPoint on Mac? (A Step-by-Step Guide)
If you’ve ever wanted to create a professional-level PowerPoint on your Mac, you’re in luck! In this step-by-step guide, we’ll walk you through the entire process from start to finish.
You’ll learn what Keynote is and how to open it on your Mac, how to create a PowerPoint, customize the slides, add text, images, and media, utilize themes and animations, and finally, save and share your PowerPoint.
By the end of this guide, you’ll be a PowerPoint pro on your Mac!
Table of Contents
Short Answer
Making a PowerPoint on a Mac is easy.
First, open up the Pages application on your Mac.
Then, select the File menu and choose New from Template.
From there, you can select a PowerPoint template and customize it to fit your needs.
When you are finished, you can save your presentation and share it with others.
What is Keynote?
Keynote is a presentation software program developed by Apple Inc.
and is available on all Mac computers.
It is a powerful program that allows users to easily create engaging and professional presentations.
Keynote provides users with a wide range of tools and features, including customizable slides, themes, animations, and more.
With Keynote, users can create stunning presentations in minutes.
It is a great tool for creating presentations for business, education, and personal projects.
Keynote is easy to use and is a great choice for anyone who wants to make a professional-looking PowerPoint on a Mac computer.
How to Open Keynote on Mac
Opening the Keynote app on a Mac computer is quite simple.
To open the app, you can either use the “Finder” app in your Applications folder, or you can use the “Spotlight Search” tool to quickly find the Keynote app.
If you choose to use the Finder, simply open the Finder app and navigate to the Applications folder.
From there, you will find the Keynote app.
You can then double-click on the Keynote icon to open the app.
Alternatively, you can use the Spotlight Search tool to quickly locate the Keynote app.
To do this, click on the magnifying glass icon in the top-right corner of your screen.
You can then type in “Keynote” in the search bar and hit the “Enter” key.
The Keynote app should appear in the search results.
You can then click on the Keynote icon to open the app.
Once the Keynote app is open, you can begin creating your PowerPoint presentation.
You can customize your slides by adding text, images, and other media.
You can further customize your slides by using various themes and animations.
Once you have created your presentation, you can save it as a .pptx file and share it with others.
With the Keynote app, you can easily create a professional-looking PowerPoint on a Mac computer.
Creating a PowerPoint on a Mac
Creating a PowerPoint presentation on a Mac computer is a straightforward process, whether youre creating a presentation for work or school.
The first step is to open the Keynote app on the computer.
Keynote is the presentation software for Mac computers, and it makes creating a presentation simple and easy.
Once you have opened the Keynote app, you can begin customizing your presentation.
You can add text, images, and other media to your slides, as well as utilize various themes and animations to make your presentation look professional and eye-catching.
You can also customize the layout of your slides, allowing you to add different elements and adjust their placement.
When your presentation is complete, you can save it as a .pptx file and share it with your colleagues, classmates, or anyone else who needs to view it.
You can also export your presentation as a PDF, a movie file, an HTML file, or a JPG file, depending on your needs.
With the Keynote app, creating a professional-looking PowerPoint on a Mac computer is easy and stress-free.
All you need to do is open the app, customize your slides, and then save your presentation in the desired format.
Whether youre creating a presentation for work or school, the Keynote app will help you get the job done quickly and efficiently.
Customizing the Slides
Customizing the slides is an important part of creating a stunning PowerPoint presentation on a Mac.
The Keynote app provides a variety of tools and features to help you design your slides.
You can easily add text, images, and other media to customize your slides.
To add text to your slides, simply select the text box and type in your desired text.
To add images, you can either drag and drop them into the slide or use the Insert Image button.
You can also insert shapes, charts, and other media to customize your slides.
Additionally, Keynote offers a range of themes and animations to help you further customize your presentation.
Themes allow you to quickly change the overall look and feel of your slides.
Animations can be used to add a touch of flair to your slides, such as transitions between slides and animated text.
To access the themes and animations, simply click on the Themes or Animations tabs in the upper right-hand corner of the app.
By taking advantage of the Keynote apps customization features, you can easily create a professional-looking PowerPoint on a Mac computer.
With just a few clicks, you can customize your slides and make them look stunning.
So, if youre looking to create an impressive presentation, the Keynote app is the perfect tool for the job.
Adding Text, Images, and Media
When it comes to creating a professional-looking PowerPoint on a Mac computer, adding text, images, and other media is key.
With the Keynote app, you can easily customize your slides by adding text, images, and other media elements.
To add text, select the text box icon from the top menu, and then type in the text you want to include in the text box.
You can also adjust the font type, font size, font color, and other text properties.
Once you have finished editing the text, click the Done button to save your changes.
To add images, click the Add Image icon from the top menu, and then select an image from your computer, or add an image from the web.
You can also adjust the size, position, and transparency of the image to make it look more professional.
Finally, you can add other media elements such as audio and video to your slides.
To do this, click the Add Audio or Add Video icon from the top menu, and then select the audio or video file you want to include.
You can also adjust the size, position, and playback settings of the media element to make it look more professional.
By using these methods, you can easily add text, images, and other media elements to your PowerPoint slides on a Mac computer.
Once you have added all the elements, you can save your presentation as a .pptx file and share it with others.
Utilizing Themes and Animations
Creating a PowerPoint presentation on a Mac computer is made easier with the help of the Keynote app.
Not only can you easily create a professional-looking presentation, but you can also customize your slides with various themes and animations.
With the help of themes and animations, you can create a presentation that is visually appealing and engaging.
When creating a presentation, you can choose from a wide variety of themes and animations.
You can choose from a variety of colors, fonts, and designs to give your presentation a unique look.
You can also choose from several animation styles to give your presentation a more dynamic feel.
For example, you can choose to have your slides transition in with a fade or a slide, or you can animate specific objects within your slides.
Themes and animations can also help to emphasize certain points in your presentation.
For instance, you can use animations to draw attention to a particular slide or element in your presentation.
Additionally, you can use themes to create a professional and consistent look throughout your presentation.
Creating a presentation with themes and animations is easy.
In the Keynote app, simply select the themes tab to access the available themes and animations.
From there, you can customize your slides with the desired theme and animations.
You can also preview your slides and animations before you save them.
Creating a professional-looking and engaging presentation on a Mac computer is easy with the help of the Keynote app.
With the help of themes and animations, you can create a presentation that is visually appealing and will help to emphasize certain points you want to make.
With a few clicks, you can quickly create a presentation that will be sure to impress.
Saving and Sharing Your PowerPoint
Once you have finished creating your PowerPoint presentation, you can save it as a .pptx file and share it with others.
To save your PowerPoint, click the File menu at the top of the Keynote window and then click Save.
You will be given the option to save your file to your Macs hard drive or to the cloud.
If you wish to share your presentation with others, you can do so by exporting it as a PDF file or by sharing it directly with other users.
To export your presentation to a PDF file, click the File menu and then select Export.
You will be given the option to export your PowerPoint as a PDF file.
If you would like to share your presentation directly with other users, you can do so by clicking the Share menu at the top of the Keynote window and selecting Share with Others.
Here, you can enter the email addresses of the people you would like to share your presentation with.
You can also set a password for your shared presentation if you wish.
Once you have saved and/or shared your presentation, you can open it up again at any time by double-clicking on the .pptx file.
This will open up the presentation in the Keynote app and you can make any changes that you wish.
With the Keynote app, creating a professional-looking PowerPoint on a Mac computer is easy and convenient.
The steps outlined above will help you create a great presentation and save/share it with others in no time.
Final Thoughts
Creating a professional-looking PowerPoint on a Mac computer doesn’t have to be difficult.
With the help of the Keynote app, you can easily create slides with text, images, and other media, and customize your slides with themes and animations.
Now that you know how to make a PowerPoint on Mac, you’re ready to create your own presentations and share them with others.
So get to it and start making your own PowerPoint today!
James Wilson
James Wilson has extensive knowledge in the information technology industry.His second love, besides dealing with computers, is smart home technology. He is continually updating information to better comprehend this problem and has a deep understanding of the apartment’s support system.
Recent Posts
Is Airtable a Public Company? Unveiling the Truth
No, Airtable is not a public company. As of now, Airtable is a private company that has raised funds from various investors but has not gone through an initial public offering (IPO) to be listed on...
How to Make Money with Airtable: Top Strategies and Success Stories
To make money with Airtable, you can offer consulting services to businesses looking to optimize their workflows through the platform. You can also create and sell templates or automation scripts...
- Apple Pencil
- Apple Watch
- All Smart TVs
In This Article
15 software used for mac presentation, 6 online presentation software for mac, does mac have presentation software, how do you create a presentation on mac, is there a mac version of powerpoint, is powerpoint better than keynote, let your presentation talk, related articles, 15 best presentation software for mac [reviewed & ranked].
Follow on Twitter
Updated on: February 08, 2024
Presentations are integral to any design: how else would you explain your idea to your client or team? People tend to leave presentations as the last possible step of their process and don’t give them as much time and attention as they need.

If you are a designer, architect, artist, businessman, or any other person that regularly makes subpar presentations, take your game to the next level with some of the best presentation software for mac !
You don’t want to download or install any App? Then check these 6 online presentation software for mac .
Here is some of the best presentation software for Mac that you can use to make your ideas and design extraordinary:

Price: Free Best for: Mac users
Keynote is one of the top presentation software for Mac and comes included with most Apple devices.
With its stunning features and powerful tools, you can bring your slides to life and create the most effective presentations for your clients or your boss.
- Best in-built presentation software for Mac
- Simple and intuitive
- Poor compatibility with windows presentation software
- Presentations can take too much storage
- Does not have as many editing tools as PowerPoint
2. FlowVella

Price: Free (limited version) or $10/month Best for: Mac users
This presentation software is excellent to combine words, images, videos, links, PDFs, and other media into a presentation.
This way, having an interactive presentation is easy.
It’s oriented towards marketing, HR professionals, and sales teams.
- Great Drag & Drop Feature
- Dozens of free templates
- You have to buy the software to use all the features and tools
3. Prezi for Mac

Price: Free (limited version) or starting at $10/month Best for: Mac users
Prezi for Mac is another great Mac presentation software that lets you create dynamic presentations. It has a trial version of 14 days.
The bad thing about making presentations is choosing a video or image to put into it. But not with Prezi.
Prezi is a leader in the video presentation movement and allows you to make the most interactive slides for your presentation.
- Great User Interface
- Zoom and overview feature
- Integration with Zoom Software
- It takes time and practice to learn how to work on Prezi.
- Not easy for beginners.

Price: Starting at $35 Best for: Mac users
Deckset is a unique presentation software that lets you put your ideas and thoughts into it and makes the slides for you.
This is great for people that want to spend less time and energy making slides for their presentation but is only for text-based presentations.
It includes a trial version to try before purchasing the complete presentation software.
- It designs your slides for you, taking off most of the pressure of creating a presentation
- Trial Version
- It is a very costly software to buy
5. PowerPoint

Price: Free (With a Microsoft 365 subscription) Best for: Mac users
PowerPoint for Mac is old but gold.
It is one of the oldest presentation software and allows you to create beautiful slides with multiple templates of your choice.
This software has many tools and features that make the presentation process fun and easy.
- Easy and simple to use
- Multiple free templates
- Lack of creativity in the included templates
- Display Compatibility issues
6. LibreOffice’s Impress

In this software for Mac, multiple editing and viewing modes make the process of editing and creating slides versatile and interactive.
This software is great for presentations that are mostly text-based.
- Free software
- It does not put a lot of strain on your system
- Not very good user interface
- Lack of integration with other presentation software
7. iSkySoft Slideshow Maker

Price: $59.95 Lifetime Best for: Mac users
iSkyDoft Slideshow Maker has to be one of the best presentation software for Mac.
It allows the user to add text, photos, and videos to the slides and music, which makes the entire experience of watching a presentation even better.
This presentation software can be used to beautifully commemorate an event, activity, design process, or team activity in one file.
Moreover, the software also has a ton of features and aftereffects that can be added to make the presentation even better.
- Easy-to-use interface with a ton of incredible features
- It has a steep subscription fee that might not be good for beginners or one-time users
8. Focusky 3D

Price: starting at $9.9 Best for: Mac users
If you want to make a presentation on your desktop but also want it to work on other devices, such as your phone or tablet, Focusky is the perfect software for you.
Focusky is a powerful 3D presentation software for Mac with a wide range of tools that allows you to customize your presentation according to your taste.
to customize your presentation according to your taste.
- It works great offline and doesn’t require any internet
- Powerful export functionality (slides into gift/flash)
- Unexciting slide visual effects
- It requires a bit of learning before you can successfully use it
9. TouchCast Pitch

TouchCast Pitch is one of the presentation software that you automatically gravitate towards when you want to make a meaningful, impactful, and interactive presentation.
Pitch turns boring presentations into winning experiences that make it hard to forget.
- It has a huge library of tools and interesting features for your use
- A bit hard to learn and teach students

If you’re trying to make a presentation in less time with the least effort and still hoping it will come out beautiful, Canva is the perfect software to use.
With its extensive features and tools, the software allows you to edit, customize, and create your slides for presentation in record time.
- It is free, simple, and has a good user interface.
- It allows you to create stunning designs in mere minutes
- It is not a specific software for presentations.
- It does not have as many interesting features as other presentation software

Price: Free or $8/month Best for: Mac users
If the presentations that Pitch lets you make are half as interactive and fun as their website, there is no better software for Mac to do presentations.
It has multiple great tools, effects, templates, and designs available for you to use for your presentation or get inspired to create your own.
- Team Collaboration feature
- Great Support Team
- It has a bit of a learning curve, especially for a beginner
- A limited selection of templates
12. WPS Office for Mac

Price: Free (limited version) or $ 25.21 / year Best for: Mac users
WPS Office must be the essential software on your desktop, whether it is Windows or Mac.
The WPS Office for Mac has all the features and tools that let you document your process and create some of the simplest and easiest presentations for your work meetings and project discussions.
- It allows for collaboration
- Easy documentation
- It doesn’t have a lot of tools for PDF editing or grammar-check for text
13. Premast Plus

Price: Free or $5.99/month Best for: Mac users
If you are a designer, or any other creative folk, looking for beautiful graphic presentation software, there is none better than Premast Plus.
It gives you a wide range of tools, templates, illustrations, and icons to use for your presentation to make it the best you can!
- Very simple
- Wide Range of rich templates
- A lot of the tools and features of this software are available only after you purchase a subscription
- A bit unstable.
14. Movavi Slideshow Maker

Price: Free Trial or $37 Best for: Mac users
Movavi Slideshow Maker is great for unconventional presentations as it lets you add images, videos, text, music, transitions, and effects to your file.
It allows you to create a movie out of your work, making the entire presentation fun and engaging.
- It has great and simple user-interface
- It lacks a lot of features and does not have the tools for professional editing and presentation-making
15. Propresenter – Church Presentations

Price: starting at $399 Best for: Mac users
Propresenter is a church presentation software for Mac that allows you to create a beautiful presentation for a sermon.
It can include worship lyrics, sermon notes, videos, images, etc., to create an impactful and powerful presentation.
The best thing about this software is that it is excellent for beginners.
- Perfect presentation software for church
- It has all the tools that you might need to add music, lyrics, sermon, and text.
- Very expensive software and only best for professionals
1. Slidesbean

Slidesbean is an innovative online presentation software for Mac that does most of the heavy lifting while making the presentation.
It has great features and interactive tools that offer everything you need to build the perfect pitch for your presentation!
Great for entrepreneurs who want to create a beautiful pitch deck.
- Great analytics
- The templates look great
- The result looks very professional
- Videos have to be uploaded to third-party platforms
- The AI feature is not too helpful
- Export for PowerPoint only exports as image
2. Renderforest

Looking for a great online presentation software for Mac that allows you to create stunning videos, animations, branding, mockups, presentations, and more?
Renderforest is the perfect site for beginners and professionals.
- High quality & professional looking templates
- Mind-blowing animations
- Video templates look great
- Free version available
- Limited customization
- Can be a bit pricy
- No iOS or Android app
- Video render time can take long
3. Zoho Show

The great thing about this online presentation software for Mac is that it allows for a group/team to collaborate on the process of creating a presentation.
It is a clean, simple, and easy software that makes creating presentations seamless and simple.
- Includes infographics
- Supports real-time collaboration
- It has good template designs
- It has a Chrome web browser extension that makes it easier to work on the slides.
- It allows broadcasting presentations
- Easy-to-use transitions
- Interface can be a bit slow on low-end devices
- Interface could be better
- No desktop App available

Visme is a fan favorite for brands, big and small, to create stunning presentations.
It has numerous templates and color pallets to choose from that make the entire process of making a presentation easy.
- Allows you to create a brand identity with “My brand” feature
- Disk capacity and usage limit can be low on basic and free plans
- No support for collaborators
- Learning curve
- Free version is way too limited
- The interface could be better
5. Google Slides

Google Slides is the most popular online presentation software that is used by millions worldwide.
It provides the basic tools and features necessary to create a striking presentation.
- Fast and easy to use
- Includes real-time collaborative mode
- It’s free
- Connected with Google services like Google Drive
- It doesn’t support non-Google-based fonts
- Limited templates
- Limited transitions and animations
- It won’t provide support for audio imports

Slides are one of the online presentation software that makes your presentation look extremely sleek and professional.
It is a must for all designers and project managers!
If you need to bring project management to the next level, then you must check out the best project management software for Mac .
- Supports custom HTML and CSS
- Supports two directions (vertical & horizontal)
- Smooth and fast interface
- Supports LaTeX
- It doesn’t provide templates
- It doesn’t support PowerPoint exports
Mac has a presentation software already preinstalled in all Apple devices called Keynote. It is completely free and it allows you to create stunning presentations for school projects, your business, your office, etc. It is available for Mac, iPhone, iPad, and even for PCs.
Keynote includes real-time collaboration with your team, which is an essential feature now that everything is done online.
You can create a presentation on Mac with the help of Keynote. To create a keynote presentation follow these 3 steps:
- Choose a theme.
- Add your content to the placeholder images and texts.
- Create a presentation from the slides.
Yes. Microsoft PowerPoint is available for download on Mac and your phone, tablet, or PC, but you would need a Microsoft 365 subscription on your device to use it on Mac. The software isn’t identical to the Windows one but is quite similar with only a few minor differences in menu and layout.
Where PowerPoint is the most common presentation software for everyone worldwide, Keynote has been declared a better presentation software for Mac users, especially for professionals.
But if you are looking for a variety of editing tools, features, and templates for your presentation, there is nothing that trumps PowerPoint.
Creating a powerful presentation is an essential part of your strategy, whether you are a businessman, a designer, an architect, or a project manager.
It would be best if you had a presentation that doesn’t bore your audience and manages to convey all the key information in the best possible way.
All the software mentioned above are some of the most extraordinary presentation software for Mac and can help you create a memorable presentation.
- How To Create A Page Like a PowerPoint Presentation
- 9+ Best Photo Management Software For Mac
- 13 Top Landspace Design Software For Mac
- 9 Best Database Software For Mac
- Top 19 Architect Software For Mac
Juwairiah Zia
Juwairiah Zia is a seasoned professional, a full stack developer and writer in her free time. She’s deeply immersed in various tech domains such as web and mobile application development and mentorship.
Don’t Miss…

- Legal Notice
- Terms & Conditions
- Privacy Policy
A project by Alvaro Trigo
17 Best Slideshow Makers for a Mac [2024]
To create a slideshow on a Mac, follow these simple steps:
1. Download Movavi Slideshow Maker.
2. Choose your working mode.
3. Add photos and music.
4. Make a slideshow and save the result.
By clicking the download button, you're downloading a trial version of the program.*
- Learning Portal
- 17 Best Slideshow Makers for Mac in 2024 – Movavi

Looking for the best slideshow software for Mac? You’ve come to the right place. Learn about 17 Mac-compatible slideshow makers, what makes each stand out, and get the lowdown on pricing, licensing, and key features so you can choose the software that’s right for you and your budget.
Movavi Slideshow Maker
Users who need powerful video and image editing capabilities
Mac lovers who own an iPhone and iPad to bounce between devices
Microsoft PowerPoint
People comfortable with PowerPoint who don’t need advanced features
LibreOffice Impress
Students and anyone looking for an open-source solution
Creatives looking for dynamic, fluid presentation software
Professionals looking to pitch their business ideas
Businesses looking to create cohesive presentations
Conference presenters or museum curators
Marketers looking to create SEO-friendly presentations
Preview in Finder
Mac natives interested in creating a quick slideshow
Apple users making movie-like presentations
Apple Photos
Mac natives looking for a bit more customization
Photographers interested in presenting high-quality images
HyperEngine-AV
Audiophiles looking to build a presentation
Wedding videographers and photographers
4K Slideshow Maker
Social media-inclined presenters
Video amateurs looking to create video-heavy presentations
Here’s what Movavi’s team does to provide you with verified information:
When selecting products to include in our reviews, we research both demand and popularity.
All products mentioned in this article have been tested by Movavi Content Team.
When testing, we aim to highlight the best features of a product and what it’s best suited for.
We study user reviews from popular review platforms and make use of this information when writing our product reviews.
We collect feedback from our users and analyze their opinions of Movavi software as well as products from other companies.

List of the best slideshow software for a Mac
The best slideshow maker for Mac depends on the user. We’ve gone through and determined the best slideshow apps for Mac devices, paying particular attention to their cost, pros, cons, and key features, to help you test out and ultimately choose the best program for you to use on your Macintosh.
1. Movavi Slideshow Maker
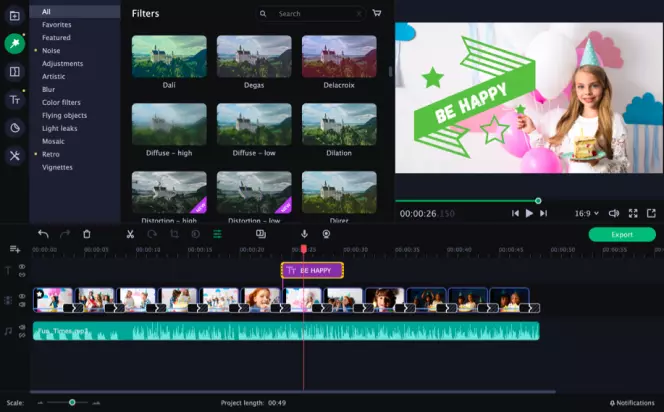
Best for: Beginners who want to create slideshows beyond the basics, as well as users who enjoy visual features like filters, transitions, and stickers
OS: macOS (also support for legacy versions for Mac and Microsoft Windows), Windows 7/8/10
Licensing: Free 7-day trial, subscription, or lifetime license
File size: 74 MB
Rating: 9.5/10
Movavi Slideshow Maker is a well-balanced tool for beginners and advanced users alike.
For instance, Movavi’s “Easy Mode” lets novices build a professional-looking slideshow in minutes without much of a learning curve. They just need to upload the necessary media files (image / images, videos, etc.) and then select slide transitions. Adding music is also straightforward, and Movavi provides guides in case any step isn’t 100% clear.
And for anyone who needs more advanced features, the “Full Feature” mode provides options like native recording, extra photo editing options, animated transitions, and even in-app video editing. Best of all, most of these features only require you to click and drag the desired elements.
After your slideshow is complete, Movavi makes it easy to save your presentation in any major file format (and some less common ones), and you can even adjust the file size – making it easier to put on a flash drive.
Key features:
- 165+ visual effects and filters to apply to your presentations
- 105+ transitions to use between slides
- 100+ titles and stickers for further customization
- Support for 14 different languages
Easy to use
Effective tool for amateurs and professionals
A free trial is available for 7 days only
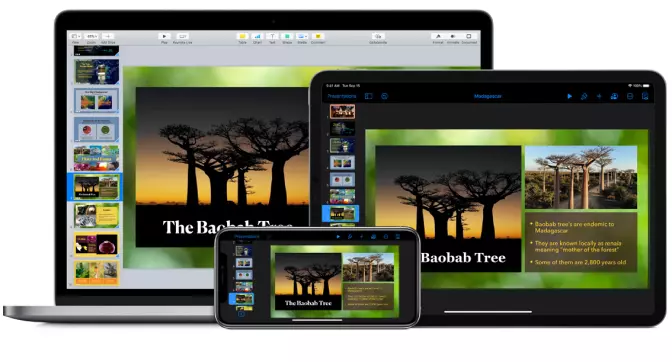
Best for: People who own the full line of Apple products (iPhones, iPads, and Macbooks) for convenient cross-device usage
OS: iOS, macOS
Licensing: Free (for new Mac laptops and desktops), or one-time purchase
File size: 345.2 MB
Rating: 9/10
Keynote is Apple’s native slideshow maker. Usable on iPhones, iPads, and accessible via the iCloud, Keynote is a versatile and free slideshow maker for Mac computers made in 2013 or later.
The current version of Keynote lets Mac users collaborate on presentations, tweak slides from their iPhone with the Keynote mobile application, and even transform handwriting into text on your computer. If you’re an Apple fanatic, Keynote is an effective way to develop slideshows and present visual, video, and text information in informal and professional settings.
- Can use Apple Pencil on an iPad to draw directly onto your presentation
- “Rehearse Mode” to practice your presentation on the fly
- 30 templated themes and the ability to create custom templates to use later
Download Keynote
Handy phone app makes it possible to edit presentations anywhere
Can easily embed videos into your presentation
Already installed on your Mac computer (unless your rig is a decade old)
Takes time to master
Not usable on Android, so you can’t bounce between Keynote on your laptop and your cellphone unless you have an iPhone (however, Keynote can now run on Windows OS)
3. Microsoft PowerPoint
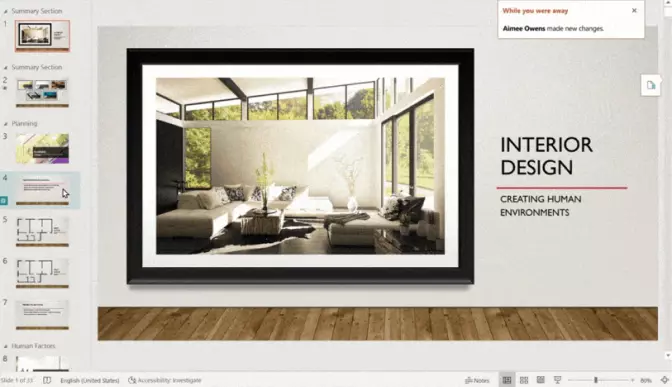
Best for: Anyone who grew up using PowerPoint and feel most comfortable using a tool they’re familiar with
OS: macOS, Windows
Licensing: 1-month free trial, subscription
File size: 700 MB
Our rating: 8/10
Microsoft PowerPoint is one of the oldest examples of slideshow maker software. It’s so well known that the phrase “I need to make a PowerPoint” is more common than “I need to make a slideshow” in the United States.
PowerPoint is a straightforward presentation tool that most people don’t use to its full potential. The software, in addition to standard slide making and templates, offers useful yet less-known features like self-running presentations and audio fading, bookmarking, and trimming.
Making a basic slideshow is as easy as choosing a theme, filling in the blanks, and adding media wherever you need it. Presenting visual elements like images and video as well as audio, text, and linking slides with smooth transitions with PowerPoint is no problem, and there are countless tutorials online if you want to take your PPT skills to the next level.
- Easily embed YouTube videos
- Merge shapes and edit image files within the application
Download Microsoft PowerPoint
YouTube tutorials and online writing guides for additional support
You’ve probably used it before, so the UI should be familiar
Usable on every all major operating systems and device
Lack of imagination when it comes to templates
Some users have encountered bugs using PowerPoint on macOS
4. LibreOffice Impress
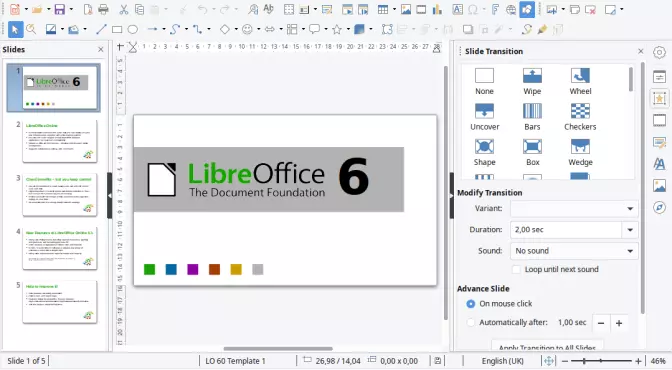
Best for: People looking for a basic, free slideshow maker usable on any major device and operating system
OS: macOS, Windows, Linux, Android, iOS
Licensing: Open-source software
File size: 252 MB (for LibreOffice productivity suite)
Our rating: 7.5/10
LibreOffice Impress is part of LibreOffice’s open-source suite of productivity software. Impress provides five different modes of viewing your in-progress presentation, and even gives you access to tools like The Fontworks to create dynamic 2D and 3D text for your slideshows.
If you’re new to Impress, simply begin with its outline mode and you’ll soon be on your way to creating a great slideshow. Does your presentation need an injection of creativity? Download any of the free LibreOffice Impress templates available online for some help.
- Free forever
- Downloadable templates
Download LibreOffice Impress
Multiple viewing modes for easy step-by-step presentation making
Basic setup that’s easy to use for anyone familiar with PowerPoint
Not online, so it’s harder to instantly collaborate on an Impress file
Some of the features and UI seem a bit out of date
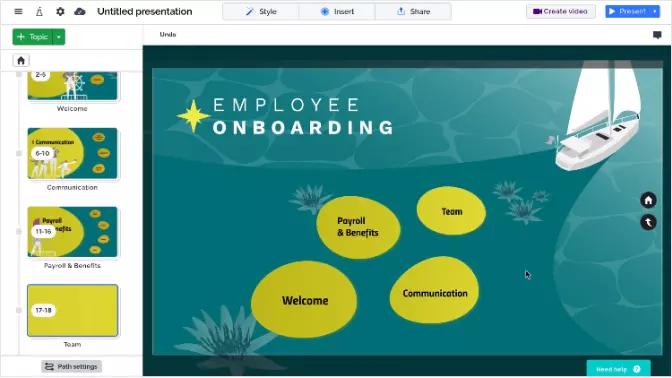
Best for: Users interested in approaching presentation-making in a new way
OS: Windows 7, 8, 10, Mac OS X or higher
Licensing: Monthly subscription
File size: 650 MB
Our rating: 8.5/10
At first glance, Prezi appears to be a response to slide-by-slide presentation tools such as Keynote and PowerPoint. While Prezi involves many of the same concepts as a standard slideshow application (offering templates, audio and video customization, etc.), the way information moves from section to section makes Prezi stand out from the crowd.
Each Prezi presentation is displayed on a large canvas. Instead of moving slide by slide, the presentation zooms in and out of sections and helps keep the user engaged when transitioning between topics. Additionally, you can bounce between audio and video with help from Prezi’s recording software, letting you create dynamic presentations that many people haven’t experienced before.
Prezi started out as solely a web app, but you can now download Prezi Next if you prefer (or require) an offline solution to building professional presentations.
Download Prezi
Doesn’t feel like a standard presentation, focuses on “the path” (transitions)
Can mix in audio and video into your canvas, and provides options to create talking-head videos
Lots of customizability
In-app collaboration is limited
Pricing is multi-tiered, may confuse users looking for a straightforward pricing model
6. Slidebean
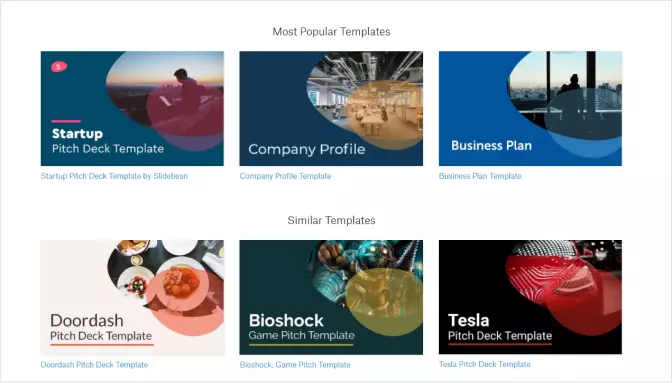
Best for: Entrepreneurs looking to pitch projects or startups
OS: Web application
Licensing: Subscription
File size: N/A
Our rating: 9/10
Slidebean was born out of a need for building aesthetic presentations without an actual graphic designer at hand. The product is specifically designed for creating professional pitch decks for businesses and marketers, and they even have a “Book Project” function if you want direct support using their tool.
This slideshow program for Mac isn’t ideal for putting together casual presentations. However if you’re looking to turn your slideshow into a pitch that lands you investors and grows your business, Slidebean is a service to investigate.
- Templates targeting both pitch decks (for slideshows) and financial model templates (if your presentation involves running numbers, like from a business plan)
Go to Slidebean
Designed with professionals in mind (visuals are buttoned up)
Customer support services readily available for its users
Narrow in scope, built to pitch ideas and create formal presentations
Minor bugs reported (like uploading an image turns the entire slide 100% black)
7. CustomShow
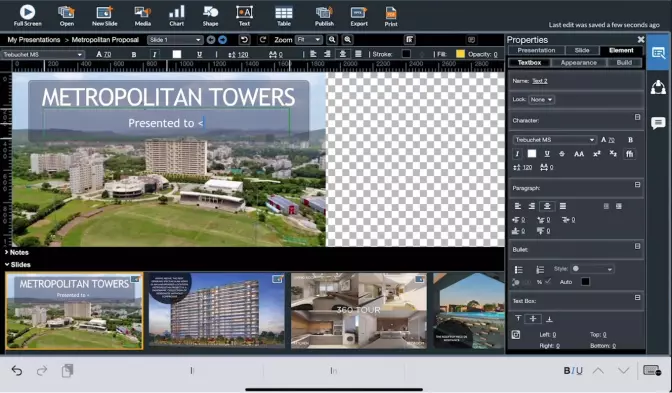
Best for: Businesses looking to set a standard for presentations across teams or the entire company
OS: Cloud-based application
CustomShow is enterprise software as a service built to help companies develop consistently branded presentations. After you’ve uploaded the requisite media files for your slideshow, you can further customize details like image shading, backgrounds for your video, and other visual effects.
From a technological standpoint, CustomShow also excels at connecting teams – providing the ability to simultaneously cast presentations to different devices. Such a feature is especially handy for the remote teams many of us find ourselves working on today. Plus with CustomShow’s mobile app and analytics tools, there’s plenty of features for enterprises serious about getting taking their business presentations to a new level.
- Multicasting presentations
- Analytics features for businesses
Go to CustomShow
Ability to easily collaborate makes it great for large companies and remote teams
Feature rich
Not for the slideshow hobbyist / individual user
Has a bit of a learning curve
8. FlowVella
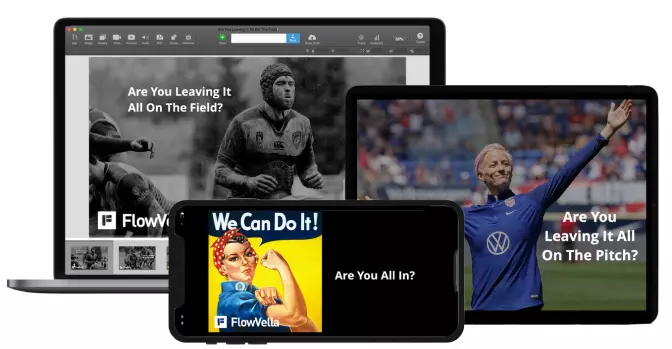
Best for: Businesses presenting at events or conferences, users who want to incorporate a range of elements into their presentations
OS: OS X and iOS
Licensing: Free trial, subscription
FlowVella presentations sometimes look a bit like the page of a website because of all the interactive elements built into them. FlowVella allows the presenter to seamlessly move between image files, slides, videos, and other media dynamically – breaking from the linear nature of standard Mac slideshow apps.
The FlowVella app even provides a “kiosk mode” for iPads, easily letting users (like museum goers or tradeshow attendees) interact with a presentation you made without accidentally changing its elements.
- Kiosk mode for tablet devices
- Autoplay video content
Go to FlowVella
Built for businesses and amateurs alike
Plenty of features for users who like to mix media into their presentations
Minor bugs in the app
Not extremely intuitive
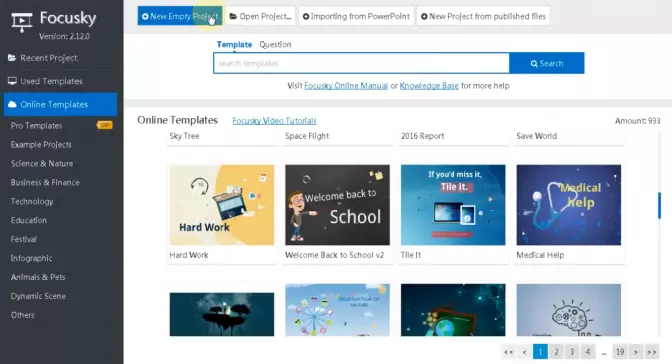
Best for: Users looking for a dynamic presentation generator that takes slideshows to another level
OS: macOS, Windows 10/8/7Vista/XP
Licensing: Free trial, subscription, lifetime purchase
File size: 372 MB
Focusky is a feature-filled slideshow maker that operates in many ways like PowerPoint. However, it goes beyond PowerPoint in terms of customization, with hundreds of templates, dynamic transitions that zoom in and out (similar to Prezi), and plenty of design assets to play around with.
- Robust transition features
- Search Engine Optimization-friendly (can create text versions of presentations to index on Google)
Download Focusky
Customization is a huge emphasis, with 5,000+ open-source vector icons and diagrams and 600+ templates for pro users
Cloud hosting for publishing presentations online, great for the current remote-work world
Free version has watermarks
Content across the site seems like it hasn’t been updated in years, so support seems questionable
10. Preview in Finder
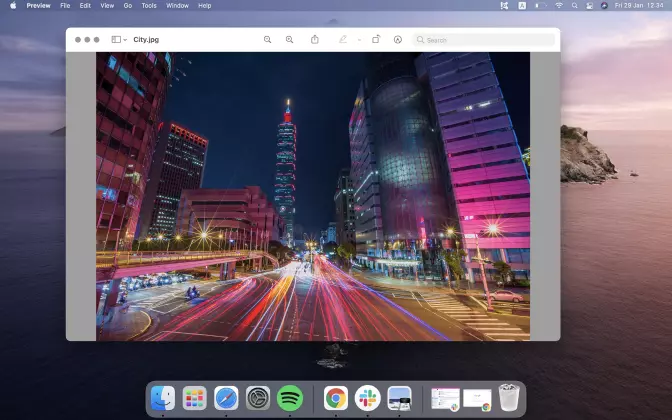
Best for: Mac users looking to create a slideshow fast with few bells and whistles
OS: macOS (Big Sur)
Licensing: Free for Mac users
Our rating: 6.5/10
Most macOS users have opened up Preview before without realizing it because it comes preinstalled on your device. If you’ve ever opened an image on your Mac computer, Preview is the default image reader so it likely opened it for you (unless someone changed the settings). However, Preview can do other things as well – including making slideshow presentations.
Simply open the files you want (JPEGs, PNGs, PDFs, etc.) to begin. The fastest way to turn these into a presentation is to arrange them in any order you want, click “View”, and then “Slideshow”.
- Embraces simplicity – sometimes we need to make a quick slideshow
- Free for Mac users and native to macOS
Simple, on-the-fly concept
User familiarity
No customization except for how you arrange your image and text files
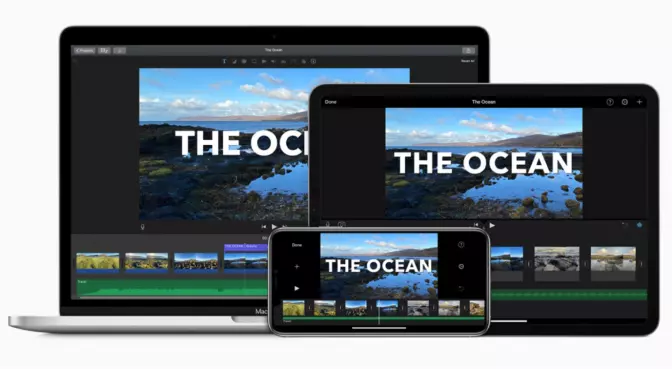
Best for: Apple users making movie-like presentations
File size: 2.2 GB
Our rating: 7/10
While iMovie wasn’t created for slideshows, it still operates well in this secondary capacity. Created for Mac users who enjoy all Apple devices, iMovie has quickly evolved into a tool popular for developing more compelling slideshows and visual presentations.
With iMovie, your primary customization features for a slideshow are titles and transitions (elements that are useful in actual movies). However, you can still handle some of your image editing needs within the tool as well.
After your media files are imported into the app, you can add text, music, and other stylistic elements to build a dynamic experience for your audience. Try applying filters and playing around with iMovie’s green screen function to add some unique finishing touches to your presentation.
- Presentations that emphasize video content
Download iMovie
Strong video-editing capabilities
Integrates easily across all Apple operating systems
Not built with slideshows in mind
Minor image editing capabilities (cropping / color adjustments only)
12. Apple Photos
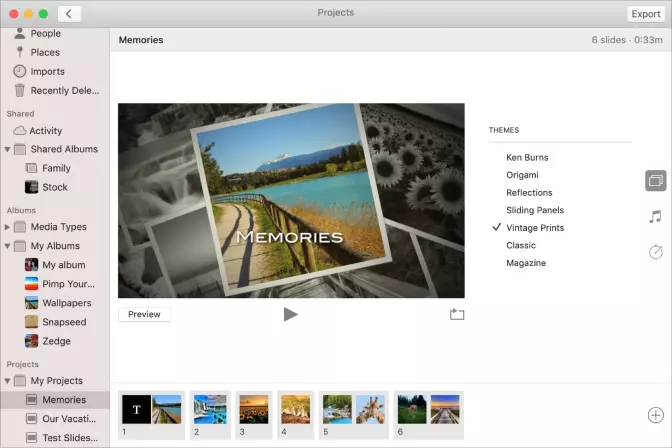
Best for: Mac users looking for a native app that’s more customizable than Preview
OS: iOS, iPadOS, macOS
The Photos app on Mac might already be on your computer (or iPhone or iPad), but do you know how to use it to make a slideshow presentation?
Apple Photos lets you create a slideshow in two different ways. The first way is to build your presentation by simply selecting a few photos, a theme, and some music. The second way is to make an actual slideshow project with text overlays and transitions (in addition to your images and musical selection(s)). Both methods can help you quickly create an aesthetic, heavily-visual presentation.
- In addition to slideshows, make cards, calendars, and photo journals with the images on your Mac or iCloud
- Intelligent curation helps you group photos together based on their content
More dynamic than Preview
Decent photo slideshow editing capabilities
Lacking in the customization department
13. FotoMagico
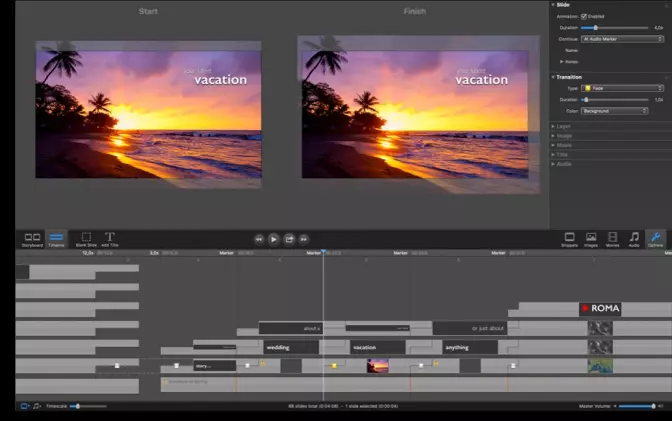
Best for: Both amateur and professional photographers looking to highlight their work
OS: macOS, iPadOS
Licensing: one-time purchase
File size: 371.5 MB
If you want to put down a little money and take your presentation game to another level, FotoMagico is an intriguing, feature-heavy option. FotoMagico, in addition to powerful image and video editing capabilities, also lets you tweak audio files and align specific musical moments with points in your presentation, making it great for people with a bit more technical know-how.
Similar to video-editing software, you can view each panel of your FotoMagico presentation at the bottom of the application. This timeline vantage makes it a simple matter to seamlessly edit and adjust minute details in your photographs and develop a presentation that meets your exact specifications.
- Create slideshows in stunning 4K resolution
Download FotoMagico
Feature-rich tool
One-time purchase
Bugs have been noted in some of their customer reviews
14. HyperEngine-AV
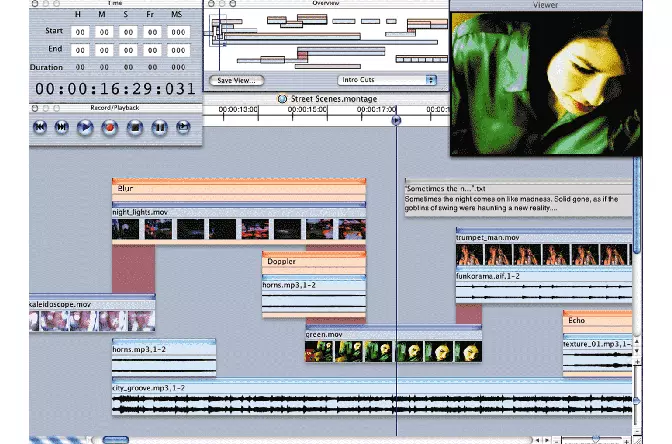
Best for: Users interested in social media integration features
OS: Mac OS X
Licensing: Open-source
File size: 11 MB
HyperEngine-AV leans further into the video-creation side of presentations than it does slideshows, but it can still handle both tasks effectively.
If you’re looking to make short product videos, YouTube shorts, or video-heavy slideshow presentations, HyperEngine has the features and UI to simplify the job. And with HyperEngine’s "trackless" workspace giving you a bird’s eye view of your various media files, you’re able to edit and drag images, audio, video, and transitions wherever you want them with ease.
- Robust audio editing functions
Download HyperEngine-AV
UI is fairly intuitive
Light program (fast and free to download)
Issues with exporting and even opening the app reported
No developer updates for a decade

Best for: Mac users looking to burn their videos or presentations onto DVDs
OS: macOS (pre-Catalina)
Licensing: Free with Mac
File size: 36.12 MB
Although iDVD is an older piece of Apple software, it can still get the job done and works especially well for people looking to create hard copies of their creations (presentations, wedding video, or otherwise). If your goal is to make a widescreen presentation complete with audio and menu options, iDVD is worth a try.
Making a video-heavy slideshow on iDVD is fairly straightforward. Once you’ve added your title and selected a theme template, you can move around your video files and adjust them as necessary.
- Helps you burn a DVD when using a Mac SuperDrive
Wide range of video-editing functions (can be used by professionals)
Not usable on Apple’s newest operating systems
Doesn’t support footage from digital cameras
16. 4K Slideshow Maker
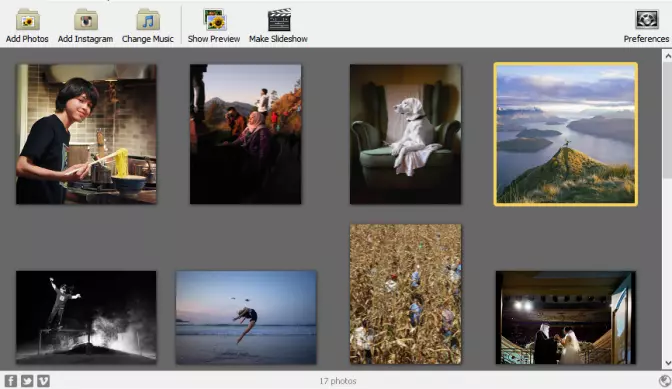
Best for: Users who want high-quality export options for their presentation
OS: macOS 10.13 and later, Linux, Windows
File size: 29.7 MB
4K Slideshow Maker states it all in its name: it’s a compact piece of software that helps you create and export a 4K slideshow (or in resolutions anywhere from the lower ends of the quality spectrum to Ultra 4K HD).
Quickly edit your images, mix in some music, and even import files directly from social media channels like Instagram into your slides with 4K Slideshow Maker. Done and ready to share your work? Move your finished presentation directly back to those social media channels (like Instagram and YouTube) to share with friends, family, and followers.
- High-resolution support (great for rendering nature scenery in its full glory)
Download 4K Slideshow Maker
Learning curve isn’t too bad for amateurs
Lets you zoom in and out of images (the “Ken Burns effect”)
Currently supports 13 languages
Lacking in the customization features (templates, icons, etc)
17. LightMV
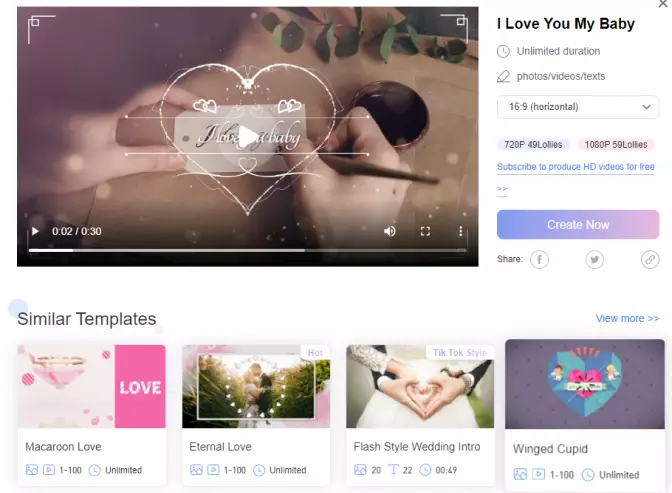
Best for: Newer users who want to mix more video content into their presentations
OS: Android, Windows, iOS, macOS
File size: 5.8 MB
LightMV is a video-focused presentation app that lets you personalize your media files in various ways to ultimately create cohesive presentations. The app provides a variety of video templates to simplify things and lower the barrier for beginners, and if you go this route then you only need to import the desired media and add transitions and text.
- Video templates created to help everything from capturing the joy of weddings to injecting energy into a business presentation
- Cloud-based rendering for easy access across different Apple devices
Download LightMV
Modern UI that’s easy for beginners to operate
Advanced features for video-editing professionals
Free 7-day trial version available
Freemium model means you can download the app but not your presentation
Trial version includes watermarking
Summary: How to choose the best slideshow app for a Mac
Still wondering what’s the best slideshow program for you personally? Now that you’ve read about some of the top slideshow creators for Mac, you should have a better idea of what program best meets your needs. But just in case you’re on the fence between a few options, here are the main things to consider first.
Ease of use: Are you looking for something easy to use that’s a bit basic, or would you prefer a more complicated tool offering more customization? Choose software that lets you get the job done at your particular pace.
Features: The features you need in your presentations will help determine which software you end up choosing. Is audio and video critical, or do you only need compelling transitions for your linear slideshow?
Pricing / licensing: Some software is free, and others have freemium offerings. Other platforms cost a flat rate or a subscription fee, but they often make it worth your time. Think about whether investing in slideshow software is something that would bring you more value in return.
Guides & support: Some tools are written about extensively online (by the creators, users, and reviewers), while others are a bit harder to dig up details on. If you’re someone who often asks questions, consider choosing slideshow software that has support options at your disposal.
Device compatibility: Although all of the tools listed in this article are usable on Mac, you may want to consider choosing an app that also works on your smartphone. Being able to knock out a presentation (or even practice) while on the go is definitely a nice option for many of us.
Cross-device usage
G2 rating :
Automatic slideshow creation and advanced features
Top Ten Reviews rating :
Creating basic slideshows
PCMag rating :
- Movavi Slideshow Maker – best for users who need powerful video and image editing capabilities
- Keynote – best for PowerPoint-like program for Mac users
- Microsoft PowerPoint – best for people comfortable with PowerPoint who don’t need advanced features
- LibreOffice Impress – best for students and anyone looking for an open-source solution
- Prezi – best for creatives looking for dynamic, fluid presentation software
- Slidebean – best for professionals looking to pitch their business ideas
- CustomShow – suitable for businesses looking to create cohesive presentations
- FlowVella – best for conference presenters or museum curators
- Focusky – best for marketers looking to create SEO-friendly presentations
- Preview in Finder – best for mac natives interested in creating a quick slideshow
- iMovie – best for making conventional video tutorials on Apple devices
- Apple Photos – best for mac natives looking for a bit more customization
- FotoMagico – best for photographers interested in presenting high-quality images
- HyperEngine-AV – best for audiophiles looking to build a presentation
- iDVD – best for wedding videographers and photographers
- 4K Slideshow Maker – best for social media-inclined presenters
- LightMV – suitable for video amateurs looking to create video-heavy presentations
An easy-to-use, yet efficient slideshow making program
* The trial version of Movavi Slideshow Maker has the following restrictions: 7-day trial period, watermark on the output slideshows, and an ability to save only half the audio length.

Frequently asked questions
What is the best program to make a slideshow on a mac.
Here are the top five apps we’ve outlined in this article in no particular order:
FotoMagico 5
However, each software comes with its own strengths and weaknesses, and targets different user groups. To find the best program for you as a Mac user, please review each tool to form your own thoughts before selecting your ideal slideshow maker software.
How do I make a slideshow on my Mac?
Making a slideshow on your Mac is easy with Movavi Slideshow Maker. Simply follow these five steps:
Click the link below and follow installation instructions to get started.
Download Movavi Slideshow Maker
Although you can adjust your settings and make manual edits feasible, for the sake of making an easy slideshow simply let the Slideshow Wizard guide you through the process.
Click File then Add Files to track down the images you plan to add to your slides.
Each Movavi theme has transitions and captions with music built into them, so preview a few, find one you like, and click Next .
View your slideshow by clicking Preview in the menu and double-check that everything is just how you want it before exporting your finished presentation on your Macbook.
Send us a Topic or Tip
Have a suggestion for the blog? Perhaps a topic you'd like us to write about? If so, we'd love to hear from you! Fancy yourself a writer and have a tech tip, handy computer trick, or "how to" to share? Let us know what you'd like to contribute!
How to Make Your Presentations Look More Professional with Presenter Overlay in macOS Sonoma

macOS Sonoma introduces a new feature called Presenter Overlay that’s designed to improve the look of presentations in video conferencing apps such as FaceTime, Zoom and Teams.
Presenter Overlay lets you place yourself on the top of a video presentation, such as a PowerPoint or Keynote deck. It removes your background and places a small floating picture of your mug ahead of the content you’re presenting. You can move the floating picture anywhere you want.
To use Presenter Overlay, you have to be running macOS Sonoma on a Mac with an Apple Silicon processor (sorry, Intel Mac owners). And, of course, the app must be updated to support the new feature.
How to use Presenter Overlay
If your Mac set-up meets all those conditions, here’s how to use Presenter Overlay (I’m using FaceTime as my video app).
Join an ongoing meeting or start a new FaceTime Call.
° Click on Screen Share Icon.

° Choose whether to share a specific window or your entire screen.
° Choose Small or Large under the Presenter Overlay Menu. In Small Overlay, your face will appear in the movable bubble, so it’s easy to be seen while showcasing your works. In Large Overlay, your mug will remain prominent in Large Overlay while your shared screen is framed next to you. You can choose to share an App, Window, or your entire Screen.

If the participant on your call is using an iPhone, he/she will receive a Join Screen Sharing pop-up and must hit Open to start viewing.
How to customize Presenter Overlay
There are various ways to customize the Presenter Overlay feature.You can choose a background color or image for a presenter overlay. You can drag and drop your presenter overlay to where you want it to appear on the screen.
You can choose which camera you wish to use (if your Mac has one than one option). You can also choose which microphone to use (again, if your Mac has more than one option).

The overlay’s size is adjustable and can be placed at any location on your screen via drag and drop. Finally, in some apps such as Zoom you can choose from these effects (Center Stage, Portrait, and Studio Light).

Center Stage uses the iPhone’s Ultra Wide camera to keep the user in the frame as they move around on video. It’s best to use this feature with bright lighting to reduce graininess, or noise, in the video. Portrait blurs the background to make the video look more professional. Studio Light can brighten the user’s face and slightly darkens the background.
As I tested this article, the latter effects didn’t appear in FaceTime. It’s possible Apple has changed this — or will change this — in future Sonoma updates.
Other Topics You Might Like:

Leave a Reply Cancel reply
Save my name, email, and website in this browser for the next time I comment.
Notify me of follow-up comments by email.
Notify me of new posts by email.
You Might Also Like

OWC Observes Memorial Day 2024: We Remember and Honor

The Best Drives and Smart Strategy for Safe, Secure and Consistent Mac Backups
Yoink for Mac is a Handy Helper that Helps You Quickly Move Files and Folders
How To Use Desktop Widgets in macOS 14 Sonoma
Email Address
- Brand Assets
8 Galaxy Way Woodstock, IL 60098 1-800-275-4576 +1-815-338-8685 (Int)
All Rights Reserved, Copyright 2020, OWC – Since 1988 | Terms of Use | Privacy Policy
We use cookies to provide you with a full shopping experience, including personalized content, and to help us improve your experience. To learn more, click here .
By continuing to use our site, you accept our use of Cookies, Privacy Policy and Terms of Use .
How-To Geek
How to make a microsoft powerpoint presentation into a video.
Share your presentations with anyone, even if they don't have PowerPoint!
Quick Links
Why convert a powerpoint to video, convert a powerpoint presentation to a video.
Microsoft PowerPoint presentations are great, but they are not as easily accessible as videos. Luckily, you can convert your presentations to videos with a built-in option. We'll show you how.
There are many reasons to turn a presentation into a video. Maybe you want to send someone a presentation but they don't have PowerPoint installed. Or, maybe you want to upload your presentation to a site that only accepts videos.
PowerPoint has a built-in option to convert presentations to videos. When you perform this conversion, all your original animations, transitions, and media items are preserved. Your resulting video also includes all recorded timings , narrations , ink strokes, and laser pointer gestures (though you can choose not to include these if you want).
Related: How to Burn Your PowerPoint to DVD
To turn a PowerPoint presentation into a video, first, open your presentation with the PowerPoint app on your Windows or Mac computer.
In the top-left corner of PowerPoint, click the "File" option.
From the sidebar that opens after clicking the "File" option, select "Export."
In the "Export" menu, click "Create a Video."
To the right of the "Export" menu, you will now see a "Create a Video" section. In this section, you will define the options for your video file.
First, choose the quality for your video by clicking the "Full HD" option.
You will see multiple video quality options. Select the one that you think works the best for you. Know that the higher the quality you select, the larger the file size of your video will be.
To include the recorded timings and narrations in your video, then beneath the video quality menu, click the "Don't Use Recorded Timings and Narrations" option.
Select the "Use Recorded Timings and Narrations" option. If this option is grayed out, that's because you don't have any recorded timings or narrations in your presentation.
You will now specify how long each slide appears in the video. Click the "Seconds Spent on Each Slide" box and enter the duration in seconds. By default, this duration is set to 5 seconds.
Finally, at the bottom of the "Create a Video" section, click "Create Video" to start making your video.
Your computer's standard "save" window will open. Here, select the folder to save your video in, type a name for your video, and click "Save."
PowerPoint will take you back to the main interface. At the bottom of this interface, you will see the progress of the conversion.
When your video is made, you will find it in the specified folder on your computer.
And that's how you make your presentations available to a wider audience by converting them to a video format!
Need your video in another format? Use VLC to convert your video to other formats.
Related: How to Convert a Video or Audio File Using VLC

Turn your presentation into a video
When you make a recording of a presentation, all its elements (narration, animation, pointer movements, timings, and so on) are saved in the presentation itself. In essence, the presentation becomes a video that your audience can watch in PowerPoint.
So you have two options for turning your presentation into a video that's ready to view:
Save/export your presentation to a video file format (.mp4 or .wmv).
Save your presentation as a PowerPoint Show (.ppsx) file. (A PowerPoint Show appears full-screen in Slide Show, ready to view immediately.)
Save as a video file
After you've created your slides and recorded any timing and narrations and laser pointer gestures that you want to include, you're ready to create a video file.

On the File menu, select Save to ensure all your recent work has been saved in PowerPoint presentation format (.pptx).
Select File > Export > Create a Video . (Or, on the Recording tab of the ribbon, select Export to Video .)
In the first drop-down box under the Create a Video heading, select the video quality you want, which pertains to the resolution of the finished video. The higher the video quality, the larger the file size. (You may want to test them to determine which one meets your needs.)
* The Ultra HD (4K) option is only available if you're using Windows 10 or later.
The second drop-down box under the Create a Video heading tells whether your presentation includes narration and timings. (You may switch this setting if you like.)
If you haven't recorded timed narration, by default the value is Don't Use Recorded Timings and Narrations .
The default time spent on each slide is 5 seconds. You can change that timing in the Seconds to spend on each slide box. To the right of the box, select the up arrow to increase the duration, or select the down arrow to decrease the duration.
If you have recorded a timed narration, by default the value is Use Recorded Timings and Narrations .
Select Create Video .
In the File name box, enter a file name for the video, browse for the folder that will contain this file, and then select Save .
In the Save as type box, choose either MPEG-4 Video or Windows Media Video .
You can track the progress of the video creation by looking at the status bar at the bottom of your screen. The video creation process can take up to several hours depending on the length of the video and the complexity of the presentation.
Tip: For a long video, you can set it up to be created overnight. That way, it’ll be ready for you the following morning.
To play your newly-created video, go to the designated folder location, and then double-click the file.
Save as a PowerPoint Show
When someone opens a PowerPoint Show file, it appears full-screen in Slide Show, rather than in edit mode. The viewer begins watching the presentation immediately.
On the File menu, select Save As .
Choose the folder location where you want to store your PowerPoint Show file.
In the Save as type box, choose PowerPoint Show (*.ppsx) .

Select Save .
Why turn your presentation into a video?
When you want to give a high-fidelity version of your presentation to colleagues or customers (either as an e-mail attachment, published to the web, on a CD or DVD), save it and let it play as a video.
You can save your presentation as either an MPEG-4 video file (.mp4) or a .wmv file. Both formats are widely supported and can be streamed over the internet.
Some tips to remember when recording your presentation as a video:
You can record and time voice narration and laser pointer movements in your video.
You can control the size of the multimedia file and the quality of your video.
You can include animations and transitions in your movie.
Viewers do not need to have PowerPoint installed on their computers to watch it.
If your presentation contains an embedded video, the video will play correctly without your needing to control it.
Depending on the content of your presentation, creating a video may take some time. Lengthy presentations and presentations with animations, transitions, and media content will likely take longer to create. Fortunately, you can continue to use PowerPoint while the video is being created
What parts of a presentation won't be included in a video?
The following items won't be included in a video that you create using PowerPoint:
Media inserted in previous versions of PowerPoint. To include these, you can convert or upgrade the media object.
For example, if you inserted the media using PowerPoint 2007, it will be linked and it will play in the presentation. However, when you export the file as a video, the linked media will be dropped. You can convert the file to the new file format (select the File tab, and under Info , select Convert ), or you can right-click the media object and then select it to upgrade; it will embed the file and export it correctly.
QuickTime media (unless you have a third-party QuickTime codec named ffdShow installed and you have optimized for compatibility)
OLE/ActiveX controls
What to do with your video after creating it
After you create a video, you can share it with others by using the following methods:
Email your presentation to others
Save to a file share or other location
Upload it to your organization's Microsoft Stream video-sharing site , as described in the next section, "Save to a video-sharing site."
Save to the Microsoft video-sharing site
After you've created the video file, you can upload it to a video-sharing site. Microsoft Stream is an enterprise video service where people in an organization can upload, view, and share videos. Microsoft 365 business or education subscribers have access to this service from within PowerPoint for Microsoft 365.
Select File > Export , and then select Publish to Microsoft Stream .

Type a title and a description for the video.
Set other options, including whether you want others in your organization to have permission to see the video:

Select the Publish button.
The upload process can take several minutes, depending on the length of the video. A status bar at the bottom of the PowerPoint window tracks the progress, and PowerPoint shows a message when the upload is finished:

Select the message to go directly to the video playback page on Microsoft Stream.
For more information about this service, begin reading with What is Microsoft Stream? It includes information about Office 365 Video vs. Microsoft Stream.
1 The Ultra HD (4K) option is only available if you're using Windows 10 or later. 2 In PowerPoint 2016, the Ultra HD (4K) option isn't available in the Volume License edition.
When someone opens a PowerPoint Show file, it appears full-screen in Slide Show, rather than in edit mode. The viewer begins watching the presentation immediately.
Burn your presentation to a disc

Need more help?
Want more options.
Explore subscription benefits, browse training courses, learn how to secure your device, and more.

Microsoft 365 subscription benefits

Microsoft 365 training

Microsoft security

Accessibility center
Communities help you ask and answer questions, give feedback, and hear from experts with rich knowledge.

Ask the Microsoft Community

Microsoft Tech Community

Windows Insiders
Microsoft 365 Insiders
Find solutions to common problems or get help from a support agent.

Online support
Was this information helpful?
Thank you for your feedback.
Keynote User Guide for Mac
- What’s new in Keynote 14.0
- Intro to Keynote
- Intro to images, charts, and other objects
- Create a presentation
- Choose how to navigate your presentation
- Open or close a presentation
- Save and name a presentation
- Find a presentation
- Print a presentation
- Undo or redo changes
- Show or hide sidebars
- Quick navigation
- Change the working view
- Expand and zoom your workspace
- Customize the Keynote toolbar
- Change Keynote settings on Mac
- Touch Bar for Keynote
- Create a presentation using VoiceOver
- Add or delete slides
- Reorder slides
- Group or ungroup slides
- Skip or unskip a slide
- Change the slide size
- Change a slide background
- Add a border around a slide
- Show or hide text placeholders
- Show or hide slide numbers
- Apply a slide layout
- Add and edit slide layouts
- Change a theme
- Add an image
- Add an image gallery
- Edit an image
- Add and edit a shape
- Combine or break apart shapes
- Draw a shape
- Save a shape to the shapes library
- Add and align text inside a shape
- Add 3D objects
- Add lines and arrows
- Animate, share, or save drawings
- Add video and audio
- Record audio
- Edit video and audio
- Add live video
- Set movie and image formats
- Position and align objects
- Use alignment guides
- Place objects inside a text box or shape
- Layer, group, and lock objects
- Change object transparency
- Fill shapes and text boxes with color or an image
- Add a border to an object
- Add a caption or title
- Add a reflection or shadow
- Use object styles
- Resize, rotate, and flip objects
- Move and edit objects using the object list
- Add linked objects to make your presentation interactive
- Select text
- Copy and paste text
- Use dictation to enter text
- Use accents and special characters
- Format a presentation for another language
- Use phonetic guides
- Use bidirectional text
- Use vertical text
- Change the font or font size
- Add bold, italic, underline, or strikethrough to text
- Change the color of text
- Change text capitalization
- Add a shadow or outline to text
- Intro to paragraph styles
- Apply a paragraph style
- Create, rename, or delete paragraph styles
- Update or revert a paragraph style
- Use a keyboard shortcut to apply a style
- Adjust character spacing
- Add drop caps
- Raise and lower characters and text
- Format fractions automatically
- Create and use character styles
- Format dashes and quotation marks
- Format Chinese, Japanese, or Korean text
- Set tab stops
- Format text into columns
- Adjust line spacing
- Format lists
- Add a highlight effect to text
- Add mathematical equations
- Add borders and rules (lines) to separate text
- Add or delete a table
- Select tables, cells, rows, and columns
- Add or remove rows and columns
- Move rows and columns
- Resize rows and columns
- Merge or unmerge cells
- Change the look of table text
- Show, hide, or edit a table title
- Change table gridlines and colors
- Use table styles
- Resize, move, or lock a table
- Add and edit cell content
- Format dates, currency, and more
- Create a custom cell format
- Highlight cells conditionally
- Format tables for bidirectional text
- Alphabetize or sort table data
- Calculate values using data in table cells
- Use the Formulas and Functions Help
- Add or delete a chart
- Change a chart from one type to another
- Modify chart data
- Move, resize, and rotate a chart
- Change the look of data series
- Add a legend, gridlines, and other markings
- Change the look of chart text and labels
- Add a chart border and background
- Use chart styles
- Animate objects onto and off a slide
- Animate objects on a slide
- Change build order and timing
- Add transitions
- Present on your Mac
- Present on a separate display
- Present on a Mac over the internet
- Use a remote
- Make a presentation advance automatically
- Play a slideshow with multiple presenters
- Add and view presenter notes
- Rehearse on your Mac
- Record presentations
- Check spelling
- Look up words
- Find and replace text
- Replace text automatically
- Set author name and comment color
- Highlight text
- Add and print comments
- Send a presentation
- Intro to collaboration
- Invite others to collaborate
- Collaborate on a shared presentation
- See the latest activity in a shared presentation
- Change a shared presentation’s settings
- Stop sharing a presentation
- Shared folders and collaboration
- Use Box to collaborate
- Create an animated GIF
- Post your presentation in a blog
- Use iCloud Drive with Keynote
- Export to PowerPoint or another file format
- Reduce the presentation file size
- Save a large presentation as a package file
- Restore an earlier version of a presentation
- Move a presentation
- Delete a presentation
- Password-protect a presentation
- Lock a presentation
- Create and manage custom themes
- Transfer files with AirDrop
- Transfer presentations with Handoff
- Transfer presentations with the Finder
- Keyboard shortcuts
- Keyboard shortcut symbols
Create a presentation in Keynote on Mac
To create a new presentation, you first choose a theme to use as a starting point. Themes use coordinated fonts and colors for a unified look and often include placeholders that you can replace with your own content.
Create a presentation from a theme
To open Keynote, click the Keynote icon in the Dock, Launchpad, or the Applications folder.
If the theme chooser (shown below) doesn’t appear, click New Document in the bottom-left corner of the dialog. You can also choose File > New (from the File menu at the top of your screen).

Note: If you’d like the ability to format table and chart data using the conventions of another language, choose the language in the bottom-left corner before choosing a theme. See Format a presentation for another language .
In the theme chooser, browse the themes by category, then double-click the one that looks closest to what you want to create. To narrow the choices, click a category along the sidebar on the left.
Some themes aren’t downloaded to your computer until you choose them or open a presentation that uses one. If your connection is slow or you’re offline when this happens, placeholder images and slide backgrounds in the presentation may appear at a lower resolution until you’re online again or the theme finishes downloading.
Each slide layout offers a different arrangement of text and images that you use as a starting point for your content.
To add your own content to the presentation, do any of the following:
Add text: Double-click placeholder text and type your own.
Choose File > Save, enter a name, choose a location, then click Save.
Keynote automatically saves your changes as you work, so you don’t need to worry about saving your presentation manually. However, it’s a good idea to rename your presentation so you can easily find it the next time you want to work on it. You can change the name of the presentation or change where it’s saved at any time.
If iCloud Drive is set up on your Mac, Keynote saves the presentation to iCloud Drive by default.
To end the presentation, press the Esc (Escape) key. For more ways to show a presentation, see Play a presentation on your Mac .
To close the presentation, click the red close button in the top-left corner of the window.
Select a default theme for new presentations
You can set Keynote to always open a new presentation in a particular theme instead of from the theme chooser.
Choose Keynote > Settings (from the Keynote menu at the top of your screen).
Click General at the top of the window, then select “Use theme” in the For New Presentations controls.
The name that appears after “Use theme” is the currently selected theme.
Click the Change Theme button, select a theme, then click Choose.
To close the window, click the red close button in the upper-left corner.
After you change this setting, you can still open a new presentation with a different theme. Hold down the Option key, then choose File > New from Theme Chooser (from the File menu at the top of your screen).

New M2 iPad Air or old iPad Pro, which is the better value? [Video]
As tech has matured over the years, every yearly update is more nuanced. The differences and upgrades are very incremental for most products today. So, the question of “Should you buy the budget version of something new or the old version of something premium?” is getting harder to answer. The current iPad lineup, specifically the new M2 iPad Air , is a great example of this. Should you buy a brand new M2 iPad Air or find a used M1/M2 iPad Pro ? Let’s see if we can answer this.
Be sure to check out our video below discussing this topic. I discuss the comparisons between the M2 iPad Air and the M1 iPad Pro in depth to help illustrate which is right for you. For some the M2 iPad Air makes sense, to others a used iPad Pro makes more sense.
M2 iPad Air vs old iPad Pro design differences
If someone handed you an M2 iPad Air and a 2018 iPad Pro, the differences would be so small you might be unable to notice. There are only three very small visible differences (four if you include the different camera bump from the newer iPad Pros).
- The rear of the iPad Air says iPad Air vs the rear of the iPad Pro just says iPad
- The lock buttons are different sizes because there is a TouchID sensor on the iPad air
- There are a few more speaker grill holes on the new M2 iPad Air (zero benefit)
The only other visual difference is going to be color choices. iPad Airs have more color choices with their more pastel look, while the iPad Pro comes in either Space Grey or Silver. So, there is nothing in the design that would really help you make a decision. The M2 iPad Air is essentially a recycled 2018 iPad Pro with a new paint job. What will make or break your decision is going to be the internals and the compatible accessories.
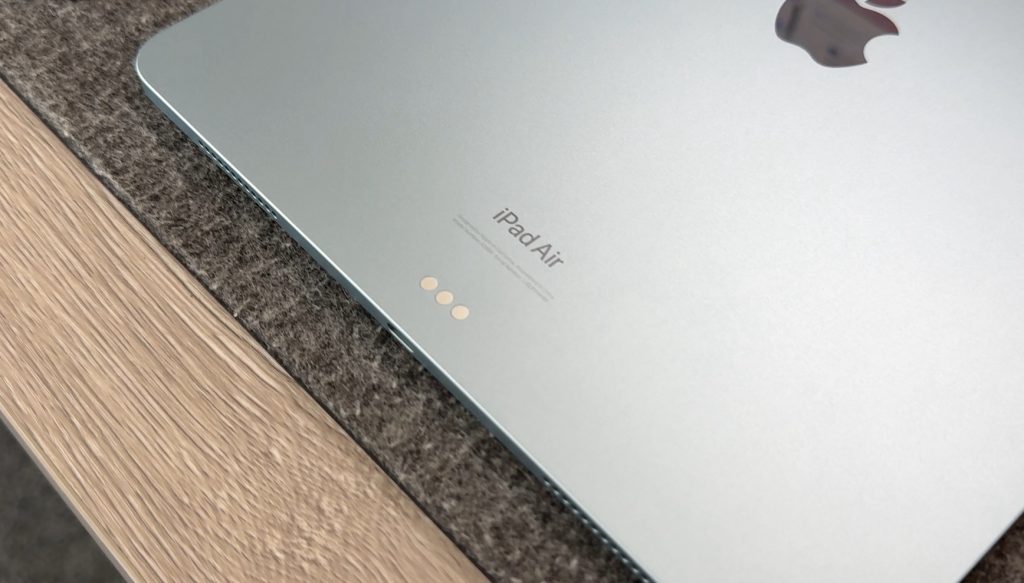
Hardware differences
This is where the comparisons start to make a difference. In my video, I used my 12.9in M1 iPad Pro, so that is what I will mostly be comparing the M2 iPad Air to. There are reasons to go with an older iPad Pro, but there are also reasons to consider a new M2 iPad Air. There are three main factors that you should consider when deciding between the two choices. The display, The USB-C port, and RAM.
One of the biggest selling points of the 12.9-inch iPad Pro is the MiniLED ProMotion display, which is absolutely stunning. It has a 120Hz display that is quick and responsive; it gets extremely bright, has a fantastic contrast ratio, and can handle anything you throw at it. Meanwhile, the M2 iPad Air still has its IPS 60Hz panel. This IPS display is still great in its own right and will 100% get the job done, but it doesn’t compete with the iPad Pros. But, if you have never used a 120Hz display before and haven’t used MiniLED, you might not care too much. You can only truly compare them when you have the iPads side by side. But if not, its sort of a wash. So that is something to consider.
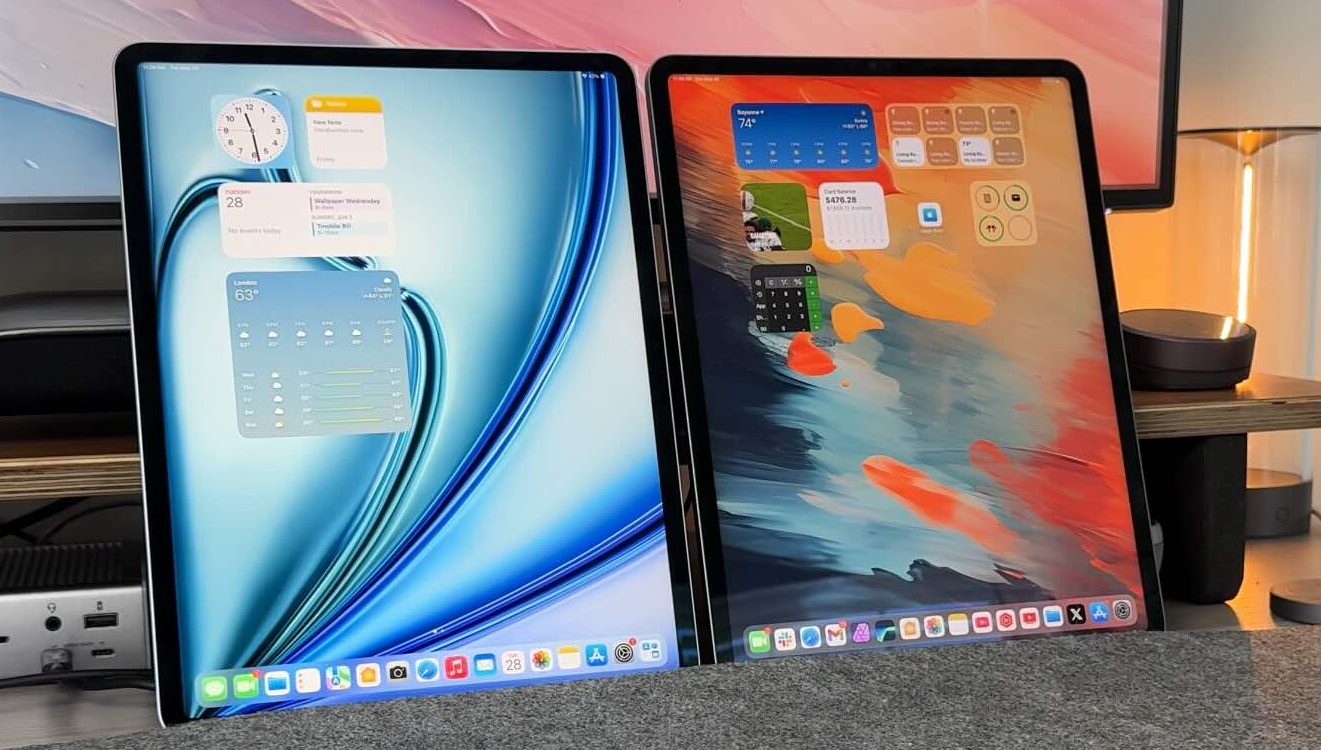
Another big factor is going to be the USB-C port. The M2 iPad Air has a USB 3 USB-C port. This allows for data transfer speeds of up to 10gbps per second, which is plenty fast for most. It also still supports display out, it charges up to 33W when you use the correct charging brick, so it can handle most tasks.
Meanwhile, the M1 and M2 iPad Pros have a Thunderbolt port. This provides up to 40gbps per second of data transfer. So, if you need the absolute fastest data transfer speeds, then you have to go with the Pro models. I am constantly moving data in and out of my iPad, and I also edit off of an SSD that benefits from the faster speeds. But for some, they don’t use their port for more than just charging, so the 10gbps per second speeds will be more than enough.
Storage & RAM
With the release of the M1 iPad Pro, Apple finally allowed us to upgrade our iPads’ RAM. It was a very expensive option, but it was there. To get 16GB of RAM on your iPad Pro, you needed to upgrade to the 1 or 2TB storage option. Then your iPad Pro would come with 16GB of RAM, and boy, did it make a difference. Performance basically doubled. When it comes to the M2 iPad Air, the storage maxes out at 1TB, and there is no 16GB RAM option at all. So if you really need the extra RAM, the iPad Air is not an option.
Other smaller differences
There are a few other differences that are worth considering between the two options
- iPad Air uses TouchID, while iPad Pro uses FaceID
- The selfie camera orientation on the iPad Air is in the correct landscape spot, while iPad Pro has it in the portrait spot (win for iPad Air)
- iPad Pros have the second ultra-wide camera lens, while iPad Air just has one (I never use the cameras)
- iPad Pros have a LiDar scanner, but iPad Air does not
Accessories supported
What is nice about the fact that the form factors are identical is that they support many of the same accessories. Both directly from Apple and third-party accessories. I recently reviewed the X33 Pro Max magnetic charging stand , and it works with the M2 iPad Air and any iPad Pro from 2018 to 2022. The M2 iPad Air and older iPad Pros work with the same magic keyboard and slim folio keyboard from Apple. One big difference is the Apple Pencil situation. The new M2 iPad Air works with the new Apple Pencil Pro, while the older iPad Pros do not. So if you need an Apple Pencil Pro, you must go with the M2 iPad Air.
Final thoughts
At the end of the day, you know who you are and what your use cases are. There is a ton of overlap in terms of form factor and features; it’s just a matter of what you need and what you are willing to pay. One final thing I will bring up is that the battery life of a brand-new device will always be better than that of an old device. If you buy a used iPad, you do not know how the previous owner took care of the battery, so that is something to consider.
The 13in M2 iPad Air starts at $799 for the 128GB version . While an M1 or M2 iPad Pro on the used or refurbed market can start much lower . I have seen people bundling their iPad Pros with magic keyboards and Apple Pencils and selling them for $600 to $800. I usually gravitate towards FB Marketplace or ebay. Be sure to find a trusted seller!
If I had to choose personally, I would go after an iPad Pro because of the display and the Thunderbolt port. I know that I would take advantage of those features. But some might not care about that and just want the cheapest way to use an Apple Pencil Pro.
Let me know what you think! What iPad would you choose? How much would you spend on a used iPad? Let’s discuss below!
FTC: We use income earning auto affiliate links. More.
Check out 9to5Mac on YouTube for more Apple news:

The new iPad Pro is powered by the A12Z processo…
The new iPad Air debuted in 2020 with a 10.9-inc…

Fernando Silva started off his professional career in the enterprise technology space with his primary focus being moving large organizations from onsite legacy technologies to a more modern cloud infrastructure. All the technologies he dealt with were mostly in the Microsoft arena but he was always a lover of Apple at heart.

Manage push notifications
IMAGES
VIDEO
COMMENTS
Here's how to use iMovie to record a video on your Mac: Open iMovie from the Launchpad. Click Create New. Select Movie from the dropdown. In the workspace, click Import Media. Select FaceTime HD Camera in the left sidebar and click the red record button. iMovie will capture video using your Mac's built-in camera.
Add video and audio in Keynote on Mac. You can add video and audio to a slide, or replace a media placeholder with a video. When you show the slide during a presentation, by default the video and audio plays when you click. You can set video or audio looping, or set the start time to make the media files play automatically when the slide appears.
Record Keynote presentations on Mac. You can record a presentation with voiceover narration on your Mac to play later in Keynote or export as a video file. This is especially useful when you want to distribute or present a prerecorded presentation virtually, or if you want to record a slideshow for someone to play in your absence.
Click File in the menu bar and navigate to Create > Slideshow > Photos. A new window will appear. Select New Slideshow from the dropdown and give the slideshow a name. Then, click OK. Select the photos you want to include in the slideshow and click the Add button in the top-right corner.
For speed, use the keyboard combination Command-Shift-5. It used to be that you would launch QuickTime Player, then choose File, New Screen Recording. Now you can just use that keystroke, and ...
Keynote lets you make dazzling presentations on a Mac, iPad, or iPhone — or on a PC using iWork for iCloud. ... Make your presentation stand out by adding stunning color and visual interest to your slides. Create motion on a title or closing slide for a bold statement, and keep viewers engaged with subtle movement throughout the presentation ...
What Makes a Good Video Presentation? A good video presentation will capture your audience's attention until the very end. When it comes to creating a video presentation, there is no definite checklist as to what constitutes a good video presentation. But there are some things you can do to make sure that yours is good enough to keep the viewer engaged.
To create a presentation video in Descript: Hit New project. Import any media (images, infographics, short video clips, GIFs, or sounds) you want to include in your presentation. Drop your visuals into the script and edit them into a sequence, or work scene by scene by adding a / at the beginning of each slide.
Record Keynote presentations on Mac. You can record a presentation with voiceover narration on your Mac to play later in Keynote or export as a video file. This is especially useful when you want to distribute or present a pre-recorded presentation virtually or if you want to record a slideshow for someone to play in your absence.
This video shows how to record presentation and export it as a video file on PowerPoint for Mac version 16.37.
This will let you select a video to embed in your PowerPoint slide. 5. Select Movie from File. A new window will pop up where you can navigate to the folder with your video file and insert it into PowerPoint. 6. Locate the video on your hard drive and click Insert.
If you need to record your PowerPoint presentation on your Mac so that it can be used online either on a video sharing platform like YouTube or perhaps in a...
Short Answer. Making a PowerPoint on a Mac is easy. First, open up the Pages application on your Mac. Then, select the File menu and choose New from Template. From there, you can select a PowerPoint template and customize it to fit your needs. When you are finished, you can save your presentation and share it with others.
The Emaze presentation software tool lets you create professional presentations quickly and easily. This popular slideshow software for Mac lets you import PowerPoint presentations and or create your own unique presentation. Add video, GIFs, and even live web pages. This is also a great tool for co-authoring presentations and for sharing them ...
1. Keynote. Price: Free. Best for: Mac users. Get Software. Keynote is one of the top presentation software for Mac and comes included with most Apple devices. With its stunning features and powerful tools, you can bring your slides to life and create the most effective presentations for your clients or your boss.
iSkysoft is a robust tool for Mac that allows you to create eye-catching slides with images, videos, and music. It offers a friendly user interface that allows you to create effective slideshows in no time. Moreover, you can provide a professional touch to your slides using impressive features. Key Features:
Head on to the recording studio. Access the "Present and record" option on the editor's top-right side or click on the three-dot menu to select it among recommended actions. Select "Go to recording studio" and set up your camera and microphone. Start recording with your notes in Presenter's View and have the options to pause and ...
In the Photos app on your Mac, select the photos you want in your slideshow. Choose File > Create > Slideshow > Photos. Click the Slideshow pop-up menu and choose New Slideshow. Type a slideshow name in the Slideshow Name field, then click OK. To reorder photos, drag photos into the order you want them in the bottom of the window.
FlowVella - best for conference presenters or museum curators. Focusky - best for marketers looking to create SEO-friendly presentations. Preview in Finder - best for mac natives interested in creating a quick slideshow. iMovie - best for making conventional video tutorials on Apple devices.
CyberLink PowerDirector has long been a PCMag Editors' Choice winner among Windows video editing software options, and the product made the jump to the Mac relatively recently, where it continues ...
Join an ongoing meeting or start a new FaceTime Call. ° Click on Screen Share Icon. Screen Share button. ° Choose whether to share a specific window or your entire screen. ° Choose Small or Large under the Presenter Overlay Menu. In Small Overlay, your face will appear in the movable bubble, so it's easy to be seen while showcasing your works.
To turn a PowerPoint presentation into a video, first, open your presentation with the PowerPoint app on your Windows or Mac computer. In the top-left corner of PowerPoint, click the "File" option. From the sidebar that opens after clicking the "File" option, select "Export." In the "Export" menu, click "Create a Video."
On the File menu, select Save to ensure all your recent work has been saved in PowerPoint presentation format (.pptx). Select File > Export > Create a Video. (Or, on the Recording tab of the ribbon, select Export to Video .) In the first drop-down box under the Create a Video heading, select the video quality you want, which pertains to the ...
To play the presentation, click in the toolbar, then press the arrow keys to advance through the slides. To end the presentation, press the Esc (Escape) key. For more ways to show a presentation, see Play a presentation on your Mac. To close the presentation, click the red close button in the top-left corner of the window.
In the bottom middle of the screen, choose the rectangle with a circle icon to record the whole screen or the dotted-line rectangle with a circle icon to record a selection of your screen. Click ...
McDonald's president responds to reports of $18 Big Mac meals. In a letter, McDonald's USA President Joe Erlinger said, "We feel a responsibility to make sure the real facts are available."
Notes Prompts is another new upgrade, offering a fun, interactive way to spark more conversations with your friends over notes. Replies were already a supported feature of notes, but now you can ...
The 13in M2 iPad Air starts at $799 for the 128GB version. While an M1 or M2 iPad Pro on the used or refurbed market can start much lower. I have seen people bundling their iPad Pros with magic ...