

This interactive isn't designed for smaller screens, try running it on a tablet or computer
This website uses cookies in order to provide basic functionality. By continuing to use this website, you are consenting to their use. For more information, please read the relevant part of our privacy policy .
Primary Science Resources for the National Curriculum
Year 6 light.
- Outstanding Science Year 6
Knowledge and Understanding
Statutory requirements, notes and guidance, upper ks2 - working scientifically, light year 6.
Pupils explain how we see by creating labelled diagrams. They identify the parts of the human eye and explain their function on an information poster. Pupils consider how mirrors can be used to change the path of light in a predictable way. Using protractors, they discuss where rear-view mirrors should be placed on scale diagrams. They apply their knowledge by building a periscope and explaining its function. Pupils investigate the relationship between the position of an object and the size of its shadow, displaying their findings on a line graph. Using scale diagrams, they predict and calculate the size of shadow cast by different objects. They demonstrate that white light is composed of a spectrum using prisms and colour spinners.
Objects and their shadows Worksheet Free!
Outstanding science year 6 | light | os6d008.
- National Curriculum
Learning objective
I can explain how the shape and size of a shadow are determined.
Children use a ruler to draw the shape of a shadow cast by an object on a simple plan diagram. They predict and then measure the width of each shadow, and try to find what kind of set-up produces the widest shadows.
- 6d4 : use the idea that light travels in straight lines to explain why shadows have the same shape as the objects that cast them.
Making a periscope Investigation
Outstanding science year 6 | light | os6d001.
I can make a periscope and explain how it works.
Children learn that a periscope is a device made from 2 angled mirrors that enables the user to see around obstacles. Using the template provided, along with 2 small mirrors, children construct their own simple periscope. They attempt to explain how it works.
- 6d1 : recognise that light appears to travel in straight lines
Positioning a rear-view mirror Worksheet
Outstanding science year 6 | light | os6d002.
I can calculate the best position for a rear-view mirror.
Children learn that light rays travel in straight lines, and that mirrors can make light reflect at precise angles, depending on their own position and angle. Children look at 4 simple diagrams. They predict, and then calculate (using a ruler and protractor) the best position for a mirror, so that the viewer (a car driver) can see an object (a motorcycle headlamp). They look for patterns between different distances and angles in their diagrams.
The human eye Worksheet
Outstanding science year 6 | light | os6d003.
I can label the main parts of the human eye and explain their functions.
Children learn about the main parts of the human eye, including the cornea, iris, pupil, lens, retina and optic nerve. They use this information to create and label their own diagram of a human eye, cutting and pasting the descriptions provided or writing their own.
- 6d2 : use the idea that light travels in straight lines to explain that objects are seen because they give out or reflect light into the eye
Reflecting light Worksheet
Outstanding science year 6 | light | os6d004.
I can use my knowledge of reflection to place mirrors to make light follow a path.
Children learn that light travels in straight lines and can be made to follow a path by placing mirrors in its path. Children use a simple grid and position mirrors at 45° angles to make light travel through a maze. They solve 12 increasingly difficult problems, and use a blank sheet to create their own.
How we see things Worksheet
Outstanding science year 6 | light | os6d005.
I can explain how we see light sources and non-light sources.
Children learn that we see light sources because they create light which travels in a straight line into our eyes. They learn that we can see non-light sources because light from light sources reflects (bounces) off them into our eyes. Children use a selection of images to build their own diagram showing how we see light sources and non-light sources.
- 6d3 : explain that we see things because light travels from light sources to our eyes or from light sources to objects and then to our eyes
The light spectrum Investigation
Outstanding science year 6 | light | os6d006.
I can explain how white light is made up of a spectrum of different colours.
Children learn that white light is a combination of different colours, and that these colours exist on the visible light spectrum. They learn how white light can be split up into its component colours. Children use a prism and a light source to create a rainbow effect and discuss how it is caused. They learn that a range of colours can be combined into white light. Children create a spinner, which they spin using either string or a pencil, to demonstrate this.
Investigating shadows Investigation
Outstanding science year 6 | light | os6d007.
I can explain how moving an object changes the size of its shadow.
Children learn that shadows are formed when light is blocked by an opaque object, creating a pattern of light on a surface. Children investigate what happens to its shadow when an object is moved towards a light source. They predict and then measure the width of an object's shadow at different distances from the light source. Children record their information in a table and use it to create a line graph. They attempt to explain the relationship between distance and shadow width.
Get instant access to all of our Year 6 resources.
Outstanding science - year 6 contains all of the following units:.
Unit 6A - Living Things And Their Habitats
Unit 6B - Animals, Including Humans
Unit 6C - Evolution And Inheritance
Unit 6D - Light
Unit 6E - Electricity
Outstanding Science
Primary science resources.
Browse resources
128 Gordon Drive Dovecot Liverpool England L14 7PZ
0151 558 1485
Terms and conditions
Privacy policy

Outstanding Science © Copyright Minerva Education Ltd. 2015-2024. Responsive design built upon Bootstrap .
- STEM Ambassadors
- School trusts
- ITE and governors
- Invest in schools
- Student programmes
- Benefits and impact
- Our supporters
- Advertising and sponsorship
- Become a STEM Ambassador
- Request a STEM Ambassador
- Employer information
- Training and support
- STEM Ambassadors Partners
- Working with community groups
- Search icon
- Join the STEM Community
Year 3: Light
This list consists of lesson plans, activities, video clips and interactive resources to support the teaching of light in Year Three. It contains tips on using the resources, suggestions for further use and background subject knowledge. Possible misconceptions are highlighted so that teachers may plan lessons to facilitate correct conceptual understanding. Designed to support the new curriculum programme of study it aims to cover many of the requirements for knowledge and understanding and working scientifically. The statutory requirements are that children are taught to:
• recognise that they need light in order to see things and that dark is the absence of light
• notice that light is reflected from surfaces
• recognise that light from the sun can be dangerous and that there are ways to protect their eyes
• recognise that shadows are formed when the light from a light source is blocked by a solid object
• find patterns in the way that the size of shadows change.
Visit the primary science webpage to access all lists.
An introduction to light sources *suitable for home teaching*
Children may still think that light comes from out eyes and this is why we can see things. Showing images of a variety of light sources, both natural and manmade will help children see that light comes from a source not from their eyes. Examples of reflective light, e.g. the Moon, traffic signs are also included, so children can see that some things may appear to give out light when in fact they are reflecting it. This could be a good way of making a distinction between sources of light and an object which reflects light as children often form misconceptions around this area. This concept is difficult for some children and may be built upon in relevant topics later in the Key Stage.
Access all BBC short clips aimed at KS2, which help to illustrate the properties of light - a great source of lesson starters/discussion points!
Quality Assured Category: Science Publisher: Institute of Physics
The first 7 slides of the presentation show different sources of light including light from cold sources, which helps with the misconception that only hot objects give out light. Using the activity with feely bags helps children understand that when there is no light in the bag we cannot see inside it. When the torch shines in the bag they can see the objects. This is because light bounces off the objects in the bag and travels to their eyes.

Modelling Light
Quality Assured Category: Science Publisher: Teachers TV
Though aimed at older children the idea of modelling light using a ribbon and other techniques used in this short demonstration could be used in Year 3. Children could model how light travels from different sources in a straight line and how light is reflected from certain surfaces, changing the direction it travels. Working in groups children could then build their own model and draw what is happening on a large sheet of paper. This helps children see that light can not bend around things or travel through objects. It also helps them see how a shadow is formed as the light can not pass through opaque object.
Making Shadows
This video explores how shadow puppets can be used to explore light, shadows and storytelling.The way characters appear and disappear illustrates how shadows are formed and how they change when objects are put in front of a light source. Children could make their own puppets to tell a story. They could work scientically to investigate what happens to shadows when the light source moves further away or closer to the puppet.
Explore, Discover, Inspire: Practical Work in Primary Science
Quality Assured Category: Science Publisher: SCORE
This activity encourages children to work scientifically to investigate and find a solution to an everyday problem. Putting the investigation into a context, that of a man who works nights and needs to sleep in the day, gives them a reason for carrying out the investigation. Using the knowledge that an opaque material would be the best for replacement curtains, children test a collection of different samples, analysing the shadows formed and then recording the light levels with a data logger. The lesson idea is on pages 17-18 of the pdf.
Shadow puppet experiment
Quality Assured Category: Design and technology Publisher: Institution of Engineering and Technology (IET)
This cross-curricular resource focuses on making shadow puppets and developing knowledge about the relationship between light and shadow.
Kitchen Concoctions
Quality Assured Category: Science Publisher: Centre for Industry Education Collaboration (CIEC)
Children can explore a range of mixtures, through fun kitchen science practicals and scenarios.

Science of Healthy Skin
Quality Assured Category: Design and technology Publisher: Centre for Industry Education Collaboration (CIEC)
Relates to Y3 light.
You'll need JavaScript enabled to experience the full functionality of this site. Please enable JavaScript by following the instructions at enable-javascript.com .
Sorry, the browser you're currently using is not supported by this site. Please upgrade your browser by following the instructions at browser-update.org .

Light Travels in Straight Lines — Experiments (Year 6)
Write a review

Choose your format:
Save to Your Lessons
Save to Homework
Share resource
Your download limit has been reached!
Check out our FAQs for more info.
Help children to learn about how light travels with this worksheet. It includes two different experiments that demonstrate how light travels in a straight lines, even when reflected. Detailed instructions and diagrams are provided.
- Key Stage: Key Stage 2
- Subject: Science
- Topic: Light
- Topic Group: Physical Processes
- Year(s): Year 6
- Media Type: PDF
- Resource Type: Activities & Games
- Last Updated: 25/10/2023
- Resource Code: S2WAC1725
- Curriculum Point(s): Recognise that light appears to travel in straight lines.
Related Topics:
Other Teachers Downloaded...

English Practice Paper — GL and Other Providers
- Mixed English
- 11+ English

Maths Practice Paper — GL and Other Providers
- Mixed Maths

The Sword in the Stone — Legend Comprehension Text (Years 5-6)
- Key Stage 2 English

Snow White — What's Happening? (Years 3-4)
- General Reading Comprehension

Verbal Reasoning Practice Paper — GL and Other Providers
- Mixed Verbal Reasoning
- 11+ Verbal Reasoning

Non-Verbal Reasoning Practice Paper — GL and Other Providers
- Mixed Non-Verbal Reasoning
- 11+ Non-Verbal Reasoning
No reviews (yet!)
Related Resources

Shadow Experiment (Year 3)
- Key Stage 2 Science

Light — Periscopes (Year 6)

Light — Straw Investigation (Year 6)

Light Travelling Investigation (Year 6)

How the Sizes of Shadows Change Investigation (Year 3)

Dark Den Investigation (Year 3)

Best Material for Blocking Light — Investigation (Year 3)

Shadow Puppet Investigation (Year 6)

Light Sources (Year 6)

Light — Hidden Message Activity (Year 6)

How Do We See Objects? (Year 6)

How Light Travels (Year 6)
Cookies are disabled on your browser. This means some features of the site won't be fully available to you.
CGP uses cookies to give you a smooth shopping experience and to help us understand how well our site is working. To agree to us using all cookies, click 'Accept', or to reject optional cookies click 'Customise'.
Accept cookies Customise cookies
Most Popular Activity: STRAW ROCKETS

Most Popular Activity: Straw Rockets
Light Science for Kids: Ways to Explore Refraction and Reflection
As an Amazon Associate I earn from qualifying purchases. You can read more on our disclosure page .
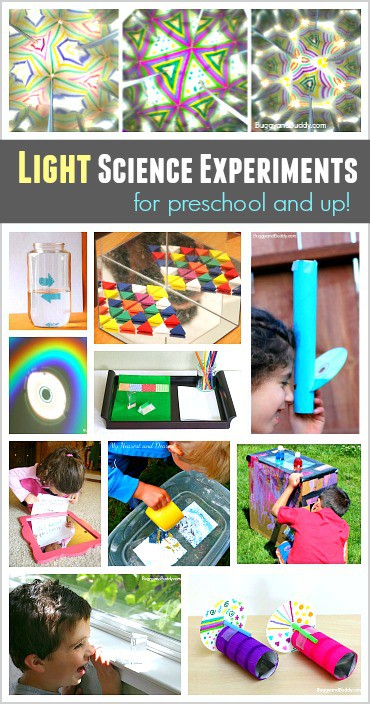
Here’s a fun collection of light science for kids ! You’ll find light science experiments about both light refraction and light reflection in this science roundup.
Follow our Science for Kids Pinterest board!
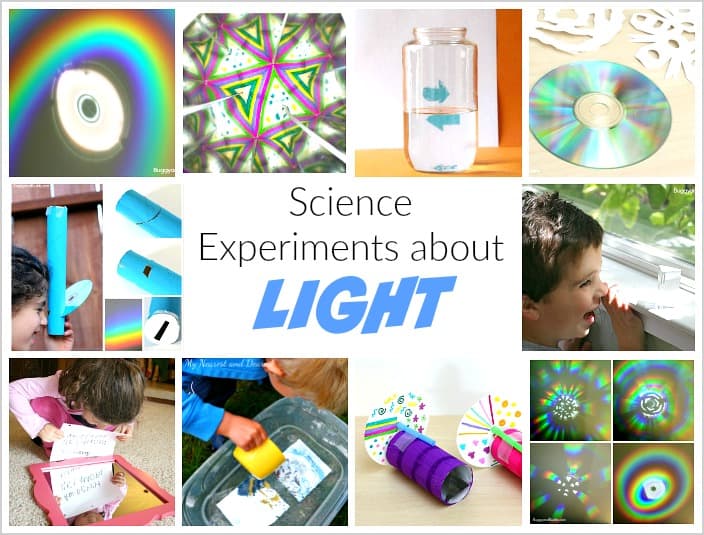
Because we have been having so much fun with our most recent light science activities, I decided to round up some more fun science ideas for kids having to do with light. You’ll find ideas for examining light refraction (the bending of light) and light reflection (when light bounces off an object) in this collection, as well as science experiments for various ages- from preschool and on up!
10+ Light Science Activities for Kids
Light refraction and rainbow science.

Make a Spectroscope Using a Cardboard Tube from Buggy and Buddy
Explore Light Patterns with a CD and Paper from Buggy and Buddy
Rainbow Science: Exploring Prisms from Buggy and Buddy

Light Box Magic from True Aim
Making a Rainbow with Water and a Mirror from No Twiddle Twaddle
Light Refraction with Water

Water Refraction Science Experiment from What Do We Do All Day?
How to Make a Magnifying Glass from Science Sparks
Light Reflection and Mirrors

How to Make a Kaleidoscope from Buggy and Buddy
Exploring Reflections with Mirrors from Buggy and Buddy

Water, Mirrors, and Reflection from My Nearest and Dearest
Exploring Shapes and Patterns in a Mirror Box from The Imagination Tree
Exploring Reflections with Mirrors from Little Bins for Little Hands
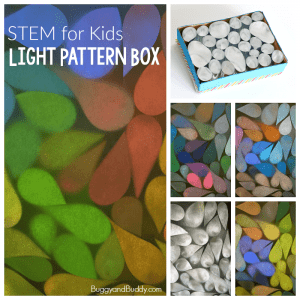
Explore Light Patterns with a Mylar Light Box from Buggy and Buddy
Find more STEM activities in our ebook! Learn more about it here , or b uy it now here !
Chelsey was previously an elementary teacher for 12 years and is now creating, playing, and learning at home with her two children. You can follow Buggy and Buddy on Twitter or Facebook by clicking on the icons below.
Similar Posts
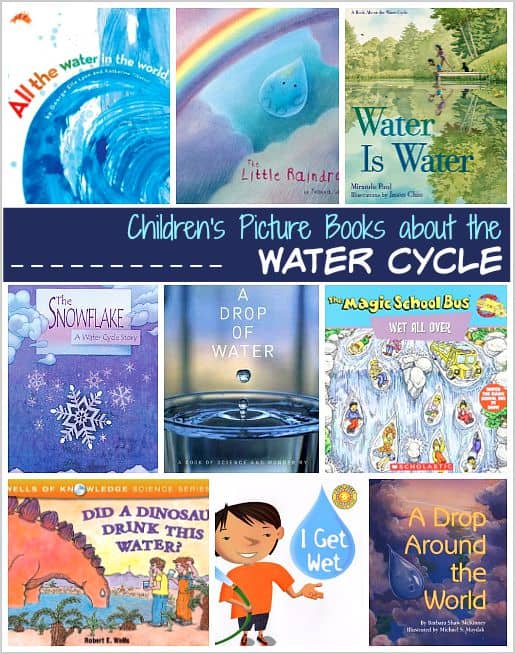
Children’s Books about the Water Cycle
30+ DIY Toys and Resources to Make for Your Classroom
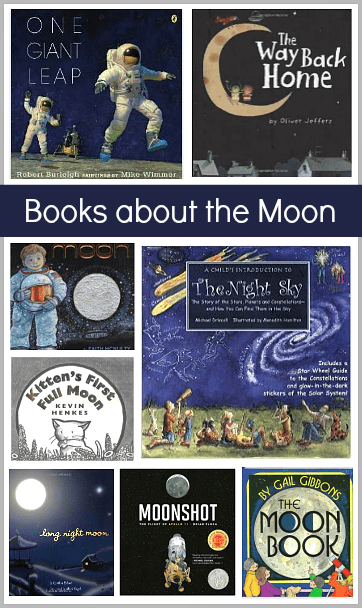
Children’s Book List: Picture Books about the Moon
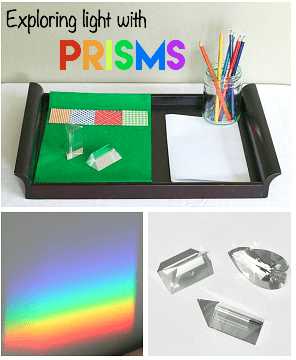
Rainbow Science for Kids: Exploring Prisms
Egg Drop Challenge with Free Planning Printable
Butterfly Life Cycle Paper Plate Craft
- Skip to primary navigation
- Skip to main content
- Skip to primary sidebar

- FREE Experiments
- Kitchen Science
- Climate Change
- Egg Experiments
- Fairy Tale Science
- Edible Science
- Human Health
- Inspirational Women
- Forces and Motion
- Science Fair Projects
- STEM Challenges
- Science Sparks Books
- Contact Science Sparks
- Science Resources for Home and School
Science Fair Project – Easy Light Maze
September 9, 2019 By Emma Vanstone 2 Comments
Light travels in straight lines through empty space. If it hits an object some of it is reflected back and the rest is absorbed by the object. It is this reflection of light that allows us to see objects around us. The walls, tables and chairs in your room don’t emit their own light, you can see them because they reflect light either from the sun or artificial light.
When light hits a transparent object ( a window is a good example of this ) some is absorbed and reflected but most passes through.
How does light travel?
Light comes from a light source. This could be the Sun, a torch, a fire or a candle.
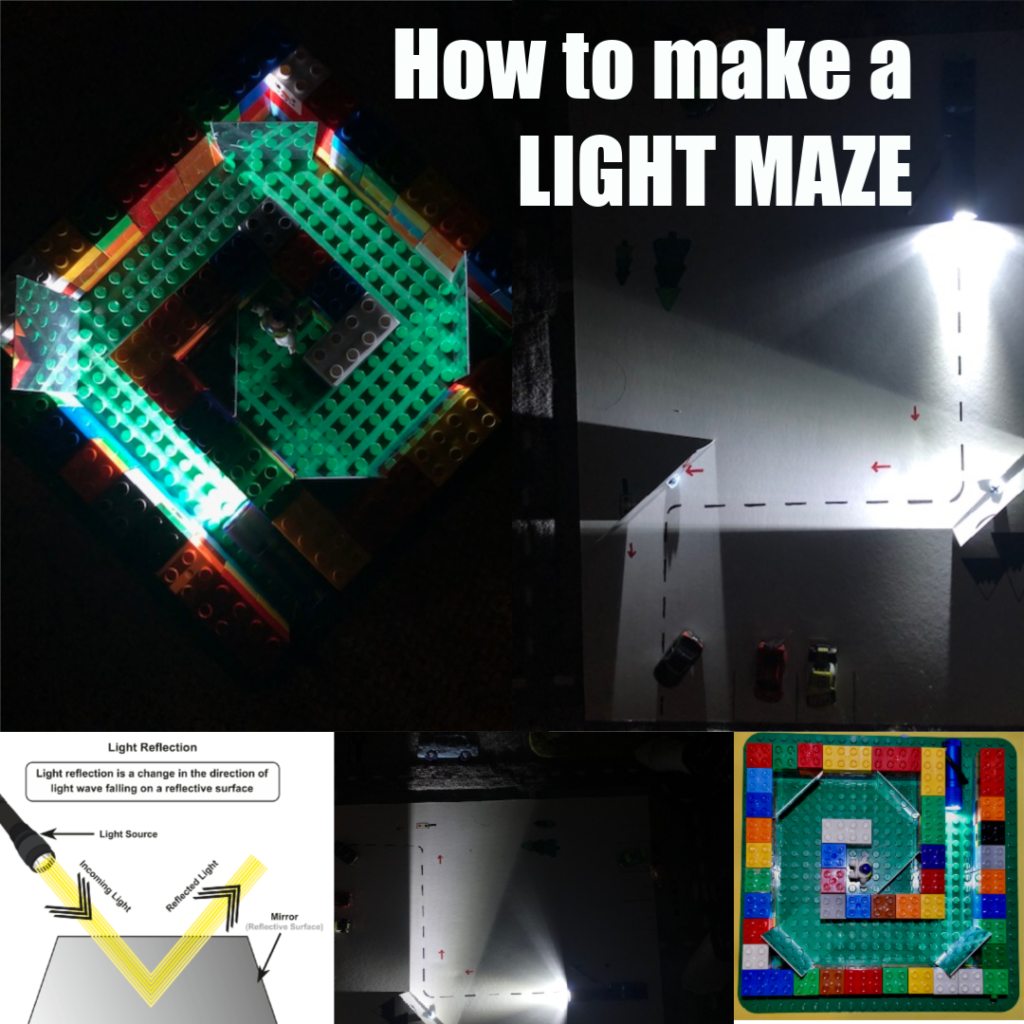
Light travels in straight lines and cannot bend. In the mazes below, we used mirrors to reflect light around corners.
When a light ray hits a mirror, it is reflected off the mirror which changes the direction of the light. The angle of the reflected light is the same as the angle of the incoming light.
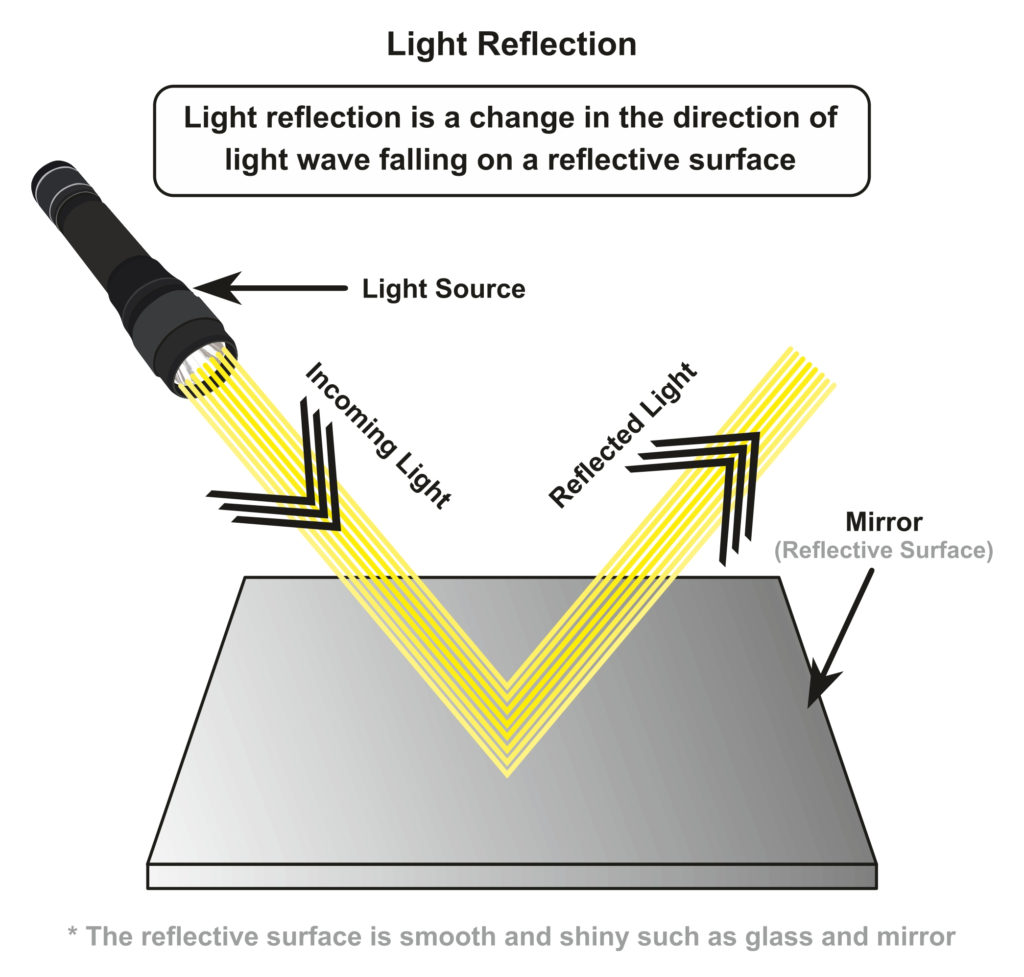
If the path of the beam of light changes ( you move the torch or the mirror ) the path of the reflected beam also changes.
How to make a light maze
This activity helps children understand that light travels in straight lines but can be reflected.
What you need to make a light maze
Modelling clay – to hold the mirrors
Card and pens ( optional )
Light mazes can be set up as a structured exercise or completely open ended.
I slightly themed our mazes, but that’s obviously completely optional.

Light Maze 1 – Light up the road
This one is set up like a road. The idea is to find a way for the grey car to light up the road around both corners.
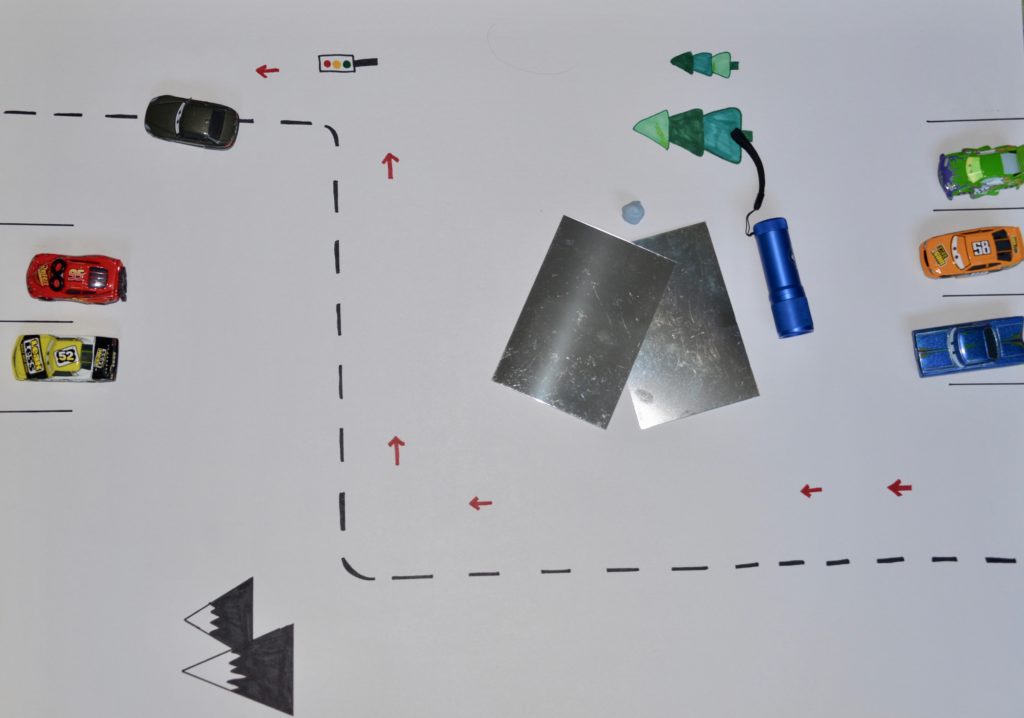
Two mirrors allow this to work nicely.

You can see here how each mirror reflects the light.

Light Maze 2 – Light up a safe route
This maze uses just one mirror. The idea is for children to find a way to help the toy soldiers see a safe path around the water and crocodile.
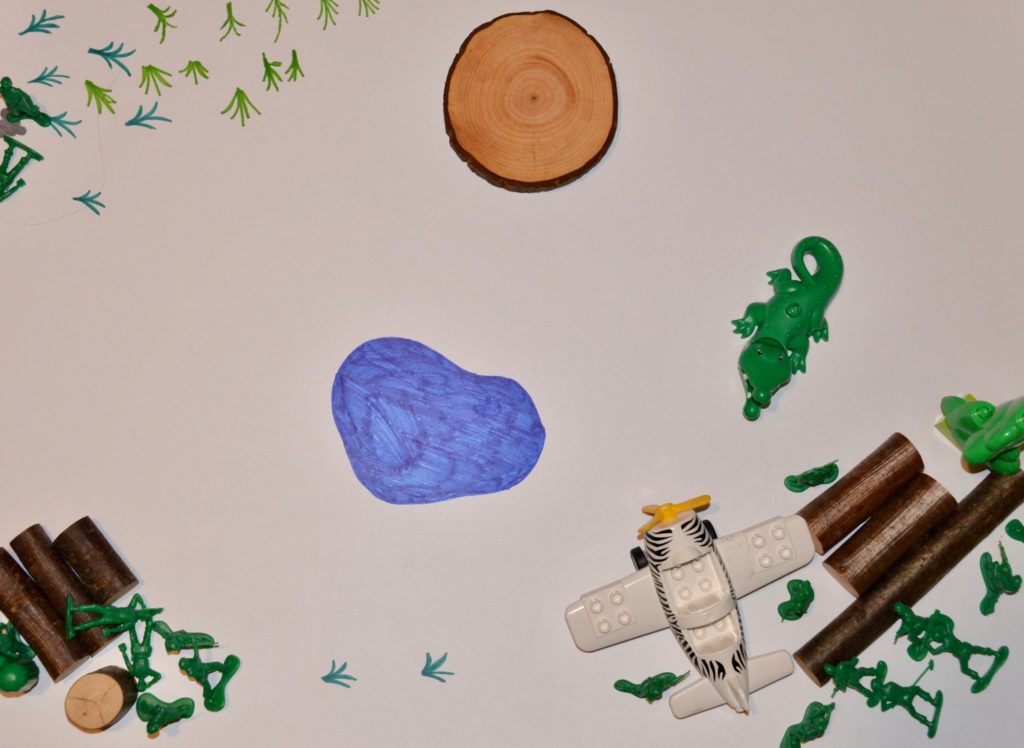
You can see in the photo how one mirror does this nicely.

Light Maze 3 – LEGO Light Maze
We used DUPLO for speed, but Lego would work just as well. I used lots of small mirrors to fit in the corners and had to cut some down to size.
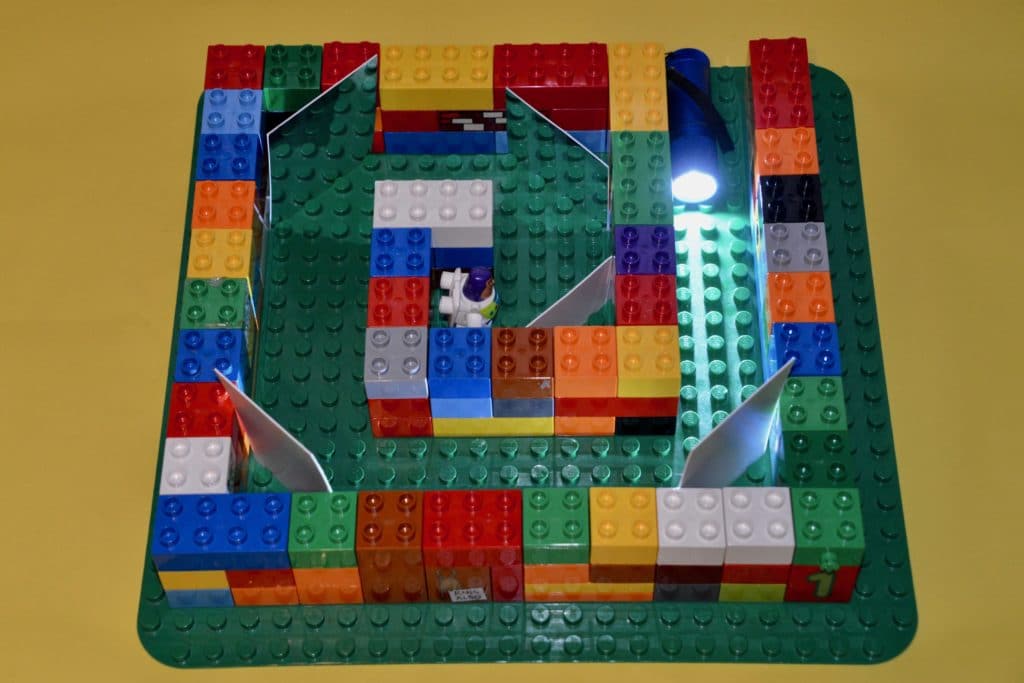
Light Maze Extension Task
Try to create a light maze without using the flashlight to test as you go along. Does it work when you turn on the light source?
Can you create a coloured maze using coloured sheets of cellophane ?
Facts about light
We can see the moon as it reflects light from the sun.
Some animals make their own light! Fireflies are a good example of this.
You can split light into the colours of the rainbow using a prism.
Light travels at 299,792,458 meters per second.
Light from the sun takes 8 minutes and 20 seconds to reach the Earth
Did you know most animals don’t recognise their reflection and often attack it?
More light experiments
Create circuits to light up a model village .
Make a rainbow with a prism
Find out why the sky looks blue .
Last Updated on April 29, 2024 by Emma Vanstone
Safety Notice
Science Sparks ( Wild Sparks Enterprises Ltd ) are not liable for the actions of activity of any person who uses the information in this resource or in any of the suggested further resources. Science Sparks assume no liability with regard to injuries or damage to property that may occur as a result of using the information and carrying out the practical activities contained in this resource or in any of the suggested further resources.
These activities are designed to be carried out by children working with a parent, guardian or other appropriate adult. The adult involved is fully responsible for ensuring that the activities are carried out safely.
Reader Interactions
April 29, 2024 at 8:49 am
Hi! Fantastic website and terrific resource! My students loved it! On your light maze experiment though, it says that the speed of light is 299,792,458 miles per second. That is not correct. It is 299,792,458 METERS per second, or 186,282 miles per second.
Sorry to be picky, but I’m a science teacher and I used your experiment in class. I was not the one who saw your error originally, it was one of my seventh grade students. Now I know that they were paying attention!
Dave Wilson Science Teacher
April 29, 2024 at 1:06 pm
Thank you, that is now corrected!
Leave a Reply Cancel reply
Your email address will not be published. Required fields are marked *

11+ Bright and Shining Light Experiments for Kids
Categories Science Experiments
These light experiments for kids are fun and easy to do. They’re the perfect way to teach them about how light works and even take it further to talk about refraction and reflection as well. You can also use these activities to talk about circuits and how energy travels to create the light that we’ve all come to need and love.
This list of fun science experiments for kids are a great way to show kids that it’s fun to learn by using hands-on experiments as well. These light science activities are all simple and easy to do and produce really bright and cool results!
Here are some great choices for unique light science experiments for kids.

Light Science Experiments for Kids
Kids love learning about light because it’s something we use everyday. If you’re learning about light, you’ll want to try some of the light experiments on this list!
Get ready to learn fun things about how light works, how shadows work, and where light comes from!
Where Does Light Come From?
Light is a form of energy. Energy is a power by which things move. On earth, most of our light comes from the sun.
The sun is a star. Other stars are too far away from our planet to give us usable light.
Light from the sun can travel by particle or by waves. Its wave form is how we see color. Long wavelengths produce colors like red and orange. Shorter light waves generate blues and purples. All the colors together create white light.
Light travels incredibly fast. Light can travel about 186,282 miles per second. Crazy!
Other light sources can include fire, electricity, and even some animals, plants and minerals can give off forms of light.

Supplies for Light Science Activities
Shop these Amazon affiliate links to make sure you’re not missing anything from your light experiments!
My Favorite STEM Products for the Preschool Classroom
These STEM products are perfect for the preschool STEM classroom!

Homer Technology App for Kids 4-6

Mel Science Classroom STEM Kits

Classroom Balance Buckets

Primary Sorting Classroom Bundle

Transparent Color Cubes

Clixo Rainbow Classroom Pack

Pet Home STEM Challenge

Stacking Mirror Blocks

Magnification Blocks

Gravity Physics Tubes

Specimen Viewers Classroom Set
11+ Light Experiments for Kids

Check out these super fun experiments for learning about light!
Learn about the visible light spectrum when you make a rainbow density jar!
Learn about where light comes from when you learn about far away stars and galaxies with this Galaxy Jar Experiment .
Observe how light changes when it is filtered through this Melted Crayon Suncatcher.
Learn about how circuits and electric lights work when you learn How to Use Squishy Circuits .
The kids will love seeing how the light refracts from various angles in this Light Refraction Experiment .
Show them a true light show by using this fun Flashlight Constellations activity.
See how the light affects this oobleck and changes it into a Glow in the Dark Oobleck experiment .
Can you ever have too many Glow in the Dark Science Experiments ? I think not!
The light is what makes these Shadow Experiments so much fun.
Learning about Rainbow Salt Circuit s is a fun and easy way to learn about how electricity can flow through something natural and still make light!
The Easy Static Electricity Experiment with a Balloon is a great way to talk about energy and light flow.
Does the pencil really bend or is it just a refraction of the light? Find out with this bending pencil experiment.
This silver egg science experiment looks like magic, but it’s actually a really cool scientific trick of the light!
Find out if light will shine through different types of rocks.
Explore shapes and light with this geometric light table activity.
More Science Experiments for Kids
How to Make an Instant Ice Rainbow
How to Make a LEGO Rainbow with Classic LEGO Bricks
25 Rainbow Science Experiments with Bright and Beautiful Colors
Rainbow Printables for Kids
Share this project with a friend!
Dr. How's Science Wows
Science, Curiosity and Life
Fun Friday – 4 fantastic light experiments for kids
Yesterday Dr. Simple answered the question… Why is the sky blue?
Sometimes it is nice to get the “proof behind the science” so I thought I would share our four favourite light experiments so your children can find out how it works for themselves!
First up, an experiment to demonstrate what Dr. Simple was talking about yesterday…

Make a blue sky in a jar
You will need….
A clean glass jar, water, milk, a spoon, a torch and a dark room.
What to do…
Fill the jar two-thirds full with water and add half a tea spoon of milk.
Turn on the torch, make sure the room is dark, then shine the torch at the jar of liquid, holding the torch to one side of the jar and look at the colour of the liquid from the front.
The milky liquid will appear light blue in colour (move the torch closer to, or farther from the jar if necessary).
What is happening?…
Tiny particles in the milk act just like the tiny particles in the atmosphere, they scatter light shining upon them. When the light comes from the side of the jar the light of shorter wavelength, like blue light, is scattered the most so this is the colour we observe.
Now with a little alteration you can make…
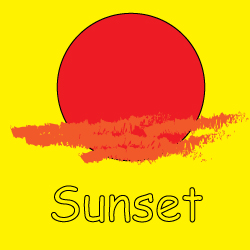
A sunset in a jar
This is the same experiment as the previous one, only this time shine the torch at the back of the jar while you observe the colour from the front. Now the milky water should appear red.
When we shine the torch from the back of the jar the light is scattered differently. This time most of the blue light has been scattered away from our line of sight so the dominant colour to reach our eye is red light, hence the solution appears red.
Remember how Dr. Simple said that even though sunlight might appear white it is actually made up of all the colours of the rainbow? Here is an experiment to prove that…

Make your own Rainbow
You will need….
A plastic container, a piece of white card, a mirror and a sunny day!
Fill the plastic container about two- thirds full with water and place it on the ground outside, in direct sunlight.
Place a mirror into the water and prop it up at an angle so the sun shines on it.
Hold the white card away from the mirror and move it from side to side or back and forth until you capture the rainbow on the card!
So what is happening?…
Water bends (refracts) light that passes through it. Each colour bends a slightly different amount so the colours separate. The separated colours are bounced off the mirror and the image is caught on the piece of white card.
If you want a simpler version of this experiment take an old CD out into the sunshine and tilt the side without the label to the Sun. You will see a rainbow of colour appear on the CD at the point where the Sun shines.

Make a fountain of light
An empty plastic bottle (one or two litre), a pin or needle, a torch, a sink or basin and a dark room.
Place the empty bottle beside the sink and, using the pin, make a small hole in the side of the bottle, about half way up.
Place your finger over the hole and fill the bottle with water.
Turn on the torch and shine the torch on the bottle, behind the hole. Make sure the side with the hole is positioned towards the sink.
Remove your finger and let the water pour into the sink. See how the stream of water lights up.
Light bends when in water so when we shine the light from behind the stream of water the light is reflected off the side and bends with it… effective the light is trapped within it.
Science blogger and writer; Owner of Dr. How's Science Wows; Mother of three junior scientists who have taught me that to be a great scientist you need to look at life through the eyes of a child!
11 thoughts on “ Fun Friday – 4 fantastic light experiments for kids ”
Your article is interesting. May I share this article?
Hi Meran, sure you can, with a link back please.
it is an great expriment
Brilliant! Thank you for sharing 🙂
Can’t wait to try these Naomi!
Hope the kids enjoy them Laura
I must pin this – the seven yr old is loving this blog at the moment.
Thanks Anne Marie that comment makes my day 😉
I need to try these 🙂
Comments are closed.
Cool Science Experiments Headquarters
Making Science Fun, Easy to Teach and Exciting to Learn!
Science Experiments
Cool Light Refraction Science Experiment – Arrow Changes Direction!
Magic trick? No, but the results of this experiment are pretty surprising. Kids (and adults) will stare in amazement and scratch their heads wondering what causes the arrow in this experiment to change direction right before their eyes! The secret is light refraction.
Exploring light refraction couldn’t be easier or more fun, simply preview the experiment with our demonstration video below and find an easy to understand explanation of how it works below.
JUMP TO SECTION: Instructions | Video Tutorial | How it Works
Supplies Needed
- Piece of Paper
Light Refraction Science Lab Kit – Only $5
Use our easy Light Refraction Science Lab Kit to grab your students’ attention without the stress of planning!
It’s everything you need to make science easy for teachers and fun for students — using inexpensive materials you probably already have in your storage closet!
Light Refraction Science Experiment Instructions
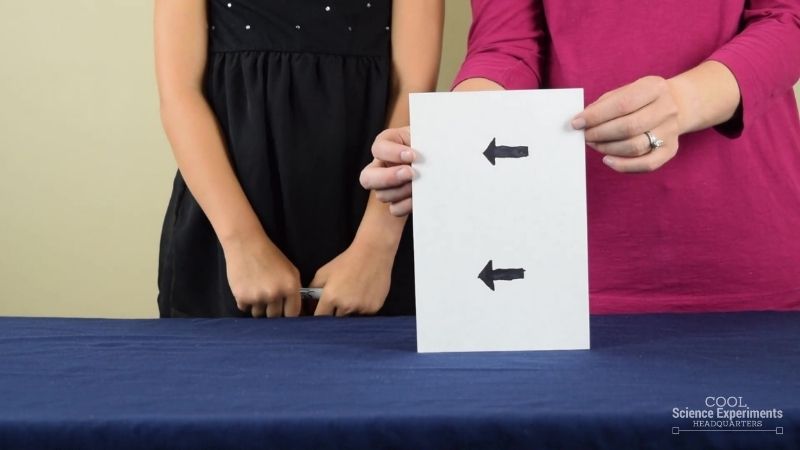
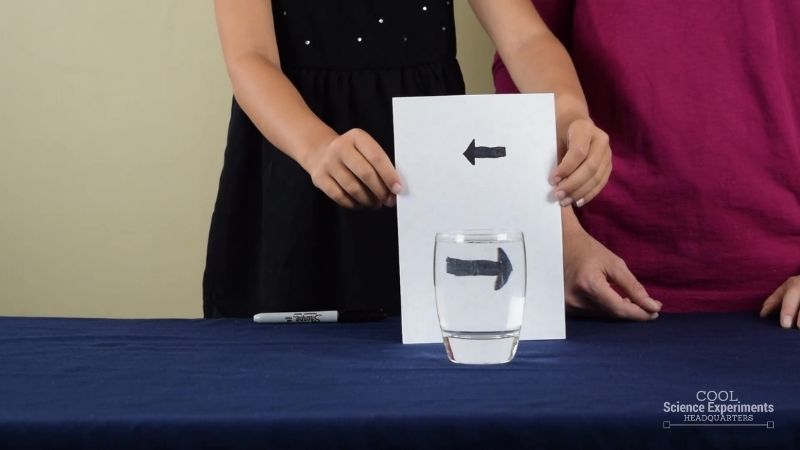
Step 1 – Get a sheet of paper and draw two arrows on it. One arrow near the top and one arrow near the bottom. Make the arrows point in the same direction.

Step 2 – Fill a glass with water.
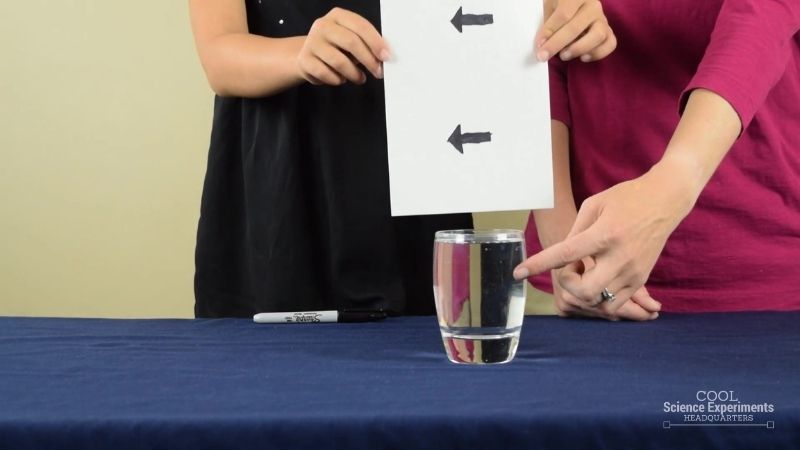
Step 3 – Slowly lower the piece of paper behind the glass of water.
Step 4 – Look through the glass of water and watch what happens. Do you know why the arrow appears to change directions? Find out the answer in the how does this experiment work section below.
Video Tutorial
How Does the Science Experiment Work
The scientific concept that is at work in this experiment is called refraction. Refraction is the bending of light. Refraction occurs when light travels from one medium to another (ie. air to water, water to air).
During the experiment, the light traveled from the image through the air, then through the glass cup into the water, and finally out of the glass cup and into the air once more before it reached our eyes. Light refracts as it passes from one medium to the next because it travels at different speeds through those mediums. Light travels fastest through air, a little slower through water, and even slower through glass.
This means that the light bends once when it travels through the glass cup into the water, and then it bends again when it travels out of the glass cup and into the air. As a result, the light paths cross and the image appears to be flipped horizontally (left/right).
Light Refraction Examples
The following are examples of refraction that occur all around us.
- Glasses or Contacts – The lenses of glasses and contacts are designed to bend light in ways that help a persons improve vision.
- Rainbow – Rainbows are formed when the rays of sunlight bend (refract) when they travel through rain drops.
- Cameras – A camera works because the lens causes the light rays to refract.
More Experiments that Show Light Refraction
Refraction of Light Science Experiment – Watch as the straw appears to bend in this experiment that shows refraction in action.
Ruler Changes Size Science Experiment – Observe how the size of an object changed when viewed through different liquids.
I hope you enjoyed the experiment. Here are some printable instructions:
Light Refraction Science Experiment
Instructions.
- Get a sheet of paper, and draw two arrows on it. One arrow near the top and one arrow near the bottom. Make the arrows point in the same direction.
- Fill a glass with water.
- Slowly lower the piece of paper behind the glass of water.
- Look through the glass of water and watch what happens.
Reader Interactions
February 5, 2017 at 9:25 am
THIS IS COOL. MY DAUGHTER WON THE SCHOOL WIDE SCIENCE PROJECT. THANK YOU SO MUCH FOR DOING THIS EXPERIMENT!
April 20, 2018 at 3:07 pm
Cause of the reflection of the water.
September 10, 2019 at 11:45 am
*refraction
January 7, 2021 at 3:53 pm
I can’t get this to work. I have used a round glass and a square plastic container. I’ve moved the piece of paper close to the container of water and father back. I have lowered the paper quickly and very slowly. Clearly it works, so what am I missing? The size of the arrows? The size of the paper?
Help! I teach a science class to elementary school children and would love to do this. Please answer [email protected]
May 23, 2018 at 7:33 am
This is because of refraction
January 22, 2019 at 3:42 am
Wonderful. Thanks for sharing
May 29, 2019 at 8:03 am
It was very useful and unique. It impressed my teacher a lot.
January 7, 2021 at 4:11 pm
I was finally able to get the arrow to change direction, but it appears that the mechanism is not the water, but the shape of the glass. It did not work with a square or wide straight sided glass. It did work in a straight sided narrow glass, but the arrow was distorted and could be manipulated back and forth by moving the paper.
March 2, 2022 at 2:52 am
Wow, this helped me for my school project i won second place thank you so much
August 4, 2022 at 7:27 pm
I tried this in a square glass container and the arrow does not change direction.
Does the concave/convex shape of the glass have something to do with the result?
May 22, 2023 at 10:07 am
That’s a great question. Do you have multiple glass containers to try the experiment with? That way you can test to see if the shape of the contain changes the results of the experiment. If you try it, come back to let us know what you find.
July 31, 2023 at 6:30 pm
It was refraction that caused the change of direction
It is caused by the refraction or the shape of the glass.
September 28, 2023 at 6:22 am
Thnx, I got 3rd position in my competition! 🤤
Leave a Reply Cancel reply
Your email address will not be published. Required fields are marked *
Save my name, email, and website in this browser for the next time I comment.

- Privacy Policy
- Disclosure Policy
Copyright © 2024 · Cool Science Experiments HQ
- Skip to primary navigation
- Skip to main content
- Skip to primary sidebar
- MEMBER LOGIN
Hands On As We Grow®
Hands on kids activities for hands on moms. Focusing on kids activities perfect for toddlers and preschoolers.
3 Super Simple Light Experiments for Kids to Do
Literacy & ABCs Science Toddlers Grade School Kindergartners Preschoolers Experiment Paper Plates 19 Comments
Science experiments are always a big hit in my house and this light experiment for kids will brighten everyone’s day – literally!
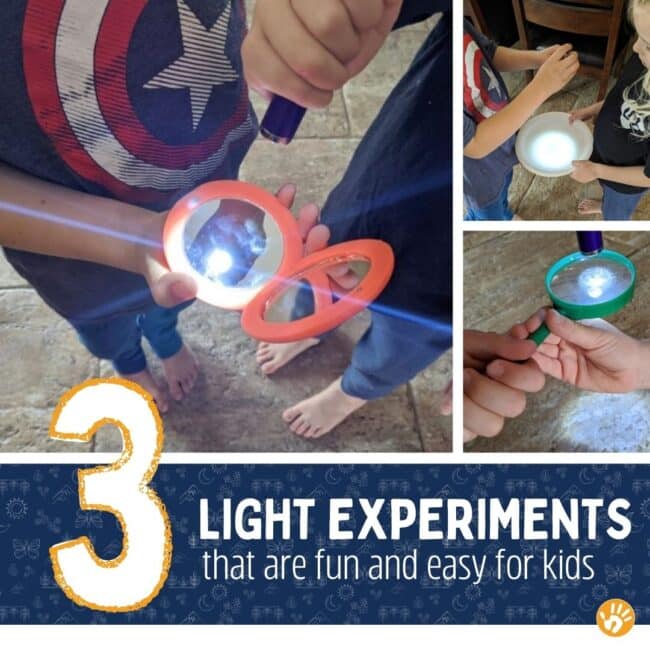
3 Super Simple Light Experiments for Kids
What three things can light do? This is the guiding question for this simple and fun light experiment for kids.
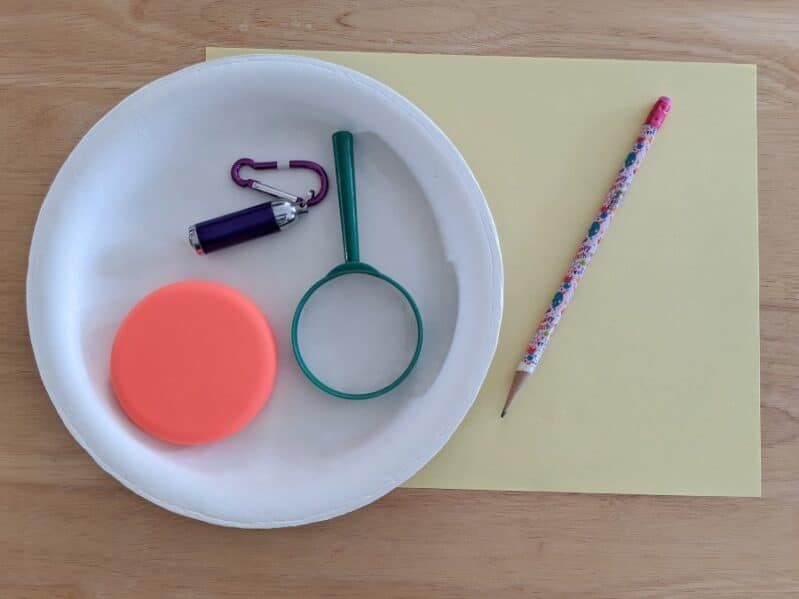
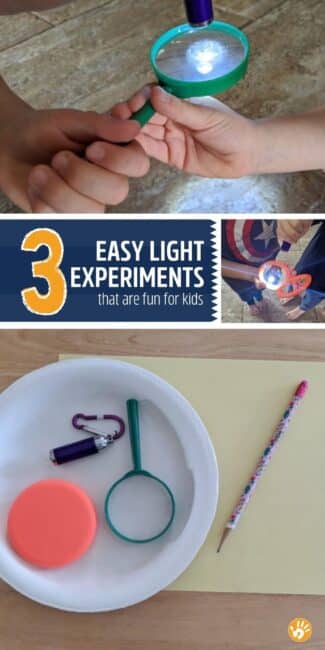
To Set up Your Own Simple Light Science Experiment, You’ll Need:
- Magnifying glass
- Paper plate or anything opaque
- Piece of paper
Try our favorite 50 simple science experiments .
Talking About Science Basics with Kids
Science activities are always a great time to practice using fun science terms. This simple light science experiment introduces three new ones:
- penetrate: or when light will pass through an object to be visible on the other side
- reflect: or when the light bounces back at you, like with a mirror or something shiny
- stop: or when the light is blocked, not reflecting or penetrating
- variable: what changes in different steps on the experiment
It can help if you write down these words and their meanings on a piece of paper or flashcards.
You could use actual words or draw a picture.
For older kids, you could also dive a little bit deeper. I love this quick explanation about the properties of light from Ducksters .
Before Your Light Experiments for Kids
This simple science experiment includes an opportunity for making predictions and recording observations.
Predicting is just making a guess based on what you already know.
You could get started by asking your kids: “What do you know about light?”
Create a quick and simple legend for the light experiment.
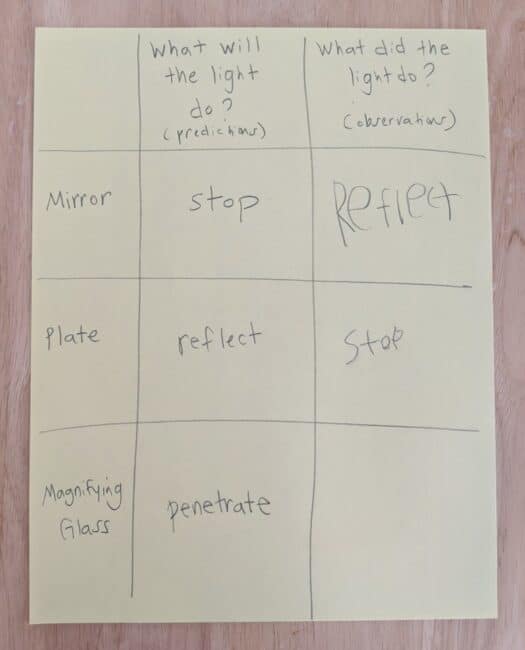
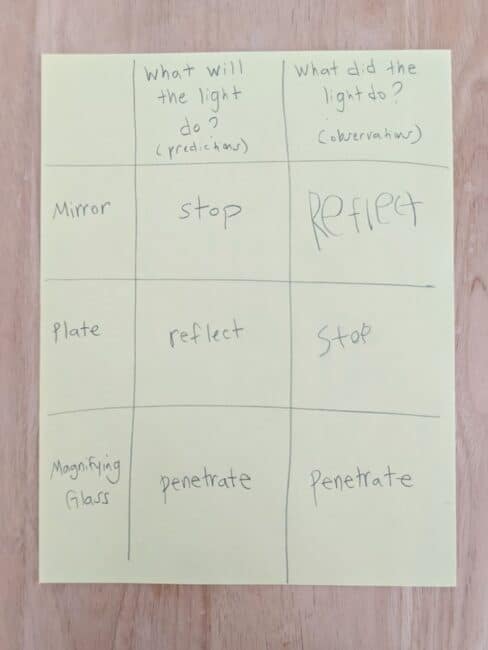
Write down your children’s predictions and make a quick chart. One column is for the prediction and the other is for the observation, plus some rows for the variables.
Label the rows with the names of your three objects, or variables (what’s changing each time). Hint: mirror, magnifying glass, plate, etc.
At the top of one column write: “What will the light do?” . (Prediction)
And then above the other column, write: “What does the light do?” . (Observations)
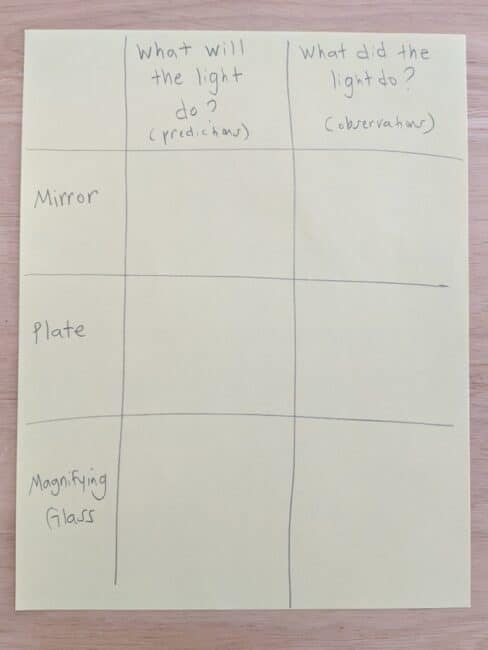
As you experiment, you’ll also jot down what happens with the light, or what you observe. Observe and observation in science is just a fancy way to explain telling what you saw happening during the experiment.
Ask these helpful questions as you predict what happens:
- Will the light penetrate the paper plate or will it stop?
- Will the light reflect off of the magnifying glass or penetrate?
- And will the mirror stop the light?
Take time to look at each object, discuss the three terms associated with light (penetrate, reflect, stop).
Make predictions, or guesses, about what the light will do with each object.
Write your predictions in the first column of the chart.
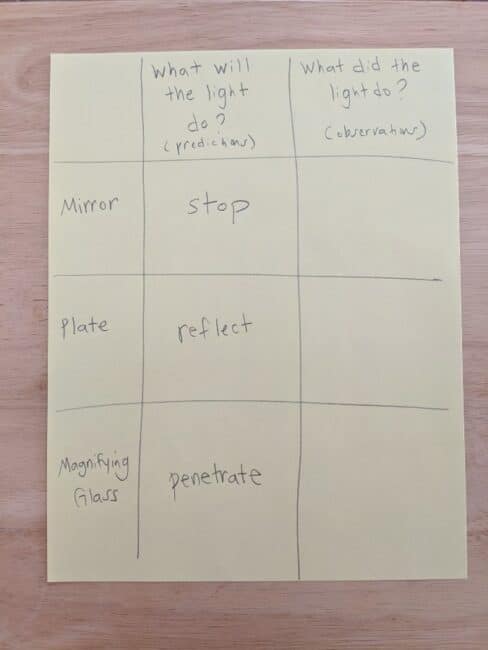
Now Experiment with Light Together
Once your predictions are made and the properties of light have been discussed, it’s time to do the experiment.
Choose the first object and have your kids shine the flashlight at the object.
Watch how the light reacts with the object. Does it shine through, shine back at you, or stop completely?
Record on your observation chart what the light did with that object. Check to see if your predictions were correct.
Keep going with the rest of the objects, making sure to observe and record your findings.
Our Easy Light Experiments for Kids
We chose the mirror first. My son held the mirror and my daughter used the flashlight.
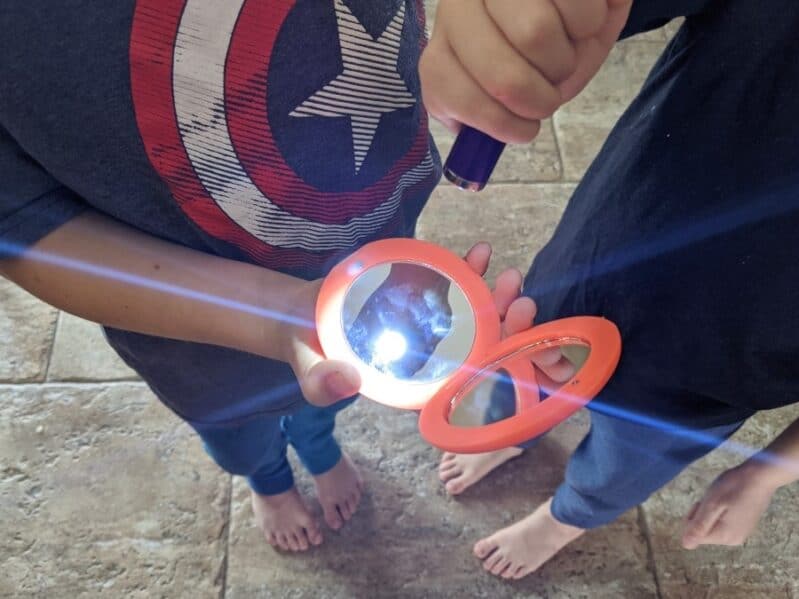
I encouraged them to explain what they noticed about the light. Both recognized that the light was shining back at us, or reflecting.
We talked for a minute about using “refect” to describe what the light was doing.
Keep shining with a simple indoor reflection activity !
My daughter wrote “reflect” in our observation column on our chart. I helped her with the spelling, but only a little.
The Paper Plate
Our second variable for the light experiment was the paper plate. This time my kids switched roles with my daughter holding the plate and my son shining the flashlight at the object.
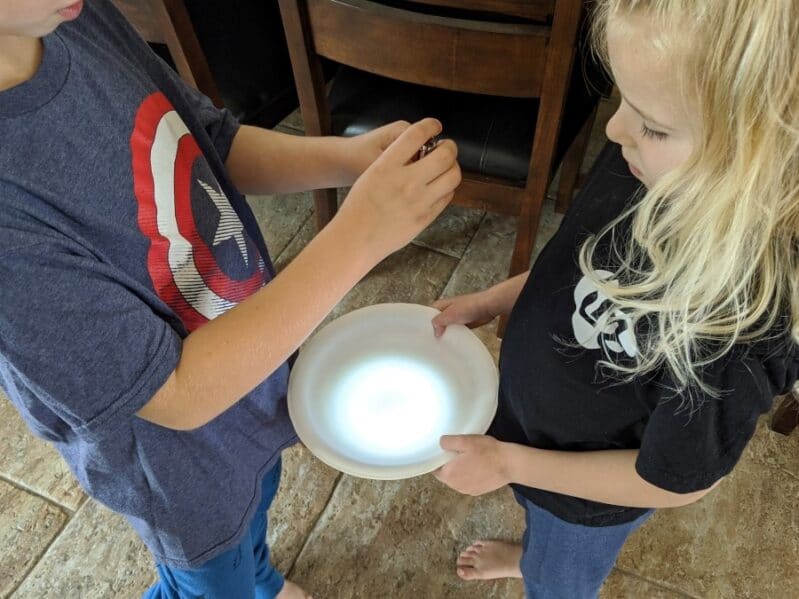
My kids quickly noticed that the light didn’t go anywhere except for on the plate.
We discussed together how this showed that the light stopped because the plate blocks or stops the light. I also added in the word “opaque,” which means that light does not pass through.
My son recorded “stop” for the plate.
You can also introduce the word “absorb” to your kids at this point in the experiment, as that is another term for stopping the light.
Originally, the kids had thought that the plate might reflect the light. Our prediction was incorrect and we talked about that for a minute or so.
Learn more about opaque objects with a fun shadow play activity !
The Magnifying Glass
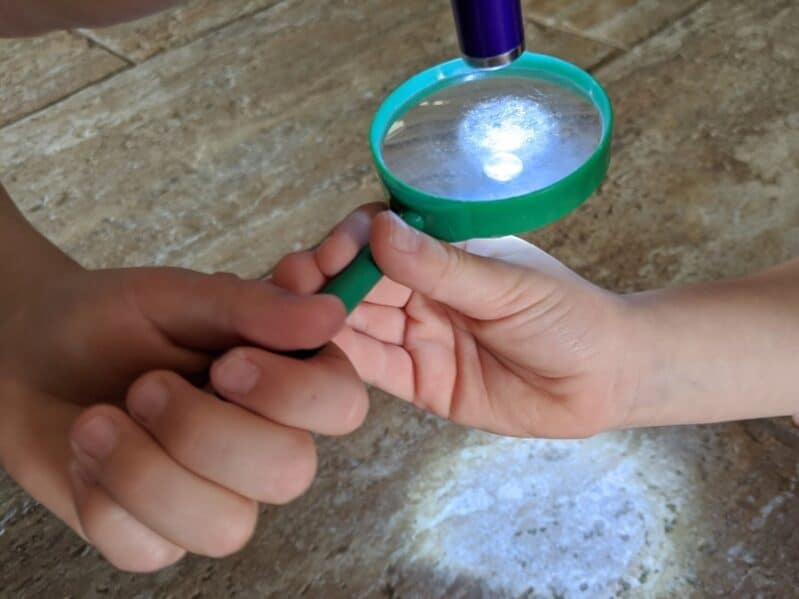
Our final object was the magnifying glass. It was my turn to shine the light as both my kids held the object.
This time the light went through the magnifying glass, shining onto the floor below. I shared the term “transparent,” meaning that light passes completely through, as we talked about this part of the experiment.
I recorded our findings on the chart. We reviewed each object and outcome together while comparing our observations to our predictions.
Keep Playing with Light!
Even though we had finished the “formal” experiment, my kids kept the learning going! They ran through the house, shining the flashlight on all sorts of objects and saying whether the light reflected, stopped, or penetrated.
I love how much ownership they took of their learning!
We love playing with a fun flashlight scavenger hunt for kids !
This fun extension activity went on for quite a while. And it’s something that I know I can keep returning to again and again, adding more challenging terminology as they grow.
What are some other fun science experiments for kids you have done? We’d love to check-out your creative learning ideas!
About alisha warth.
I have raised my children doing activities with them. As a homeschool mom, I am always looking for ways to make our learning fun. I'm honored to be able to contribute my ideas to the awesome site that is Hands On As We Grow.
More Hands on Kids Activities to Try
Reader Interactions
19 comments.
Stacey A Johnson says
November 24, 2020 at 8:46 pm
This is fantastic! Thank you for sharing! I have been putting science bags together to send home for my kinders because we are doing online school….I was looking for some light activities because we are going to tie them into the holidays we study in December. (The idea that most celebrations, customs, rituals, use some sort of light) I can’t wait to do this with them!
MaleSensePro says
February 10, 2020 at 11:29 pm
Its a great learning experience.. its indeed the best kind of way kids should learn, thanks for sharing :)
Leave a Comment Cancel reply
Your email address will not be published. Required fields are marked *
This site uses Akismet to reduce spam. Learn how your comment data is processed .
What Parents Have to Say…
- Hands On As We Grow Newsletter "It is hard to think of things to keep the 3 year old entertained and engaged while taking care of the baby. Everything we have tried so far from your website, the three year old has loved. Your ideas are so simple and he can do them for hours. HEAVEN!" - Karen I.
- I am now one happy Dad! "You have changed how I spend time with my kid in so many positive ways! I am now one happy dad that no longer wonders what I am going to do with this little guy for the next 12 hours :P Your site was this first time dad life saver!" - Jack C.
- Hands On As We Grow Newsletter "I feel like a new mama having so many fun ideas. I used to dread the afternoon, after naps, as it was so boring doing the same thing day after day but now I look forward to our "play" time!" - Haley S.
- Free Activity Challenge "Thank you so much for these activities. They have proven to me that I CAN be that mom that does cool and creative things with her kids! And those cool and creative things can actually be quite simple! What a revelation. Thank you!!" - Katie M.
- Activity Plans eBooks "This takes down the need to scour the internet for ideas. It's like looking for a recipe on the internet, so many options that often times it is less overwhelming to look in a book on the shelf than stress about too many options." Robyn G
- So organized and easy to use. I have found it impossible to Google ideas from a million different sites, get organized, shop for supplies, etc. This is exactly what I have been searching for! Thanks for making something so organized and easy to use. - Early Years Activity Plans User, Melissa C.
- The Activity Room Member "I absolutely love that this takes all the prep work out of engaging my children. It is so easy to just put up the calendar, and glance at it for inspiration when we are in a funk." - Rachel
- Grateful to have activities handed to us... "There's always something new for us to discover, as well as old favorites. I am so grateful to have activities handed to us... Fun and easy ones that can be put together in a moment's notice! You're awesome Jamie and I appreciate you sharing your activities and ideas!!" - Melissa C.
Shop eBooks of Activities

Get activity plans delivered to your inbox, every week!
Activities that hands-on parents absolutely love.
Improve Kids Fine Motor Skills with 30 Materials & Activities
What Toddler Crafts & Art Projects Can We Do? 30 Ideas
35 Name Activities For Preschoolers
50+ Simple Activities for Toddlers
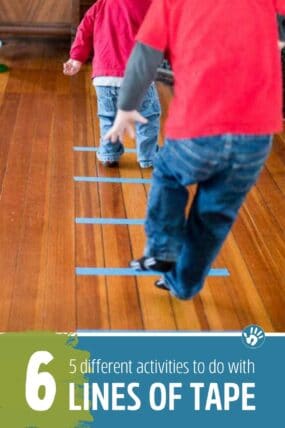
6 Different Activities for 6 Lines of Tape
Why Routines for Kids are Important
Get started having fun with your kids.
PLAN THE FUN WITH THE FREE KIDS ACTIVITIES PLANNER! AND RECEIVE ACTIVITIES EVERY WEEK!
- Preschoolers
- Kindergartners
- Grade School
- Literacy & ABCs
- Math & 123s
- Art Projects
- Gross Motor
- Shop Activity Plans
- Member Login

COMMENTS
The free STEM projects, experiments, lessons and activities below help educators teach K-12 students about the physics of light, specifically, visible light, with hands-on exploration and active learning. The resources below have been grouped by grade band to help educators select the experiments and lessons that best fit their needs.
Light Experiments for Kids. Make a light maze to learn about light travelling in straight lines and reflection. Learn about light and refraction with these direction swapping arrows. Try one of our simple shadow investigations including drawing around 3D shapes, making a sundial and creating shadow puppets. Electricity. Learn how to make a ...
Fill the glass almost to the top. Draw arrows on one piece of of card or paper. Place the paper behind the glass and watch as the arrow points the other way. Now try to think of a word that still makes sense if you put it behind the glass. We tried bud, the green ( badly drawn ) plant is on the opposite side when the paper is not behind the glass.
Light Experiments for Kids. This is a set of simple activities that introduce science to young children, through common questions and experiences they have had. This resource includes clear instructions, a list of equipment you will need and a written explanation of the science behind the activity you are experiencing with your child.
Year 6: Light. This list consists of lesson plans, activities and video clips to support the teaching of light in year six. It contains tips on using the resources, suggestions for further use and background subject knowledge. Possible misconceptions are highlighted, so that teachers may plan lessons to facilitate correct conceptual understanding.
Free interactive activities for children to learn about light. They will discover that Light is a visible form of energy. Light travels very fast. Shiny surfaces such as mirrors or polished metal will reflect light. Transparent objects will slow down light, causing it to bend upon entry or exit. This is called refraction. Transparent objects with non parallel surfaces can separate white light ...
Children learn that light travels in straight lines and can be made to follow a path by placing mirrors in its path. Children use a simple grid and position mirrors at 45° angles to make light travel through a maze. They solve 12 increasingly difficult problems, and use a blank sheet to create their own. 5 pages.
How do we see light? In this lesson, we will learn the steps that take place when we see an object. We will draw diagrams to show how we see; we will learn the different parts and functions of the human eye; and we will learn why people wear glasses and sunglasses. In this lesson you will need a piece of paper, a pencil and a ruler. 1 Slide deck.
Modelling Light. Though aimed at older children the idea of modelling light using a ribbon and other techniques used in this short demonstration could be used in Year 3. Children could model how light travels from different sources in a straight line and how light is reflected from certain surfaces, changing the direction it travels.
Australian Resource. Explore more than 108 "Light Experiment" resources for teachers, parents and pupils as well as related resources on "Light Experiments". Instant access to inspirational lesson plans, schemes of work, assessment, interactive activities, resource packs, PowerPoints, teaching ideas at Twinkl!
Write a review. Help children to learn about how light travels with this worksheet. It includes two different experiments that demonstrate how light travels in a straight lines, even when reflected. Detailed instructions and diagrams are provided. Curriculum Point (s): Recognise that light appears to travel in straight lines.
Here's a fun collection of light science for kids! You'll find light science experiments about both light refraction and light reflection in this science roundup. Follow our Science for Kids Pinterest board! Because we have been having so much fun with our most recent light science activities, I decided to round up some more...
Light Maze 1 - Light up the road. This one is set up like a road. The idea is to find a way for the grey car to light up the road around both corners. Two mirrors allow this to work nicely. You can see here how each mirror reflects the light.
11+ Bright and Shining Light Experiments for Kids. Science Experiments. These light experiments for kids are fun and easy to do. They're the perfect way to teach them about how light works and even take it further to talk about refraction and reflection as well. You can also use these activities to talk about circuits and how energy travels ...
Place the empty bottle beside the sink and, using the pin, make a small hole in the side of the bottle, about half way up. Place your finger over the hole and fill the bottle with water. Turn on the torch and shine the torch on the bottle, behind the hole. Make sure the side with the hole is positioned towards the sink.
With easy-to-follow instructions and simple materials, these exciting experiments dive into basic concepts such as reflection, absorption, diffusion, and much more. I scoured the internet to discover the BEST activities for experimenting with light. This post includes dozens of fun science light experiments for kids to keep you and your kids ...
Light Refraction Science Experiment Instructions. Step 1 - Get a sheet of paper and draw two arrows on it. One arrow near the top and one arrow near the bottom. Make the arrows point in the same direction. Step 2 - Fill a glass with water. Step 3 - Slowly lower the piece of paper behind the glass of water.
This simple light science experiment introduces three new ones: penetrate: or when light will pass through an object to be visible on the other side. reflect: or when the light bounces back at you, like with a mirror or something shiny. stop: or when the light is blocked, not reflecting or penetrating. variable: what changes in different steps ...