
Why You Should Be Using Discrepant Events
- Planning , Science
One of the best ways to engage students in science at the start of a new unit is to use a discrepant event. Discrepant events pique students’ interest and leave them craving the knowledge that you plan to teach them. Students are often left begging you to tell them “how did that happen?” That’s the kind of engagement we need (and want!) in science. It’s a win-win!

What is a Discrepant Event?
A discrepant event is a surprising and paradoxical outcome that is not what an observer would normally expect. A most common example of a discrepant event would be oobleck. Most children (who have never seen it before) would not expect it to have both properties of a solid and properties of a liquid. Nor would they expect it to roll into a ball and form, but immediately spread out as soon as the “ball” is placed on the table.
Why Should You Use Discrepant Events?
The largest reason is that students will become hooked on science. To them, this will appear to be “magic” and their ears will be wide open to understand just how that worked. Then they will be ready to “amaze” their friends both with the “trick” and then with their “smarts.”
But there’s also the fact that it’s a well-researched and well-documented teaching strategy! It helps teachers assess students’ knowledge and target any misconceptions.
Further, it helps students develop more of a scientific mindset. When a scientist makes an observation, something may spark their curiosity which will then lead to an investigation or research. This is exactly what inquiry science is – and exactly what NGSS wants us to do .
It develops critical thinking and problem-solving skills – something all students need to develop more of.
Examples of Discrepant Events
In the first video below, the mini marshmallow is placed in a syringe and the end is capped. Then, as the plunger is pulled back the marshmallow increases in size. When the plunger is pushed in toward the marshmallow, it decreases in size. This would be a great example to do on a doc cam or for students to do themselves. It’s best to use a syringe that is a bit longer (and not necessarily as wide as the one I used in the video).
This is one of my favorite examples. In the video below, you have two candles that are burning. After about a minute of both candles burning, you blow one out. Then you hold the one candle that is still lit over the unlit candle’s smoke. The unlit candle will then light. It’s exciting to watch the flame “jump” from the lit candle to the unlit candle without actually touching the flame to the wick! Of course, you don’t have to use two candles. You can also use a candle with a match. Just relight the candle using a match and the smoke. This discrepant event is sure to excite your students and make them say, “how did that happen?! “
In this example, I asked my husband to kindly volunteer for me so I could record the demonstration. First, my husband takes a long paint stick and places it under two pieces of flat newspaper. (Make sure when you do it, you smooth out the air pockets between the newspaper and the table. You’ll notice this in the video.) My 5-year-old twins were around, so I went ahead and asked them what they thought would happen. They reacted just as most kids do: they thought the stick would pop up through the newspaper (tearing the newspaper) and then land on the floor. I mean, who would really believe a newspaper would break a paint stick? When you watch the video, I slow it down when my husband breaks the stick so you can see there’s no crazy business with the stick and newspaper. Then you can see the newspaper does not tear. Try it yourself. 🙂
In this example of a discrepant event, two empty aluminum cans are placed on parallel straws close to one another. Then a straw is placed near the cans that are apart from one another. Then I blow between the cans and instead of blowing the cans apart, as one would expect, the cans actually move toward one another.
These are just a few examples of discrepant events. There are lots of them out there. Just do a quick google search to get more ideas, or follow me to discover more!
How to Use Discrepant Events in the Classroom
Before demonstrating any discrepant event, first, ask students what they think could happen. Emphasize that there is no right or wrong answer. Then after the demonstration, have students write down any questions they have along with what they think is occurring. Ask the students guiding questions to help facilitate the discussion. Depending on your goal, you can have students work through the scientific method and processes, or you can have students research. Ultimately, make sure that students are never left hanging and that you do explain what did occur and how it happened.
After your first time using a discrepant event in the classroom to introduce a science concept, not only will your students be engaged, motivated, and hooked on science, but so will you!

- discrepant event , Engagement , motivation

FIND IT NOW!
Check me out on tpt.

CHECK THESE OUT

5th Grade Math Workshop Growing Bundle- 9 Units

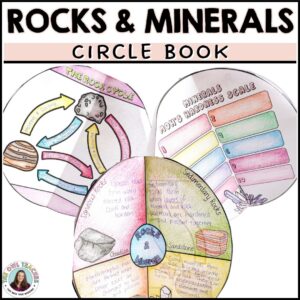
Three Types of Rocks and Minerals with Rock Cycle Circle Book
Want to save time?
COPYRIGHT © 2016-2024. The Owl Teacher | Privacy page | Disclosure Page | Shipping | Returns/Refunds
BOGO on EVERYTHING!
- CAIS Workshops
- Big Macs & Healthy Teens
- Rethinking & Greening Classic Science Projects
- National Board Certification
- Full STEAM Ahead
- MAKE Learning Fun
- Bottle Rockets
The Science Guru
Back to school with discrepant event science, asking questions.
My first demo begins with two black plates upon each of which I place an ice-cube. Within seconds, students notice a difference between what is happening to the ice cubes. As a puddle forms around one cube, the other remains solid ice showing now signs of melting. I then ask students to record two questions, the answers to which they think will help them understand the difference between the two ice cubes. Students share their questions (Are the ice cubes both made of the same substance? Is one plate hotter than the other?) and explain why they the answers to their questions will help them more fully understand what’s going on. After a few minutes of sharing (but not answering) questions, one student invariably suggests moving the not melting cube to the other plate. When it begins melting and students exclaim that it must be that the one plate is hotter than the other, I pass around the plate sitting under the rapidly melting cubes. To students surprise, it is not warm but instead ice-cold! We continue the discussion and questioning, eventually discovering that the plates are made of different materials (wood vs. metal) and discussing conduction and relative temperature. In this 20-minute investigation concludes with a discussion of how asking questions helped us (and scientists) understand an unexpected phenomenon.
Ideas & Resources
My discrepant event introductory lessons typically include five different demos, each practicing a different skill (recording observations, asking questions, recording data, making predictions, etc.). Below are some of the materials I use in my classroom and resources on how to bring discrepant event science into your classroom.
From NSTA Press: Author Thomas O’Brien created his Brain-Powered Science series for educators who love to surprise and challenge their students with unanticipated results. Using his inquiry-oriented experiments based on the science of discrepant events—hands-on explorations or demonstrations in which the outcomes are not what students expect—teachers can challenge students’ preconceived ideas and urge them to critically examine empirical evidence, draw logical inferences, and skeptically review their initial explanations with their peers.
Ice Block Demo – As described and pictured above.
Self-Inflating Balloons – A sealed, opaque mylar balloon mysteriously begins to self-inflate
Happy & Sad Balls – A ball suddenly stops bouncing after being secretly switched for one made of a non-elastic material
UV Detecting Beads – Beads change from colorless to vibrant colors, but only in some types of light.
Sinking & Floating Spheres – Two spheres with identical masses respond differently when placed in a bowl of water
Astro Blaster – A red ball mysteriously bounces five times higher than the height from which it was dropped.
Share this:
- Click to email this to a friend (Opens in new window)
- Click to print (Opens in new window)
- Click to share on Twitter (Opens in new window)
- Click to share on Pocket (Opens in new window)
- Click to share on LinkedIn (Opens in new window)
- Click to share on Tumblr (Opens in new window)
- Click to share on Facebook (Opens in new window)
- Click to share on Reddit (Opens in new window)
- Click to share on Google+ (Opens in new window)
- Click to share on Pinterest (Opens in new window)

About The Author
Mike matthews.
Michael is a National Board Certified Science teacher. He currently serves as the Director of Curriculum and Program Innovation at an Independent School in the San Francisco Bay Area.
Other posts by Mike Matthews
Author his web site
by Mike Matthews posted in Best Practices , From the Classroom , Resources Comments Off on Back to School with Discrepant Event Science!
Comments are closed.
About the Founder
Mike is a National Board Certified Science teacher. He currently serves as the Director of Curriculum and Program Innovation at an Independent School in the San Francisco Bay Area.
Follow me on Twitter
Recent posts.
- Designing a Future-Proofed Makerspace – Intro
- MAKE Learning Fun Workshop – NSTA 2015 in Chicago
- Greetings from the Boston NSTA Conference!
- Google Glass in Science Class
- Inside The New Exploratorium – Opening Tomorrow!
- Entries RSS
- Comments RSS
- WordPress.org
Latest Post
- Designing a Future-Proofed Makerspace – Intro 08 09
- MAKE Learning Fun Workshop – NSTA 2015 in Chicago 13 03
- Greetings from the Boston NSTA Conference! 04 04
- Google Glass in Science Class 15 01
- Inside The New Exploratorium – Opening Tomorrow! 16 04
- Takeaways from The NSTA Convention – Part 1 15 04
- Deep in the heart of SCIENCE! 12 04
- Greetings from the 2013 CAIS Conference! 11 03
- Back to School with Discrepant Event Science! 17 09
- Rube Goldberg Machines (Innovative Ideas Video!) 01 06
The Science Guruis proudly powered by WordPress Entries (RSS) and Comments (RSS) .
Yashfa ver. 1.7 created by WP GPL
Promoting Scientific Inquiry Inside and Outside of the Classroom
Exposing students to discrepant events and online simulations can spark wonder and motivate them to investigate science beyond the classroom.
Your content has been saved!

Scientific inquiry continues to be conflated with any instructional activity in which students ask questions and seek answers in the learning process, but scientific inquiry is much more than the act of inquiring. Even before the pandemic, teachers struggled with adopting not only the higher levels of scientific inquiry into their classrooms but also reaching a clear consensus of what science as inquiry entails. The abrupt transition to virtual teaching led to many students passively watching their teachers engage in science far removed from the scientific-inquiry process.
The four levels of scientific inquiry establish a framework for engaging students in science as inquiry:
- Confirmation inquiry: This is often considered level zero, as inquiry is absent. Students complete an activity with prescribed problems and procedures in which they are already aware of the solutions.
- Structured inquiry: Students follow procedures for an investigation of a novel topic.
- Guided inquiry: Students determine their own methods to collect evidence for a teacher-posed problem.
- Open inquiry: Students formulate their own questions and methods for on-topic investigations in the curriculum.
With virtual teaching, there are many challenges integrating the higher levels of scientific inquiry, as students may not have the supplies or materials they would in the classroom. They also may lack the necessary safety equipment or adult supervision. But there are still effective ways to teach scientific inquiry to students learning remotely.
3 Strategies for Teaching Scientific Inquiry Virtually
1. Demonstrations with discrepant events. With virtual learning, it’s very easy to fall into the trap of performing demonstrations while students watch passively. Guarantee that all demonstrations are at least structured inquiry by carefully selecting discrepant events to spark curiosity and motivate students for further investigations.
Discrepant events cause cognitive dissonance due to the surprising and unanticipated results. Baffled students naturally generate many questions that can be used for an extension activity, such as an open inquiry in which students test their explanations. Working through the cognitive dissonance can have profound effects on learning. Thomas O’Brien has three books published by the National Science Teaching Association with discrepant events for students from fifth grade to 12th grade.
If a discrepant event is based on household materials that students typically have accessible, they first meet in groups to brainstorm their questions, predictions, and methods for testing the discrepant event. Even without access to the materials, groups can work together by engaging in effective team communication by assigning one student to be the manipulator of the materials while the others serve in roles such as researchers. If the discrepant event requires materials that are not readily available, students will similarly work in groups to brainstorm and then instruct me in how to manipulate the demonstration for the entire class. Together as a group, we will work through the discrepant event to explain the phenomenon.
2. Simulations with PhET. PhET simulations by the University of Colorado have been an integral part of teaching science as inquiry for a long time. Since 2002, scholars have created 159 free interactives for physics, chemistry, math, biology, and earth science in 95 languages. With almost 3,000 coordinating lesson plans available, it’s easy to find inspiration to create your own.
These simulations are investigative, meaning students actively engage in all levels of inquiry and manipulate the simulations accordingly. They are not just passively clicking and watching. One of my favorites is the energy skate park , which, among other things, allows students to design a skate park using the concepts of mechanical energy. PhETs can easily be confirmation or structured-inquiry lessons by providing students a set of instructions to complete for the simulation, and PhET provides many lesson plans for each simulation. However, teachers can adopt a guided-inquiry approach by providing a central challenging question to the students. Students have autonomy to manipulate and determine their own methods for answering the teacher-posed questions.
It’s even possible for students to engage in open inquiry with PhETs or other simulations. When engaging my students in open inquiry, I will first briefly model the basic functions of the simulation. Then students are presented the following four prompts to scaffold the development of their research questions, hypotheses, and methods for the investigation:
1. Describe your topic in general. How does it act?
2. What can you change or manipulate with the simulation? Brainstorm all possibilities. These are the independent variables.
3. What can you measure or describe about the response in the simulation? Brainstorm all possibilities. These are the dependent variables.
4. Review your responses, and select an independent variable and dependent variable. Develop your research question, prediction, and methods.
3. Investigations. My best virtual homework assignments have been guided and open-inquiry investigations. Students have increased motivation to perform an investigation rather than complete a worksheet. The important thing is to develop scaffolding that guides students in their thinking processes. I start small. These do not need to be long-term projects, but rather activities that students can complete within an hour, a day, or a week.
We begin investigations with the four prompts listed above for simulations once we have established a topic. The groups debrief their responses using a jigsaw approach so that each member of the group is accountable to share and seek feedback from students in other groups. Students organize their data into a CER (claim, evidence, and reasoning) template that they again will share using a jigsaw approach in mixed groups.
IMAGES
VIDEO