
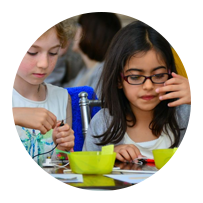
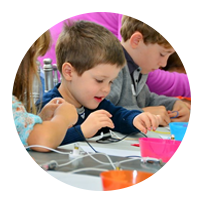
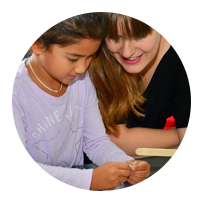
Classes for Curious minds
A place for children to learn, experiment, explore and play
For children aged 3-12 years
Sugar Water Density Rainbow Experiment

Learn about density in this fun and simple science experiment.
November 2019

You Will Need
- Food colouring
- Pipette/syringe
The Experiment
- Fill 4 glasses with water. Leave the 5th glass empty.
- Add 2-3 drops of food colouring to each glass of water. Add red colouring to the first glass, yellow to the second, green to the third, and blue to the fourth.
- In the glass with red colouring, do not add any sugar. In the yellow glass, add one tablespoon of sugar. In the green glass add two tablespoons of sugar. In the blue glass add three tablespoons of sugar. Leave the fifth glass empty. Stir the sugar/food colouring/water solution in each glass until the sugar is completely dissolved - you can use warm or room temperature water to speed this up and make sure all sugar is dissolved.
- Using the pipette or syringe, fill the empty 5th glass ¼ full with the blue sugar solution, then add ¼ of the green solution which should sit on top. Then add ¼ of the yellow solution, then ¼ of the red solution to finish. Go slowly, making sure the different layers don’t mix into each other. You should have created a rainbow!
The Science
Density is the number of particles in a given volume. When more sugar is added, more space between the water particles is filled. Adding sugar to the water increases the density of the water, so the more sugar in the solution, the greater the density.
The blue sugar solution has the most sugar so it is the densest as it has the highest number of sugar particles per 100ml of water. The densest solution stays at the bottom, with the least dense on top. The red solution has less sugar so has a lower density, and, as a result, stacks on top of the mixture with a higher density - so the differing densities separate out.
Want More Epic Experiments?
If you enjoyed this experiment and want more fun, more science, and more epic experiments, enrol now in our science enrol now in our holiday camps and science classes where kids can learn, experiment, explore, and play!
Book your Holiday workshops and Term classes today!
Schools & Nurseries
Start a Science or Little Maths club to your school/nursery
We offer tailor-made tutoring to students of Chemistry, Physics, Biology and Maths.
Latest News

We published our first book: FULL OF BRAINS!
Holiday Science Camps
AGES 4-12 YEARS
find out more and enrol
Science Term Classes
AGES 3-4 YEARS AGES 4-7 YEARS AGES 8-12 YEARS
Schools & Nursery Clubs
AGES 3-4 YEARS AGES 4-12 YEARS
Our website uses cookies to give you a better customer experience. By continuing we will assume you are happy with receiving all cookies. ACCEPT You can get more information on cookies HERE
Rainbow In A Jar Science Experiment
I love incorporating easy science experiments into the classroom as often as I can. I thought this rainbow in a jar science experiment was perfect for March.

To make this rainbow in a jar, the students are exploring density by layering sugar water to make a rainbow.
The materials are all things you most likely already have on hand.
THIS ACTIVITY WORKS WELL WITH

Approx. 2 cups of warm tap water
1/2 cup measuring cup
1 Tablespoon measuring spoon
4 small jars of glasses
Approx. 1 1/2 cups of granulated white sugar
Red, blue, yellow, and green food coloring
Tall thin glass or test tube. I used an old Starbucks bottle
4 popsicle sticks

Experiment steps
Measure a 1/2 cup of warm tap water into the 4 jars.
Add 2 drops of food coloring to each of the 4 jars.

To the jar of red water, add 2 tablespoons of sugar. To the jar of yellow, add 4 tablespoons of sugar. In the jar of green water, add 6 tablespoons of sugar. And to the jar of blue water, add 8 tablespoons of sugar.

Stir each of the jars to dissolve the sugar. If your water is not warm enough to dissolve the sugar, put the jar in the microwave for 30 seconds at a time, stirring in between until the sugar is dissolved.

The students can already see at this point that by dissolving increasing amounts of sugar, you’re increasing the density of the sugar water solutions. They can easily see that the jars all started the same and now the blue looks a lot fuller than the red.
Step 5:
Pour about an inch of the blue water into the bottom of your glass or test tube.
Use your straw to gently drip the green water on top of the blue layer. It works best to place the straw to the side of the glass just above the blue layer. You want to add the layers to the glass slowly and carefully, otherwise, they’ll mix together resulting in a muddled rainbow.

Add the yellow layer next using the same method and last the red layer. Stand back and admire your beautiful rainbow!

I hope your students love making the rainbow and learning about density in a fun way!
If you’re looking for another great science experiment that would be great for the science fair, you might like the simple circuit that we made. You can get all of the details for that project here.

See you next time!

Share this:

20 Comments
- Pingback: Spring Into STEM: 15 Science Activities For Kids | Bear Hugs And Blanket Forts
- Pingback: 21 Best Science Fair Projects To Try - Fun with Mama
- Pingback: 21 Best Science Fair Projects - Fun with Mama
- Pingback: 100+ Science Experiments for Your Homeschool Science Class - Year Round Homeschooling
- Pingback: Water Droplet Obeys Allah : Book Inspired Water & Weather Themed Activities to Learn About Allah SWT - Amani Creative Kids
- Pingback: Simple Rainy Day Exploration and Activities to Learn About Allah SWT for Preschoolers - Amani Creative Kids
- Pingback: 5 experimentos científicos con niños
- Pingback: How to Engage Preschoolers with Jar Science Experiments
I cannot find regular food coloring any where! Can gel food coloring be used??
I’ve never used gel food coloring, but if you can get it to mix with the water it would work just fine. Basically, you are just coloring the water in order to be able to see the layers.
What a pretty density experiment!!
- Pingback: 30 Fun Friday Ideas - Primary Playground
I didnt get layers..All the colours got mixed..what could have gone wrong?
Hi there. If you didn’t get layers, the sugar measurements may have been off. Also, the layers/colors need to be added VERY slowly otherwise it will all just become mixed. I hope that helps!
Would brown sugar work just as well?
My guess would be no since brown sugar contains molasses and would be a different density. But it is a science experiment, so it wouldn’t hurt to try it and see what would happen.
So fun! It looks awesome! Takes some time to do though but worth it! Kids thought it was cool but I think I had more fun then they did 😁
This was extremely fun. First we did not think it was working but then we put a light from behind and seen the wonderful masterpiece. We tried using a straw and it was a bit hard then we found some droppers and it was a whole lot easier. Thank you.
I was wondering about the straw and exactly how that would work. With the droppers, did you have to add the drops really slowly and one at a time? Or could you just squeeze it? Asking, because I want to try this with my two and threes. Some will be able to listen and add slowly l, but some may want to squeeze as hard as they can
Hi there. If you’re using a straw, you would plug the top end with your thumb and slowly let the liquid run out of it down the side of the inside of the jar. Same for the dropper. You don’t want to just “drop” the liquid in as it will then mix and you won’t get the density layers. You will just end up with a purple, brown mix. It may work for some of your twos and threes, but it may just be too much for some of them. Maybe an alternative is they watch you do it and then they could play with their own droppers in other colored water and make art on paper.
Leave a Reply Cancel reply
Your email address will not be published. Required fields are marked *
Save my name, email, and website in this browser for the next time I comment.
Notify me of follow-up comments by email.
Notify me of new posts by email.
- What Is Sugar?
- Where Does Sugar Come From?
- Types of Sugar
- Sugar vs. Sugars
- History of Sugar
- Sugar Refining & Processing
- Sugar’s Role in Food
- Sources of Added Sugars
- Sugar in Balance
- Sugar in the Context of the Total Diet
- Sugar Intake Recommendations
- How Much Sugar Do Americans Consume?
- Nutrition Policy
- Sugar Basics
- Sugar’s Role in Obesity
- Sugar & Diabetes
- Dental Health & Sugar
- Heart Health & Sugar
- Farmer Profiles
- More to Sugar
- Science Experiments
- Our History
- U.S. Sugar Industry
- Board Members
- In the News
- Positions & Principles
- Dietitian Toolkit
- Fun Facts About Sugar
- Printable Sugar Resources
- Video Resources
- Spanish Resources
- Resources for Educators
- STEM Resources for Educators
- Resources for Families
- Media Resources
- Resources for Health Professionals
- Press Releases
- Additional Sugar Resources
- Publications
Get Social with #MoreToSugar

Science with Sugar: Sugar Water Rainbow
Sugar can play a role in several fun and educational at-home science experiments to keep kids learning (and having fun) this summer..
The Sugar Water Rainbow you’ll create in this science experiment is a display of density. Density is the number of particles in a given volume. When the sugar dissolves in the water, it increases the density of the water. The blue sugar solution has the most sugar, so it has the greatest number of sugar particles per cup. The densest solution stays at the bottom and the least dense stays on top.
Ingredients/Supplies:
- 12 tablespoons sugar
- 4 cups water
- Food coloring
- Tablespoon measure
- A pipette, syringe or baster
Directions:
- Put 1 cup of warm water into 4 of the glasses.
- Add 2-3 drops of red food coloring to the first glass, yellow to the second, green to the third and blue to the fourth.
- In the glass with red food coloring, do not add any sugar. Add 2 tablespoon of sugar to the yellow glass, 4 tablespoons to the green glass and 6 tablespoons to the blue glass. Stir the mixture in each glass until the sugar is dissolved.
- Using the pipette, syringe or baster, fill the empty fifth glass about ¼ full with the blue sugar solution. Then, going slowly so you don’t mix the layers, add the same amount of green solution which should sit on top of the blue sugar water. Do the same with yellow and then red.
- And there you have it – the perfect sugar water rainbow!
Here are a few more ideas for some sugar science fun:
- Homemade Bubbles [hyperlink – https://www.sugar.org/blog/homemade-bubbles/ ]
- Ice Cream in a Bag [hyperlink – https://www.sugar.org/blog/vanilla-ice-cream/ ]
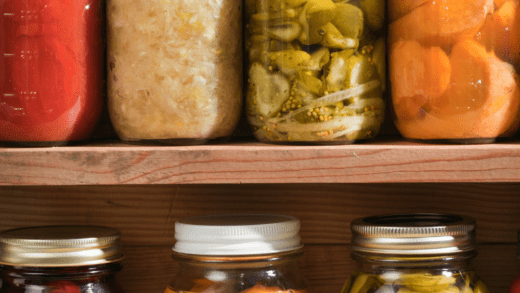
Real Sugar and Salt: Effective and All-Natural Food Preservatives
September 2024
Garden produce can be enjoyed not only at harvest time but throughout the year thanks to real sugar and salt—all-natural ingredients which have played an important role in food preservation methods such as canning for centuries.
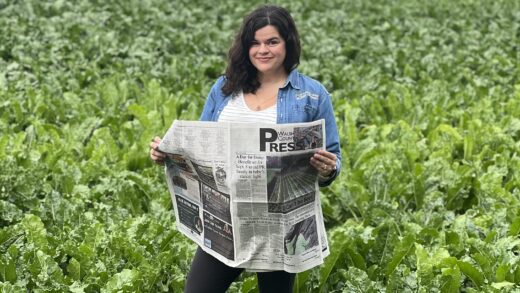
Allison Olimb, Crystal, ND
As a newspaper editor, Allison Olimb loves telling stories. The story of how her family came to be sugar beet farmers is one of her favorite.
Real Sugar: Straight From the Fields
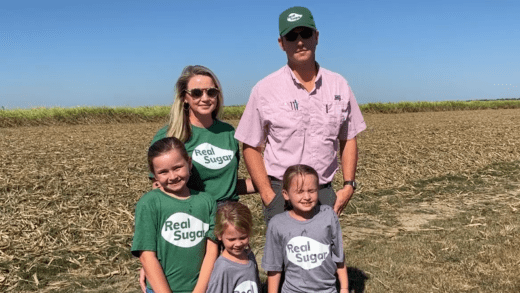
August 2024
Get to know some of the passionate sugar beet and sugar cane growers and dedicated employees of the sugar industry.
Stay in Touch
- Sugar & the Diet
- Sugar & Health
- Privacy Policy
© 2024 The Sugar Association, Inc. All rights reserved.
Colorful Sugar Water Density Tower
When density is the subject, going extra large is the idea when you want a crowd to see the results easily..
Print this Experiment

This is one of those great demonstrations you could set up in the middle of a crowd and everyone would be able to see everything. If you’re looking for a simpler, more personal, or a one-on-one density activity, check out the Sugar Rainbow version. However, if your emphasis is LARGE as well as focusing on supersaturated solutions, this is the one you want to use. Yes, the two activities are very similar but this one feeds the crowd!
Here's What You'll Need
4 clear, tall glasses or jumbo test tubes, 4 pipettes, eye droppers, or a turkey baster, 4 plastic cups, 9 oz (266 ml), 4 stirring spoons, granulated sugar, tablespoon measure, food coloring or color fizzer tablets, water and paper towels, microwave oven, adult supervision, let's try it.
Fill the cups with 8 oz (237 ml) of hot tap water. Use your method of choice to color the water. You’ll want a different color for each cup, for example, blue, green, yellow, and red.
Add 2 level tablespoons (26 g or 3 sugar cubes) of granulated sugar to the first cup, 4 to the second cup, 6 to the third cup and 8 tablespoons to the fourth cup.
Be sure to label each color with the amount of added sugar. For example:
- Blue = 2 tablespoons
- Yellow = 4 tablespoons
- Red = 6 tablespoons
- Green = 8 tablespoons
Use a separate spoon to stir each cup and stir until the sugar is completely dissolved. It’s crucial that all of the sugar be dissolved in each cup. Use separate spoons so you don’t dilute one density with another.
It’s likely, however, that you’ll reach the saturation point of sugar in a cup of water by the second or third cup. You’ll stir and stir but there seems to always be some sugar remaining undissolved in the cup.
You’ll need to move to a super saturated solution to dissolve all the sugar and this means heating the water. Place a cup in a microwave oven for 20 seconds to warm the water. Stir the warmer water. Continue warming and stirring in stages until all of the sugar is dissolved in all of the cups.
Start with the cup containing the most dissolved sugar (green water in the example). Using a pipette, dropper, or a turkey baster, add the bottom layer of colored sugar water to the jumbo test tube. Keep the sides of the test tube dry by placing the baster well down into the center of the tube before gently squeezing it.
Adding layers is challenging. The tendency is to rush and that simply mixes batches of sugar water in the test tube causing separate color layers to disappear. NOTE: If you have only one pipette or baster, be sure to rinse and dry it between each color change so one solution doesn’t mix with another.
Using a new pipette, carefully add the next density layer (red in the example) onto the surface of the first. The best technique is to keep the tip of the pipette against the wall of the test tube and a little above the surface of the rising sugar water. Slide the pipette up the wall as the level rises, too. This will take a lot of patience so squeeze slowly. Add as much of this color as you did of the first one.
At first, the colors may seem to mix a little no matter how careful you are. Then, as more of the second color fills the test tube, a separation will appear. The less dense solution is floating on top of the more dense solution.
Use a new pipette to continue with the next color the same way. Grab a fourth pipette to finish with the least dense color until you have stacked all of them on top of each other in the tube. Admire your work and look for more colors in the tube than you had at the start.
How Does It Work
Keep in mind that this activity takes a lot of patience. You won’t see the color you’re adding right away. Just keep carefully squeezing the sugar water solution into its layer and you’ll see it begin to stack up.
Density is the measurement of how much “stuff” is packed into a measured space. That’s how we get the equation for density: Density = Mass (the stuff) ÷ Volume (a measured space). Nearly every substance and material imaginable has a different density. This is especially true for the sugar solutions you made.
By increasing the amount of sugar in solution but keeping the amount of water constant , you created solutions that have increasing densities. As you add sugar to the water, more and more sugar molecules take the available space between water molecules, making the solution more dense. The cup containing eight tablespoons of sugar will be the most dense and the cup with two tablespoons will be least dense. As you can see, a solution with a lower density stacks on top of a mixture with a higher density.
How did you make a supersaturated solution? When you dissolve sugar in water, there’s a point beyond which no more sugar can dissolve. This is called a saturated solution. The available water molecules have grabbed the most sugar molecules they can. However, if you heat this solution (add energy to it), the water molecules move much faster and more sugar can be dissolved. When this solution is cooled, the sugar remains in solution and it’s called a supersaturated solution . However, it’s very unstable and the sugar will crystallize very easily with very little effort. A stray sugar crystal, a bump, or a random nucleation site can spur very rapid crystal growth.
Take It Further
What happens if you shake or mix up the finished sugar density column? What will the colors do? When you’re ready, try it. The colors will not separate again and go back to the the layers you see before you shook it. Remember, it’s all just sugar water and not at all like a water and oil density tower. The various sugar waters will mix evenly and you end up with a very dark-colored, sweet syrup.
Use different solids to dissolve in water. See what you get using baking soda, salt, flour, or cornstarch. Do a test using oil and sugar to see if you can build a density tower similar to the sugar water version. The science never quits!
Related Experiments

Sugar Rainbow - Stacking Liquids in a Straw
Explore the science of density as you learn how liquids of different densities stack on top each other. A simple combination of some sugar and […]

Amazing 9 Layer Density Tower
With this science magic trick, you’ll put a new spin on our famous Seven-Layer Density Column demonstration. First, you’ll discover how to stack seven or […]

Color Mixing Tray
How fast can you mix 24 different colors using only red, yellow, and blue water? Experiment by adding droplets of primary color to the 24 […]
Browse more experiments by concept:

Sugar Water Density Experiment
What happens when you combine blue, green, yellow, and red water in a single glass? Brown, right? Not necessarily! Make this mesmerizing rainbow in a glass by experimenting with water density.
Density measures the amount of mass in a particular space. For example, oil molecules are packed less tightly than water molecules, making oil less dense than water and causing it to float on top when the two are combined. Water can have different densities as well. An easy way to change water density is with sugar. When you mix sugar with water, the sugar molecules occupy the space between the water molecules, making the solution more tightly packed (denser). The more sugar you add, the denser the solution.
In this sugar water density experiment, we will change the density of different colored water solutions so that they stay separated from each other. All you need are a few common household items.

- 5 drinking glasses
- Food coloring in four different colors
- Small turkey baster

How to Conduct the Sugar Water Density Experiment
1. Fill four drinking glasses with 1/4 cup of warm water each.
2. Add sugar and food coloring to the water. Each color will have a different amount of sugar in it.
Glass 1: Add 1 tablespoon of sugar and 2 drops of red food coloring. Stir vigorously to completely dissolve the sugar.
Glass 2: Add 2 tablespoons of sugar and 2 drops of yellow food coloring. Stir vigorously.
Glass 3: Add 3 tablespoons of sugar and 2 drops of green food coloring and stir.
Glass 4: Add 4 tablespoons of sugar and 2 drops of blue food coloring and stir.
NOTE: Stirring to completely dissolve the sugar is very important. Without the sugar fully incorporated into the water, you’ll have trouble getting the colors to separate. Heat up your water if it’s not working—five to 10 seconds in the microwave and an extra stirring session should help.

3. Use the turkey baster to transfer about half of the blue water into the empty glass. This is where you’ll make your rainbow.
4. Still using the baster, transfer half the green water into the rainbow glass. Add it slowly on top of the blue water. It should sit on top.
5. Add the yellow, and then the red. You’ll see a beautiful rainbow!
NOTE: Make sure the sugar is completely dissolved before attempting to layer the colors—it’s what creates the difference in density of each color.

Bring on the Science!
During this activity, natural questions may come up. If they don’t, start a discussion using the questions below!
- Density helps us predict whether something will sink or float. Density is super important to consider when building things like ships or submarines.
- Think about swimming. Did you know that it’s easier to float in the ocean than in a pool? That’s because ocean water is denser than pool water, due to the high salt concentration in the ocean.
If your child was enthralled by this experiment, they’ll love our Science Expeditions subscription !
Get Free Activities and Exclusive Offers
Blog categories.
- Craft & DIY
- World Holidays
Watch the Video!
Recent Posts
- Celebrate Your Daughter with This Japanese Girls’ Day Craft
- Enjoy a Fun-Filled Day with 10 Non-Screen Activities for Kids
- Spinning Science: How to Make a Tornado in a Bottle
- These Cute Easter Bunny Crafts Are a Hopping Good Time
- 3 Adorable DIY Gifts for Your Kids’ Favorite Teachers
Choose an Account to Log In

Notifications
Science project, growing yeast: sugar fermentation.

Yeast is most commonly used in the kitchen to make dough rise. Have you ever watched pizza crust or a loaf of bread swell in the oven? Yeast makes the dough expand. But what is yeast exactly and how does it work? Yeast strains are actually made up of living eukaryotic microbes, meaning that they contain cells with nuclei. Being classified as fungi (the same kingdom as mushrooms), yeast is more closely related to you than plants! In this experiment we will be watching yeast come to life as it breaks down sugar, also known as sucrose , through a process called fermentation . Let’s explore how this happens and why!
What is sugar’s effect on yeast?
- 3 Clear glass cups
- 2 Teaspoons sugar
- Water (warm and cold)
- 3 Small dishes
- Permanent marker

- Fill all three dishes with about 2 inches of cold water
- Place your clear glasses in each dish and label them 1, 2, and 3.
- In glass 1, mix one teaspoon of yeast, ¼ cup of warm water, and 2 teaspoons of sugar.
- In glass 2, mix one teaspoon of yeast with ¼ cup of warm water.
- In glass 3, place one teaspoon of yeast in the glass.
- Observe each cups reaction. Why do you think the reactions in each glass differed from one another? Try using more of your senses to evaluate your three glasses; sight, touch, hearing and smell especially!
The warm water and sugar in glass 1 caused foaming due to fermentation.
Fermentation is a chemical process of breaking down a particular substance by bacteria, microorganisms, or in this case, yeast. The yeast in glass 1 was activated by adding warm water and sugar. The foaming results from the yeast eating the sucrose. Did glass 1 smell different? Typically, the sugar fermentation process gives off heat and/or gas as a waste product. In this experiment glass 1 gave off carbon dioxide as its waste.
Yeast microbes react different in varying environments. Had you tried to mix yeast with sugar and cold water, you would not have had the same results. The environment matters, and if the water were too hot, it would kill the yeast microorganisms. The yeast alone does not react until sugar and warm water are added and mixed to create the fermentation process. To further investigate how carbon dioxide works in this process, you can mix yeast, warm water and sugar in a bottle while attaching a balloon to the open mouth. The balloon will expand as the gas from the yeast fermentation rises.
Related learning resources
Add to collection, create new collection, new collection, new collection>, sign up to start collecting.
Bookmark this to easily find it later. Then send your curated collection to your children, or put together your own custom lesson plan.
- Skip to primary navigation
- Skip to main content
- Skip to primary sidebar

- FREE Experiments
- Kitchen Science
- Climate Change
- Egg Experiments
- Fairy Tale Science
- Edible Science
- Human Health
- Inspirational Women
- Forces and Motion
- Science Fair Projects
- STEM Challenges
- Science Sparks Books
- Contact Science Sparks
- Science Resources for Home and School
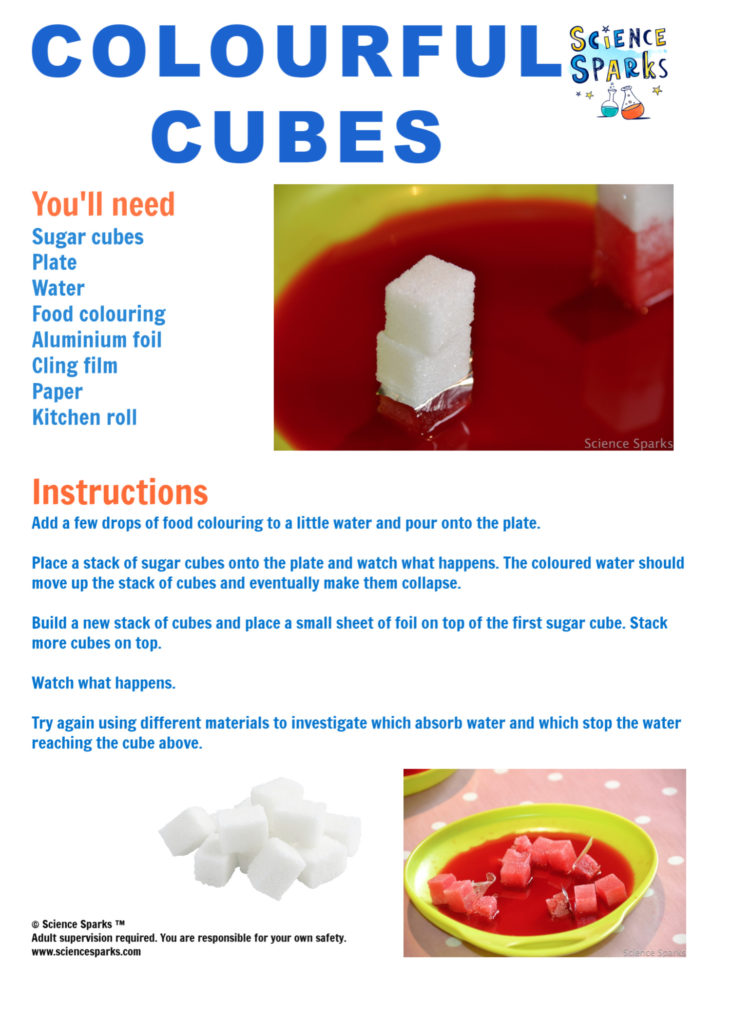
Sugar Cube Absorbing Experiment
July 12, 2020 By Emma Vanstone 22 Comments
We’ve looked at how objects absorb water before using sponges , underpants and even the good old walking water experiment . Today we’re trying an absorbing experiment with a twist and trying to halt the process to investigate which materials absorb water and which don’t!

Absorbing Experiment Materials
- Sugar cubes
- Food colouring
- Aluminium foil
- kitchen roll
Instructions
Add a few drops of food colouring to a little water and pour it onto the plate.
Add a stack of sugar cubes and watch what happens. The coloured water should move up the stack of cubes and eventually make them collapse. Check how many cubes the coloured water passes through before stopping. Ours only reached cube 3.
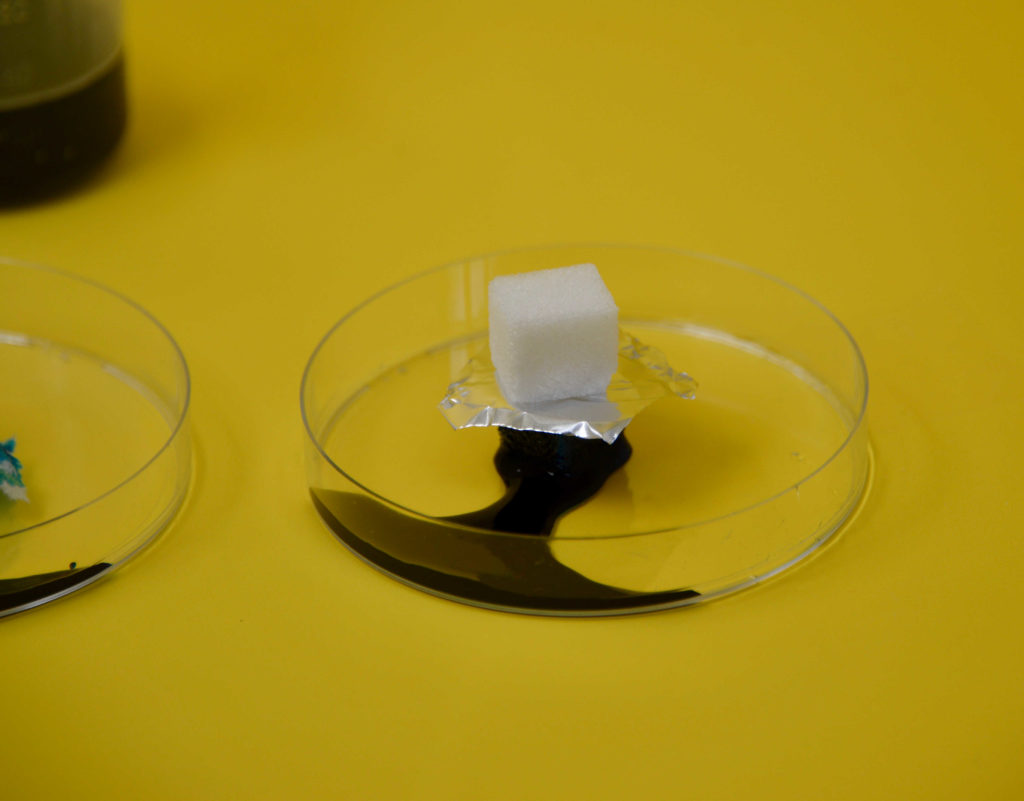
Add a small foil sheet on top of one sugar cube and stack some more on top. Does this stop the water from reaching the top cubes?

Try the same with cling film, paper or tissue. Which works the best?
Can you try to predict which material will stop the water from spreading through the cubes the best?

Which falls down first?

What’s happening to the sugar cubes?
The sugar cubes absorb the water, as you can see by the colour rising through the cubes. Our foil and cling film stopped the water flow for a while, but eventually, it found its way through. I think we cut the foil/clingfilm a little small. These were the last stacks to fall through.
The paper absorbed the water quickly and let it reach the cubes above. This is because the paper is porous and allows water to pass through it. The foil and clingfilm prevent water from passing through.
If you leave the sugar cubes long enough, they will dissolve completely!
Extension tasks
Design an investigation by thinking about how to make it a fair test. Think about the amount of water used, the number of cubes and the amount of material used to block the water.
Perhaps you could time how long each cube tower takes to fall!
Make it a Challenge!
Can you stop the tower from toppling?

More absorbing experiments
Can you waterproof a boot or a dinosaur ?
Slightly different, but Tinkerlab has a brilliant activity where celery draws coloured water up through its stem. You can also use the same technique for making coloured flowers !

Suitable for Key Stage 1 Science
Investigating Materials
Last Updated on March 2, 2023 by Emma Vanstone
Safety Notice
Science Sparks ( Wild Sparks Enterprises Ltd ) are not liable for the actions of activity of any person who uses the information in this resource or in any of the suggested further resources. Science Sparks assume no liability with regard to injuries or damage to property that may occur as a result of using the information and carrying out the practical activities contained in this resource or in any of the suggested further resources.
These activities are designed to be carried out by children working with a parent, guardian or other appropriate adult. The adult involved is fully responsible for ensuring that the activities are carried out safely.
Reader Interactions
June 11, 2012 at 3:11 pm
Very interesting. x
June 11, 2012 at 3:54 pm
I’m sure the children loved watching the whole process but I’d be extremely interested to know how many 5 year olds were able to manage figuring out the cause for the sugar melting at different paces. It is within their grasp as I’m sure they’ve all handled kitchen paper, foil and cling film. Lots of children that age are smart enough to figure it out in those circumstances.
June 12, 2012 at 1:09 pm
My main aim with these investigations is to spark an interest in why things happen. I’m not necessarily all that bothered that my children understand fully the reasons behind it. I just want them to be curious about the world.
June 12, 2012 at 1:08 pm
we had soo much fun!
June 11, 2012 at 4:50 pm
I like this idea! I was going to do the paper towel absorption experiment later today, now maybe I’ll do both!
June 12, 2012 at 4:16 am
Such a neat experiment!
June 12, 2012 at 1:07 pm
its cool isn’t it?
June 12, 2012 at 1:10 pm
The sugar cubes are ideal for your experiment! The water absorbing shows so clearly for children, and it adds a little bit of fun to the science experimenting that you are using both sugar and color—2 things children really seem to love!
June 14, 2012 at 5:20 pm
Wow, great fun… my kids would want to eat it! Wonder if I could make them wait until the end of the experiment!
Thank you for sharing on Kids Get Crafty!
Maggy & Alissa
June 16, 2012 at 8:34 am
Yes I always remember sneaking the sugar cubes from my grandma’s bowl!
June 15, 2012 at 11:23 pm
Fantastic experiment! Tempted to buy some sugar cubes now…
June 16, 2012 at 8:31 am
Do, because we shall be doing some more experiments with sugar cubes!
June 20, 2012 at 1:20 am
I love this, especially since the results are eatable and it’s very visual.
June 21, 2012 at 10:58 am
What a cool experiment!! My kids would love this! Thanks for sharing on TGIF! Have a great week, Beth =-)
June 24, 2012 at 2:28 pm
Thanks Beth!
October 12, 2012 at 5:00 pm
the problem I encountered is that with most of the materials I tried, the bottom sugar cube collapsed well before the top cube got any moisture in it at all. so I turned the experiment upside down–stack two sugar cubes, lay a piece of plastic/foil/paper/fabric/whatever on top, then use an eyedropper to put water on top. this worked much better.
March 19, 2014 at 5:10 pm
How long does this experiment take? I only have one hour with my kids and was wondering if the water will make it through the sugar by then.
Leave a Reply Cancel reply
Your email address will not be published. Required fields are marked *
Yeast and Sugar Science Fair Project
40 Comments

In this Yeast and Sugar Science Fair Project, we’ll watch yeast feed on sugar to fill a balloon with air. A fun science project for kids that’s with household, everyday materials.
Our Inspiration
I’ve been baking bread just about every day for the past three weeks (nothing too crazy since it’s all done in the bread maker), but last week my 3.5 year old and I got into a discussion about the properties of yeast.
We like to tinker and experiment — big surprise, I know — and decided to see what would happen if we mixed yeast with warm water.
My preschooler took this job very seriously, poured the water into a bowl, added a couple teaspoons of yeast, and waited a few patient minutes before she said, “it makes a brownish color.” True, and to make it bubble like it does in bread, we needed to activate it with sugar.
What’s so great about an experiment like this is that it’s easy to do with household materials, and it’s ripe for authentic child-generated questions and observations. When I asked what she thought would happen if we added sugar to the yeast she said, “I don’t know! Let’s mix them and find out!.”

Supplies: Yeast and Sugar Science Fair Project
- Sugar, 2 tablespoons
- Active Dry Yeast, 1 packet or 2 1/4 tablespoons
- Warm water (105-115 degrees F, 40.5-46 degrees C)
- Mixing bowl + funnel
- Bottle that you can fit a balloon over

Mix the yeast and sugar into the warm water and stir. I noticed that N was sniffing the concoction and asked her what it smelled like. She said “poop.” I could see what she was saying. Consider yourself warned.
Once it all dissolves, pour the mixture into the bottle and cover the bottle with the balloon.

After a few minutes you’ll be amazed by something like this!

Will it blow off the bottle?
N wanted to feel it as it filled with air. She noticed the balloon was getting bigger and wanted to know how big it would get, wondering out loud, “will it fill up all the way and blow off the bottle?”
Good question!

My handy-dandy ship captain sister (no joke — that’s her job!) was visiting, and put herself right to work as chief measurer.

Move it to a safe spot
Once the bottle filled up completely, we moved the whole yeast sugar experriment to the sink. The bubbles were slow-moving, and there was nothing to worry ourselves with, but N enjoyed pulling the balloon off and watching the foam slowly pour over the bottle’s top.

Ideas for Extending this Experiment
As we went through the process, I thought of a few fun extensions for older kids or those who want to take this further. You could play around with food coloring/liquid watercolors, have a few bottles going at once and compare the results of different sugar:yeast ratios, or compare the results of different water temperatures.
I found my recipe at The Exploratorium’s Science of Cooking series, where we also learned that as the yeast eats the sugar it makes carbon dioxide, which is essentially the same process that yeast goes through in our bread dough.
Mmmmm. I’m off to eat some whole wheat cranberry walnut oat bread. Toasted. With butter and Maldon salt. How do you like your bread? And have you played around with yeast concoctions?
More Science Experiments for Kids
If you enjoyed this project, you’ll love this article: Science Fair Project Ideas .
What a great idea!!
Thanks, Deborah 🙂
thank you soooooooooooooooooooooooooooo much for this info
I used to bake a lot of bread with my boys when they were younger (pre-celiac diagnosis) and they always loved my scientific explanation of why the bread rises: the yeast eats the sugar and farts. 🙂 That’s what all the bubbles are, of course!
Yep, farts would be another not-so-pretty way to describe this process. Between that and my daughter’s description, I’m not sure if anyone will want to try this themselves 😉
we love yeast! my son thinks of yeast as little pets. here is our experiment we did a few months ago. it seems to come up ever year or so. great post!
http://mamascouts.blogspot.com/2011/09/science-experimentwake-up-yeast.html
Thanks for sharing your yeast experiments, Amy! I love them, and we have to try this with maple syrup next time (if I can convince my MS-adoring family to part with it first!).
way cool! you know I like to tinker as well with my girls – this will be something we can easily do at home.
I pinned this! 🙂 thanks for sharing!
Thanks for pinning it, Bern 🙂 And yes, I can totally imagine your two little scientists going crazy over this one!
This is the best blog for experiments! Thanks for sharing all your great ideas. Â Linking up to it in a science for preschoolers post.Â
Hi Kristin, Thank you soooooo much for the kind words about Tinkerlab. And thanks for sharing us with your readers….feel free to send me a link if you’d like and I’ll share it on Facebook.
This is so fun! We did this today and the kids loved it. Thank you!
awesome, lindsie! i’m thrilled to hear it was successful. thanks for taking time to give me this update.
Hmmm…sugar, yeast and water…also known as Kilju or sugar wine! https://en.wikipedia.org/wiki/Kilju
As well as CO2, yeast and sugar also produces Ethanol (alcohol). Probably best not to teach the kids that part though!
That’s funny, Chris. I’m sure that my 4-year old won’t be least bit interested in sugar wine!
Point taken. Out of interest, did you ever find out what made the “poop” smell? In theory it should just produce CO2 which doesn’t smell.
could i add flour to the mixture. would it have the same effect ?
it’s nice
moooooooooooooooooooooooooooooooooooooooooooooooooooooooooooooooooooooooooooooooooooooooooooooooooooooooooooooooooooooooooooooooooooooooooooooooooooo
why soooooooo many o’s sara
What quantity of water did you use? I’m doing an adaptation of this for my science assignment
Miguel Cabrera
What were the measurements for each balloon
Thanks for this great post. We did this today while baking bread. My boys loved measuring the baloons often and seeing what would happen.
[…] is a safe activity for preschoolers and toddlers because you are using edible materials. Moreover, kids will see, touch, and smell while observing, […]
Thanks Nice Experiment
I don’t get it, it does not have a video!
[…] Blow Balloon With Yeast Experiment […]
Is this supposed to be 2 1/4 TEASPOONS or TABLESPOONS. Your instructions say one packet of yeast (which is 2/4 teaspoons) but you wrote 2 1/4 tablespoons. Thanks for any clarification you can provide
* my comment should read that one packet of yeast is 2 1/4 teaspoons
Comments are closed.
TinkerLab is a creative studio dedicated to sparking curiosity and a love for art through hands-on making. Our mission is to inspire creativity and experimentation in makers and artists of all ages, transforming everyday moments into creative adventures.
USEFUL LINKS
Testimonials
Privacy Policy
Terms & Conditions
GET IN TOUCH
855 El Camino Real
Suite 13A-144
Palo Alto, CA 94301
10 WAYS TO INTRODUCE ART TO PRESCHOOLERS
An inspiring 10-point poster for your fridge, planning binder, or to share with colleagues or friends.

TinkerLab acknowledges the ancestral land of the Muwekma Ohlone Tribe, and pays respect to elders both past and present. This land was and continues to be of great importance to the Ohlone people, and we have a responsibility to acknowledge, honor and make visible the our relationship to Native peoples. Donate to the Association of Ramaytush Ohlone.
Get Your ALL ACCESS Shop Pass here →
Yeast Fermentation Experiment
Fermentation is a fascinating process that kids can easily explore through a simple experiment using yeast and sugar. This hands-on activity teaches students about fermentation and introduces them to the scientific method, data collection, and analysis.

Investigate how different types of sugar (white, brown, and honey) affect the rate of yeast fermentation by measuring the amount of carbon dioxide (CO₂) produced.
Example Hypothesis: If yeast is added to different types of sugar, then the type of sugar will affect the amount of carbon dioxide produced, with white sugar producing more CO₂ than the others.
💡 Learn more about using the scientific method [here] and choosing variables .
Watch the Video:
- Active dry yeast
- White sugar
- Brown sugar
- Measuring spoons and measuring cups
- Small bottles or test tubes
- Rubber bands
- Ruler or measuring tape
- Notebook and pen for recording data ( grab free journal sheets here )
- Printable Experiment Page (see below)

Instructions:
STEP 1. Prepare a yeast solution by dissolving a packet of active dry yeast in warm water according to the package instructions.
STEP 2. Label 3 bottles and add 1 tablespoon of white sugar to the “White Sugar” bottle. Add 1 tablespoon of brown sugar to the “Brown Sugar” bottle. Measure 1 tablespoon of honey and add it to the “Honey” bottle.
STEP 3. Measure and pour an equal amount of the yeast solution into each bottle, ensuring the yeast is well mixed with the sugar.
STEP 4. Quickly stretch a balloon over the mouth of each bottle. Secure the balloons with rubber bands if needed. Ensure the balloons are sealed tightly to prevent CO₂ from escaping.
STEP 5. Place the bottles in a warm, consistent environment to promote fermentation.
STEP 6. Observe and record the size of the balloons at regular intervals (e.g., every 15 minutes) for 1-2 hours. Use a ruler or measuring tape to measure the circumference of each balloon.
TIP: Note the time it takes for the balloons to start inflating and the differences in balloon size over time for each type of sugar.
STEP 7: Analyze the data by comparing the amount of CO₂ produced (balloon size) for each type of sugar. Create a graph showing the balloon size over time for each sugar type.
STEP 8. Determine which sugar type resulted in the most and least CO₂ production. Discuss possible reasons for the differences, considering what each sugar is made of. Think about whether the results support or disprove the hypothesis. Can you come up with further experiments or variations to explore other factors affecting yeast fermentation?

Free Printable Yeast and Sugar Experiment Project
Grab the free fermentation experiment worksheet here. Join our STEM club for a printable version of the video!

The Science Behind Yeast Fermentation
For Our Younger Scientists: Yeast is a type of fungus that feeds on sugars. When you mix yeast with sugar and water, it starts to eat the sugar and convert it into alcohol and carbon dioxide gas. The gas gets trapped in the balloon, causing it to inflate. This shows that fermentation is happening!
Yeast fermentation is a biological process where yeast converts sugars into alcohol and carbon dioxide (CO₂) in the absence of oxygen. This process is used in baking, brewing, wine making and biofuel production. How much fermentation occurs can vary depending on the type of sugar used.
Yeast contains enzymes that break down sugar molecules through a series of chemical reactions . Here’s how it works:
Enzymes are molecules, usually proteins, that act as catalysts to speed up chemical reactions within living organisms.
First the yeast is mixed with warm water, and it becomes activated. The warm environment “wakes up” the yeast cells, preparing them to consume sugars.
Yeast cells produce enzymes that break down sugar molecules (sucrose, glucose, and fructose) into simpler molecules. This process is called glycolysis. During glycolysis, sugar molecules are converted into pyruvate, releasing a small amount of energy.
In the absence of oxygen (anaerobic conditions), yeast cells convert pyruvate into ethanol (alcohol) and carbon dioxide gas (CO₂). The carbon dioxide produced during fermentation is what inflates the balloons in the experiment.
Different Sugars & Fermentation
Different sugars can affect the rate of fermentation. This is how:
- White Sugar (Sucrose): Composed of glucose and fructose and is easily broken down by yeast, leading to efficient CO₂ production.
- Brown Sugar: Contains sucrose along with molasses, which includes minerals and additional nutrients. May result in a slightly different fermentation rate due to its composition.
- Honey: Contains a mixture of glucose, fructose, and other components. The additional components can influence the fermentation process, potentially leading to different CO₂ production rates compared to pure sucrose.
The amount of CO₂ produced depends on how easily the yeast can break down the sugar molecules and convert them into ethanol and CO₂. Sugars that are more readily broken down by yeast will typically produce more CO₂ faster.
More Fun Science Experiments
Explore chemistry , biology and more, including…
- Bread Mold Experiment
- Baking Soda Balloon Experiment
- Bread In A Bag
- Elephant Toothpaste
- Mentos and Soda

Helpful Science Resources To Get You Started
Here are a few resources that will help you introduce science more effectively to your kiddos or students and feel confident presenting materials. You’ll find helpful free printables throughout.
- Best Science Practices (as it relates to the scientific method)
- Science Vocabulary
- All About Scientists
- Free Science Worksheets
- DIY Science Kits
- Science Tools for Kids
- Scientific Method for Kids
- Citizen Science Guide
- Join us in the Club
Printable Science Projects For Kids
If you’re looking to grab all of our printable science projects in one convenient place plus exclusive worksheets and bonuses like a STEAM Project pack, our Science Project Pack is what you need! Over 300+ Pages!
- 90+ classic science activities with journal pages, supply lists, set up and process, and science information. NEW! Activity-specific observation pages!
- Best science practices posters and our original science method process folders for extra alternatives!
- Be a Collector activities pack introduces kids to the world of making collections through the eyes of a scientist. What will they collect first?
- Know the Words Science vocabulary pack includes flashcards, crosswords, and word searches that illuminate keywords in the experiments!
- My science journal writing prompts explore what it means to be a scientist!!
- Bonus STEAM Project Pack: Art meets science with doable projects!
- Bonus Quick Grab Packs for Biology, Earth Science, Chemistry, and Physics

Layering Liquids Density Experiment
Learning about density is great fun for kids. This layering liquids density experiment is fun and tasty! Give it a try.

We have done this density experiment before with our saltwater density investigation . Today we’re changing it up a bit. Instead of using saltwater, we are using sugar water. And to make this even more fun, let’s use flavored sugar water. We’ll have a fun little drink when we’re done experimenting.
To make this an experiment , we need to change something. Let’s change the amount of sugar in our flavored waters. We could go to the trouble of making different concentrations of sugar water, but that requires a lot of stirring and sometimes the sugar won’t dissolve as well as you hope. Let’s use pre-made flavored sugar water, aka juice {any sugary drink would work}. The greater difference in sugar concentration between the liquids, the easier it will be to layer them. {You’ll still get layering with even slight density differences – ask my Oceanography students about that lab – but the layers tend to mix, especially if your kids are doing the pouring.}
Here are the materials you need:
- Clear glasses
- Graduated cylinder (optional, but it helps use less liquid)
- grape juice (40 g of sugar)
- orange juice (22 g of sugar)
- apple juice (29 g sugar)
- white grape juice light (11 g of sugar; also sweetened with sucralose)
- water (0 g of sugar)
- Syringe (optional but it helps to layer the liquids)
Stacking Two Liquids
I showed Aiden the different liquids and told him they each contain a different amount of sugar. I asked him to pick two of them.
I said: This grape juice has more sugar than the orange juice. What do you think will happen when we pour the juices together? (You can just use a small amount of each liquid and pour them into a tall skinny container like a graduated cylinder. You’ll use less materials this way.)
Make some predictions:
- Pour drink A onto drink B, this will happen…
- Pour drink B onto drink A, this will happen…
Make an observation: The drink with the higher amount of sugar sinks to the bottom.
We repeated this with the other drinks. Choose two liquids, predict what will happen, and observe the results.

When we added the orange juice to the apple juice, the orange juice sank. This tells us that the orange juice was more dense than the apple juice. Density isn’t just about the amount of sugar in the water. Other things dissolved in the water – maybe some pulp in the case of orange juice – will affect it. (Density is the amount of stuff [mass] per volume.)
Stacking Five Liquids
Now that we’ve established the densities of the liquids, we can layer even more liquids.
- Place the liquids in order of their density.
- Pour the most dense (highest sugar content) drink into a glass.
- Slowly pour the liquid with the next greatest density into the glass. Slowly pour the drink down the side of the glass. (Using a syringe or medicine dropper makes it easier. There will be less mixing.)
- Continue layering the liquids in order of decreasing density.

How many liquids can you stack? We managed to get five different density layers.

More Ways to Explore the Science of Liquids with Kids
Check out these liquid science activities from some of my blogger friends.
Bern from Mom to 2 Posh Lil Divas experiments with oil and water . Allison from Learn Play Imagine shares a walking water experiment . Megan from Coffee Cups and Crayons asks: Does it dissolve?
Are you following Inspiration Laboratories on Facebook ? Or you can subscribe to the Inspiration Laboratories weekly newsletter. Each issue has exclusive hands-on science explorations for children, a recap of our latest activities, and special resources selected just for you!
This post was originally published on August 7, 2013.
Leave a Reply Cancel reply
Your email address will not be published. Required fields are marked *
Save my name, email, and website in this browser for the next time I comment.
© 2024 Inspiration Laboratories
The fermentation of sugars using yeast: A discovery experiment
Charles Pepin (student) and Charles Marzzacco (retired), Melbourne, FL

Introduction
Enzyme catalysis 1 is an important topic which is often neglected in introductory chemistry courses. In this paper, we present a simple experiment involving the yeast-catalyzed fermentation of sugars. The experiment is easy to carry out, does not require expensive equipment and is suitable for introductory chemistry courses.
The sugars used in this study are sucrose and lactose (disaccharides), and glucose, fructose and galactose (monosaccharides). Lactose, glucose and fructose were obtained from a health food store and the galactose from Carolina Science Supply Company. The sucrose was obtained at the grocery store as white sugar. The question that we wanted to answer was “Do all sugars undergo yeast fermentation at the same rate?”
Sugar fermentation results in the production of ethanol and carbon dioxide. In the case of sucrose, the fermentation reaction is:
\[C_{12}H_{22}O_{11}(aq)+H_2 O\overset{Yeast\:Enzymes}{\longrightarrow}4C_{2}H_{5}OH(aq) + 4CO_{2}(g)\]
Lactose is also C 12 H 22 O 11 but the atoms are arranged differently. Before the disaccharides sucrose and lactose can undergo fermentation, they have to be broken down into monosaccharides by the hydrolysis reaction shown below:
\[C_{12}H_{22}O_{11} + H_{2}O \longrightarrow 2C_{6}H_{12}O_{6}\]
The hydrolysis of sucrose results in the formation of glucose and fructose, while lactose produces glucose and galactose.
sucrose + water \(\longrightarrow\) glucose + fructose
lactose + water \(\longrightarrow\) glucose + galactose
The enzymes sucrase and lactase are capable of catalyzing the hydrolysis of sucrose and lactose, respectively.
The monosaccharides glucose, fructose and galactose all have the molecular formula C 6 H 12 O 6 and ferment as follows:
\[C_{6}H_{12}O_{6}(aq)\overset{Yeast Enzymes}{\longrightarrow}2C_{2}H_{5}OH(aq) + 2CO_{2}(g)\]
In our experiments 20.0 g of the sugar was dissolved in 100 mL of tap water. Next 7.0 g of Red Star ® Quick-Rise Yeast was added to the solution and the mixture was microwaved for 15 seconds at full power in order to fully activate the yeast. (The microwave power is 1.65 kW.) This resulted in a temperature of about 110 o F (43 o C) which is in the recommended temperature range for activation. The cap was loosened to allow the carbon dioxide to escape. The mass of the reaction mixture was measured as a function of time. The reaction mixture was kept at ambient temperature, and no attempt at temperature control was used. Each package of Red Star Quick-Rise Yeast has a mass of 7.0 g so this amount was selected for convenience. Other brands of baker’s yeast could have been used.
This method of studying chemical reactions has been reported by Lugemwa and Duffy et al. 2,3 We used a balance good to 0.1 g to do the measurements. Although fermentation is an anaerobic process, it is not necessary to exclude oxygen to do these experiments. Lactose and galactose dissolve slowly. Mild heat using a microwave greatly speeds up the process. When using these sugars, allow the sugar solutions to cool to room temperature before adding the yeast and microwaving for an additional 15 seconds.
Fermentation rate of sucrose, lactose alone, and lactose with lactase
Fig. 1 shows plots of mass loss vs time for sucrose, lactose alone and lactose with a dietary supplement lactase tablet added 1.5 hours before starting the experiment. All samples had 20.0 g of the respective sugar and 7.0 g of Red Star Quick-Rise Yeast. Initially the mass loss was recorded every 30 minutes. We continued taking readings until the mass leveled off which was about 600 minutes. If one wanted to speed up the reaction, a larger amount of yeast could be used. The results show that while sucrose readily undergoes mass loss and thus fermentation, lactose does not. Clearly the enzymes in the yeast are unable to cause the lactose to ferment. However, when lactase is present significant fermentation occurs. Lactase causes lactose to split into glucose and galactose. A comparison of the sucrose fermentation curve with the lactose containing lactase curve shows that initially they both ferment at the same rate.

Fig. 1. Comparison of the mass of CO 2 released vs time for the fermentation of sucrose, lactose alone, and lactose with a lactase tablet. Each 20.0 g sample was dissolved in 100 mL of tap water and then 7.0 g of Red Star Quick-Rise Yeast was added.
However, when the reactions go to completion, the lactose, lactase and yeast mixture gives off only about half as much CO 2 as the sucrose and yeast mixture. This suggests that one of the two sugars that result when lactose undergoes hydrolysis does not undergo yeast fermentation. In order to verify this, we compared the rates of fermentation of glucose and galactose using yeast and found that in the presence of yeast glucose readily undergoes fermentation while no fermentation occurs in galactose.

Fig. 2. Comparison of the mass of CO 2 released vs time for the fermentation of sucrose, glucose and fructose. Each 20 g sugar sample was dissolved in 100 mL of water and then 7.0 g of yeast was added.
Fermentation rate of sucrose, glucose and fructose
Next we decided to compare the rate of fermentation of sucrose with that glucose and fructose, the two compounds that make up sucrose. We hypothesized that the disaccharide would ferment more slowly because it would first have to undergo hydrolysis. In fact, though, Fig. 2 shows that the three sugars give off CO 2 at about the same rate. Our hypothesis was wrong. Although there is some divergence of the three curves at longer times, the sucrose curve is always as high as or higher than the glucose and fructose curves. The observation that the total amount of CO 2 released at the end is not the same for the three sugars may be due to the purity of the fructose and glucose samples not being as high as that of the sucrose.
Fermentation rate and sugar concentration
Next, we decided to investigate how the rate of fermentation depends on the concentration of the sugar. Fig. 3 shows the yeast fermentation curves for 10.0 g and 20.0 g of glucose. It can be seen that the initial rate of CO 2 mass loss is the same for the 10.0 and 20.0 g samples. Of course the total amount of CO 2 given off by the 20.0 g sample is twice as much as that for the 10.0 g sample as is expected. Later, we repeated this experiment using sucrose in place of glucose and obtained the same result.

Fig. 3. Comparison of the mass of CO 2 released vs time for the fermentation of 20.0 g of glucose and 10.0 g of glucose. Each sugar sample was dissolved in 100 mL of water and then 7.0 g of yeast was added.
Fermentation rate and yeast concentration
After seeing that the rate of yeast fermentation does not depend on the concentration of sugar under the conditions of our experiments, we decided to see if it depends on the concentration of the yeast. We took two 20.0 g samples of glucose and added 7.0 g of yeast to one and 3.5 g to the other. The results are shown in Fig. 4. It can clearly be seen that the rate of CO 2 release does depend on the concentration of the yeast. The slope of the sample with 7.0 g of yeast is about twice as large as that with 3.5 g of yeast. We repeated the experiment with sucrose and fructose in place of glucose and obtained similar results.

Fig. 4. Comparison of the mass of CO 2 released vs time for the fermentation of two 20.0 g samples of glucose dissolved in 100 mL of water. One had 7.0 g of yeast and the other had 3.5 g of yeast.
In hindsight, the observation that the rate of fermentation is dependent on the concentration of yeast but independent of the concentration of sugar is not surprising. Enzyme saturation can be explained to students in very simple terms. A molecule such as glucose is rather small compared to a typical enzyme. Enzymes are proteins with large molar masses that are typically greater than 100,000 g/mol. 1 Clearly, there are many more glucose molecules in the reaction mixture than enzyme molecules. The large molecular ratio of sugar to enzyme clearly means that every enzyme site is occupied by a sugar molecule. Thus, doubling or halving the sugar concentration cannot make a significant difference in the initial rate of the reaction. On the other hand, doubling the concentration of the enzyme should double the rate of reaction since you are doubling the number of enzyme sites.
The experiments described here are easy to perform and require only a balance good to 0.1 g and a timer. The results of these experiments can be discussed at various levels of sophistication and are consistent with enzyme kinetics as described by the Michaelis-Menten model. 1 The experiments can be extended to look at the effect of temperature on the rate of reaction. For enzyme reactions such as this, the reaction does not take place if the temperature is too high because the enzymes get denatured. The effect of pH and salt concentration can also be investigated.
- Jeremy M. Berg, John L. Tymoczko and Lubert Stryer, Biochemistry , 6th edition, W.H. Freeman and Company, 2007, pages 205-237.
- Fugentius Lugemwa, Decomposition of Hydrogen Peroxide, Chemical Educator , April 2013, pages 85-87.
- Daniel Q. Duffy, Stephanie A. Shaw, William D. Bare, Kenneth A. Goldsby, More Chemistry in a Soda Bottle, A Conservation of Mass Activity, Journal of Chemical Education , August 1995, pages 734-736.
- Jessica L Epstein, Matthew Vieira, Binod Aryal, Nicolas Vera and Melissa Solis, Developing Biofuel in the Teaching Laboratory: Ethanol from Various Sources, Journal of Chemical Education , April 2010, pages 708–710.
More about April 2015

Department of Chemistry 200 University Ave. W Waterloo, Ontario, Canada N2L 3G1
Sciencing_Icons_Science SCIENCE
Sciencing_icons_biology biology, sciencing_icons_cells cells, sciencing_icons_molecular molecular, sciencing_icons_microorganisms microorganisms, sciencing_icons_genetics genetics, sciencing_icons_human body human body, sciencing_icons_ecology ecology, sciencing_icons_chemistry chemistry, sciencing_icons_atomic & molecular structure atomic & molecular structure, sciencing_icons_bonds bonds, sciencing_icons_reactions reactions, sciencing_icons_stoichiometry stoichiometry, sciencing_icons_solutions solutions, sciencing_icons_acids & bases acids & bases, sciencing_icons_thermodynamics thermodynamics, sciencing_icons_organic chemistry organic chemistry, sciencing_icons_physics physics, sciencing_icons_fundamentals-physics fundamentals, sciencing_icons_electronics electronics, sciencing_icons_waves waves, sciencing_icons_energy energy, sciencing_icons_fluid fluid, sciencing_icons_astronomy astronomy, sciencing_icons_geology geology, sciencing_icons_fundamentals-geology fundamentals, sciencing_icons_minerals & rocks minerals & rocks, sciencing_icons_earth scructure earth structure, sciencing_icons_fossils fossils, sciencing_icons_natural disasters natural disasters, sciencing_icons_nature nature, sciencing_icons_ecosystems ecosystems, sciencing_icons_environment environment, sciencing_icons_insects insects, sciencing_icons_plants & mushrooms plants & mushrooms, sciencing_icons_animals animals, sciencing_icons_math math, sciencing_icons_arithmetic arithmetic, sciencing_icons_addition & subtraction addition & subtraction, sciencing_icons_multiplication & division multiplication & division, sciencing_icons_decimals decimals, sciencing_icons_fractions fractions, sciencing_icons_conversions conversions, sciencing_icons_algebra algebra, sciencing_icons_working with units working with units, sciencing_icons_equations & expressions equations & expressions, sciencing_icons_ratios & proportions ratios & proportions, sciencing_icons_inequalities inequalities, sciencing_icons_exponents & logarithms exponents & logarithms, sciencing_icons_factorization factorization, sciencing_icons_functions functions, sciencing_icons_linear equations linear equations, sciencing_icons_graphs graphs, sciencing_icons_quadratics quadratics, sciencing_icons_polynomials polynomials, sciencing_icons_geometry geometry, sciencing_icons_fundamentals-geometry fundamentals, sciencing_icons_cartesian cartesian, sciencing_icons_circles circles, sciencing_icons_solids solids, sciencing_icons_trigonometry trigonometry, sciencing_icons_probability-statistics probability & statistics, sciencing_icons_mean-median-mode mean/median/mode, sciencing_icons_independent-dependent variables independent/dependent variables, sciencing_icons_deviation deviation, sciencing_icons_correlation correlation, sciencing_icons_sampling sampling, sciencing_icons_distributions distributions, sciencing_icons_probability probability, sciencing_icons_calculus calculus, sciencing_icons_differentiation-integration differentiation/integration, sciencing_icons_application application, sciencing_icons_projects projects, sciencing_icons_news news.
- Share Tweet Email Print
- Home ⋅
- Science Fair Project Ideas for Kids, Middle & High School Students ⋅
Science Experiments on the Osmosis of a Potato

Osmosis Experiments With Potatoes for Kids
Osmosis, the process in which solvent molecules move from an area of lower solute concentration to an area of higher solute concentration, can easily be demonstrated with potato experiments. Potatoes are full of both water and starch, and will gain water when immersed in watery solutions. Conversely, they will lose water when in concentrated solutions, such as those containing a great deal of starch. You can use potatoes to set up osmosis experiments for students of all ages and levels.
Potatoes in Saltwater
Cut a potato in two, and immerse one of the halves in a very salty solution of water — one containing a quarter cup of salt in a cup of water. Immerse the other piece in tap water containing no added salt. Leave both in their respective solutions for half an hour, then remove the potato halves from their solutions and observe their differences. The one in the salty solution will have shrunk, indicating that water is diffusing from a less concentrated solution to a more concentrated solution. The one in the tap water solution, in contrast, will actually swell slightly, indicating that it is taking in water.
Salt, Sugar and Pure Water
This experiment helps students to differentiate between different degrees of concentration gradients. Make one salt water solution, one sugar water solution, and for the third solution, simply use tap water. Make three thin potato slices — 1/2 cm thick. Place each potato slice into each of the solutions, and leave the slices in the solutions for a half hour.
Observe that the slice placed in salt is very flexible, while the slice placed in sugar is flexible, but less so. Since potatoes already contain sugar, less water will diffuse out of the potato placed in sugar water. The slice placed in water will be rigid, since it will absorb water.
Potato Lengths in Saline Solutions
Give your students potato "cylinders" that are uniform in length and size: for instance, you could cut them to be 70 mm in length and 7 mm in diameter. Make solutions of saline in three different concentrations, 20 percent, 0.9 percent and 0.1 percent. Have the students measure the lengths and diameters of the potato cylinders before and after soaking them in the saline solutions for half an hour. Then, have them calculate the changes in the lengths and diameters of the cylinders, and plot the saline concentrations versus the changes.
Potato Cube Weights
Cut potatoes into four groups of small, uniform cubes measuring 1/2 cm by 1/2 cm. Make four different solutions of sucrose: 10 percent, 5 percent, 1 percent and 0.01 percent. Weigh each group, on a mass balance, before immersing it in the appropriate sucrose solution for half an hour. After immersion, weigh each group again and have your students calculate the changes in the potato masses. Ask them to comment on why a group gained mass, lost mass or retained the same mass.
Related Articles
Osmosis science activities for kids, ib group 4 project ideas, fun science experiments with potatoes, science projects for cut flowers, high school science experiments with plants, sugar & salt crystal science projects, how to grow a potato in water for a science project, ideas for a science fair project using kool-aid, science fair on how vitamin c & ibuprofen affect plant..., how to measure solubility for a science project, activities on conductivity, water evaporation science fair projects, how to make a five percent solution with salt, how to make crystals out of salt, science projects and research with salt, sugar, water..., polarity projects using a potato, how to make polymer crystals, osmosis egg experiments, how to make a saltwater battery for a science project.
- The Teachers Corner: Science Experiment--Osmosis
About the Author
Tricia Lobo has been writing since 2006. Her biomedical engineering research, "Biocompatible and pH sensitive PLGA encapsulated MnO nanocrystals for molecular and cellular MRI," was accepted in 2010 for publication in the journal "Nanoletters." Lobo earned her Bachelor of Science in biomedical engineering, with distinction, from Yale in 2010.
Find Your Next Great Science Fair Project! GO
Amazingly Cool Classic Science | Yeast Science Experiment
Every kid should do at least several classic science experiments before they get too old to enjoy them. On the list today was the classic yeast science experiment. We decided to find out what type of sugar helped yeast grow best, or if sugar helps at all.

* This post may contain affiliate links for your convenience. Click here for my full disclosure.
We are on a small kick to explore foods that we eat at a Thanksgiving Feast and of course, bread is a very popular item. When the kids saw the dough rising in the bowl, they immediately had questions that they wanted answers to. That’s when I thought this would be the perfect way to explain the way yeast works.
Classic Yeast Science Experiment
What you’ll need for the yeast science experiment:.

- 3 types of sugar (we used brown sugar, white sugar, and honey)

I set everything up in advance of this project so the kids could jump right in. I measured 2 teaspoons of each type of sugar into four mini containers (we used film canisters) and laid everything out on the table for the kids to use.

The kids poured half a packet of yeast into each bottle, then added two teaspoons of warm water.

The kids next added one type of sugar to three bottles, but nothing to the last bottle. We labeled each bottle to keep track of what sugar was wear.
A little shake mixed up the bottles and we could already see the yeast starting to grow!

The kids screwed the caps back on the bottles and taped a water balloon to the top of each bottle spout (we had blown them up previously to stretch them out and make them easier to expand).

We set the bottles of yeast aside for 30 minutes, then came back to check our results.

Although it looked like the brown sugar activated the yeast the fastest, over the 30-minute period the white sugar outpaced it. The honey eventually blew up the balloon, but it took about an hour. The nothing jar never had enough air to blow up its balloon.
We were curious, so we put our yeast bottles into the bathtub and left it for several hours. That night, we looked at our bottles again. The white sugar bottle had enough pressure to pop the balloon off the top. The honey and brown sugar bottles had balloons almost completely filled with yeast. The no-sugar bottle was still sad and deflated.

The kids determined that if we wanted to make fluffy bread, we definitely should feed our yeast white sugar.

Looking for more STEAM (Science, Technology, Engineering, Arts and Math) projects and inspiration?
Check out my new book STEAM Kids Christmas and get a FREE STEAM Kids Coloring book if you buy during launch week! You can get both books (eBook PDF format) for only $9.99! But the sale and bonus book offer ends November 21 , so grab your copy now and don’t miss out!

Get more information on STEAM Kids Christmas by clicking here . Or go order your copy now! eBook PDF or Paperback

You can also get a bundle with our best selling STEAM Kids book, STEAM Christmas and STEAM Kids Coloring book for one low price: Click here to get your bundle today !
Not quite ready to jump in, don’t worry… you can hop over and grab a FREE Preview which includes 2 sample activities, 6 sample challenge cards, and the table of contents of the book!
For more adventures in STEM Learning, check out:

FREE DOWNLOAD
Discover how to get siblings to get along even when all they do is annoy each other with the Sibling “Get Along” Poster Pack!
1 thought on “Amazingly Cool Classic Science | Yeast Science Experiment”
Pingback: The Coolest Science Fair Projects for Kids - Left Brain Craft Brain
Leave a Comment Cancel Reply
Your email address will not be published. Required fields are marked *
Save my name, email, and website in this browser for the next time I comment.

CONNECT WITH ME
COMMENTS
Learn about water density and color mixing with this fun and easy science activity for kids. Use sugar, food coloring, and a baster to create a rainbow in a jar or a density tower.
Learn how sugar dissolves in water with this animation/live action video. See the reaction on a molecular level and explore fun facts about solubility, vocab, measurements, and temperature.
Learn how to make sugar crystals by varying the amount of sugar and water in a solution. Explore how saturation and solubility affect the rate and shape of crystal formation.
This would be especially interesting to measure where fresh and salt water meet, e.g., in a tidal estuary where a river or stream meets a bay or the ocean. Advanced. Slowly pour water containing a pinch of non-dairy creamer over a layer of sugar crystals in the bottom of an aquarium, trying not to allow too much turbulence to develop in the water.
Stir the sugar/food colouring/water solution in each glass until the sugar is completely dissolved - you can use warm or room temperature water to speed this up and make sure all sugar is dissolved. Using the pipette or syringe, fill the empty 5th glass ¼ full with the blue sugar solution, then add ¼ of the green solution which should sit on top.
If your water is not warm enough to dissolve the sugar, put the jar in the microwave for 30 seconds at a time, stirring in between until the sugar is dissolved. The students can already see at this point that by dissolving increasing amounts of sugar, you're increasing the density of the sugar water solutions.
Learn how to grow sugar crystals and make homemade rock candy with this simple chemistry experiment. Find out how to set up a science fair project, explore variables, and observe crystal formation with a magnifying glass or microscope.
Learn about density as you create a rainbow in a glass with water, sugar and food coloring. This web page also has more ideas for sugar science fun, such as homemade bubbles and ice cream in a bag.
Learn how sugar dissolves in cold and hot water with this fun science experiment for kids. Find out why hot water can dissolve more sugar than cold water and what happens when the water becomes saturated.
When this sugar-water solution cools, the dissolved sugar particles, which are continuously bumping into each other, start to occasionally stick together; this is the beginning of the crystallization process. Once several sugar particles are stuck together, they actively attract other sugar particles to join them. ... Experiment with speeding ...
Make up a sugar solution using four tablespoons of granulated sugar to every 32 ounces of water. In watering the plants you will give each plant the same amount of water. You can make the sugar solutions as you need them each day for 14 days.
Stir the warmer water. Continue warming and stirring in stages until all of the sugar is dissolved in all of the cups. Start with the cup containing the most dissolved sugar (green water in the example). Using a pipette, dropper, or a turkey baster, add the bottom layer of colored sugar water to the jumbo test tube.
How to Conduct the Sugar Water Density Experiment. 1. Fill four drinking glasses with 1/4 cup of warm water each. 2. Add sugar and food coloring to the water. Each color will have a different amount of sugar in it. Glass 1: Add 1 tablespoon of sugar and 2 drops of red food coloring. Stir vigorously to completely dissolve the sugar.
Learn how to make sugar crystals with water, sugar and a lolly stick. Watch the crystals form over a few days and discover the science behind this edible experiment.
Typically, the sugar fermentation process gives off heat and/or gas as a waste product. In this experiment glass 1 gave off carbon dioxide as its waste. ... warm water and sugar in a bottle while attaching a balloon to the open mouth. The balloon will expand as the gas from the yeast fermentation rises. Disclaimer and Safety Precautions
Learn how sugar cubes absorb water and try to stop it with different materials. This fun and easy activity is suitable for Key Stage 1 Science and explores materials and their properties.
Learn how to make a balloon inflate with yeast and sugar in this easy and fun science experiment for kids. Find out what happens when yeast eats sugar and makes carbon dioxide, and how to extend the project with different variables.
Prepare a yeast solution by dissolving a packet of active dry yeast in warm water according to the package instructions. STEP 2. Label 3 bottles and add 1 tablespoon of white sugar to the "White Sugar" bottle. Add 1 tablespoon of brown sugar to the "Brown Sugar" bottle. Measure 1 tablespoon of honey and add it to the "Honey" bottle ...
Extra: Place a few sugar cubes in a glass. Cover with clay. The sugar cubes represent a layer of rock, the clay represents topsoil. Make a few holes or a crack in the clay so rainwater can seep into the ground and reach the layer of rock. Spray water over your glass, representing rain coming down over your piece of land.
grape juice (40 g of sugar) orange juice (22 g of sugar) apple juice (29 g sugar) white grape juice light (11 g of sugar; also sweetened with sucralose) water (0 g of sugar) Syringe (optional but it helps to layer the liquids) Stacking Two Liquids. I showed Aiden the different liquids and told him they each contain a different amount of sugar.
This paper reports a simple experiment to compare the fermentation rates of sucrose, lactose, glucose, fructose and galactose using yeast. The results show that sucrose ferments faster than glucose and fructose, and that lactose does not ferment without lactase.
Learn how to demonstrate osmosis, the movement of solvent molecules across a membrane, with potato slices and cubes. Compare the effects of different solutions on potato size, shape and weight, and plot the data to show the concentration gradient.
Learn how yeast reacts with different types of sugar and grows in this classic science project. Find out which sugar helps yeast grow best and how to make fluffy bread with yeast.
Proponents of the long-debated reopening of Midnight Pass cheered Hurricane Helene's abrupt restoration of a natural flow of water from Sarasota Bay to the Gulf of Mexico between Siesta and Casey ...