Get Your ALL ACCESS Shop Pass here →

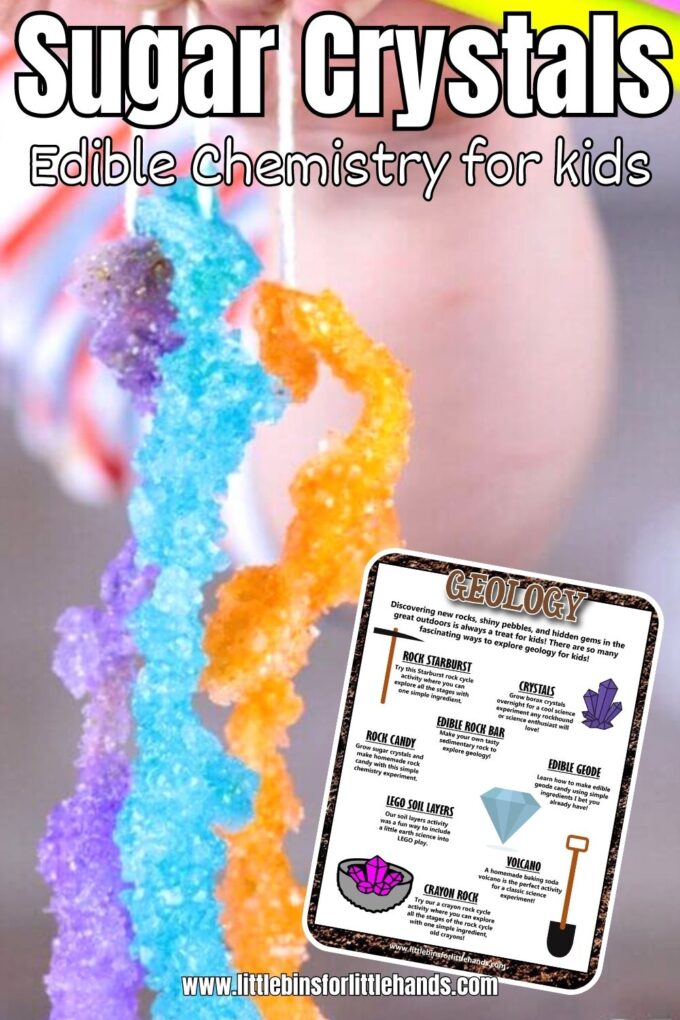
Sugar Crystal Experiment
This is an absolutely sweet science experiment! Grow sugar crystals and make homemade rock candy with this simple chemistry experiment. We can show you how to set up a science fair project to go along with it! Growing sugar crystals is a fun and easy science experiment for kids. .
Incredible Edible Science
Who doesn’t love science you can eat ? Grow sugar crystals for tasty chemistry , and the kids will have a blast learning all about crystals!
Crystal science has fascinated humans for thousands of years. Many of our precious gemstones are formations of crystal. Check out other crystal science projects like our salt crystals and borax crystals. You can also make edible rock candy geodes .
This sugar crystal experiment uses the same saturation principles and makes a saturated solution to form the crystals. Growing crystals is fun for kids and teaches them about solutions, molecular bonds, patterns, and energy. All from two ingredients: sugar and water!
Oh, and of course, you can incorporate it into a geology lesson , too!
💡 You can eat these crystals when you are done growing them, making it even more fun!
How to Grow Sugar Crystals
Why do we call chemistry experiments like this kitchen science ? It is because all the needed supplies come straight out of the kitchen. Easy!
Note: You will need to set aside 8+ days to complete this sugar crystal experiment.
- 1 cup water
- 4 cups sugar
- Edible glitter
- Food coloring
Also check out more fun ideas for mason jar science! Once you set up your sugar crystal experiment, try a few more quick science in a jar ideas!

HOW TO MAKE SUGAR CRYSTALS
STEP 1. The day before starting your sugar crystal experiment, cut a piece of string a little longer than your jars. Tie one end of the string to a straw. Tie a knot in the other end.
Get the strings wet and coat them in sugar. Let them dry overnight.

STEP 2. Add four cups of sugar and one cup of water to a saucepan the following day and heat until boiling. Heating the water to dissolve the sugar is the key to making your supersaturated solution.
Create the sugar solution: Heat water in a saucepan until it just begins to boil. Remove the saucepan from the heat. Add granulated sugar to the hot water, stirring continuously, until no more sugar dissolves. Keep adding sugar and stirring until you see some sugar settling at the bottom of the saucepan without dissolving further. This indicates that you have a saturated solution.
STEP 3. Pour your sugar mixture into the jars. Add edible food coloring to each jar and add some edible glitter.
STEP 4. Lower the string into the jar and place the jars in a safe place. Leave the sugar crystals to form for at least a week.

SUGAR CRYSTALS: DAY 8
Once the sugar crystals are as big as you want them, remove them from the sugar solution. Lay them on a paper towel or plate and let them dry for several hours.
Inspect the sugar crystals with a magnifying glass or microscope when they are dry . How are the crystals similar? How are they different? What can you see in the microscope or with a magnifying glass that you can’t see with your eyes?
Fabulous, edible science is at your fingertips when you explore science in the kitchen with your kids!

FREE Geology Activities Guide
Just because it’s food or candy doesn’t mean you can’t apply the scientific method .

Sugar Crystal Science Fair Projects
Science projects are an excellent way for older kids to show what they know about science. They can also be used in various environments, including classrooms, homeschooling, clubs, and groups.
💡 Kids can take everything they have learned about using the scientific method , stating a hypothesis, creating variables , and analyzing and presenting data.
Want to turn this sugar crystals experiment into a cool sugar crystallization science project? Check out these helpful resources below. Take a look at the science fair project outline below to get started.
- Science Project Tips From A Teacher
- Science Fair Board Ideas
- Easy Science Fair Projects
Sample Science Procedure to Grow Sugar Crystals:
- Begin the project by explaining what crystals are and the process of crystallization. Take a look at different examples of sugar crystals to learn more.
- Formulate a hypothesis. For example, “I predict that crystals will grow faster/bigger in a solution with more sugar.”
- Prepare the different containers for growing crystals according to the steps above.
- Encourage kids to set up multiple containers with different variables to test.
- a. Vary the sugar concentration in the solution (e.g., 1 cup sugar:1 cup water, 1 cup sugar:1/2 cup water, etc.).
- b. Compare different types of sugar (granulated sugar, powdered sugar, brown sugar).
- c. Test the effect of temperature by placing one container in the fridge and another in a warm place. d. Investigate the impact of time by checking the crystals’ growth at regular intervals (e.g., every day for a week).
- Have the kids observe the containers regularly and record them in a notebook. They should note changes in crystal size, shape, and formation patterns. Use our free science fair pack to help!
- Help the kids analyze their results and draw conclusions based on their observations.
- Discuss whether their hypotheses were supported and if they noticed any unexpected findings.
- Prepare a display board for the science fair, showcasing the experiment’s steps, observations, and results.
This project provides an excellent opportunity for kids to learn about the scientific method, observation, and the fascinating world of crystal formation while enjoying some sweet treats!
More Fun Edible Experiments
See if you can turn one of these science experiments into a science fair project!
- Strawberry DNA Extraction (not edible, but a great project)
- Make Edible Geodes
- Fizzing Lemonade
- Maple Syrup Snow Candy
- Homemade Butter
- Ice Cream In A Bag
Printable Science Projects For Kids
If you’re looking to grab all of our printable science projects in one convenient place plus exclusive worksheets and bonuses like a STEAM Project pack, our Science Project Pack is what you need! Over 300+ Pages!
- 90+ classic science activities with journal pages, supply lists, set up and process, and science information. NEW! Activity-specific observation pages!
- Best science practices posters and our original science method process folders for extra alternatives!
- Be a Collector activities pack introduces kids to the world of making collections through the eyes of a scientist. What will they collect first?
- Know the Words Science vocabulary pack includes flashcards, crosswords, and word searches that illuminate keywords in the experiments!
- My science journal writing prompts explore what it means to be a scientist!!
- Bonus STEAM Project Pack: Art meets science with doable projects!
- Bonus Quick Grab Packs for Biology, Earth Science, Chemistry, and Physics

- Pingback: 30 Incredible Chemistry Experiments - 123 Homeschool 4 Me
- Pingback: How to Make Rock Candy | CandyWarehouse Blog
- Pingback: Thanksgiving Lesson Plans for a Kid Friendly STEMs-Giving! | Little Bins for Little Hands
I am a librian and I just wanted to say that I love your website!! We have been doing take-home kits instead of in person youth programming due to COVID, and your STEM projects with explanations of the science are a real life-saver!
Love it! So happy to hear that we’ve been of help to you in these difficult times!
Comments are closed.

Subscribe to receive a free 5-Day STEM Challenge Guide
~ projects to try now ~.


- Science Notes Posts
- Contact Science Notes
- Todd Helmenstine Biography
- Anne Helmenstine Biography
- Free Printable Periodic Tables (PDF and PNG)
- Periodic Table Wallpapers
- Interactive Periodic Table
- Periodic Table Posters
- Science Experiments for Kids
- How to Grow Crystals
- Chemistry Projects
- Fire and Flames Projects
- Holiday Science
- Chemistry Problems With Answers
- Physics Problems
- Unit Conversion Example Problems
- Chemistry Worksheets
- Biology Worksheets
- Periodic Table Worksheets
- Physical Science Worksheets
- Science Lab Worksheets
- My Amazon Books
How to Make Rock Candy or Sugar Crystals Recently updated !

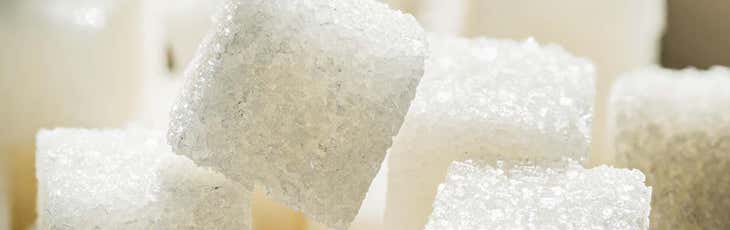
Sugar crystals are called rock candy because these hard crystals are edible. Sugar (sucrose) crystals are one of the few types of crystals you can grow and eat. You can eat the natural clear crystals or you can color and flavor them.
Rock Candy Materials
You only need a few common kitchen materials for this crystal project:
- 3 cups sugar (sucrose)
- 1 cup boiling water
- food coloring (optional)
- flavoring (optional — good choices include cherry, peppermint, and cinnamon)
- clean glass or plastic jar
- wooden skewer or cotton string
You don’t need string or a skewer to grow sugar crystals, but they are good support structures for making rock candy sticks. Crystals also grow on pipe cleaners, but they probably aren’t food-friendly. The crystals also grow on the bottom and sides of their container, forming a confection that is known as Misri in India and Iran.
You can use different kinds of sugar, but avoid powdered sugar because it often contains anti-caking agents. Anti-caking agents don’t dissolve, so the tiny particles attract crystal growth. While this sounds like a good things, it means you’ll get a mass of small crystals rather than large crystals.
Grow Sugar Crystals
The procedure is really easy.
- Dissolve the sugar in the boiling water. Heat the sugar solution on the stove, or in the microwave if you have trouble getting the sugar to dissolve. Once the sugar dissolves, remove it from heat. If you keep heating it, it hardens and burns.
- Add a few drops of food coloring and flavor, if desired.
- Let the solution cool a bit before pouring it into your jar. You don’t want to get burned!
- Pour the sugar solution into a jar. Place a wooden skewer into the jar or else hang a string into the middle of the jar, tied to a pencil or butter knife.
- Place the container somewhere it won’t be disturbed. If you like, cover the jar with a paper towel or coffee filter to allow evaporation while keeping the crystal solution clean.
- It takes a few days to get good crystal growth. If you see crystals forming on the top of the jar, you can remove them and eat them. If you leave them, these crystals will compete with your stick or string for sugar and will reduce the size of your crystals.
- Remove the crystals and enjoy them! If you want to store the crystals before eating them, keep them in an airtight container so humidity in the air won’t make the rock candy sticky.
If you enjoyed growing sugar crystals, how about trying another easy crystal-growing project ?
How Long Does It Take to Grow Sugar Crystals?
Sugar crystals may appear overnight or it may take several days (weeks) for growth. Sugar crystal growth depends on three main factors:
- Solution Concentration : Crystals don’t start growing until you have a saturated solution , where no more sugar dissolves in the water. Whether or not the liquid is saturated depends on the amount of sugar in the water and the temperature. If you aren’t seeing crystal growth, try lowering the temperature. Refrigeration might do the trick!
- Temperature : Temperature determines when crystals start growing and how big they are. Slow cooling resulting in slower growth, but larger crystal formation. Similarly, quick cooling promotes crystal growth, but you get a mass of smaller crystals. Ideally, slowly cool the hot sugar water down to room temperature (or lower). Quick cooling doesn’t yield great results. Putting the liquid in a window causes temperature fluctuations, so crystals dissolve when it’s warm and form when it’s cool. Avoid the window.
- Humidity : Humid air contributes water to the liquid and slows crystal growth. Dry air evaporates water and aids crystal growth. If you aren’t seeing crystals, try improving air circulation or reducing humidity. The easiest solution is turning on a fan.
About Sugar Crystals
The white granular sugar you buy at the store is sucrose (C 12 H 22 O 11 ), which is a disaccharide consisting of glucose and fructose subunits. Raw sugar is usually golden or brown and contains some natural impurities, but still crystallizes. However, while pure sugar crystals are colorless, raw sugar crystals retain their color.
Sucrose contains covalent bonds and crystallizes using these bonds, too. The molecule crystalizes in the monoclinic space group. The resulting crystal is hard, brittle, and rigid. Examples of other crystals that contain covalent bonds are quartz and diamond.
- Beevers, C. A.; McDonald, T. R. R.; Robertson, J. H.; Stern, F. (1952). “The crystal structure of sucrose”. Acta Crystallogr . 5 (5): 689–90. doi: 10.1107/S0365110X52001908
- Hynes, R. C.; Le Page, Y. (1991). “Sucrose, a convenient test crystal for absolute structures”. Journal of Applied Crystallography . 24 (4): 352. doi: 10.1107/S0021889891002492
- Richardson, Tim (2002). Sweets: A History of Candy . Bloomsbury. ISBN 978-1-58234-229-0.
How to grow sugar crystals
May 23, 2020 By Emma Vanstone 1 Comment
Growing sugar crystals is a great experiment for kids as you can observe the results over a few days and watch how the crystals form on lolly sticks. Who doesn’t love science you can eat?
To make it even more fun experiment with different colours and flavours. How about peppermint for Christmas?
If you’re looking for an edible experiment that doesn’t take quite as long as the sugar crystals try one of our easy candy science experiments .
What you need:
3 cups of caster sugar
1 cup of water
A lolly stick
A jar or bowl
Some sparkles and/or food colouring( optional )
Sugar Crystal Instructions
Place the sugar and water into a pan and heat whilst stirring until the sugar has dissolved ( ask a grown up to help with this part ). Leave the mixture to cool for about 15 minutes. Add a few drops of food colouring or edible sparkles if you want, but this is completely optional.
Take care as the mixture may still be very hot
Pour the solution into a glass jar and suspend the lolly stick in the sugar solution, we used a fork to hold it in place. Don’t let the stick touch the bottom or sides of the jar.

You should see crystals start to form after a few days.

Why do sugar crystals form?
A crystal is a solid material with a naturally geometrically regular form. Some take millions of years to form, such as diamonds. The crystals we made above take just a few days.
Most minerals dissolved in water will form crystals given enough time and space. The shape of the crystal formed depends on the mineral’s molecule shape.
In the case of our sugar crystals there are two processes at work.
Evaporation – the water evaporates slowly meaning the solution becomes more saturated, so the sugar molecules come out of solution and collect on the string/wire or stick.
Precipitation – the solution we made was very concentrated which means there was too much solute ( the sugar ) to remain dissolved in the water, therefore it starts to precipitate.
Quick summary – How to make sugar crystals
The sugar crystals form because the water and sugar mixture is supersaturated . This means it contains more sugar than can be dissolved in the amount of water. Imagine lots of tiny sugar molecules moving around the water bumping into each other and sticking to each other. The sugar molecules stick to the lolly stick and pull other sugar molecules towards them.
Top tip for making sugar crystals
If your crystals don’t grow very well, try seeding the lolly stick first by putting some sugar on the end, this will give the crystals something to stick to.

More edible science for kids
Here at Science Sparks we love edible experiments ! How many of these have you tried?
If you liked this, you’ll love my new book Snackable Science which contains 60 exciting edible experiments for kids !

Last Updated on October 19, 2020 by Emma Vanstone
Safety Notice
Science Sparks ( Wild Sparks Enterprises Ltd ) are not liable for the actions of activity of any person who uses the information in this resource or in any of the suggested further resources. Science Sparks assume no liability with regard to injuries or damage to property that may occur as a result of using the information and carrying out the practical activities contained in this resource or in any of the suggested further resources.
These activities are designed to be carried out by children working with a parent, guardian or other appropriate adult. The adult involved is fully responsible for ensuring that the activities are carried out safely.
Reader Interactions
Leave a reply cancel reply.
Your email address will not be published. Required fields are marked *
Choose an Account to Log In

Notifications
Science project, sugar crystallization.

Grade Level: 4th-5th Grade; Type: Chemistry
Discover which kind of sugar will be quickest to form crystals.
Research Questions
- What does applying heat to the water before adding the sugar allow it to do?
- How do natural crystals form?
- What happens when a solution is supersaturated?
- How is each type of sugar derived and what are its chemical properties?
Have you ever wondered how candy is made? Rock candy is one of the earliest forms of sweets and can be easily created in your own home with basic ingredients and some patience.
When people think of sugar, the first thing that comes to mind is usually white granulated sugar, which is the most common. However, there are actually different types of sugars that are different colors, textures, forms, consistencies, and/or obtained in different ways and from different sources. For example, brown sugar is tinted brown because there is molasses in its composition. Powdered sugar is actually super-crushed regular white granulated sugar that is usually used in baking.
Rock candy is created through processes called crystallization and supersaturation. There is an excess amount of sugar in the sugar vs. water ratio, thus crystals form as the water gradually evaporates (turns from a liquid to a gas). The cool thing about rock candy is that the shape of the candy is actually the shape of the tiny individual sugar crystals magnified and is basically just many tiny sugar crystals grown together.
In this experiment, you are dealing with heat and an open flame. Keep any other materials away from the flame. The liquid inside will be boiling hot. Adult supervision throughout the experiment is also highly recommended.
- 2 cups of regular granulated cane sugar (white)
- 2 cups of brown sugar
- 2 cups of powdered sugar
- 6 cups of water (two cups for each type of sugar)
- 3 small and thoroughly cleaned transparent glass jars (preferably the same size)
- Cotton string (found in hardware stores, or craft stores)
- 3 screws, galvanized washers, paper clips, or just some kind of small weight to hang on the string
- 3 pencils to suspend the string in the jar (length must be wider than the opening of the jar)
- 3 labels, a notepad/notebook for notes, and a pen/marker
- Small saucepan
- Wooden spoon
- Measuring cup
- Pair of anti-heat gloves, pot holders, or oven mitts
Experimental Procedure
- Gather the materials in one spot: this is a nice habit to learn so that you don't have to fumble around for materials during the experiment and so that you can enjoy the whole experience!
- Label your three glass jars “White Sugar”, “Brown Sugar”, and “Powdered Sugar.” Set them aside.
- Making sure an adult is there to supervise, turn the stove up to medium-high heat and boil the water in the saucepan.
- Take two cups of white sugar and carefully pour them into the boiling water, stirring continuously with a wooden spoon to help the sugar complete dissolve. When the solution reaches a rolling boil, it's ready. Note how fast it dissolves. Remove from heat.
- Take the glass jar labeled “White Sugar” and carefully pour the solution into the jar. Take a small piece of wax paper and cover the opening of the jar.
- Measure a piece of cotton string that is two-thirds the depth of your glass jar. Tie the small weight you chose to one end of the string and tie the other end to the pencil. Carefully dip the string (washer end first) into the solution and let it soak for a couple minutes. Then remove the string, straighten it out, and lay it flat to dry on wax paper for three days (leaving the pencil and the washer attached).
- Repeat steps 3–7 for the Brown Sugar and the Powdered Sugar. Important: remember which string went in which solution! Also, be sure not to throw out the sugar solution in the jars. You'll be using it after the three days have passed.
- After the three day waiting period for prepping the strings is over, simply suspend the three cotton strings in their respective jars (with the liquid sugar solution in the jars) at room temperature for about one week. Do not touch the strings as movement will disturb the growth process. You should observe, note, and, if possible, take photos of the day-to-day growth of crystals for each jar. A chart is included below as a suggestion.
- After one week, you should see at least some sugar crystals. They should be clear and in rather spiky and sharp formations. Compare and contrast the growth, size, and shape of the sugar crystals in all three jars. Are there any differences? Similarities?
Terms/Concepts: Crystallization, Crystal Nucleation, Supersaturation, Solutions and Mixtures, Sugar and Sucrose, Heat, Dissolve, States of Matter, Evaporation
References:
- http://en.wikipedia.org/wiki/ROCK_CANDY
- http://www.stevespanglerscience.com/experiment/00000078
- http://www.cheresources.com/cryst.shtml
- Geankoplis, C.J. (2003) "Transport Processes and Separation Process Principles". 4th Ed. Prentice-Hall Inc.
- R. F. Symes, R. R. Harding (2007) “Eyewitness: Crystal & Gem”. DK Publishing.
Related learning resources
Add to collection, create new collection, new collection, new collection>, sign up to start collecting.
Bookmark this to easily find it later. Then send your curated collection to your children, or put together your own custom lesson plan.
- Renew Membership
AACT Member-Only Content
You have to be an AACT member to access this content, but good news: anyone can join!
- AACT member benefits »
- Forgot User Name or Password?
Save Your Favorite AACT Resources! ×
Log in or join now to start building your personalized "My Favorites" page. Easily save all the resources you love by logging in and clicking on the star icon next to any resource title.
Crystallization of Sugar Mark as Favorite (4 Favorites)
DEMONSTRATION in Solubility , Physical Change , Solute & Solvent , Kitchen Chemistry , Kitchen Chemistry - High School , Kitchen Chemistry - Elementary School . Last updated May 03, 2023.
In this demonstration, students will observe how to make rock candy in order to understand how sugar crystals form. They will be able to explain what a supersaturated solution is and how it is relevant to sugar crystallization.
Grade Level
Elementary School
NGSS Alignment
This demonstration will help prepare your students to meet the performance expectations in the following standards:
- 5-PS1-4: Conduct an investigation to determine whether the mixing of two or more substances results in new substances.
- Analyzing and Interpreting Data
By the end of this demonstration, students should be able to
- Understand that dissolving sugar in water is a physical change.
- Define saturated and supersaturated solution.
- Explain the scientific process associated with the creation of rock candy.
Chemistry Topics
This demonstration supports students’ understanding of
- Supersaturated Solution
- Solute and Solvent
- Physical Change
Teacher Preparation : 15 minutes
Lesson : 45 minutes

- 3 cups of sugar
- 1 cup of water
- Large microwave-safe container to mix sugar and water (taller is better than wider)
- 2 clothespins (to secure the skewer in the cup)
- 1 skewer or popsicle stick
- 1-cup measuring cups
- Food coloring
- Plastic wrap
- Spoon or stirrer (metal is recommended)
- Paper or plastic plate (optional)
- Store-bought rock candy (for comparison)
- Computer/projector to show video
- Always wear safety goggles when handling chemicals in the lab.
- Students should wash their hands thoroughly before leaving the lab.
- Students should wear proper safety gear during chemistry demonstrations. Safety goggles and lab apron are required.
Teacher Notes
- Ask for volunteers to help you with the demonstration to keep students engaged.
- After one week, when you are ready to remove the popsicle stick from the solution, use a spoon or your stirrer to gently break the sugar crust that formed along the top of the solution. Once this crust is broken, the popsicle stick should be easy to take out.
- When cleaning your microwave-safe container after the lab is complete, you may find that sugar crystals are difficult to remove from the sides and bottom of the container. If this is the case, add hot water to your container to let the sugar crystals dissolve. You may need to empty and refill your container with hot water a few times before all the sugar crystals come out.
- Teachers may want to consider doing this activity on a smaller scale, using small student groups to each create their own solution—depending on the age and ability of students.
- Additionally, a similar experiment from the AACT library that may be of interest to teachers is, Winter Crystals .
- How many students have had rock candy before?
- What do you think are the ingredients in rock candy?
- Pass around store-bought rock candy (without the label) and ask students to infer which ingredients are in rock candy. After the activity and after students have cleaned up and washed their hands, you can let students have a small taste of rock candy if you choose.
- When sugar is added to water, the sugar crystals dissolve. When you add sugar to the point it can no longer be dissolved, the solution is called saturated at that temperature.
- Saturation points can be different depending on the temperature of the solution; higher temperatures can hold greater amounts of sugar.
- When rock candy solution begins to cool, there is more sugar in the solution than typically possible at the cooler temperature and the solution is supersaturated with sugar. In a supersaturated state, sugar will begin to crystallize into a solid state.
- Understanding how sugar crystallizes is important in the candy making business; if recipes are not followed correctly, sugar crystals can form and give candy a grainy texture.
- One way to prevent crystals from forming is to add an acid like lemon juice to break up sucrose into fructose and glucose. Fatty ingredients like butter also help to block the crystallization process.
- [Optional] Watch a video that describes how to make rock candy, which is the crystallization of sugar.

- Add 3 cups of sugar to a microwave safe cup.
- Add 1 cup of water to the cup and mix well. At first, this mixture will be difficult to stir.
- Microwave for 2 minutes on high. Note: Glass containers will become very hot in the microwave—make sure to use oven mitts if your container becomes hot!
- Remove the mixture from the microwave and stir.
- Microwave for another 2 minutes on high, stir. The mixture will be done heating when the solution is clear, not cloudy.
- Add 2-3 drops of food coloring and stir again.
- Dip the skewer or popsicle stick in water and then roll in sugar and lay on wax paper for 15 minutes to dry. The sugar rolling can be done on a piece of wax paper or on a plate.
- Once the stick is dry, gently add it to the solution in the cup, securing it with two clothespins. Note: Adding the popsicle stick quickly into the mixture may cause some of the sugar to fall off. Try to keep as much sugar on the popsicle stick as possible.
- The skewer/popsicle stick should not touch the sides or bottom of the cup. It is best to position it in the center (see photo)
- [Optional] Cover the solution with plastic wrap to prevent bugs or dust from falling in.
- Let the solution sit undisturbed for 1 week. Students should check the mixture every day and record observations.
- After one week, remove the popsicle stick and compare your results with store-bought rock candy.
- A supersaturated solution was created by heating the saturated solution and letting it cool down. Supersaturated means the solution contains more sugar (or other solute) than it can hold at that temperature. The excess sugar crystallizes, forming a solid.
- Another method is evaporation which does not require making a supersaturated solution. When the water evaporates from the solution, it becomes more saturated. As the water evaporates, sugar crystals form.
Expected Results:
- Day zero (Monday, when the experiment is started): Solution should be clear, the only sugar present is what may have fallen off of the Popsicle stick.
- Day 1 (Tuesday): Some crystallization may be forming a crust on the top of the solution, but the popsicle stick is largely unchanged.
- Day 2 (Wednesday): Crust on top of the solution is present. Some sugar crystals begin forming on the popsicle stick and on the bottom of the container.
- Day 3 (Thursday): Sugar crystals on the Popsicle stick are larger and more obvious. They should be growing where the rolled sugar was on the popsicle stick.
- Day 4 (Friday): Crystals are starting to form on the sides of the container, crystals on the popsicle stick have noticeably grown in size.
- Day 7 (Monday, final day of the experiment): Really large crystals have formed on the popsicle stick (see photos below), lots of crystals are present along the bottom of the jar.
For the Student
Today you will observe how rock candy is made in order to understand how sugar crystals form. You will learn what a supersaturated solution is and how it is used in sugar crystallization.
- Wash your hands thoroughly before leaving the lab.
- Wear proper safety gear during chemistry demonstrations. Safety goggles and lab apron are required.
Pre-Lab Questions
- What do you think are the ingredients in rock candy? Write down your ideas below:
- What is a physical change ? What is a chemical change ? Give an example of each.
Why is it important to understand how sugar is crystallized? What would happen if we were making candy and didn’t understand how crystals are formed?
- You will watch the teacher demonstration.
- Check the solution every day and record your observations. Carefully look to see if anything in the container has changed from the day before!
- After one week, compare your results with store-bought rock candy.
Observation
| | |
- What do you think would happen if we didn’t heat up the solution? Would the results be the same?
- Why do you think we rolled the Popsicle stick in sugar before adding it to the solution?
- What type of change(s) happened in the container? Were there any physical changes? Were there any chemical changes? Explain.
Based on your observations, what do you think would happen if we left the solution for 2 weeks?
Science Fun
Grow Rock Candy Crystal Science Experiment
In this fun and easy crystal science experiment, we’re going to grow rock candy crystals.
Note: Since hot water in involved, please insure adult supervision is utilized.
- Measuring cups
- Clean glass jar
- Butter knife or popsicle stick
- Rough string or yarn
- Microwave safe container
- Food coloring
Instructions:
- Tie a piece of the string to the center of the popsicle stick. Lay the popsicle stick across the top of the jar. Let the string hang down inside the jar. Make sure the string does not touch the side or bottom of the jar.
- Add three cups of sugar to the microwave safe container.
- Now add one cup of water to the sugar.
- Use the spoon to mix the sugar and water.
- With adult supervision, microwave the sugar and water mixture for two minutes.
- Have the adult remove the container and use the spoon to carefully stir the hot sugar water solution. Be careful to avoid splatters as the solution is very hot!
- Now have the adult microwave the solution for another two minutes.
- Have the adult carefully and gently stir the hot solution one more time.
- If you like, add several drops of food coloring at this time to give your candy some color.
- Carefully have the adult pour the sugar solution into the clean glass jar.
- Now dip the string into the solution for several moments and allow the string to absorb some of the sugar solution.
- Lay the string on the wax paper to dry. Be sure the strings lays perpendicular to the pencil and forms the shape of a T.
- Once dry, lower the string into the jar of sugar solution. The solution will have thickened so carefully work the string down into the solution.
- Place a paper towel over the top of the jar to keep out dust and debris and allow the string to remain in the solution for a week.
- Look at the string throughout the week and observe any changes.
- After a week, remove the string and enjoy your sugar rock crystal candy!
EXPLORE AWESOME SCIENCE EXPERIMENT VIDEOS!
How it Works:
The sugar dissolves in the heated water. As the solution cools, it becomes less able to hold the dissolved sugar. The sugar then clings to string and forms the rock candy crystals.
Make This A Science Project:
CAUTION: Do not eat – experiment making different solutions and record the rate at which crystals forms. Some ideas to test would be Epsom salts, Borax, and salt.
EXPLORE TONS OF FUN AND EASY SCIENCE EXPERIMENTS!
SUBSCRIBE AND NEVER MISS A NEW SCIENCE FUN VIDEO!
previous experiment
Next experiment.
The Adventure Tower, located in the center of our building, is currently closed for routine maintenance and updates. We know the tower is a popular area for active exploration, so we're temporarily offering discounts as a thank you for understanding. Click here to learn more.
- Monday, Thursday, Friday from 9 am to 3 pm and Saturday, Sunday from 9 am to 5 pm
- Subscribe to Our Newsletter
- DIY Science
Rock Candy Chemistry: The Science Behind Crystallized Candy
- Exhibits + Activities
- Tickets + Pricing
- Planetarium
- Accessibility
- Directions + Building Maps
- Public Events
- Field Trips + Homeschool
- Private Event Rentals
- Become a Member
- Sponsorship + Corporate Giving
- Giving Impact
- Meet the Team
- Frequently Asked Questions
- In the Press
- Buy Tickets
- Subscribe to our newsletter
Monday, Thursday, Friday from 9am to 3pm
Saturday and Sunday from 9am to 5pm
Full Screen Modal Title
Search this site.
SEARCH RESULTS
By Carly Vaughn, Digital Marketing Manager

Did you know that candy-making is really just a tasty form of chemistry? Next time you bite into your favorite sweet treat, consider the time and scientific experimentation that went into creating a shelf-stable, packaged candy that not only stays fresh but tastes AMAZING.
Learn more about the science behind your favorite Halloween treats, and find out how to create candy experiments of your own at home!
In general, candy is made by dissolving sugar into water to create a solution. Granulated sugar, the most common type used in candy-making, is sucrose, a disaccharide molecule made up of glucose and fructose. When you force these two molecules to break apart, a very tasty reaction occurs: caramelization. The way that we force this reaction to occur is by adding heat into the mix when we try and dissolve sugar into water. Heating up the solution forces the sucrose molecules to break up and caramelize.
But when we do that, the sugar molecules really want to crystallize back into their solid form. Candy-makers use that crystallization process, and some strategic interference, to create the candies that we know and love.
The two basic categories of candy made this way:
- Crystalline candies like rock candy and fudge.
- Non-crystalline candies like caramels and marshmallows.
The key to mastering candy-making and creating amazing sweet treats is figuring out the concentration of sugar in your solution and the temperature that you need to heat it to. Lower concentrations of sugar are used with lower temperatures, since the more you heat your water the more sugar you can force to dissolved. Temperatures range anywhere from 223 degrees Fahrenheit to 350 degree Fahrenheit. Any higher and your sugar will burn (and taste bitter).
Itching to make your own candy at home? The most fun recipe to make is probably rock candy! Not only will you get to experiment with candy-making science, you’ll get to watch the formation of sugar crystals.
Homemade Rock Candy Experiment
Ingredients
- 2 cups water
- 6 cups granulated sugar
- Optional: 1/2 to 1 teaspoon flavoring extract or oil – feel free to get creative!
- Optional: food coloring – to give your candy a fun color
- 4 12-ounce jars or one quart-sized jar
- Cotton thread & pencils or 4 wooden skewers
- Candy thermometer
The Experiment
- Clean your jars with hot water.
- For each jar, cut a piece of string that’s a few inches longer that the height of your jar and tape it to a pencil. Position the pencil over the mouth of the jar and wind it until the end of the string is hanging about an inch from the bottom. If you’re using skewers, use a clothespin to hang it in the jar.
- Bring 2 cups of water to a boil over medium high heat, then add one cup of sugar. Stir until it dissolves completely. Repeat this step with all 6 cups of sugar to create a supersaturated liquid. If your sugar is not dissolving, raise the heat.
- Heat the sugar solution until it reaches 230 degrees Fahrenheit on your candy thermometer. This is called the “soft ball” stage in candy-making.
- Remove the solution from heat and add flavorings (no more than 1 teaspoon).
- Carefully wet the strings or skewers in your syrup and roll them in granulated sugar. This will be the base of the sugar crystals.
- Optional: Add 6-7 drops of food coloring to your jars.
- Pour the sugar solution into your jars, leaving some room at the top.
- Position your strings or skewers in the clean jars as outlined in step 2.
- Let your jars sit undisturbed for 3-5 days. Watch your jars as candy crystals form! Make sure you don’t jiggle your jars too much. For larger candy crystals, put your jars in a dark warm room (or the back of the pantry).
- Finally! It’s time to enjoy some tasty candy!
Did you try this experiment? Tell us your results!
- 4th of July
- Announcement
- Cooking Candy
- Early Explorers
- Endothermic
- Engineering
- Environment
- Experimentation
- For Preschoolers
- Galactic Gardens
- Marine Biology
- Math Moves!
- Mathematics
- Meteorology
- Outdoor Fun
- Pollinators
- Red-White—BOOM
- Solar Eclipse
- Special Events
- Storybook STEM
- Tinkering Garage
- Uncategorized
- Water Cycle
- Winter Wonders
RECENT POSTS

- February 2024
- January 2024
- October 2023
- February 2023
- August 2022
- February 2022
- December 2021
- October 2021
- February 2021
- September 2020
- October 2019
- September 2019
- January 2019
- December 2018
- October 2018
- September 2018
- August 2018
- February 2018
- January 2018
- December 2017
- November 2017
- November 2015
- October 2015
- September 2015
- August 2015
- Privacy Policy
| ||||||||||||||||||||||||||||||||||||||||||||||||||||||||||||||||||||


IMAGES
COMMENTS
STEP 2. Add four cups of sugar and one cup of water to a saucepan the following day and heat until boiling. Heating the water to dissolve the sugar is the key to making your supersaturated solution. Create the sugar solution: Heat water in a saucepan until it just begins to boil. Remove the saucepan from the heat.
Experimental Procedure. Find out the saturation point of 1 cup of water. a. Fill a 12 oz-drinking cup with 1 cup of water. b. Microwave water (or heat it in a kettle) until it starts boiling. c. Add sugar in one-tablespoon increments until no more dissolves. d. Record amount of sugar.
Soak the other piece of string in a cup of water for 5 minutes. After soaking, use your hand to squeeze the excess water from the string. Roll the string in 1 tablespoon of sugar on a plate. The string will be coated with sugar. These small bits of sugar are the seeds on which other sugar crystals might grow.
Grow Sugar Crystals. The procedure is really easy. Dissolve the sugar in the boiling water. Heat the sugar solution on the stove, or in the microwave if you have trouble getting the sugar to dissolve. Once the sugar dissolves, remove it from heat. If you keep heating it, it hardens and burns.
In this activity, you make a saturated solution of sugar and water and grow rock candy sugar crystals. To speed up the process, you jump-start the nucleation process by adding sugar crystals, called seed crystals, to the string first. These actively attract other molecules to join them, so sugar crystals tend to grow on those seed crystals.
Sugar Crystal Instructions. Place the sugar and water into a pan and heat whilst stirring until the sugar has dissolved ( ask a grown up to help with this part ). Leave the mixture to cool for about 15 minutes. Add a few drops of food colouring or edible sparkles if you want, but this is completely optional. Take care as the mixture may still ...
Welcome to science at home in this experiment we are making rock candy by crystallizing sugar. This is a simple experiment that can be done at home with some...
The cool thing about rock candy is that the shape of the candy is actually the shape of the tiny individual sugar crystals magnified and is basically just many tiny sugar crystals grown together. In this experiment, you are dealing with heat and an open flame. Keep any other materials away from the flame. The liquid inside will be boiling hot.
As the water evaporates, sugar crystals form. Expected Results: Day zero (Monday, when the experiment is started): Solution should be clear, the only sugar present is what may have fallen off of the Popsicle stick. Day 1 (Tuesday): Some crystallization may be forming a crust on the top of the solution, but the popsicle stick is largely unchanged.
The sugar dissolves in the heated water. As the solution cools, it becomes less able to hold the dissolved sugar. The sugar then clings to string and forms the rock candy crystals. Make This A Science Project: CAUTION: Do not eat - experiment making different solutions and record the rate at which crystals forms.
In this experiment, we are making sugar crystals at home to learn about Crystallization of Sugar.Level: Grade 6 - Science Experiment For Kids, Crystallizatio...
Homemade Rock Candy Experiment. Ingredients. 2 cups water. 6 cups granulated sugar. Optional: 1/2 to 1 teaspoon flavoring extract or oil - feel free to get creative! Optional: food coloring - to give your candy a fun color. Equipment. 4 12-ounce jars or one quart-sized jar. Cotton thread & pencils or 4 wooden skewers.
Boil about 1 ½ cup (400 ml) water. Add about ¾ cup (200 ml) of sugar to the water, and stir the solution well. Pour the solution into the jar. Make sure that the jar you selected can withstand the temperature (a glass should work). Suspend the string from a pencil. Submerge the string in the solution. The sugar crystals will grow slowly on ...
We have a video at the beginning of the article for a step by step instructions on how to conduct the sugar crystals experiment. Or you can read further for a detailed, step by step explanation of the whole process. Measure the sugar so the ratio is 1.5 cups of sugar on 1 cup of water. Add water to the pot and let it boil.
Toffee owes its smooth texture and easy breakability to an absence of sugar crystals, thanks to a large amount of butter in the mix. METHOD 3: ADD SOME ACID. If you don't want to buy invert sugar, a simple way to prevent crystallization is to "invert" the sucrose by adding an acid to the recipe.
Making sugar crystals is a fine task and needs accuracy and attention. Overheating the solution can cause decomposition and great discoloration. ... Crystal Growing Experiment - Making Rock Candy. This is a nice little experiment for young scientists. Supplies: 600 grams (21 ounces) of sucrose (table sugar) 8 ounces of tap water
Leave to dry for a few hours. Prepare the solution to grow the crystals: add sugar and water to a saucepan in the ratio of 3:1 and heat slowly until the sugar dissolves completely. Leave the syrup on the hot plate to cool for 15-20 minutes. Pour the cooled syrup into glasses and add food coloring.
Take a cup of hot boiling water and pour it into a glass. Add two cups of sugar to the boiling water. Add a few drops of food coloring liquid. Stir it well until it dissolves completely. Take a stick and tie a piece of thread in the center. Keep the stick on the glass so that the three-fourths of the thread is dipped inside the sugar syrup.
Grow edible sugar crystals at home! Learn about the heat and time required to form gems and crystals with this easy science experiment for kids. This fun and...
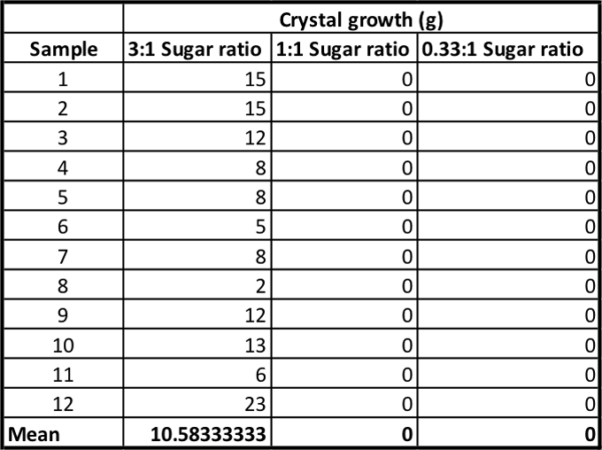
For the 1:1 solution, add equal amounts of sugar and water to the pot and bring to a boil. So for 12 cups of water, you would need 12 cups of sugar. For the 0.33:1 solution, 15 cups of water and 5 cups of sugar should be plenty. Once the solution is clear, add food coloring to get a desired color.
You made a super-saturated solution of sugar and water! The sugar crystals could only stay dissolved whilst the water was hot. Cooling the solution down made it super-saturated, which is unstable.As the water cooled down, less of the sugar crystals could remain in the water and so they began to settle out onto the kebab stick, which effectively acted as a seeding crystal.
See how in a day, crystals of sugar formed through a super saturated solution of sugar water.Credits:Experiment process and explanation- Hariom GaurAudio: NC...
The appearance of sugar crystals under the microscope both under the compound microscope and stereo-microscope is an enjoyable experiment. With the stereo-microscope, there's more in-depth focusing of the entire crystal structure as the microscope is better adapted for 3-dimensional viewing otherwise known as depth perception.